It’s mid-July in my Zone 5b garden, and it’s hot. My zucchini and cucumbers have finally started producing after a cold, challenging spring, tomatoes are beginning to ripen, and I’m harvesting bush beans by the handful. While it feels like peak gardening season, I’m already planning my next harvest. Mid-summer is the perfect time to think about succession planting – a simple way to keep your garden productive well into the fall.
Succession planting is the practice of sowing new crops as others finish, allowing you to make the most of your growing season and garden space.
In Peterborough, Ontario, our growing season averages about 150 frost-free days, leaving plenty of time for another crop before fall.
What I’m harvesting: Garlic
By the end of July, I’m pulling my garlic crop and curing it before storage, leaving a large empty patch in my garden.
What I’m succession planting: Bush Beans
Bush beans have a short seeding to harvest window, 50 to 60 days, meaning I can plant another round where my garlic has been pulled and get a harvest before first frost.
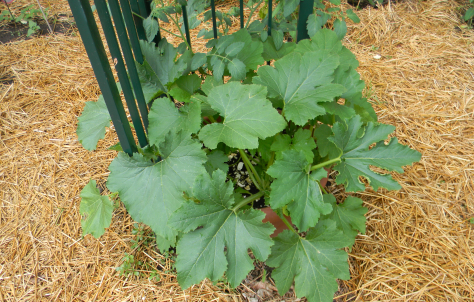
What I’m harvesting: Zucchini and Cucumbers
My cucurbit crop is usually showing signs of stress in late summer, and I will often pull plants that are no longer producing.
What I’m succession planting: Root Vegetables
The empty space left by my cucumber and zucchini plants can be filled by fall root crops like beets, carrots and turnips. These crops can often take a few light frosts before being harvested.
What I’m harvesting: Leafy Greens
Lettuce is notorious for bolting in summer heat, becoming bitter and unappetizing. Time to pull your sad lettuce plants to make room.
What I’m succession planting: Brassicas
Cabbage, broccoli and cauliflower thrive in cool weather. Sowing them now means that you can have a bountiful fall harvest that will easily withstand a few light frosts.
A few things to remember when succession planting:
Your newly available garden space will more than likely be depleted of nutrients and require a boost. Before planting a new crop, amend the soil with compost to support healthy growth.
New plants will need protection from pests that have already established. Be sure to cover brassicas to protect them from cabbage moth damage, and inspect your garden every few days for insect and disease damage.
Seeds planted in mid-summer can dry out more quickly than spring plantings. Keep your soil consistently moist until seedlings are established, and use a layer of mulch once plants emerge to retain moisture.
Always check the days to harvest information on seed packets. If you’re planting seeds in mid-July and your first frost is typically October 1st, you have about 70 growing days available. As long as the plant you choose matures in less than 70 days, you should be safe to plant.
Don’t think of July as the beginning of the end of your garden. Think of it as the beginning of your fall harvest. With a little planning and the right crops, you can continue harvesting fresh vegetables well into the fall.
Resources for further reading on succession planting:
If you’ve ever had a succulent like “Hens & Chicks” Sempervivum that suddenly produces a tall flower stalk and then begins to die, don’t panic—you probably didn’t do anything wrong. You may have discovered a monocarpic plant.
The word monocarpic simply means “flowers once.” These plants spend years growing into beautiful rosettes, storing energy in their thick, fleshy leaves. When conditions are right, they put all that energy into one spectacular flowering display. After the flowers fade, the main plant dies.
It may sound sad, but it’s actually a perfectly normal part of the plant’s life cycle.
Many popular succulents are monocarpic, including the already mentioned hens-and-chicks (Sempervivum), but also some Aeonium species (non-hardy succulents), and many Agave varieties (tequila, anyone?). The good news is that these plants often produce offsets, or “pups,” around their base before or during flowering. These baby plants continue growing long after the parent plant has finished its life.
If your monocarpic succulent starts to flower, enjoy the show if you appreciate them! Once the main rosette has completely died, simply remove it and allow the pups to fill in the space. Before long, you’ll have a healthy new generation of plants.
BUT if you’re like me and find the flowers messy, feel free to cut all of the flower stalks out — you aren’t removing anything that isn’t already on the way out. While you’re pruning, keep an eye out for the new offsets that will take their place and push them back into the soil if they pop out with the parent.
Nature has many surprising strategies, and monocarpic succulents remind us that sometimes the grandest finale is also a last hurrah!
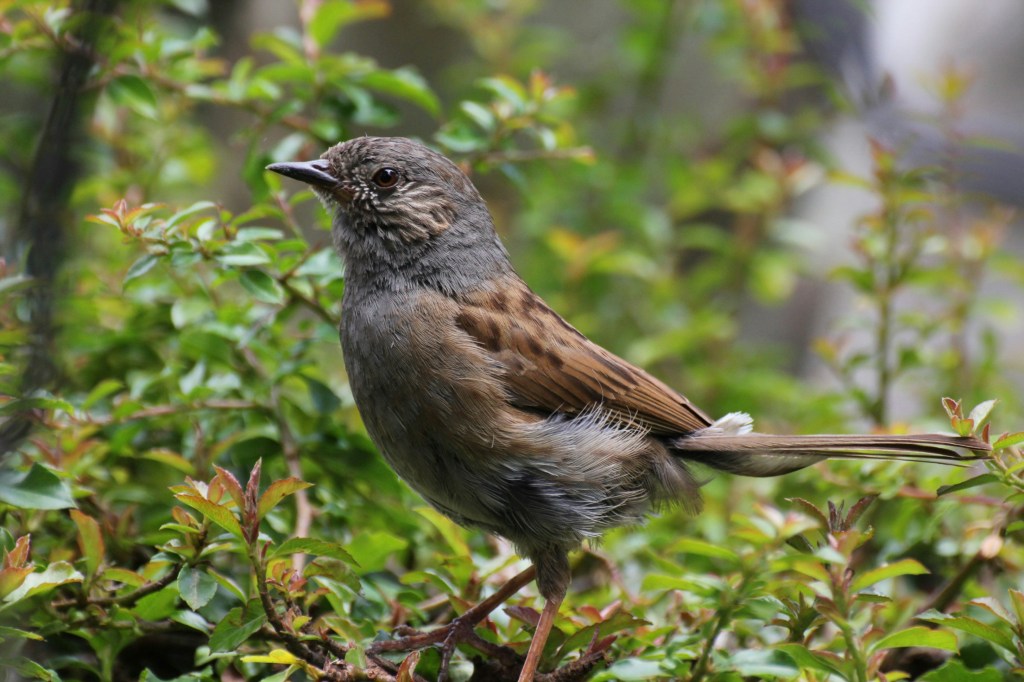
This past fall, I had the opportunity to spend several weeks in southwest England while completing a teaching secondment at Hartpury University. As a conservation biologist from Ontario, I expected to learn about agriculture, veterinary science, and education. What I didn’t expect was to become completely fascinated by hedgerows.
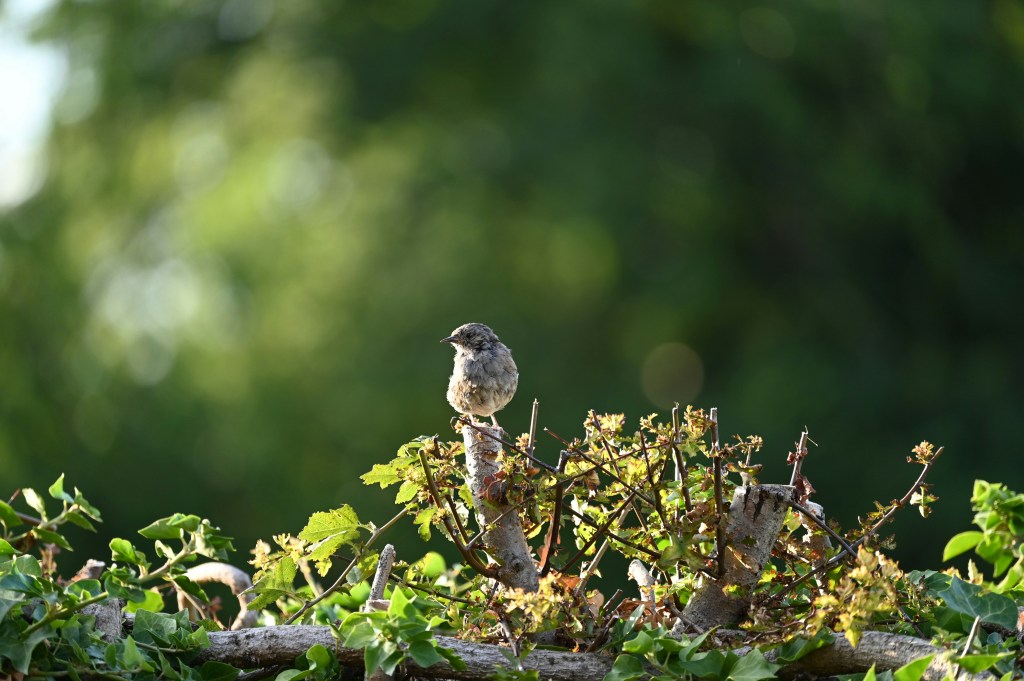
Everywhere I looked, the English countryside seemed stitched together by them. Ancient lines of hawthorn, blackthorn, hazel, dog rose, and mature trees divided fields into a patchwork quilt of green. Even in heavily farmed landscapes, there was always a hedge nearby. For wildlife, these weren’t simply field boundaries; they were highways, restaurants, nurseries, and safe havens all rolled into one.
In the United Kingdom, approximately 70% of the land is farmed, leaving relatively little truly wild space for nature. Yet despite this, England still contains roughly 400,000 kilometres of managed hedgerows; enough to circle the Earth almost ten times. These hedgerows are considered the most widespread semi-natural habitat in the British countryside and support hundreds of species of plants, birds, mammals, reptiles, insects, and fungi.
Walking through the countryside, it became obvious why they are so important. Hedgerows are alive. Their spring blossoms feed pollinators. Their berries sustain birds through winter. Their tangled branches provide nesting sites for songbirds. Badgers use them as travel corridors. Bats follow them like aerial highways. And of course, perhaps their most famous resident, the hedgehog, relies heavily on hedgerows for shelter, nesting sites, and protection from predators. Hedgerows are often described as “wildlife corridors,” but that phrase barely captures their value. They are entire ecosystems stretched across the landscape.
What struck me most was how different this is from much of rural Ontario.
Across Canada, agricultural fields have grown steadily larger as machinery has become larger and more efficient. Fence rows have disappeared. Small woodlots have been removed. Wetlands have been drained. In many areas, hedgerows have been sacrificed in the pursuit of uninterrupted fields that can accommodate modern equipment.
For us, crossing a large corn or soybean field might seem insignificant. We can simply walk across it in a few minutes. But imagine being a sparrow, salamander, garter snake, or tree frog. Suddenly, that open field becomes a vast and dangerous desert. There is no shade. No shelter. No water. No protection from predators overhead.
Many songbirds move through landscapes one patch of cover at a time, flitting from branch to branch and shrub to shrub. A large exposed field can become an effective barrier, isolating populations and making it difficult for wildlife to access food, nesting sites, and mates. Research consistently shows that hedgerows improve habitat connectivity and allow wildlife to move safely through agricultural landscapes.
The benefits extend beyond wildlife.
Hedgerows are remarkably effective environmental infrastructure. They reduce wind speeds, helping protect crops and soils. They capture snow during winter, slowing runoff and helping recharge groundwater. They reduce soil erosion, intercept nutrients before they reach waterways, and store significant amounts of carbon in both their woody biomass and surrounding soils. Research has shown that hedgerows can substantially increase soil carbon storage while also supporting biodiversity.
These benefits feel especially relevant in Central Ontario, where severe windstorms and extreme weather events seem increasingly common. While we often think about climate resilience in terms of expensive infrastructure projects, sometimes the solution is as simple as planting trees and shrubs in the right places.
The good news is that gardeners and landowners can bring some of the magic of the English hedgerow home. A hedgerow doesn’t need to be kilometres long to make a difference. Even a property boundary planted with native shrubs such as serviceberry, nannyberry, chokecherry, dogwood, elderberry (among so many others!), can provide food and shelter for wildlife throughout the year. Leave the berries standing through winter. Allow the vegetation to grow dense and somewhat untidy. Let it become a place where wildlife can hide.
In a world increasingly dominated by large-scale landscapes and manicured spaces, hedgerows remind us that nature thrives in the margins. They are proof that conservation doesn’t always require vast wilderness areas. Sometimes it simply requires a line of shrubs connecting one patch of habitat to another.
So here’s a hearty huzzah for the hedgerow; the hardworking helper of the countryside. Quietly holding soil in place, sheltering wildlife, storing carbon, slowing winds, feeding birds, and connecting landscapes, one branch at a time.
References
Blair, J., Olave, R., & McAdam, J. (2018). Hedgerows as a Form of Agroforestry to Sequester and Store Carbon in Agricultural Landscapes: A Review. 4th European Agroforestry Conference.
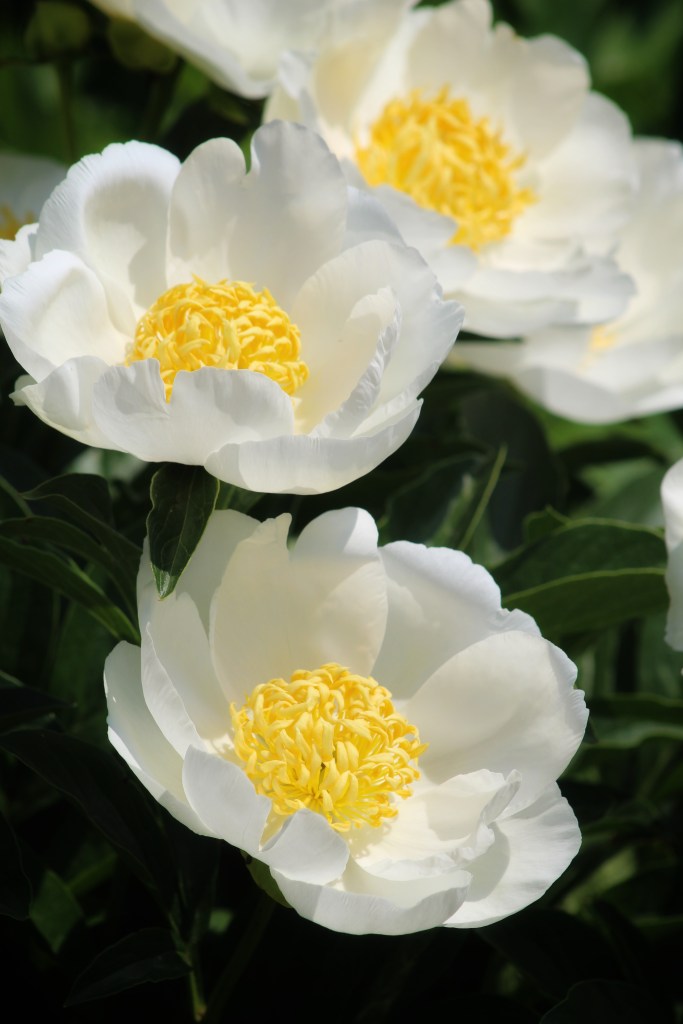
I love some of the old fashioned perennials that have been around for a very long time. One of them is the peony, and as you drive around you can often see abandoned farms surrounded by flowering peonies, often in the burgundy shade. Some peonies can bloom for 100 years if planted in the right place.
There are over 30 species of peonies and 3 different types:
Herbaceous – the one that we are most familiar with and native to eastern Asia.
Tree peonies – they resemble a shrub and have woody stems.
Itoh peonies – are an intersectional peony and native to Japan. It was bred by crossing an herbaceous peony with a woody tree peony and has characteristics of both peony types.
Herbaceous peonies are cold hardy and require a cold season to bloom. The rhizomes do not like to be buried too deep, ½ inch to 2 inch only. Plant the eyes ( next year’s buds) no more than 2 inches below the soil surface. If you mulch them , ensure that the mulch is set back from the rhizomes to ensure that they are not buried too deeply. The stems die back in winter and emerge in the spring. They do not like to be moved so think carefully about the right site. They like full sun and require good drainage.
Herbaceous peonies — will do better if they are staked or supported with peony rings early in the season. This keeps their gorgeous blooms upright and also provides better air circulation.
Peonies resist most pests and don’t worry if you see ants on the buds. Peonies secrete sweet nectar on the buds and that attracts ants. In fact ants will help protect the buds from other flower eating insects. This is called “mutualism”.
Tree peonies – require a large hole 2 feet deep and 1 foot wide as they will grow into a 4 to 6 foot shrub . Amend the soil with organic matter and position the graft 4 to 6 inches below ground level. They have permanent, woody stems and don’t die back in the winter. I wrap mine with burlap to protect the buds.
Itoh peonies – thy have the best characteristic of both the other peonies. Plant them just below the soil surface. They bloom on old wood so don’t cut them back. Itoh’s are shorter than the other 2 and don’t need staking. They can have a second bloom cycle later in the season.
If you do plan to divide your peonies the best time is late summer or early fall. Make sure that there are 3 to 5 eyes on each divided section. Make sure that you plant the new section at the same level as it was planted previously
Peonies come in many shapes and forms, single, double, some with amazing centres and many, many colours. These include white, cream, many shades of pink, burgundy, purple, red, coral and yellow. Most peonies are very fragrant.
We are extremely fortunate to have Joe and Hazel Cook of Blossom Hill Nursery in our area. They have hybridized and grown many, many prize winning peonies. Check online for their opening hours.
My peonies are just coming into bloom and make wonderful cut flowers. If there any ants on the buds just swish them through water and shake gently to remove the ants.
Generally speaking, peonies are low maintenance and drought resistant. Once established they will give you many years of amazing blooms and gorgeous fragrance.
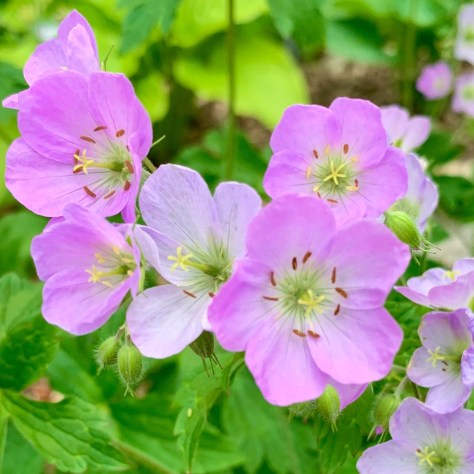
Have you ever considered container gardening with native plants? If you are keen to hear the buzz of pollinators on your balcony, or in a limited gardening space or around the accessibility of a raised bed this is a viable way to add native plants to your environment. What brought me to this topic was being asked twice in one afternoon for advice on using perennial native plants in containers. So yes, I am talking about native plants but the practice would be similar to planting any perennial in a container. The hardiness of your chosen plant is an important consideration so avoid plants that are borderline hardy for your hardiness zone.
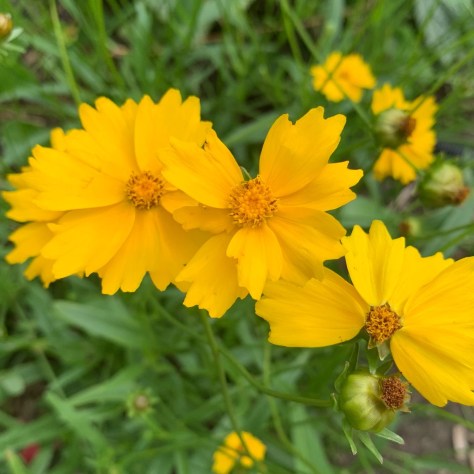
Lanceleaf Coreopsis
Containers can be wood, ceramic, fibreglass or textile grow bags. Metal may absorb too much heat in summer and terra cotta may crack in winter. If you plan on moving them, weight will be an important consideration. Ensure there are drainage holes in the bottom. It is not advised to use stones or clay shards in the bottom of your container as this practice of adding rubble can actually hinder drainage. The planting material should be light and fertile and can include potting soil with compost and perlite. The size of your container will determine the number of plants you can include and bigger is probably better. The larger the container the more your plants will be protected from the damaging effects of the freeze thaw cycle we experience in winter. To help overwinter, keep them in a shady spot if possible and mulch heavily with organic material such as dead leaves.
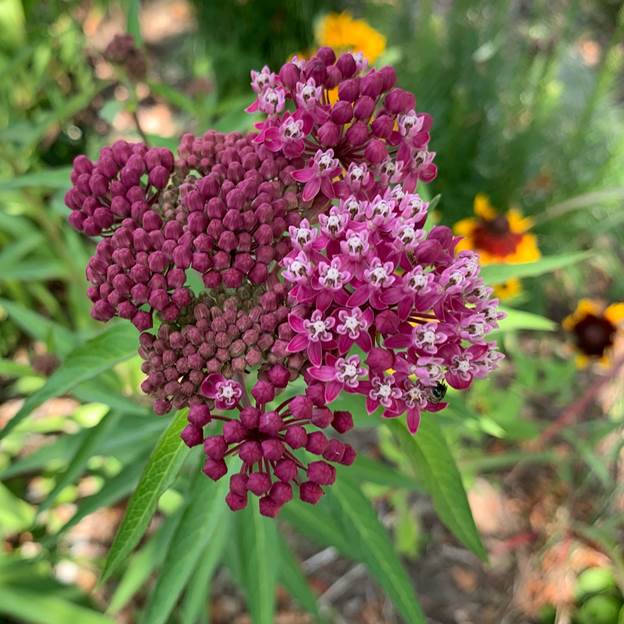
Swamp Milkweed
Watering a container is definitely a commitment over the growing season and native plants are no different, requiring ongoing attention to their moisture needs until winter.
When it comes to plant choice, it is the same as choosing plants for a garden. Right plant, right place! Plants preferring the same conditions of light and moisture will make it easier to care them. Blooming Boulevards has an excellent guide on this topic including plants for all conditions.
Another place to start looking for suitable native plants for containers is The Wildflower Seed Library. The excellent book The Gardeners’s Guide to Native Plants of the Southern Great Lakes Region by Rick Gray and Shaun Boothe includes an appendix for landscape use of native plants including plants for containers.
Maidenhair Fern
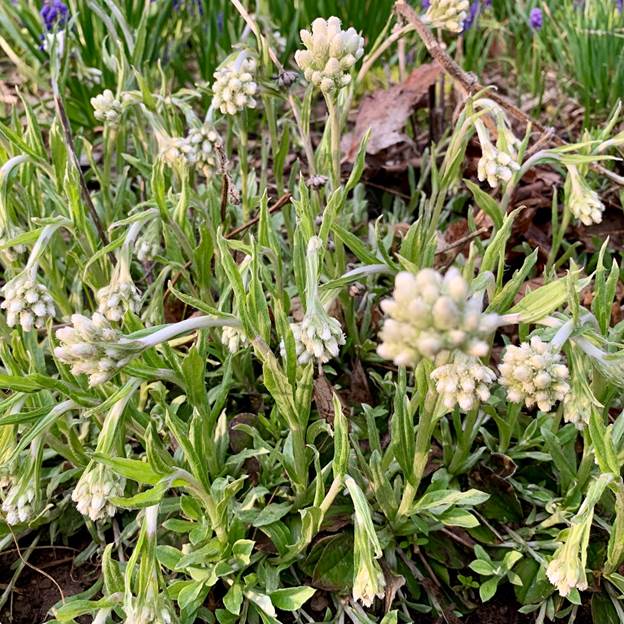
My photos which I have included are just a few of the many beautiful options for creating a beautiful container display that will be bring a buzz to your life!
By Christine Freeburn, Peterborough Master Gardener
Cucumbers (Cucumis sativus) are a warm weather vegetable which means they don’t like cooler spring temperatures. If you are starting from seed, plant indoors and grow under lights 3 to 4 weeks before the last frost date.
Growing in peat or coir pellets will help with transplanting shock, but do not let pellets dry out. Germination takes 6 to 10 days. Remember to harden off, before putting into ground that is warm (18C to 22C), usually the end of May.
If you are purchasing seedlings, be mindful of outdoor temperatures when planting. Anything below 10C and plants could shock, setting them back or even killing them. If June nights are cool (we could still have a frosty night in June), cover your plants with a bed sheet or heavier row cover.
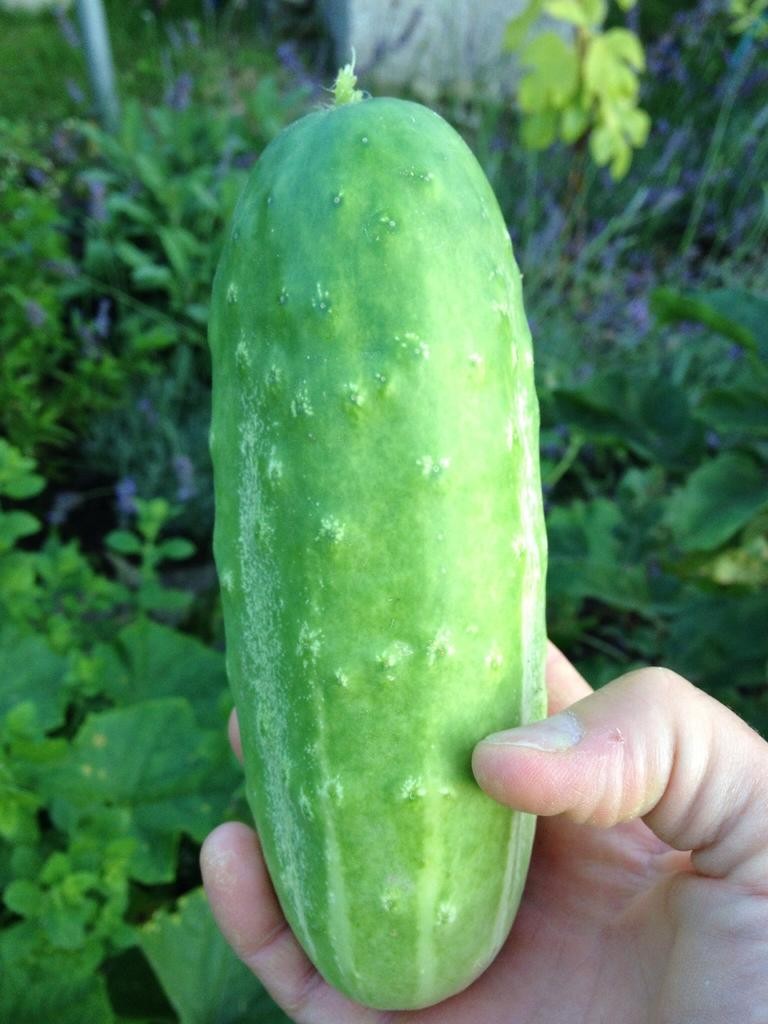
There are many different varieties of cucumber from the ‘Straight Eight’ or ‘Marketmore76’ which are a slicing type, pickling varieties like ‘Avenger’, minis like ‘Manny’ and the popular seedless English type like ‘Summer Dance’.
You may also notice, they are listed as Garden or Greenhouse varieties. Greenhouse types are often thin skinned, want it warm and don’t require pollination, and so are good for growing under cover or in a greenhouse. If you are growing your cucumbers in hills, the garden variety is fine.
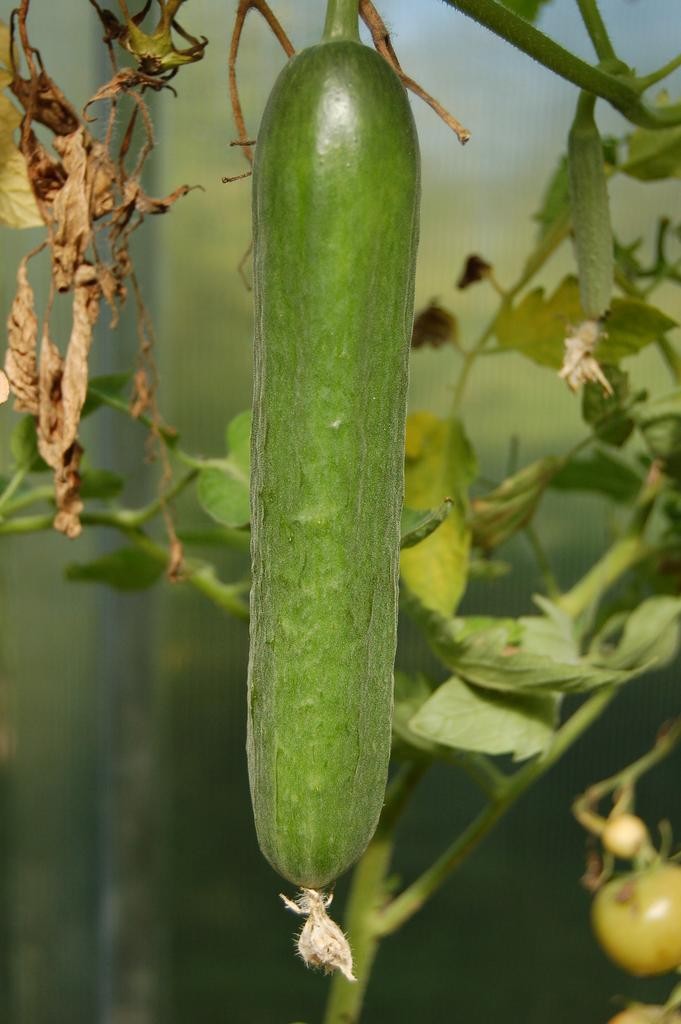
When you are reading catalogues or seed packets, check the pollination key for your chosen variety. This tells you what each variety needs to pollinate and bear fruit. Cucumbers that have stubby ends or no growth have not been pollinated fully.
Pollination Key
Monoecious - male and female flowers on the same plant, so one plant will do, however pollination does need to happen, so invite pollinators to your garden. You can also pollinate yourself. The female flower is identified by having a tiny fruit just behind it. You can remove a fresh male blossom and gently rub it against the pollen of the female to help with fertilization.
Gynoecious - plants have only female flowers and need another plant to pollinate
Parthenocarpic - these plants do not require pollination and are usually Greenhouse varieties.
Cucumbers need lots of compost/fertilizer as they are heavy feeders. They also need to be evenly moist. Water the soil, not the plant to prevent powdery mildew and other viral diseases.
You can grow cucumbers up a trellis. In fact, I recommend it as this helps to keep fruit clean, encourages good air flow to reduce disease and can keep pests away. You will need to train the vines. Use clips to gently hold in place. Install your trellis or whatever you are using, when you plant your cucumbers and before they begin to grow.
Cucumbers can also be grown in containers where it is easier to keep them evenly moist and mulched. And you can still trellis them, if you are buying the vining type. I use 3 bamboo stakes which I put in a teepee shape by tying the tops together. You can purchase bush type cucumbers, which are more compact than vining types, but production is not as high with bush types.
The cucumber beetle is the main pest for this crop. Crop rotation is important as beetles overwinter in soil, coming out of soil in mid summer to munch on your plants and transmit bacterial wilt. Planting nasturtiums, dill or marigolds may help to keep the pests away. The best remedy is row covers. Put row covers on new plants as soon as they go into the ground. Covers will need to be removed for pollination, once flowers appear.
Cucumber beetle
Pick cucumbers in the morning when they hold the most moisture. Pick fruit often to encourage more to grow. Cucumbers contain vitamin K, potassium, antioxidants and fibre. Enjoy them!
“Gardening adds years to your life and life to your years.” – Unknown
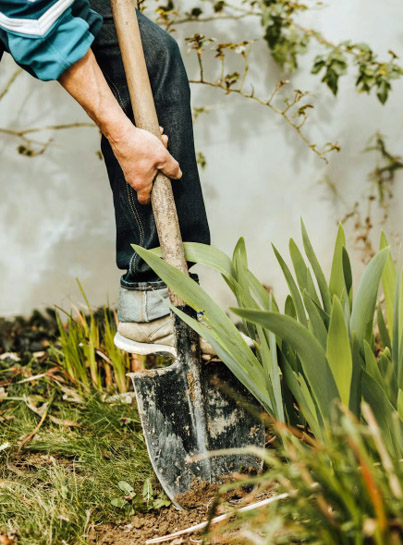
Gardeners and non-gardeners alike can all agree that tending a garden, while incredibly satisfying and rewarding, can also be physically demanding. When we enter our green spaces, we often focus on the plants before us, prioritizing tasks and brainstorming solutions to gardening challenges.
However, what we may not always consider are the significant benefits gardening offers to our physical health.
The physical act of gardening typically involves tasks such as digging, lifting, walking, kneeling, and bending. These activities require us to engage our brains, muscles, hearts, bones, and lungs.
Some may classify gardening simply as a physical activity — which is fair — but I would argue that it can also serve as a form of exercise with far-reaching and long-lasting health benefits.
Gardening Benefits for our Physical Health
Protects against cognitive decline. Gardening requires planning, multitasking, and problem-solving, all of which challenge and stimulate the brain. The physicality involved in gardening also increases blood flow and oxygen to the brain and can significantly decrease the risk of Alzheimers and other forms of dementia.
Engages all major muscle groups. Gardening works the arms, legs, abdominals, shoulders, glutes, neck, and back. Maintaining physical strength as we age is incredibly important for preserving mobility, coordination, and independence. Strong muscles also help prevent life-altering falls and fractures by improving balance and overall stability.
Excellent for heart health. Gardening can increase your heart rate and improve circulation. It can help lower blood pressure and reduce the risk of strokes, diabetes while supporting cardiovascular health overall.
Supports bone health. Gardening can help increase bone mineral density, which may prevent or combat the effects of osteoporosis. Spending time outdoors also provides a healthy dose of Vitamin D, which is essential for strong bones.
Improves lung health. Breathing fresh air in an oxygen-rich environment can help improve lung capacity and efficiency, allowing us to work, play, and live more actively. Lungs also play a role in detoxification as they help us expel toxins and carbon dioxide, a form of metabolic waste.
Gardening can help us live longer, healthier, and more fulfilling lives. However, it is important to always listen to your body when engaging in any type of physical activity.
It is always advisable to consult with your doctor before beginning any new physical activity, especially if it causes pain or discomfort. Avoiding overexertion, staying hydrated, and stretching are essential practices for maximizing the health benefits of gardening.
Spending time in our gardens engages both the mind and body, encourages social connection, and provides exposure to Vitamin D — the “sunshine vitamin” — all while offering an incredible sense of satisfaction and accomplishment.
It is no wonder that gardening remains a recommended activity for seniors, not only because of its far-reaching benefits, but also because it can be modified to suit everyone’s individual needs and preferences.
Here in Ontario we have a long enough growing season to accommodate both the cold hardy annuals such as sweet peas and the tender annuals like zinnia and celosia. So why do so many gardeners wait until the third week of May to plant their cold hardy annuals? Fear of frost. How many times have you heard the mantra “Don’t plant until Victoria Day weekend”. While that is good advice for many plants, it actually works against this class of plants that like to put down roots in cold soil.
There are actually 2 ways to deal this class of plants:
Direct sow in the spring. As soon as winter has left and the ground can be worked in April, seed varieties such as Nigella, Ammi, Bupleurum and Calendula. Seed thickly and thin the seedlings. This method takes advantage of the abundant moisture that is in the ground, allows plants to develop good root systems prior to facing the heat of summer. Some types such as Larkspur actually do better this way for many folks as Larkspur is quite heat intolerant and germinates poorly in the average Canadian home. I actually germinate mine indoors in my sunroom which is kept at 50 F in the winter.
Transplant seedlings in spring. This is my preferred method for the cutting garden. This method is more precise than sowing seed into the ground and allows for sequencing of seeding to produce the best sized transplant. The first seed that I start is Lisianthus (January 1) followed by snapdragons and sweet peas in February. My seedlings are grown slowly at 50 F which produces less top growth and more root.
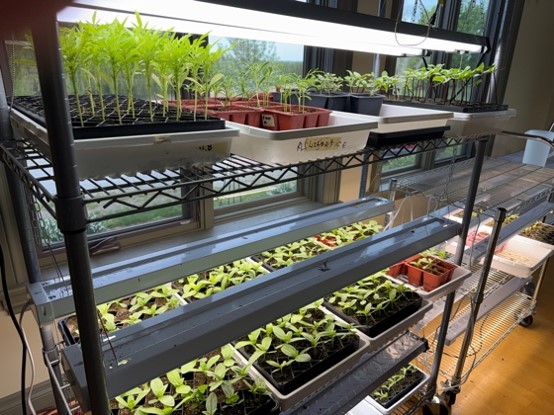
Tender annuals waiting to be hardened off before planting out
On average, I plant these varieties out around the third week of April. The key to planting successfully is proper “hardening off”. This is a process of gradually acclimating your seedling to the harsher outdoor conditions (sunlight, wind and temperature fluctuations) over 7 days. This helps to prevent transplant shock, sunburned leaves and weak stems. A rough guideline for hardening plants is as follows:
Day 1-3: Place plants outside in out of direct sunlight and wind for 1-2 hours
Day 4-7: Gradually increase time spent outside by a couple hours each day and move into sunlight for part of that time
By day 7, if temperatures are staying above 7 C, plants can stay out all night.
Avoid the midday sun early on. Water carefully. Your plants will dry out faster when outside. Watch the wind initially as it can snap stems.
Snapdragon showing extensive leaf damage with new growth coming from buds at base of stem
Once seedlings are in the ground, the work is still not over. Watch the weather forecast carefully. Some young seedlings may need protection if temperatures drop below freezing. If temperatures are going to drop, I cover seedlings with frost cloth. Frost cloth is a lightweight, breathable garden fabric designed to protect plants by trapping warmth radiating from the soil to create a microclimate. This cloth can also be used in fall to protect tender plants like dahlias from early frosts. I also use this cloth as a shade cloth to protect delicate flowering plants from the harsh July sun.
This year has been a real challenge. We have had a very cold and windy spring. It was hard to even find consistent conditions in which to harden the plants off. I held off from my usual third week of April planting and ended up hardening plants for about 11 days. Most of the seedlings were planted in the first week of May. A couple days after planting, temperatures were forecasted to be less than 0 C. Of more concern was the wind. My cutting garden receives the full force of the wind as it blows across my farm fields. On went the frost cloth. But the wind must have found its’ way under cloth as the next day some of the snapdragons showed damage to leaves. However, the seedlings were planted deeply with some stem in the ground and in the next week or so, new growth started to appear from the base of the plant. I still can’t access the full extent of damage but am willing to wait to see how many plants recover.
In the meantime, there were tulips to harvest, sunflower seeds to sow, weeding to be done. Soon it will be time to start hardening off the tender annuals like the zinnias!
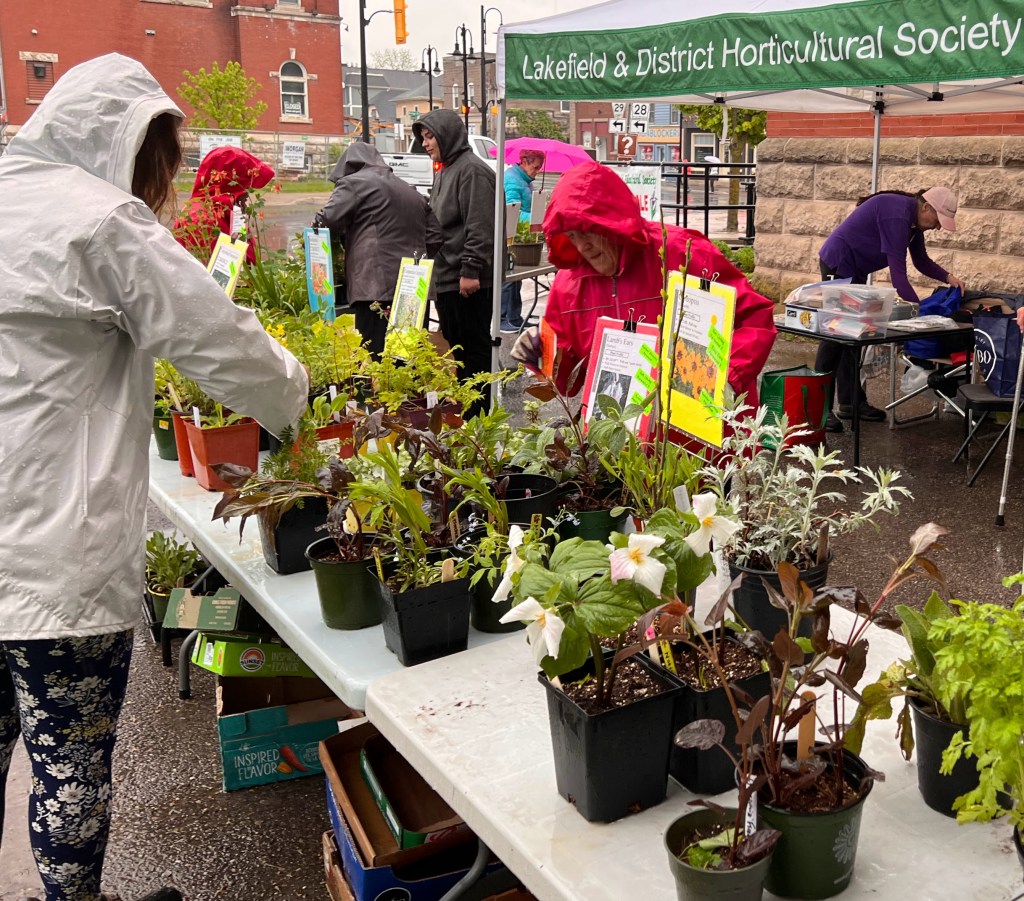
This May, gardeners will once again flock to community plant sales in search of bargain perennials and unusual finds. These sales support worthwhile causes and help plants find new homes—but they can also unintentionally introduce invasive species into your garden. Before planting that exciting new addition, consider one simple precaution: root washing.
Why Root Wash New Plants?
Many gardeners have unknowingly introduced invasive plants through seeds hidden in the soil of donated or purchased plants. An even greater concern today is the spread of invasive jumping worms that I wrote about in a previous blog. Their tiny (1 – 3 mm), soil-coloured cocoons—about the size of a sesame seed—can easily hitchhike in the soil around plant roots.
Since 2016, jumping worms have been confirmed at 63 locations across southern and eastern Ontario (EDDMaps 2026). Although the adult worms die during winter, their cocoons survive and hatch over the next one or more years (Dobson et al. 2022). Dr. Michael McTavish, who has confirmed many infestations in Ontario, notes that by the time gardeners notice the tell-tale “coffee ground” soil texture or spot an actual worm, the infestation has usually been present for years (McTavish, 2025 pers. comm.).
In gardens, jumping worms quickly consume organic matter in the upper soil layer resulting in soil drying, erosion, loss of nutrients, and ultimately decreased plant growth. Root washing greatly reduces the risk of introducing jumping worms, invasive seeds, and other unwanted organisms in your garden.
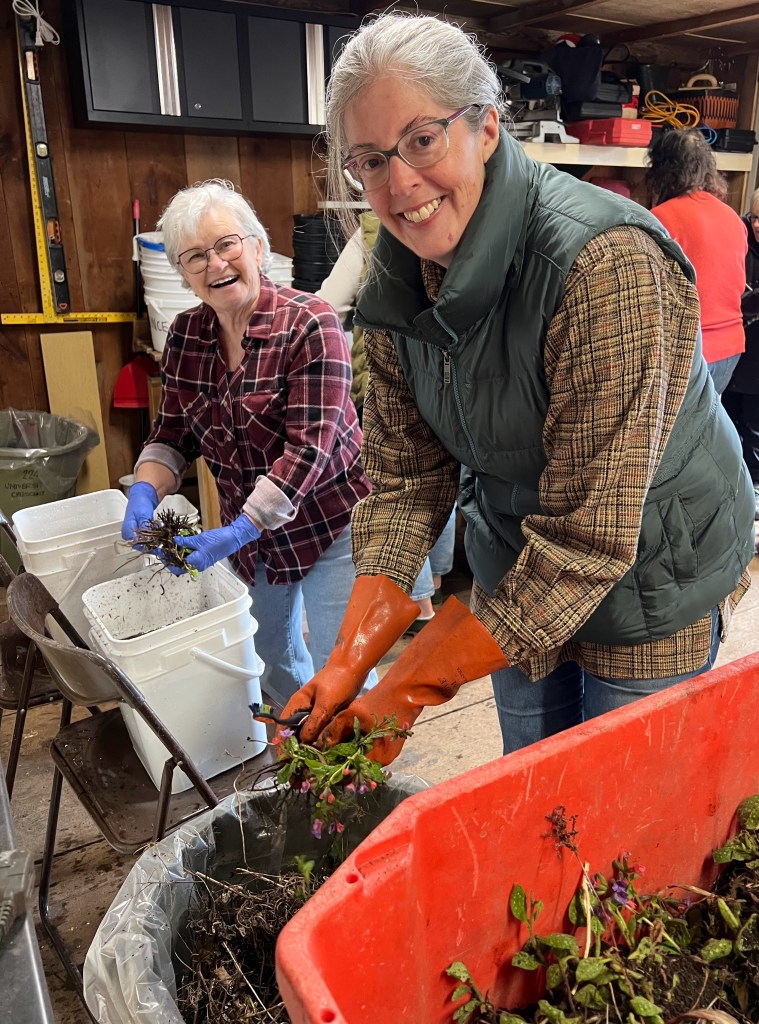
Root Washing at the Lakefield Horticultural Society Potting Day
The Lakefield Horticultural Society holds a Potting Day several weeks before its annual plant sale so divisions can become established before sale day. This year, we added root washing to the process.
Our revised assembly line included:
Plant division
Soil removal
Root washing
Potting into clean containers with sterile soil
Labelling
Moving plants outdoors onto tarmac
Fortunately, we worked in a cool, shaded area, since root washing is not recommended in strong sun or hot weather.
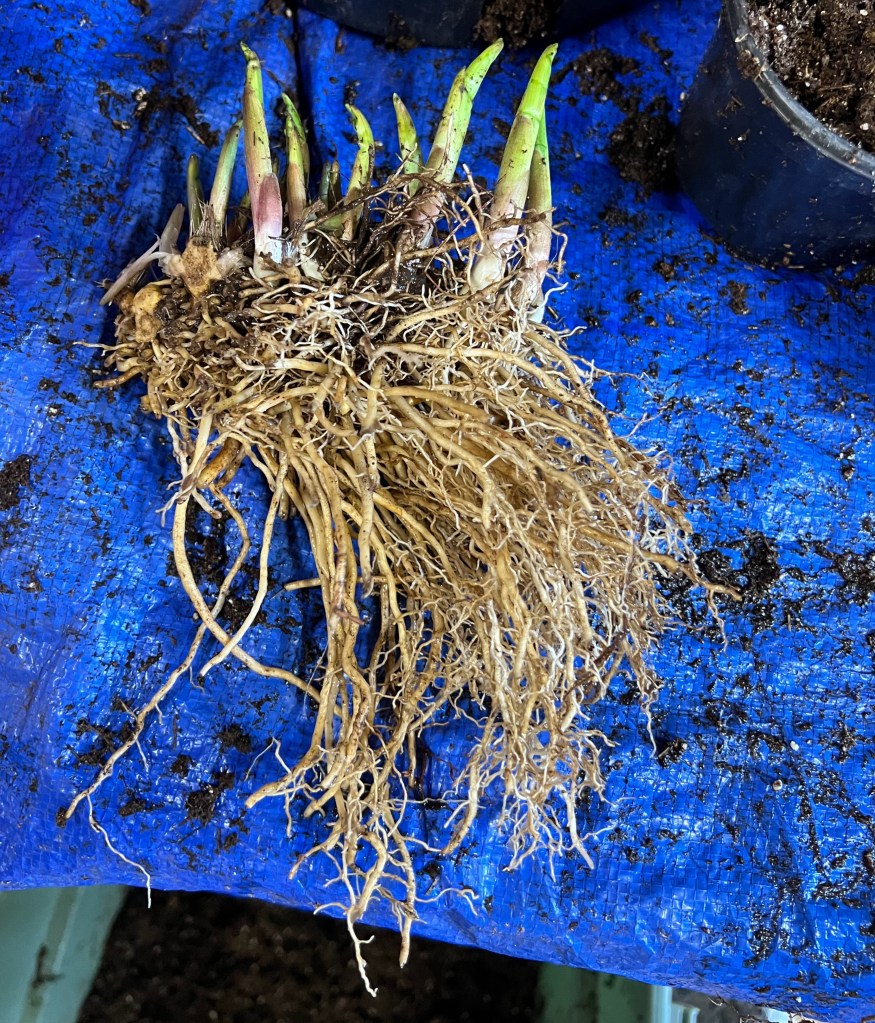
How to Root Wash Plants
Step 1: Remove Excess Soil
Gently tap plant roots against the inside of a garbage bin lined with a heavy-duty plastic bag to dislodge as much soil as possible.
Step 2: Rinse the Roots
Swish the roots in a pail of cold water, then transfer them to a second pail of clean water and repeat.
An old toothbrush proved surprisingly useful for gently removing stubborn soil particles from roots and iris rhizomes.
Photo: Silvia Strobl CC-BY NC SARoot divisions in the red bin are gently tapped against the inside of a garbage bin to remove as much soil as possible. Then the division is successively swished in two pails of cold water, removing more soil particles.
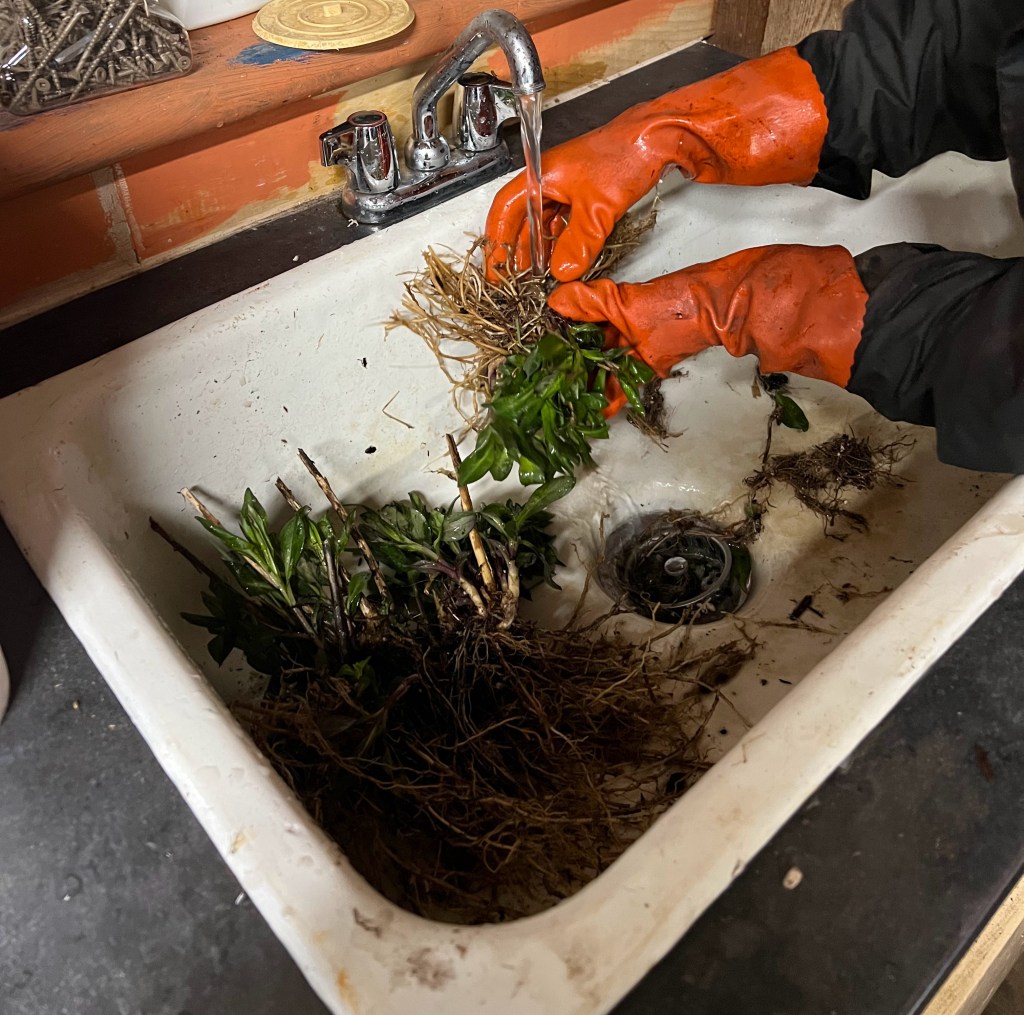
Step 3: Final Rinse
Use a gentle spray of water over a sink with a drain catcher—or over another pail—to remove the remaining soil particles. The plant can then be potted in sterile soil or planted directly into the garden.
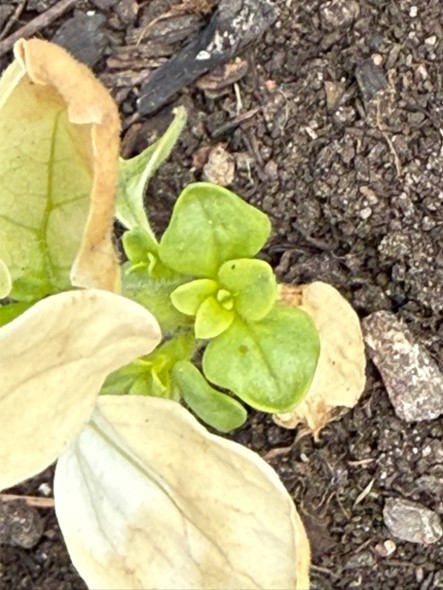
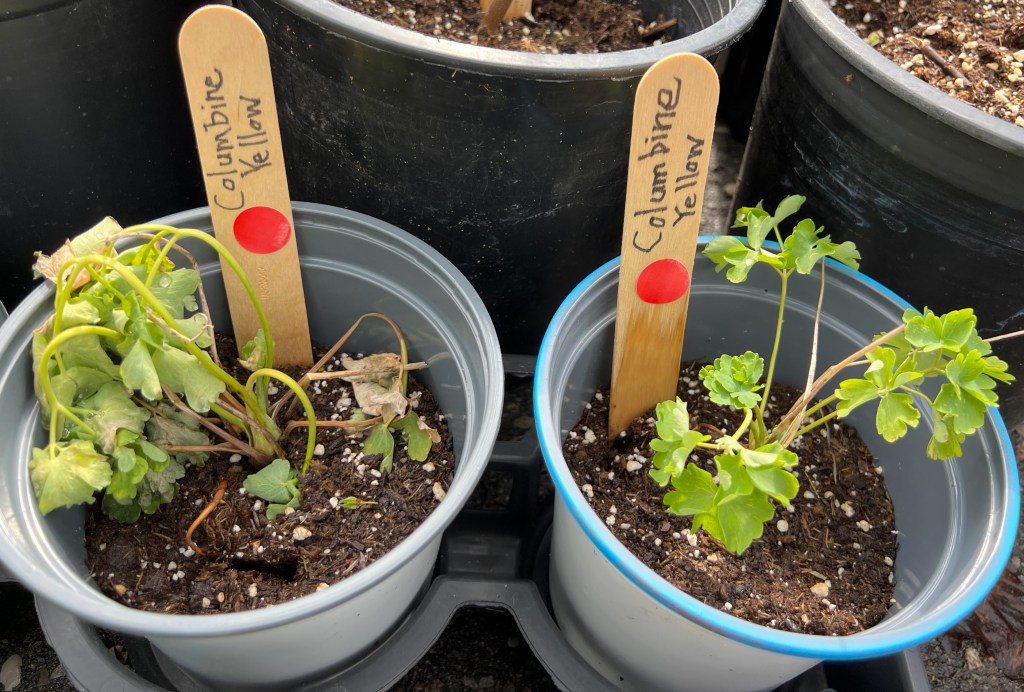
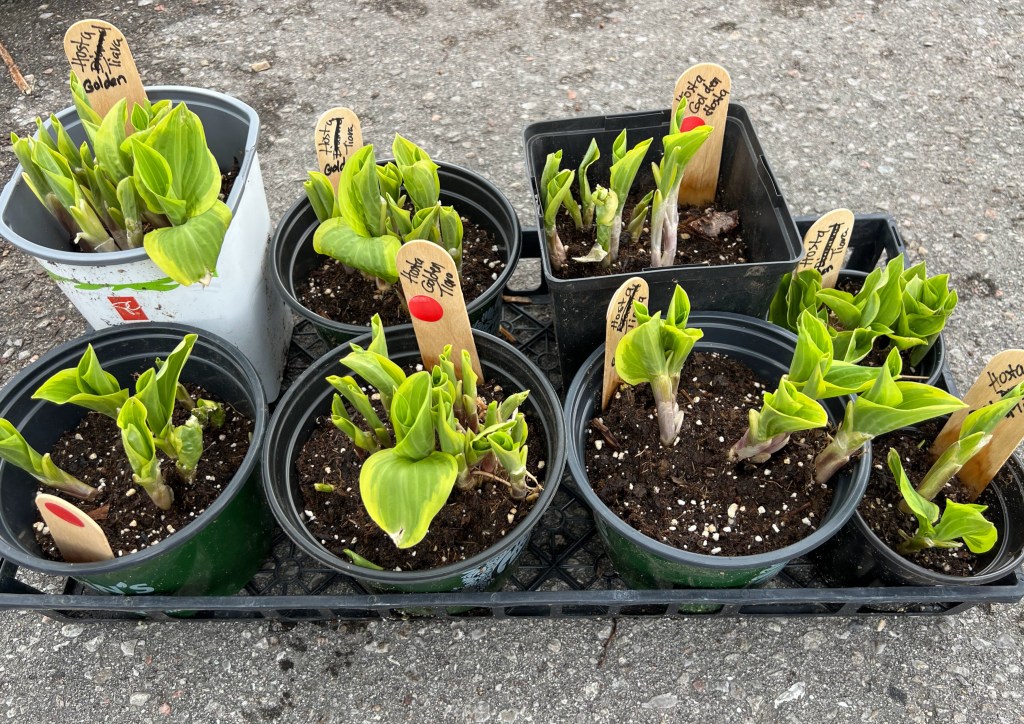
Hostas washed particularly well, while larger rhubarb divisions and some columbine cultivars struggled after treatment.
Photo: Silvia Strobl CC-BY NC SAFinal rinsing of roots to remove remaining soil particles.
Photo: Silvia Strobl CC-BY NC SA A freshly root-washed hosta division ready for potting (that is sterile potting soil on the tarp and in the bin below the table).
What We Learned
A few practical lessons emerged from the day:
Root washing did not appreciably slow the potting process. Nine volunteers root washed more than 200 plants in 2.5 hours. It was not nearly as time consuming as we expected.
Root washing is easier for some plants than others.
Hostas tolerated the process very well; rhubarb and columbine cultivars did not.
Used toothbrushes are excellent tools for removing stubborn soil.
One volunteer root washed plants at home before arriving, leaving the soil behind in her own garden—an approach we may encourage in future years.
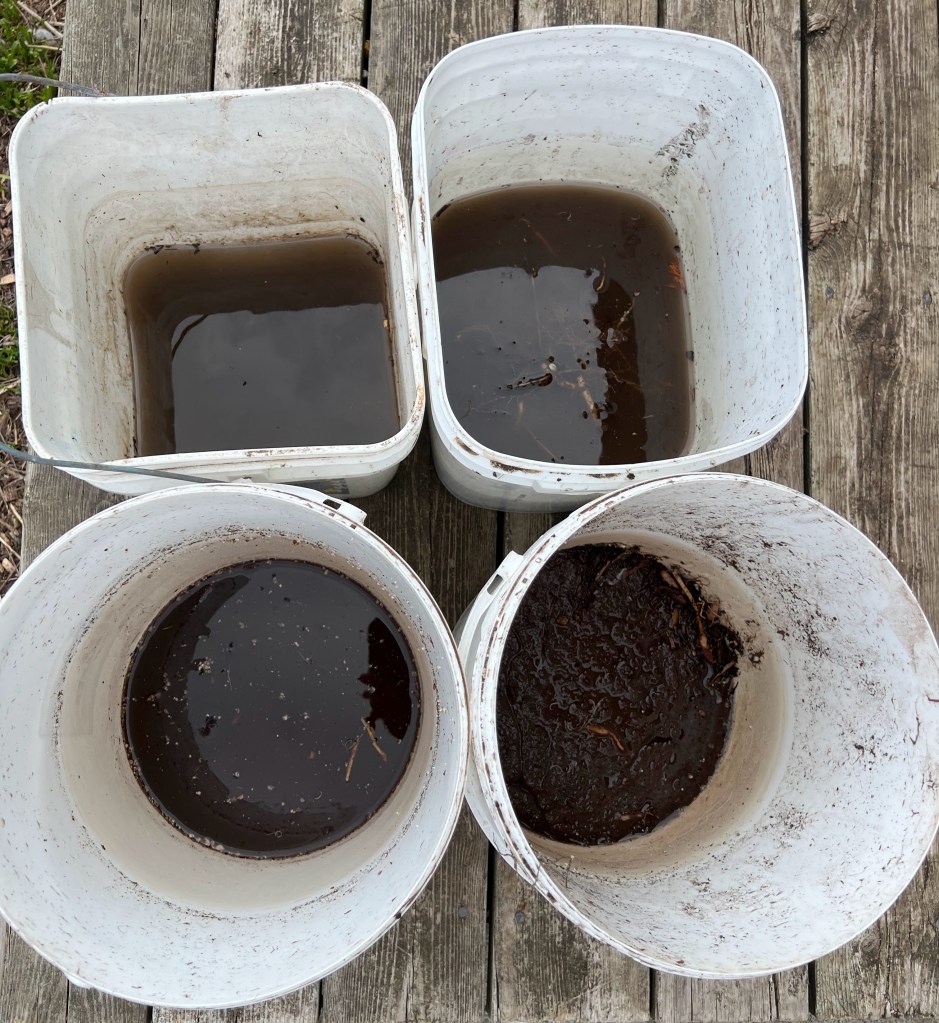
Safe Disposal of Soil and Wash Water
The removed soil was collected in heavy-duty plastic bags and disposed of through municipal waste collection. Surprisingly little soil accumulated after processing approximately 250 plants.
As rinse water became muddy, fresh pails replaced dirty ones. The used water was allowed to sit for several days so soil particles could settle to the bottom. Clear water was then poured into the municipal sewer system for treatment, while the remaining sediment could either be solarized (Master Gardeners of Ontario 2022) or disposed of through municipal waste collection.
Photo: Silvia Strobl CC-BY NC SA Pails with remaining sediment. We used about a dozen pails, switching ones with dirty water and others with clean water regularly.
Caution is advised when root washing in rural areas as I couldn’t find any information on whether jumping worm cocoons can survive in untreated waste systems.
Root Washing Benefits More Than Perennials
For trees and shrubs, root washing has benefits beyond decreasing the risk of invasive organisms. Removing potting soil encourages roots to grow outward into the surrounding native soil rather than remaining confined to the original potting mix. The result is better long-term establishment and survival (Chalker-Scott 2020).
Root washing also allows gardeners to identify and correct root problems such as girdling or spiralling, before planting. Woody roots can be pruned so they spread outward like spokes on a wheel, while fibrous roots can simply be straightened by hand (Hopton-Villalobos 2021).
Even nursery-grown perennials benefit. Potting mixes containing perlite and vermiculite drain quickly and are ideal for greenhouse production, but roots sometimes fail to expand into heavier garden soils after transplanting. By removing the potting mix and “mudding in” the roots directly into garden soil, plants often establish more successfully—and gardeners avoid introducing invasive pests at the same time (Wagar 2025).
A Small Step that Protects Your Garden
Root washing may add a little extra time to planting, but it is one of the simplest and most effective ways to protect your garden and local ecosystems from invasive species. As there is currently no proven treatment for jumping worm infestations, prevention is the gardener’s best defence.
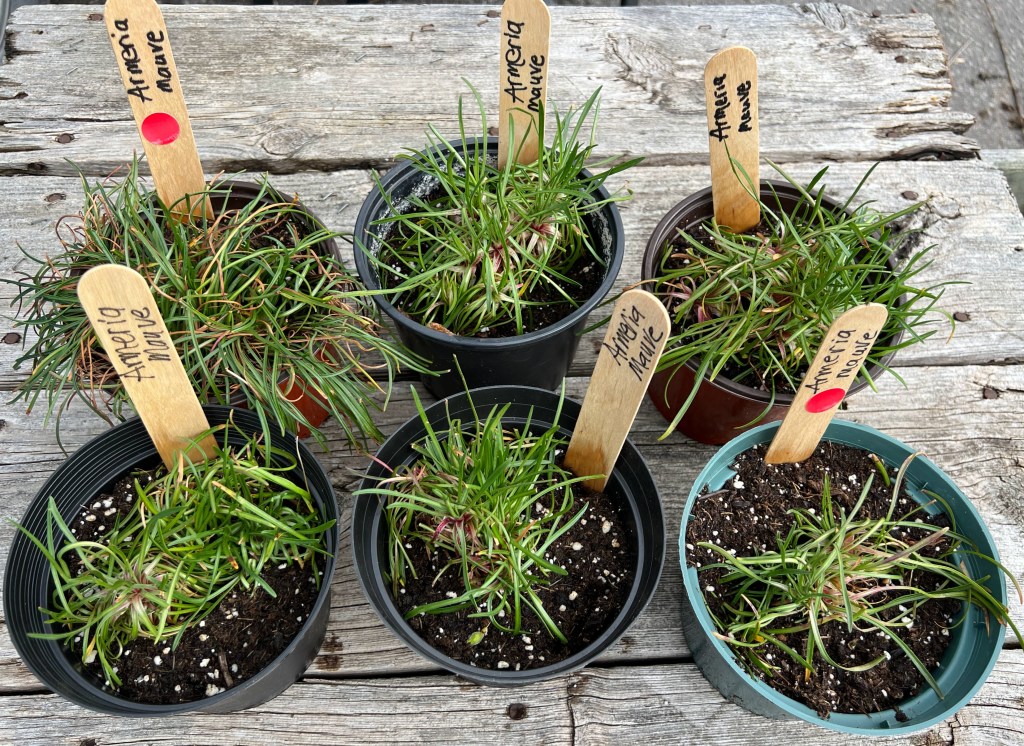
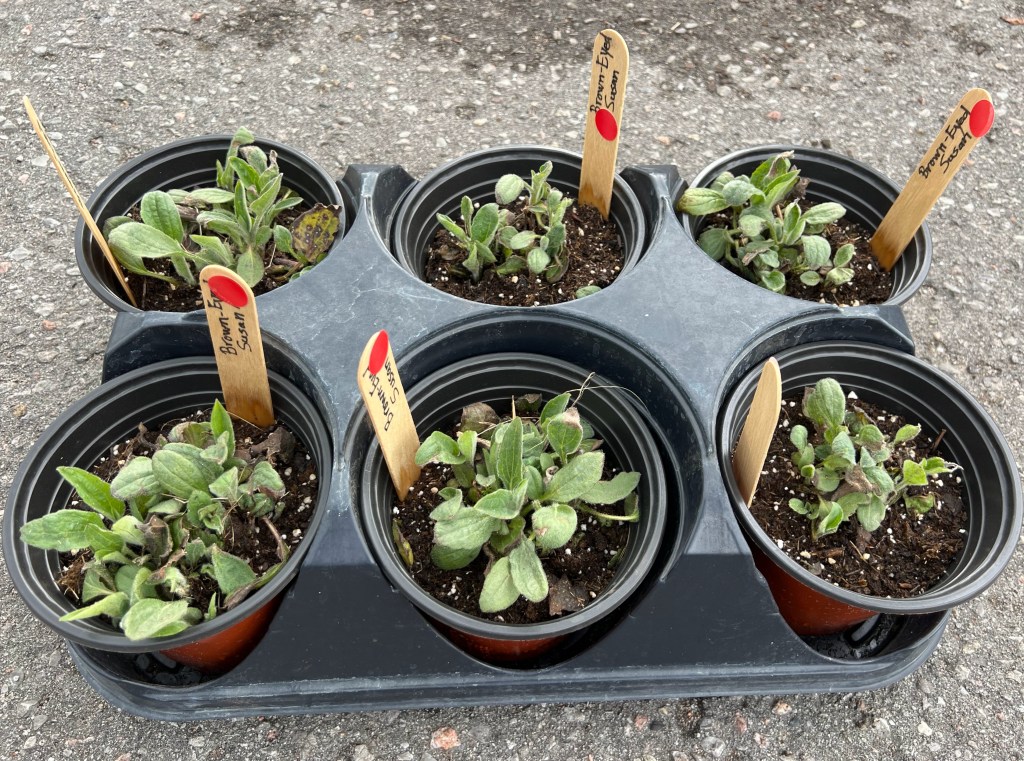
Photo: Silvia Strobl CC-BY NC SA Some of the potted plants two weeks after root washing. Clockwise from top left: Black-eyed Susan cultivar, Golden Tiarella Hosta, Armeria, and Columbine cultivar (these did not root wash well as can be seen in the pot on the left and several others not shown).
McTavish, M. Pers. Comm. 2025. Formerly Postdoctoral Fellow with the Daniels Faculty of Forestry, now Conservation Scientist with rare Charitable Research Reserve.
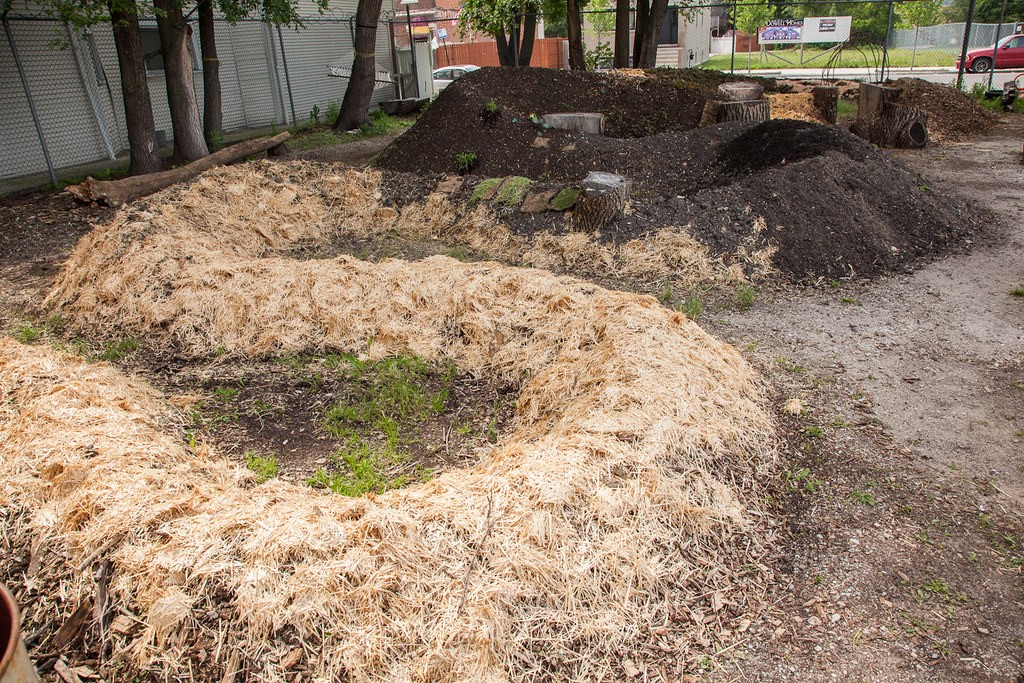
Hugulkultur is a German word meaning ‘hill culture’. It is a form of permaculture, a traditional way of building a raised bed using rotting logs and plant debris. Large logs form the base layer, subsequent layers of organic materials decompose over time creating a rich soil, perfect for many plants, especially vegetables.
There are many advantages to ‘hugelkultur’: it’s easy, affordable, low maintenance, it serves as a self-composting system, and conserves water when constructed in a location where it can capture surface runoff.
The concept is fairly simple. Placed on the lower elevation of a site with its length parallel to water flow, the hugel will catch and absorb moisture. An ‘S’ or serpentine shape positioned to capture runoff is a common shape, but a broken circle or several parallel squiggly strands are other ideas. Design choice is dependent on space available, water run-off, sun and light exposure, and easy access for the gardener. Most hugels are built slightly into the soil though deeper troughs, even completely raised hugels work as well. The width and length of the hugel are also dependent on space available and needs; 3’ wide x 6’ long x 3 – 5’ deep provides good area.
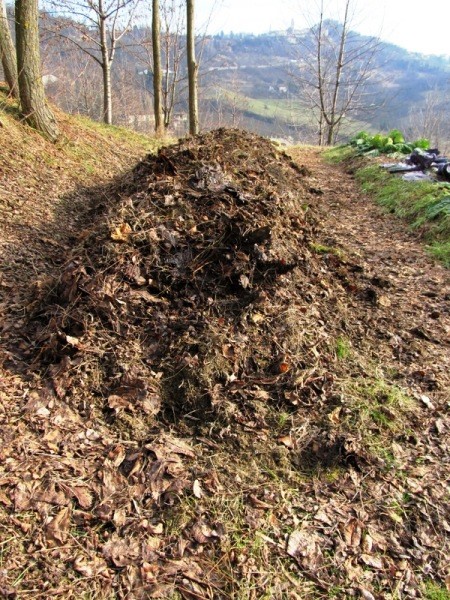
If the hugel is on turf, it’s worth the effort to scrape away the turf and rake some soil away before getting the biggest logs in place. Branches and leaves can be used to fill in the gaps, next comes kitchen and garden waste, manure, grass clippings and finally topsoil and some mulch (or the scraped away soil). Gaps can be filled in by stomping on the mound and moving things around a bit to allow leaves and small matter to slip through. Watering after the addition of each layer kickstarts the decomposition process and also helps things settle. Once things have settled, it’s ready for planting.
A border along the edges of the hugel creates more stability and reduces the risk of the shape collapsing and the top of the mound washing away. Different materials such as brick, wood, or stone can be used to create an edge.
Not all logs and branches are suitable: hardwoods are best; black walnut should be avoided (many plants are sensitive to it), willow as well (branches will sprout), and even cedar is not the best (slow to decompose).
The hugel will likely benefit from additional watering in its first stages; once decomposition starts, less water is required. Over time, as wood and other organic materials decompose, the hugel will sink and additional compost would be beneficial. There is some discussion about whether the decomposing wood takes up nitrogen to the extent plant growth is inhibited so adding compost or growing legumes are considered effective mitigation techniques.