Category Archives: Websites

It’s Spring… It’s Spring!

By Cheryl Harrison, Master Gardener

Yes, it is finally spring!  We can feel the sun getting warmer and see the light lasting longer and so can your orchids.

Before the outdoor gardening season starts, have a look at your Phalaenopsis orchids … actually check all of your houseplants but I am going to stick with just Phalaenopsis orchids for now.  Your orchids may have already started to bloom.  I have 5 Phalaenopsis orchids and one of them has been in bloom for a couple of weeks.  The others are not in bloom but, after inspection, I realized that they all needed to be repotted.  How do I know that??

Orchids are epiphytes which means that they grow on other plants but are not parasitic so do not hurt the other plants.  Epiphytes have aerial roots to anchor themselves to a tree, for example, or in a pot. The aerial roots pull minerals, moisture and nutrients from the air.  They are not growing in soil.  When I checked the medium in the pots of my Phalaenopsis, by gently lifting the plant from its pot, the medium had broken down and looked more like soil than the appropriate mixture of bark, perlite and sphagnum moss (or renewable coconut chips).

Phalaenopsis orchids often need to be repotted after purchase because they may have been in the pot for quite some time and the potting medium has decomposed or they may be in an incorrect potting medium.  Incorrect potting mediums include anything that holds too much moisture and/or is compacted around the plant’s roots e.g. regular potting soil or a ball of sphagnum moss.  They also need to be repotted every 2 to 3 years because again, the medium in their pots will have decomposed, begun to become compacted around the roots and hold too much water. Too much water will lead to root rot followed by a decline in plant health and subsequent plant death.

The other indicator that repotting may be needed with Phalaenopsis orchids occurs because the plant is monopodial which means that it grows taller with new leaf growth at the tip of the stem.  The plant can end up top heavy and if not well anchored in its pot, it can fall over as flowers, stem and leaves are pushed up out of the pot by the roots.  With repotting, you can settle the plants roots back down into the pot.  If the potting medium is still in good shape, then it does not need to be replaced but if you are repotting the plant anyway then it may be a good time to replace the medium.

I have collected my supplies to repot my plants.  Note that I am not going to disturb the one that is blooming.  I will leave it until it is done blooming then repot because I do not want it to drop its flowers with the shock of being repotted.  The flowers are way too pretty!

Now you know why my Phalaenopsis orchids need to be repotted, so check your plants before you get too busy with the start of outdoor gardening season … it’s spring!

For more information:

How to Repot an Orchid: Phalaenopsis, Chicago Botanical Garden

The Case for Coir

By Christine Freeburn, Master Gardener

For many years, we have been told of the depleted bogs where peat has been harvested and why we should not be buying it. Many gardeners wonder what they would use to replace this product that is a great soil amendment and seed starting medium.

Peat is an organic naturally forming product which can take hundreds of years to replace. We all know the history of peat bogs in the British Isles when peat was used to heat homes and then mined irresponsibly, destroying wetlands and ecosystems. The International Union for Conservation of Nature (IUCN) is a group which is responsible for setting up a Peatland Programme in the UK.

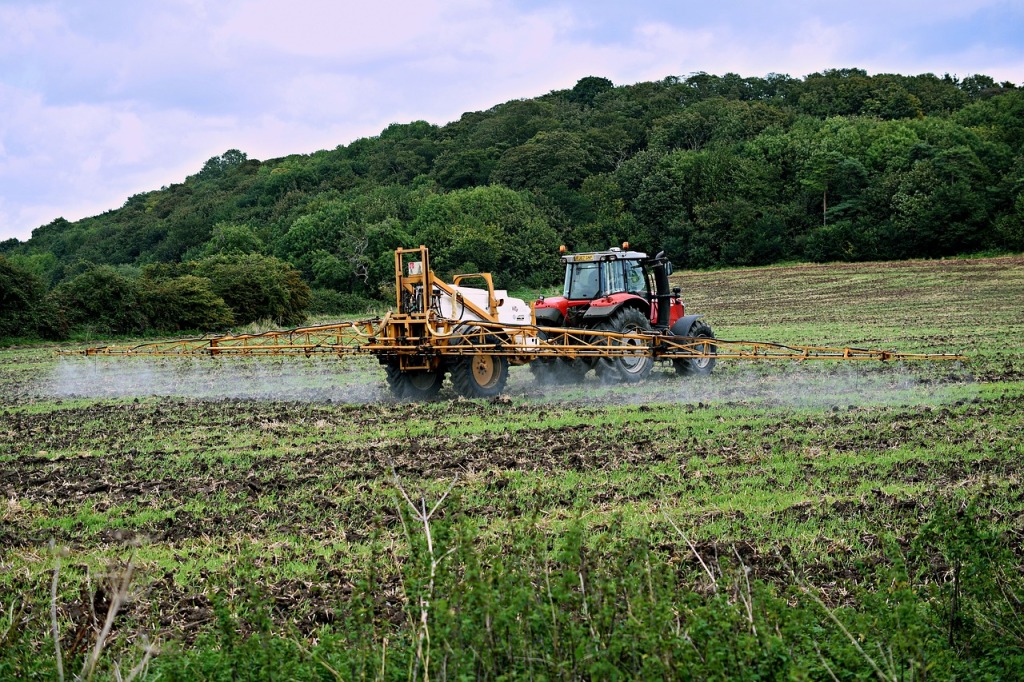
Peat harvesting

Did you know that Canada is the largest producer and exporter of horticultural peat, with about 1.3 million tonnes of peat being mined in 2010? Peat companies must, however, follow federal and provincial guidelines. Just recently, in Manitoba, this ruling occurred: On January 20th, 2023, Moswa Meadows and Fish Lake Fen were designated as provincially significant peatlands in the newly created Provincially Significant Peatlands Regulation in order to ensure the biodiversity of the two areas is preserved. Specified development activities, including mining, forestry, agriculture, and peat harvesting, are now prohibited across the nearly 28,000 hectares that make up Moswa Meadows and Fish Lake Fen and will ensure the areas can continue to provide long-term beneficial goods and services including carbon sequestration and storage, water filtration, and flood mitigation. For more about peat management in Canada, check out

Peat Mining in Manitoba

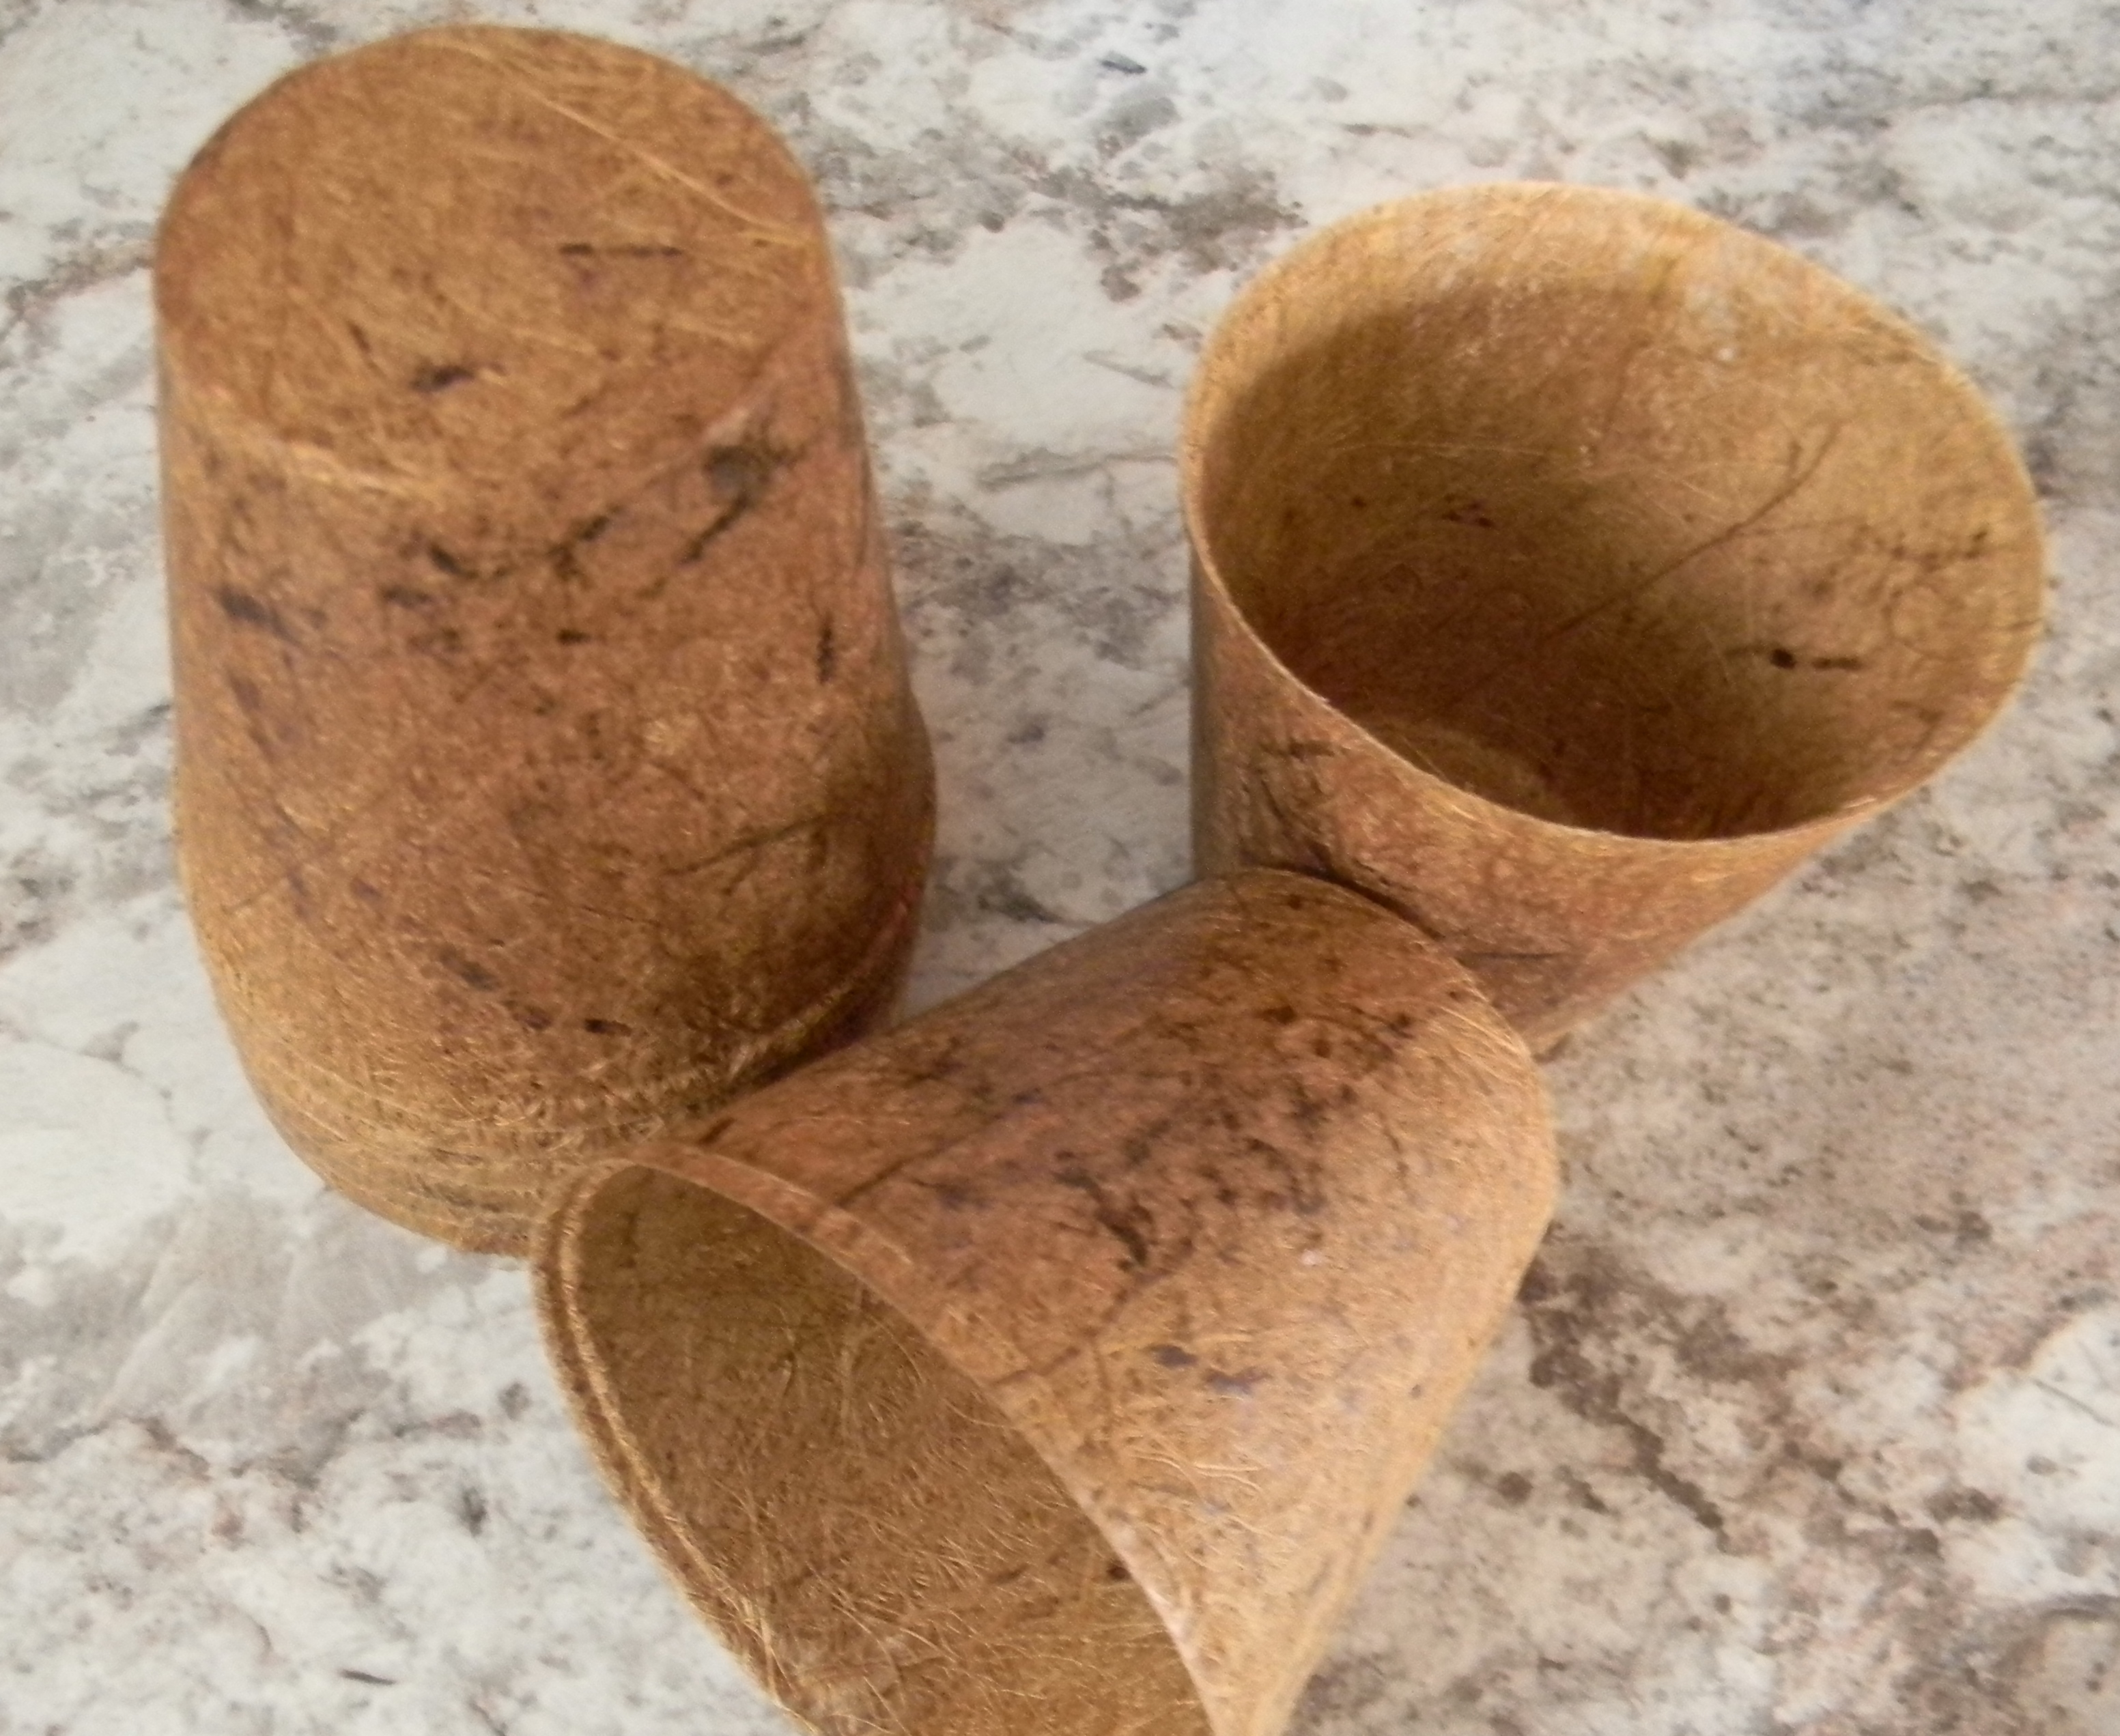
Coir  (pronounced COY-er) comes from the coconut plant.  It is the part between the meaty white flesh and the hard outer shell. Because coconuts are grown and harvested for food, coir is readily available. India is the largest exporter of coir. It can be used on its own as a growing medium for seed starting and root cuttings or as a soil amendment for holding moisture and is a great replacement for peat.

Sample package of coir

Coir has a pH of 5.7 to 6.5 which is perfect for plants to obtain nutrients. It can be used in containers to help hold moisture and lighten soil. The square foot garden formula is one third peat moss, vermiculite and compost, so coir would be an excellent peat replacement. Coir last longer than peat, being slower to breakdown. It has no odour. It gives sandy soil more structure. Excess salt may be a problem, however, rinsing with fresh water a few times should remove enough of the salt.

Coir is available in many different ways including bales, bricks, pots and discs. Compressed blocks need to have warm water added for it to absorb and expand, just like peat. Place the brick in a bucket, add water and watch it expand. The coir will absorb the water, and can expand by up to 15%. It will soften and have a fluffy texture which can then be placed in pots for planting slips or rooting plants. The small disks also need to have water for them to expand and act like the peat pods we are familiar with. And like the peat pods, these coir disks can be planted directly into the garden. Check out this article:  What is Coconut Coir?

Coir products are available online at many sites like Veseys Seeds. I have also found them in Peavey’s and Home Hardware in Peterborough. Let’s all be responsible by purchasing coir rather than peat.

Will This Old Veggie Seed Grow?

By Lois Scott, Master Gardener

You have probably heard this adage applied to various activities/hobbies, but here I go.  Buying seeds and starting seeds are two different activities.  I engage in both, but sometimes the buying outruns the starting and I find myself looking at an unused package of vegetable seed purchased in the past and wondering if those seeds are viable.  Checking vegetable seed viability is easy and may save you from the disappointment of a poor harvest.

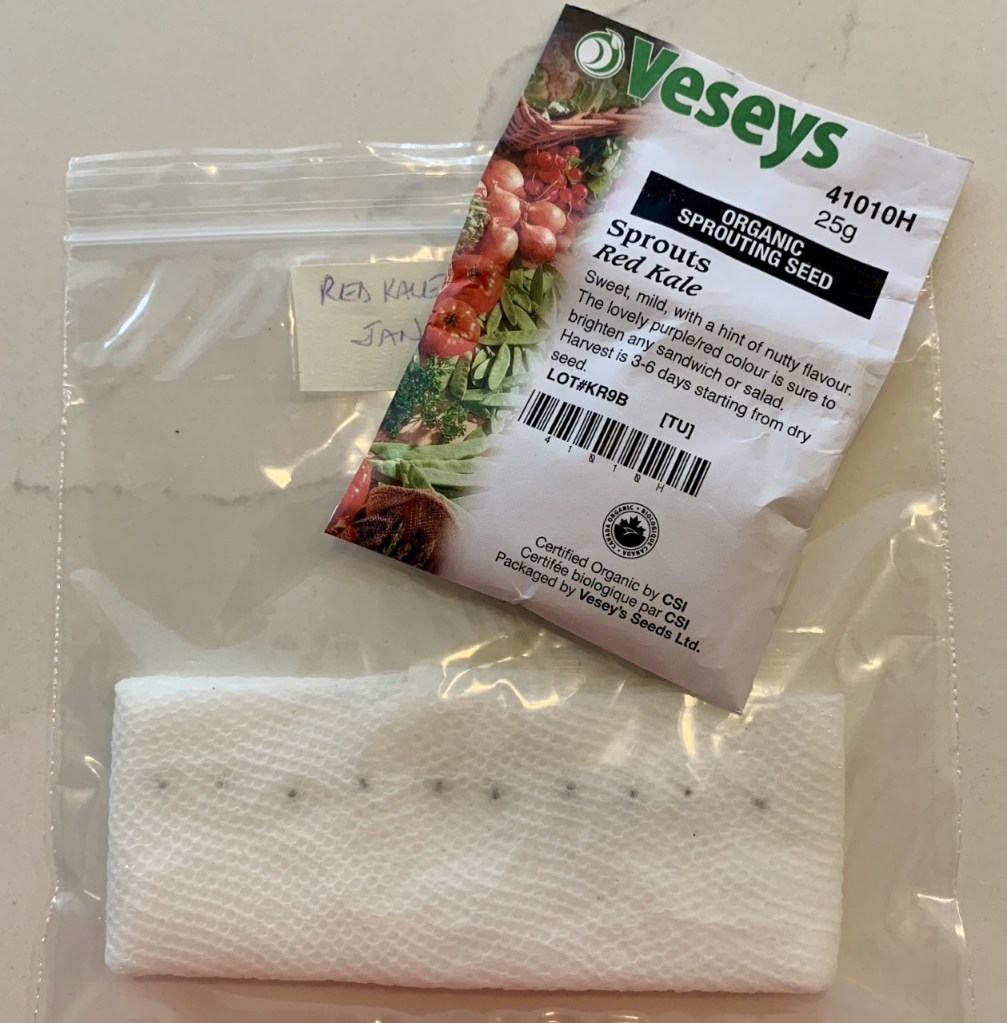
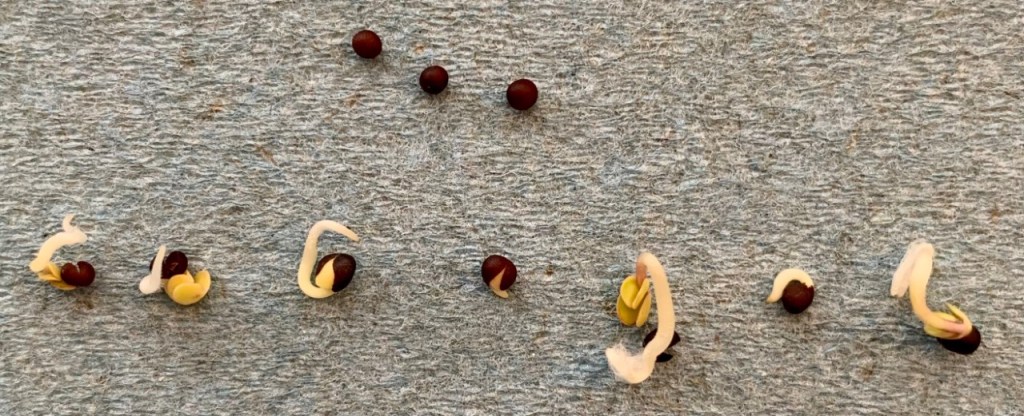
To say a seed is viable is to say it is alive.  Checking for this can be easily done by wrapping a number of seeds (10-20) in a moistened paper towel, placing them in a sealed plastic bag in a warm place (21-26*C) and then checking for germination in a week or so.  Your germination rate is a percentage, calculated by multiplying the seeds germinated by 100 and dividing that by the total number of seeds in your trial.  It is recommended that if your germination rate is below 70% you should buy new seed.  In my demonstration featured in the two photos shown, I used 10 seeds and 7 sprouted.  My germination rate is 70%. 

Checking for seed viability by putting seeds in water and discarding the floating ones is not a reliable test.

Different types of vegetable seeds remain viable for different lengths of time https://today.oregonstate.edu/news/give-seeds-test-performance but proper storage of seeds will optimize their viability.  They are best stored in a cool place like a refrigerator, cool basement or root cellar. https://hortnews.extension.iastate.edu/how-store-seeds-and-test-germination-rates 

Some seed companies also list on the back of their seed packages the optimum germination rate and the year the seeds were packed and tested.  So, I know that the rapini seeds I haven’t used were packed in 2022 and maybe I should plant them this year!

It’s coming to that seed starting time of year so don’t hesitate to give some of your older seeds a chance to prove themselves and save yourself from vegetable garden let-down.

Clivia: Perhaps a Houseplant for your Collection?

By Cheryl Harrison, Master Gardener

I recently acquired a Clivia miniata.    This plant was new to me which, of course, was part of it’s appeal.  It also has dramatic long strappy green leaves and flowers during our cold, gray Ontario winter. 

When you bring a new plant home, be sure to carefully inspect it for hitchhikers; you do not want to bring in disease or insects which could be problematic for your current houseplants .   For example, Clivia may occasionally suffer from scale or mealy bug.  Thankfully, my new plant is lovely and healthy!

Clivia are part of the Liliaceae family.  Amaryllis is in the same family.  Clivia flowers are similar in shape to Amaryllis but smaller.  Clivia form a large ball of flowers so have lots of impact… colours range from yellow to red.  My plant has orange flowers.  Clivia may grow to be 2 to 3 feet (60-90 centimetres) tall and almost as wide.  This means that it requires a heavy pot to balance the top growth or it may tip over.  They like to be root-bound so may stay in the same pot for up to 5 years.

Clivia is native to South Africa.  The common name is flame lily, Natal lily or bush lily.  The plant was named after Lady Charlotte Florentine Clive, Duchess of Northumberland in England.  Clivia was very popular during the Victorian era.  If you would like to know more about the history of this plant, check here.

This plant is the ideal house plant.  It could be placed in a North window or in indirect light from an East or West window.  High humidity is not required so no misting is needed.  Clivia prefers rich, well drained organic soil.  A half strength dilution of 20-20-20 fertilizer may be applied monthly in the summer. This plant’s  large fleshy roots will rot if watered too much so allow the soil to become dry to the touch between waterings. 

Clivia may be placed in bright shade outdoors in the summer but does not like cool temperatures so must be wintered indoors.  In fall, when you bring your plant indoors, it needs a rest period to encourage that wonderful winter bloom.   Reduce watering but give it just enough water to keep the leaves hydrated and place the plant in a cool area for 6-8 weeks.  Then, place your plant back in its usual spot and water as described above.  Your plant should flower but this may take up to 8 weeks.  Clivia may flower 2-3 times per year but note that the plant is slow growing and needs to mature before it blooms.  This may take 3 to 5 years if you have purchased a young plant.  For more Clivia information, please see here.

I encourage you to welcome the easy to grow Clivia into your home!  Their beautiful leaves, and eye-catching blooms make them a striking plant to add to your houseplant collection.

Tree Identification with a Winter Key

By Laura Gardner, Master Gardener

Plant apps can be useful identification tools but their accuracy often depends on the quality of the photos and the features that are being examined. They tend to work best with more unique features such as fruit or flowers. I find that as a learning tool they can be limited because they do not give the user details about how or why the particular species was suggested. There are some other tools that can lead to an identification as well as help hone identification skills.

There is a little book called Winter Tree Finder by May Theilgaard Watts and Tom Watts. Originally published in 1970 and at only 58 pages, it is the perfect size to take into the garden or on nature walks. Known as a dichotomous key, it covers deciduous trees of the Eastern US and Canada and provides maps that show the various species ranges. Dichotomous keys lead you along a path towards the correct species by asking a series of questions about the tree’s various parts. This particular key relies mainly on the appearance and arrangement of terminal and lateral buds on twigs, twig width, bud scales, and vein or vascular bundle scars for identification. Other features may also be considered such as lenticels (pores), bark colour, pith (tissue inside twig), fruit, thorns, etc. It also includes a ruler on the back cover that is used to measure the width of the twigs.

There is a tree that is growing on my neighbour’s property that I know is Acer negundo (Manitoba Maple) and I decided to see if this book could identify it. I pruned a twig that was hanging over on my side of the fence. If you wish to identify other trees that are not on your property, it is appropriate to take photos, take a guidebook or key with you, or get permission to take a cutting.

Step 1: I noted whether the leaf scars are in an opposite or alternate arrangement (phyllotaxy) on the twig and if they were in pairs or were more numerous (whorled). Leaf scars are the markings on the twig where the leaf stalk was attached before it dropped off in the fall. In the case of my tree, there was an opposite arrangement and paired leaf scars.

Step 2: I looked at the width of the twig—less than 0.25” or greater than .25” In this case, the twig was no greater than 0.25.”

Step 3: I examined the texture of the terminal bud and the shape and the number of old vascular bundles or vein scars. Old vascular bundles represent the xylem and phloem (ports or channels) where water had flowed to the leaves. Since the terminal bud was not rough and dry, is conical, and the leaf scars had three bundles and were somewhat V-shaped, the twig belongs to the genus Acer (Maple).

Step 4: I considered the colour of the buds. The key asked if the buds were red, reddish brown or not. These buds might be seen as reddish brown and so could lead one down the path towards a different species but they also were “whitish and woolly” and the twigs were “purplish.” The leaf scars also met at a point on the twig. These combined features pointed towards A. negundo (Manitoba Maple). Colour variability within a species might question an identification. Also bear in mind that these types of guides may not identify exact cultivars or hybrids. But since this exercise, I now see this tree everywhere on my winter walks.

Other Similar Books

Fruit Key and Twig Key to Trees and Shrubs by William M. Harlow

The Shrub Identification Book and The Tree Identification Book by George W. Symonds

Woody Plants in Winter by Core and Ammons (also online through Archive.org as an eBook.)

Online Sources

University of Wisconsin K-12 Forestry Education Program: https://www3.uwsp.edu/cnr-ap/leaf/Pages/LEAF-Tree-Identification-Cards.aspx

An excellent web site of winter tree photos can be found at http://www.portraitoftheearth.com/trees/specieslist.html

Some Fascinating Off-Season Reading

By Laura Gardner, Master Gardener

Now that the gardening season has winded down, I’ve turned my attention to some interesting reading. On my nightstand there are some little books that I’ll pick up and read a few snippets just before bed. They are part of a series called “Pedia” published by Princeton University Press.[i] The word “pedia” comes from the Greek word “paideia” for “learning” or “education.” There may be a perception that University presses publish only heavy academic titles. However, many do publish titles that are suited for the general reader. In this particular series, so far it covers the subjects flora, insects, trees, fungi, geology, dinosaurs, birds, and neurology. The petite clothbound books are like miniature encyclopedias, each with around 100 entries on a wide range of topics. Some of the entries are so fascinating that I needed to find out more.

Here are three entries that show gardeners the symbiotic relationship between insect species such as bumblebees, beetles, ants and selected plants:

In “Florapedia,” there is an entry for the plant Cornus canadensis (Bunchberry), a native of the Dogwood family that can be found in some of our Peterborough County forests. Its flowers are said to be capable of the fastest movement in the plant world. As a self-incompatible plant (i.e., unable to self-pollinate), it relies on a unique process of pollen transfer. Amazingly, it has the ability to project its pollen at a rate of 4 metres per second—more than 2,000 times the acceleration of gravity (p. 20). When an insect touches on an unopened flower, it triggers the firing of the pollen through the release of stored energy. The pollen then transfers to the insect which in turn moves on to another flower to cross-pollinate. Larger pollinators such as Bombus (Bumblebees) are required to initiate the opening of the flowers; although flowers that open by themselves are able to fire the pollen at a distance of about 1 metre to adjacent plants.[ii]

In “Treepedia,” we learn that Magnolia trees were among the first flowering species on the evolutionary scale (about 100 million years ago) and that they were and still are pollinated by beetles (p. 82). Magnolias developed hardened carpels (female reproductive parts) so they are able to tolerate the beetles’ chewing mandibles.[iii] The beetles are attracted to the large, strongly scented flowers as well as the pollen and other secretions. Pollen grains are readily captured by the insects’ hairy bodies—which are transferred to other flowers.[iv] Some gardeners may only think of bees as being pollinators and don’t think of the importance of beetles. Some other species that are pollinated by beetles here in Ontario include Asimina triloba (Pawpaw), Nymphaeaceae spp. (Water Lillies), and Lindera benzoin (Northern Spicebush).

In “Insectopedia,” the topic of seed dispersal, the term myrmecochory is explored. More than 4,000 plant species rely on ants for seed dispersal. Ants are attracted to the nutritious fatty seed coats called elaiosomes and take them back to their nests. The remaining unwanted parts of the seeds are discarded near the nests and subsequently germinate into new plants (pp. 155-156). Have you ever wondered how some new plants pop-up some distance from the parent plant? Species such as Sanguinaria canadensis (Bloodroot), Trillium spp., (Trillium), Scilla spp., (Squill), Hepatica acutiloba (Sharp Lobed Hepatica), Viola spp. (Violets), are just a few examples of plants that can spread with the help of ants.

These little books would make a nice gift for any curious gardener, amateur botanist, or nature enthusiast.


[i] Pedia series. Princeton University Press: https://press.princeton.edu/series/pedia-books

[ii] Edwards, J., Whitaker, D., Klionsky, S. et al. A record-breaking pollen catapult. Nature 435, 164 (2005). https://doi.org/10.1038/435164a

[iii] Evich, Philip. The Botany of Magnolias. Smithsonian Gardens. Online: https://gardens.si.edu/learn/blog/the-botany-of-magnolias/

[iv] Hooks, Cerruti R., and Anahí Espíndola. Beetles and Pollination. Maryland Agronomy News. Online: https://blog.umd.edu/agronomynews/2020/06/29/beetles-and-pollination/

The Fall of a Fall Favourite

By Lois Scott, Master Gardener

Sometimes it feels like my garden will never reach the ‘mature’ stage even though I have been gardening in the same spot for 36 years.  There are a variety of reasons for that, but one major one was my need to remove plants that are now considered invasive. “Invasive species are considered one of Canada’s greatest threats to the survival of our wild animal and plant life.  Invasive species kill, crowd out and devastate native species and their ecosystems”.  https://www.invasivespeciescentre.ca/learn.

So, who were the super villains in my garden?  I’m looking at you, Burning Bush (Euonymus alatus) and also you, Barberry (Berberis).  I was initially truly disappointed when I realized they needed to go but then my short attention span came into play and I was on to the next thing.  What new plants could I get to replace said villains?!!!  And they are environmental villains:

Burning Bush
Japanese Barberry

Burning bushes are certainly very visible at this time of year due to their intense red foliage, but Chokeberry (Aronia melanocarpa) makes a wonderful substitute for both Burning Bushes and Barberry.  They are native to Ontario, will grow up to 2.5 metres tall, have white flowers in spring and their fall colour is dramatic.  They will grow in moist or dry areas and they attract pollinators and songbirds.  There are actually many native shrubs that are very ‘ornamental’ and worthy garden additions.  https://www.inournature.ca/best-native-shrubs

Chokeberry (Aronia melanocarpa)

At the risk of blathering on about native plants, one small benefit for me is that if I choose a native plant that is not aggressive (rampant spreader etc) and is suited to the conditions of the site (right plant, right place) I won’t find myself having to hack out this year’s fan favourite that turns into next year’s invasive disaster.  Always a good thing for me and the wildlife and pollinators in my garden!

For Garlic Lovers Only … How to Grow and Harvest Garlic in Ontario

By Carol Anderson, Master Gardener in Training

Unlike many of our more tender vegetable and herb favorites, garlic prefers to spend the winter “contemplating” spring from a safe and protected spot in your outdoor garden bed. And the good news is that the timing is perfect – planting garlic in October, after the first frost (or two), is ideal for ensuring a healthy crop of garlic that will be ready for harvest the following summer (usually mid to end of July).

The reason for this is that garlic is considered a “winter annual” and exposure to the cold temperatures ensures proper bulb development. The cold of winter, also known as vernalization, prompts the clove to break open after a period of dormancy. However, the garlic cloves that you plant (also called “seed stock”) must be planted to the correct:

  • Depth: to ensure that they are insulated from extreme or harsh conditions, and
  • Distance: to ensure that the stock has enough room to multiply into large and healthy buds.

What you will need:

-small trowel
-garlic seed stock (*see special note)
-leaves or hay (as mulch)
-compost (recommended)
-pen and paper
-toothpicks (optional)

Planting Guidelines:

  1. Condition your Soil. Although garlic will grow in many soil types, adding 2 inches of compost and working this into your soil is recommended. A soil that can hold nutrients and water easily (making them available to your plants) will improve your overall yield.
  2. Split the garlic bulb into the seeds while trying to keep as much of the soft shell on each of the cloves.
  3. Make a “map” of your garlic field on the ground with either toothpicks or the end of your trowel marking where each garlic “seed” will be placed. It is recommended that each seed (clove) is planted ~6” apart and ~4” deep in rows that are 10” apart. (Note: the clove should be planted to a depth that is 4 X the length of the clove – e.g. 4” for a 1” clove).
  4. Place the clove with the pointy side up in the 4” deep hole and cover gently with soil.
  5. Make a paper “map” of your garlic field so that you remember where each garlic bulb will be growing in the Spring.
  6. Cover our garlic field with 12-18” of leaf or straw mulch.

Growing and Harvesting Recommendations:

  1. In the Spring, you may need to remove or refresh the mulch. It is recommended to keep the garlic field mulched with a few inches of mulch to keep the moisture in and reduce weed growth.
  2. Using a standard garden hoe, weed frequently between the rows to uproot any early weed growth.
  3. Most garlic varieties produce a garlic “scape” – a thin curly green end of the plant. If the scape is left on the plant, energy will go to flower formation, instead of bulb growth. Remove the scape immediately after it has curled (see below) by cutting or snapping it off (see Special Note below).
  1. Harvest the garlic by using a garden fork or spade – loosen the soil 4-6 inches around the bulb and then lift the entire plant with bulb attached gently from the soil. (Note: garlic is usually ready to harvest in July when some of the leaves have begun to turn brown. Leaving them too long will allow decay. It is recommended, however, that during a moist summer a “test” is done by digging up a bulb before the leaves start to brown to avoid premature decay).
  2. Tie 5-10 garlic bulbs together in a bunch with garden twine/hemp and hang to dry/cure for 2-3 weeks in a dry well-ventilated area.
  1. Cut the dried garlic stem close to the bulb using garden cutters and remove the dried roots close to the bulb using kitchen scissors. Store the bulbs in a cold cellar or cool dark location for later use (never in the refrigerator), keeping as much of the sheath/covering of the bulb intact as possible. Garlic can be stored for up to one year in the right conditions.
  2. Enjoy!!!!

Special Notes:

Garlic Stock: Do not use imported garlic purchased from the grocery store as this could introduce unwanted diseases into your garden. Garlic stock (or seed garlic) can be purchased from local growers near you….and the good news…once you grow your own…you will have an endless supply of “stock” acclimatized to your own growing conditions.

Spring Planting: Garlic can be planted in the spring. However, you must keep your “stock” in cold storage prior to spring planting to ensure that the bulbs experience a prolonged cold period to stimulate flowering/bulb development.

Garlic Scapes are not garden waste, they are delicious in salad…and they make a deliciously potent pesto!!!! Try this garlic pesto recipe out.

Sources:

Garlic Growers of Ontario
Garlic Growers Association – Toronto Garlic Festival
The Old Farmer’s Almanac

Reflecting on the Past Season

By Marilyn Homewood, Master Gardener

The frost has made its first appearance marking the end of the summer growing season.  Before plunging headlong into bulb planting, I find it valuable to use this time to take stock of the past season as it serves to help me plan for next year (although I must admit I have already submitted a lengthy list of dahlia tubers for next spring).  I find it helpful to keep a gardening journal throughout the year for reference purposes and it becomes an important part of this process. There are many entries especially in spring when I am propagating, not so much in the summer but I always do a fall summary.  This written record has served me well over the past few years.  I also take this opportunity to look back over the photos I took throughout the season. They sometime remind me of just how much I enjoyed a certain plant.  One plant whose value seems to fade from my memory is sweet peas. Time consuming to grow, somewhat fleeting in our climate, I am always ready to drop them from next year’s list until I look at the photo.  Then I recall just how much I enjoyed their appearance and scent!!

Successes: It can be hard to see all the good things that happen when you are in the midst of seed starting, weeding, transplanting and harvesting.  I tend to dwell on what is not working (don’t all gardeners?) and often pass over the good stuff.  Evaluating the successes allows you to repeat or expand on your wins for next year.  This year I grew lisianthus (prairie gentian) for the first time.  It grew well in our climate and produces a bloom that is both attractive and long lasting.  It has continued to push out buds and I am still cutting it for the vase.  Next year, I will try starting it from seed, grow more of them and also plant some in the landscape for bloom from August to frost.

Challenges: Identify what did not go well and try to ascertain what the problem was and if it can be addressed.  Sometimes things just don’t work in your situation and its worth evaluating if the time, effort and money is worth allocating to this endeavor.  After a couple years of trying, I have decided to give up on ranunculus.  They are labour intensive as they require pre-sprouting in March with planting out in April under hoops and frost cloth.  Growth was great on the plants however each time a plant budded up an unidentified varmint would come in and make off with the flower bud.  So it’s a choice between adding rabbit protection to the already busy growing regime or devoting the resources elsewhere.

Future Opportunities: Always be on the lookout for possibilities for next season.  Whether it is a major project or a plant acquisition, this is a good time to firm up ideas.  I watch a lot of different types of gardening webinars and do a lot of reading and am always jotting down plant ideas that might work for me.  This is a good time to evaluate that list and based on available space, determine what to try for next year.  If it involves propagation, it might mean acting now.  I have decided to expand my planting of perennial poppies and am going to take root cuttings for the first time which will be overwintered in my extension.  With any luck, I will have new plants for next spring.

Try investing in a few hours musing over you garden and you reap the rewards next year.

https://extension.psu.edu/evaluating-the-garden

https://www.canr.msu.edu/news/garden-health-evaluation-part-1

Insect Galls on Trees

By Laura Gardner, Master Gardener in Training

I was out for a walk earlier this summer and noticed that a number of trees in my neighbourhood have lumps on their leaves, leaf stalks, shoots, or at the ends of their branches. At first glance you might be alarmed and think they are diseased, but many are the homes of tiny insects such as aphids, mites, sawflies, psyllids, and midges. They are often quite numerous and they come in different shapes and sizes. A gall is formed through the expansion of plant cells—similar to a tumour. This may be triggered by organisms such as viruses, bacteria, fungi, nematodes, or insects. Insects induce the galls through actions such as oviposition (inserting the egg into the plant tissue), the release of chemicals by the female and eggs, and through feeding. It is a shelter for the young and protects them from predators. While sometimes causing leaf deformity, in the majority of cases, galls are a cosmetic concern and do not harm the tree.

Here are a few you may encounter that are caused by insects:

These variable shaped galls specific to Populus deltoids (Eastern cottonwood) are the homes of an aphid called Mordwilkoja vagabunda (Poplar Vagabond Aphid). New galls are a light colour but become darker with age. Each gall releases upwards of 2,000-winged offspring in mid-July to early August. Sounds like it could have been the inspiration for a science fiction novel or movie.

Rabdophaga strobiloides (Willow Pinecone Gall Midge) are found at the ends of branches of various Salix spp. (Willow). What is amazing about these structures is that up to 31 different insects use them for their young—residing in the papery-like folds of the gall.[i] The galls are also frequently predated by birds and parasitic wasps.[ii] The biodiversity that Willows support is wide and for this they are known to be keystone species—they are also among the earliest plants to flower in the spring and support emerging pollinators like Queen Bumblebees.

Euura proxima (Willow Redgall Sawfly) frequents certain Salix spp. (Willow). This gall can be identified by its red bean-like appearance on the leaves. Sawfly larvae are often mistaken for Butterfly or Moth caterpillars. They can be distinguished by the number of abdominal prolegs: the former has six or more and the latter five or less.

Pachypsylla celtidismamma (Hackberry Nipple Gall Maker) is a Psyllid (Jumping Plant Lice) that forms round, often clustered galls on the underside of Celtis (Hackberry) trees. Adults spend the winter in cracks of the tree bark itself or even in nearby buildings.

The Eriophyid mite, Vasates quadripedes (Maple Bladder Gall) forms on Acer spp (Maple) such as the upper leaves of this Acer x freemanii ‘Autumn Blaze’ (Freeman Maple ‘Autumn Blaze’). The galls first appear as green, then turn to red, and finally black. The mites overwinter in the creases of the tree’s bark.

So, if your trees have strange growths on them, check out the wonderful web site https://gallformers.org. There you can identify galls by their specific host trees, the form of the galls, and their location on the trees. You can also narrow your search down to those that occur in Ontario. Another good site for identification is https://www.bugguide.net, a comprehensive database of insects for the US and Canada.


[i] Willow Pinecone Gall Midge. Minnesota Seasons. http://www.minnesotaseasons.com/Insects/willow_pinecone_gall_midge.html#:~:text=It%20consists%20of%20numerous%2C%20stunted,shape%20resembles%20a%20pine%20cone

[ii] Van Hezewijk, B.H. and Roland, J. (2003), Gall size determines the structure of the Rabdophaga strobiloides host–parasitoid community. Ecological Entomology, 28: 593-603. https://doi.org/10.1046/j.1365-2311.2003.00553.x