By Carol Anderson, Master Gardener
What else is there to do in February, other than shovel … so why not begin planning your spring gardening clean-up? In my last blog, I shared with you my invasive ground cover plight and promised to update you in the early summer with my progress on eradicating and controlling the many species on my property. But I didn’t share with you the whole story – that in my excitement over my new home, I failed to look at the overall state on my gardens … more specifically my shrubs. It would appear that the previous homeowner planted somewhere between 20-30 shrubs about 17 years ago … and then forgot about them! So in addition to my “ground cover grievances”, I also have some “bothersome bushes”! Let me share with you my plan-of-attack to address overgrown flowering shrubs in my garden using a few examples that you will recognize.
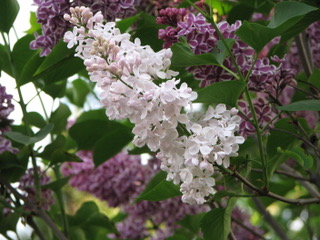
Although pruning supports the growth of healthy and robust plants, it is one of the most inconsistent and often poorly executed garden techniques. Pruning is not only essential to maintaining plant health, but also an essential practice used to improve the quality of the plant (e.g. flowers or yield), “train” plants (shape and structure), and control their size. Perhaps the reason that pruning is avoided by many gardeners is because proper pruning takes careful planning and execution; knowing your plants growth patterns and life cycle will determine pruning time and technique to be used. The general rule of thumb, as you likely know, is that if the shrub blooms in the spring (e.g. common lilac, bridal wreath spirea, some ninebark), then most likely the flowers bloom from buds formed on last years’ growth. Therefore, pruning after flowering enables new growth to become established in preparation for flowering the following year. In contrast, most summer blooming shrubs (e.g. hydrangea, hibiscus) will flower on “new growth”, therefore they require a late winter/early spring prune to stimulate new growth for flowering in the same year.
In general, your garden pruning is undertaken as follows
Step 1.
Create a pruning plan based on each shrub’s needs and growth habits. Include timing and any specific needs of the shrub and any notes you made from last year’s observations.
Step 2,
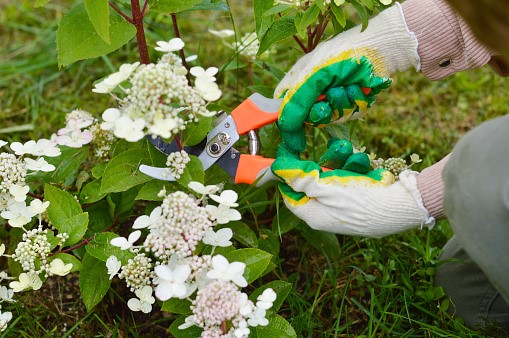
Sanitation pruning (removing dead, dying and broken branches) should be carried out on all shrubs in the spring and fall and as needed throughout the growing season, regardless of the flowering time.
Step 3.
Pruning approach. The approach will depend upon the objective. Thinning (removing older branches to their point of origin) is used to improve vigour by stimulating growth throughout the plant, as well as air and light penetration. This is most often done when the shrub is overcrowded. Heading back (pruning back to a lateral branch or node with an outward facing bud lower on the stem) is used to improve overall vigour and bushiness (by diverting energy to the new growth) and to enhance flowering.
However, given that most of my flowering shrubs are overgrown and will likely not produce as they should, I need to utilize additional (more drastic) pruning techniques as follows:
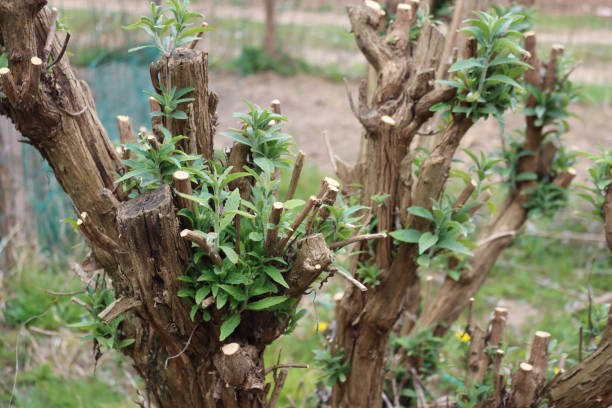
Group 1. Very overgrown, dense mat of old growth, minimal flowering and damaged branches/potential for disease.
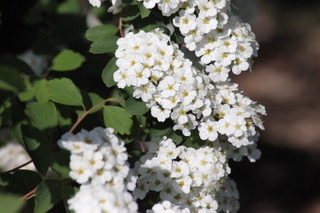
e.g. Common ninebark (Physocarpus opulifolius), Bridal wreath spirea (Spirea prunifoloia), and Common Lilac (Syringa vulgaris)
Reserved for only the most neglected and problematic shrubs … Extensive Rejuvenation (or Renewal) Pruning! This technique requires pruning the entire shrub down to 6-10” from the ground in the Spring and then pruning out ½ of the new growth mid-summer and heading back the other ½ of the new growth to encourage bushiness. Not all flowering Shrubs can tolerate this. If these shrubs show signs of disease, they will be removed.

Group 2. Flowers evident, branches spindly/lack vigour/bushiness.
e.g. Panicle hydrangea (Hydrangea paniculata)
Gradual Rejuvenation (renewal) Pruning. This method is intended to truly rejuvenate a plant, while maintaining its’ overall appearance, making it more attractive during the renewal process. The technique requires 3 years, removing 1/3 of the oldest growth each year.
Group 3. Shrub has foliage but limited flowering and stunted growth.
e.g. Rose of Sharon (Hibiscus syriacus)
Although a Rose of Sharon does not usually need regular pruning (unless to manage shape or size), it would appear that heading back would be beneficial to stimulate vigour, new growth and budding. It is likely that this shrub may also need some specific fertilizer in Spring to stimulate growth and bud formation or soil amendments to acidify the soil.
As always, stay tuned and in my next blog I will update everyone on my invasive groundcover and overgrown shrub approaches (what worked, what didn’t and what next)!!!