I love some of the old fashioned perennials that have been around for a very long time. One of them is the peony, and as you drive around you can often see abandoned farms surrounded by flowering peonies, often in the burgundy shade. Some peonies can bloom for 100 years if planted in the right place.
There are over 30 species of peonies and 3 different types:
Herbaceous – the one that we are most familiar with and native to eastern Asia.
Tree peonies – they resemble a shrub and have woody stems.
Itoh peonies – are an intersectional peony and native to Japan. It was bred by crossing an herbaceous peony with a woody tree peony and has characteristics of both peony types.
Herbaceous peonies are cold hardy and require a cold season to bloom. The rhizomes do not like to be buried too deep, ½ inch to 2 inch only. Plant the eyes ( next year’s buds) no more than 2 inches below the soil surface. If you mulch them , ensure that the mulch is set back from the rhizomes to ensure that they are not buried too deeply. The stems die back in winter and emerge in the spring. They do not like to be moved so think carefully about the right site. They like full sun and require good drainage.
Herbaceous peonies — will do better if they are staked or supported with peony rings early in the season. This keeps their gorgeous blooms upright and also provides better air circulation.
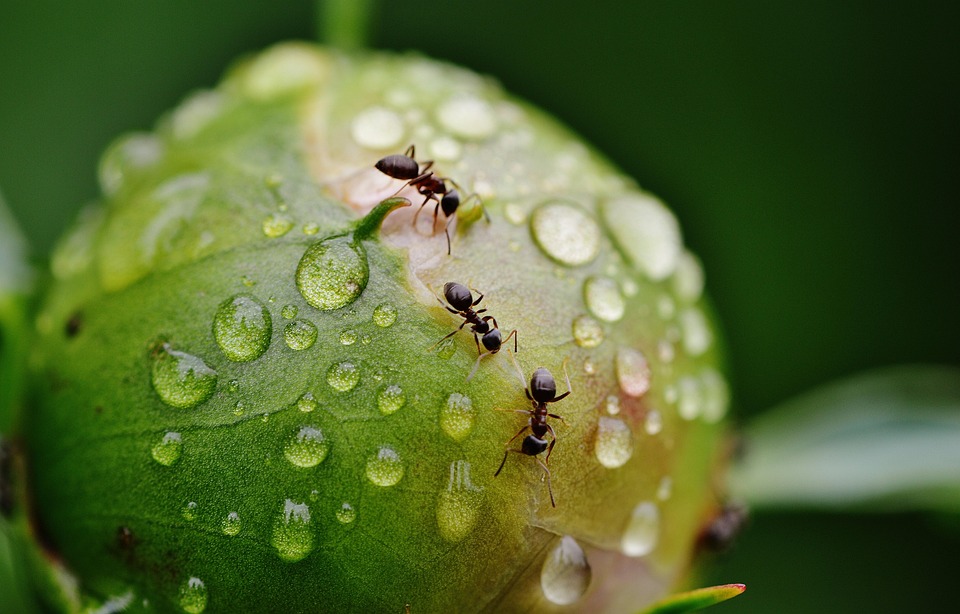
Peonies resist most pests and don’t worry if you see ants on the buds. Peonies secrete sweet nectar on the buds and that attracts ants. In fact ants will help protect the buds from other flower eating insects. This is called “mutualism”.
Tree peonies – require a large hole 2 feet deep and 1 foot wide as they will grow into a 4 to 6 foot shrub . Amend the soil with organic matter and position the graft 4 to 6 inches below ground level. They have permanent, woody stems and don’t die back in the winter. I wrap mine with burlap to protect the buds.
Itoh peonies – thy have the best characteristic of both the other peonies. Plant them just below the soil surface. They bloom on old wood so don’t cut them back. Itoh’s are shorter than the other 2 and don’t need staking. They can have a second bloom cycle later in the season.
If you do plan to divide your peonies the best time is late summer or early fall. Make sure that there are 3 to 5 eyes on each divided section. Make sure that you plant the new section at the same level as it was planted previously
Peonies come in many shapes and forms, single, double, some with amazing centres and many, many colours. These include white, cream, many shades of pink, burgundy, purple, red, coral and yellow. Most peonies are very fragrant.
We are extremely fortunate to have Joe and Hazel Cook of Blossom Hill Nursery in our area. They have hybridized and grown many, many prize winning peonies. Check online for their opening hours.
My peonies are just coming into bloom and make wonderful cut flowers. If there any ants on the buds just swish them through water and shake gently to remove the ants.
Generally speaking, peonies are low maintenance and drought resistant. Once established they will give you many years of amazing blooms and gorgeous fragrance.
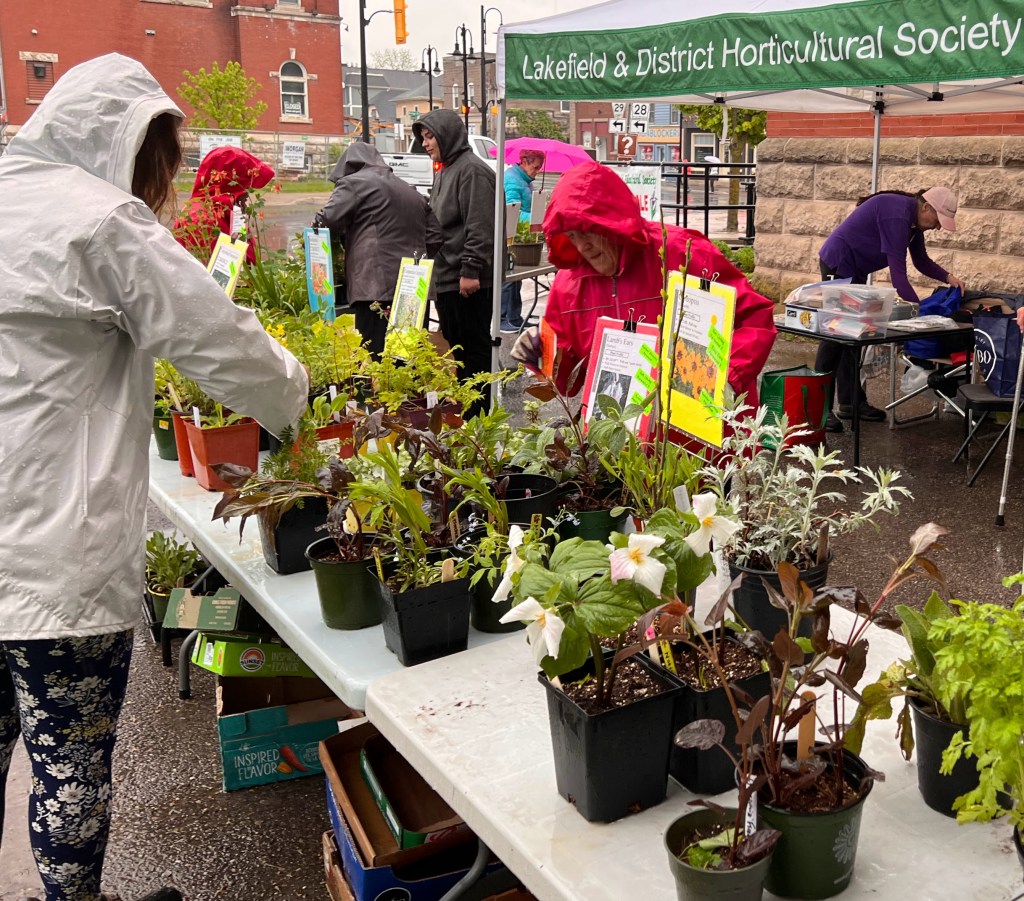
This May, gardeners will once again flock to community plant sales in search of bargain perennials and unusual finds. These sales support worthwhile causes and help plants find new homes—but they can also unintentionally introduce invasive species into your garden. Before planting that exciting new addition, consider one simple precaution: root washing.
Why Root Wash New Plants?
Many gardeners have unknowingly introduced invasive plants through seeds hidden in the soil of donated or purchased plants. An even greater concern today is the spread of invasive jumping worms that I wrote about in a previous blog. Their tiny (1 – 3 mm), soil-coloured cocoons—about the size of a sesame seed—can easily hitchhike in the soil around plant roots.
Since 2016, jumping worms have been confirmed at 63 locations across southern and eastern Ontario (EDDMaps 2026). Although the adult worms die during winter, their cocoons survive and hatch over the next one or more years (Dobson et al. 2022). Dr. Michael McTavish, who has confirmed many infestations in Ontario, notes that by the time gardeners notice the tell-tale “coffee ground” soil texture or spot an actual worm, the infestation has usually been present for years (McTavish, 2025 pers. comm.).
In gardens, jumping worms quickly consume organic matter in the upper soil layer resulting in soil drying, erosion, loss of nutrients, and ultimately decreased plant growth. Root washing greatly reduces the risk of introducing jumping worms, invasive seeds, and other unwanted organisms in your garden.
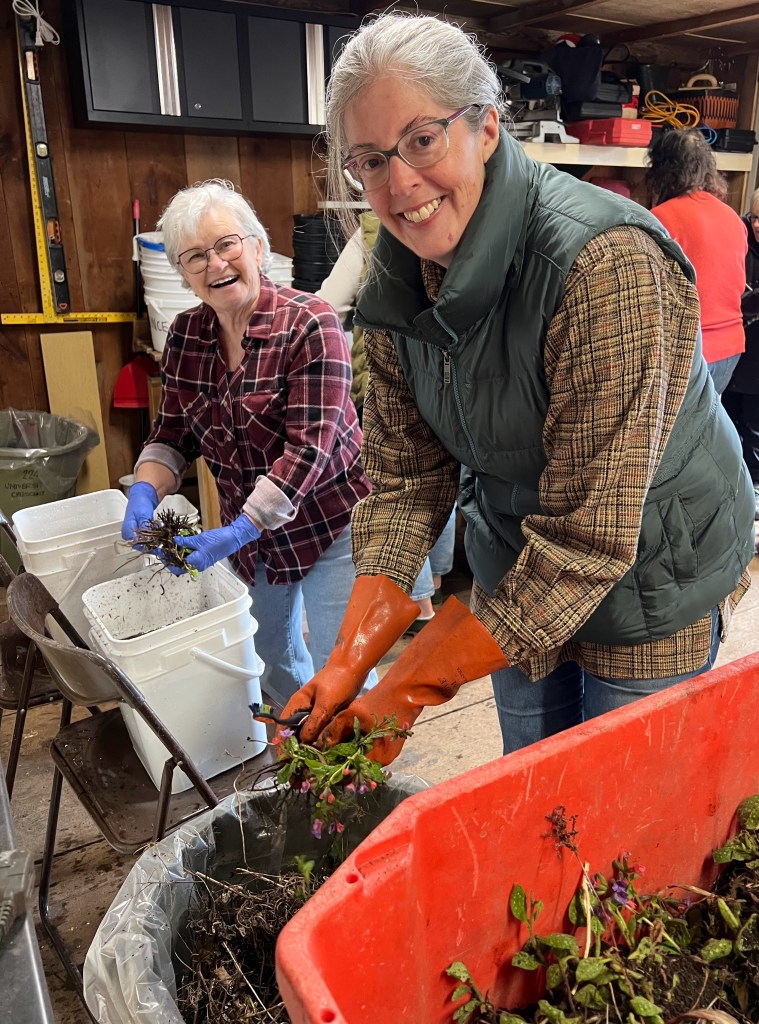
Root Washing at the Lakefield Horticultural Society Potting Day
The Lakefield Horticultural Society holds a Potting Day several weeks before its annual plant sale so divisions can become established before sale day. This year, we added root washing to the process.
Our revised assembly line included:
Plant division
Soil removal
Root washing
Potting into clean containers with sterile soil
Labelling
Moving plants outdoors onto tarmac
Fortunately, we worked in a cool, shaded area, since root washing is not recommended in strong sun or hot weather.
How to Root Wash Plants
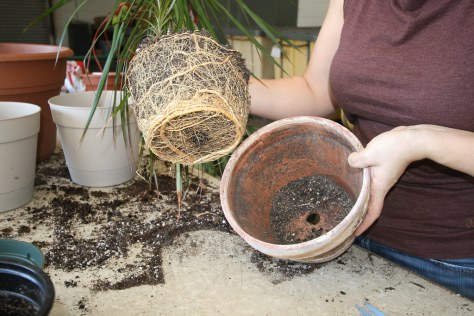
Step 1: Remove Excess Soil
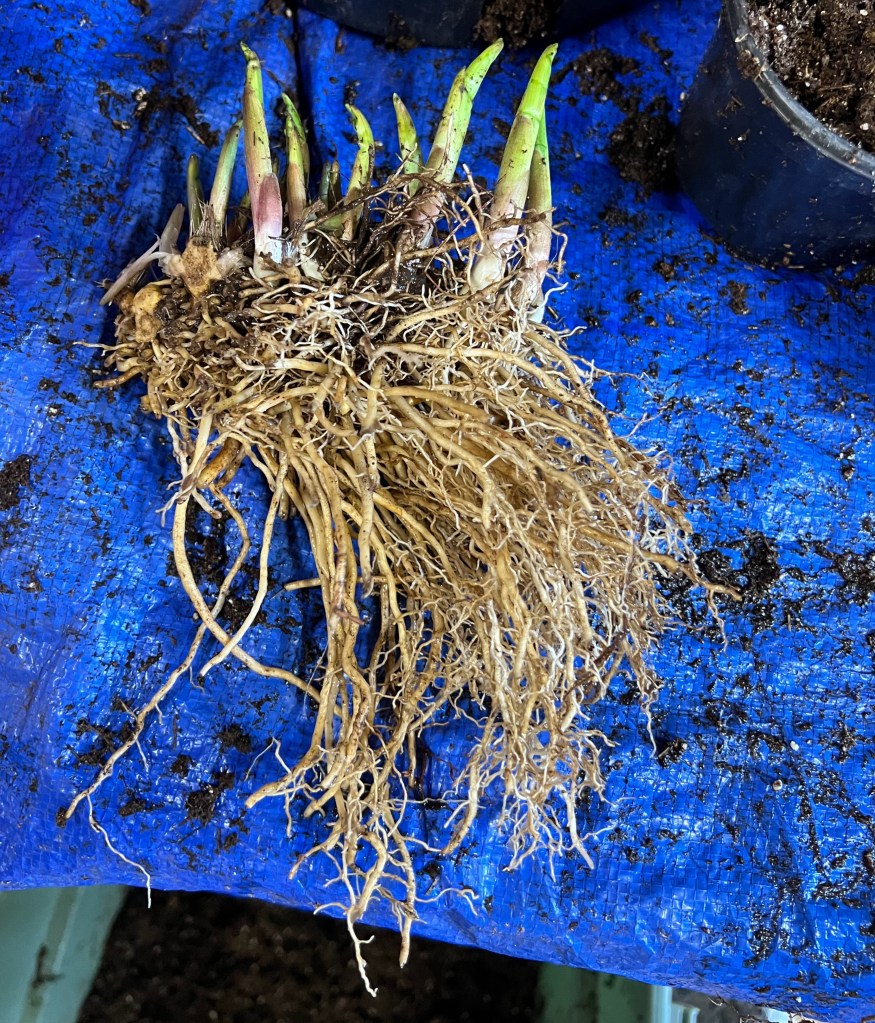
Gently tap plant roots against the inside of a garbage bin lined with a heavy-duty plastic bag to dislodge as much soil as possible.
Step 2: Rinse the Roots
Swish the roots in a pail of cold water, then transfer them to a second pail of clean water and repeat.
An old toothbrush proved surprisingly useful for gently removing stubborn soil particles from roots and iris rhizomes.
Photo: Silvia Strobl CC-BY NC SARoot divisions in the red bin are gently tapped against the inside of a garbage bin to remove as much soil as possible. Then the division is successively swished in two pails of cold water, removing more soil particles.
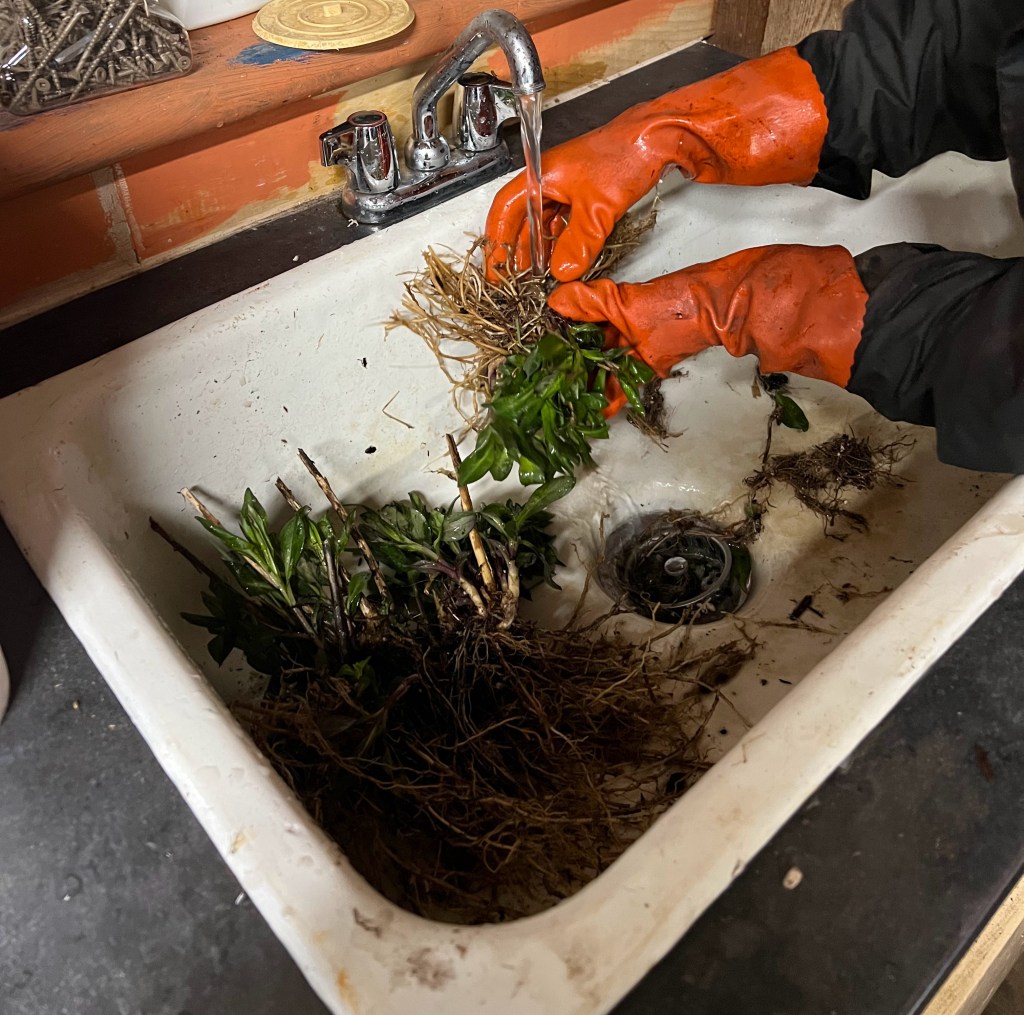
Step 3: Final Rinse
Use a gentle spray of water over a sink with a drain catcher—or over another pail—to remove the remaining soil particles. The plant can then be potted in sterile soil or planted directly into the garden.
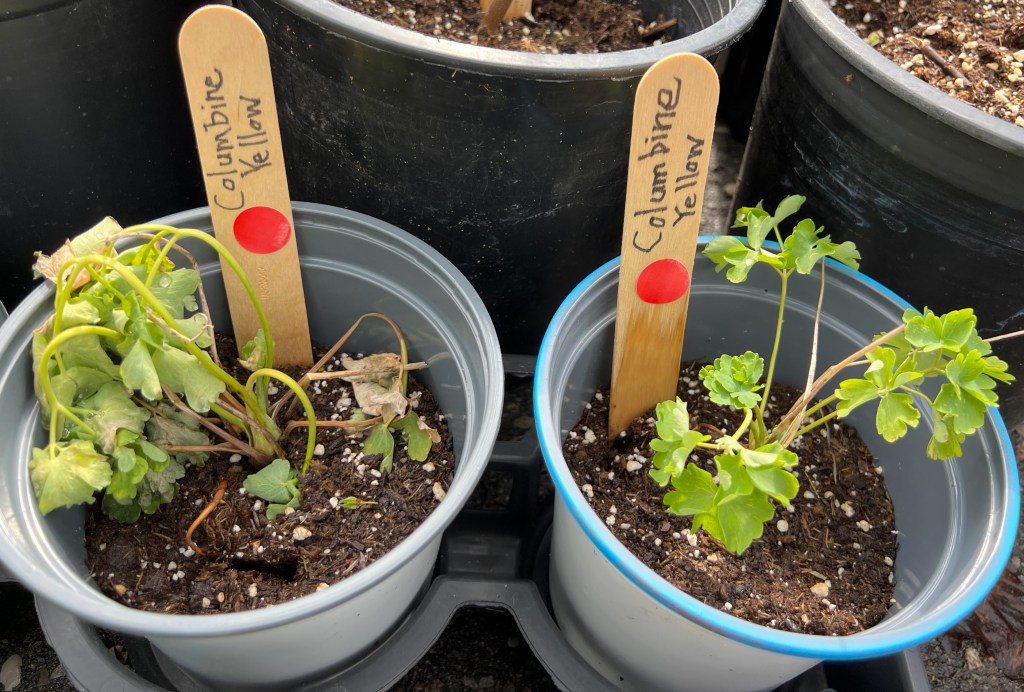
Hostas washed particularly well, while larger rhubarb divisions and some columbine cultivars struggled after treatment.
Photo: Silvia Strobl CC-BY NC SAFinal rinsing of roots to remove remaining soil particles.
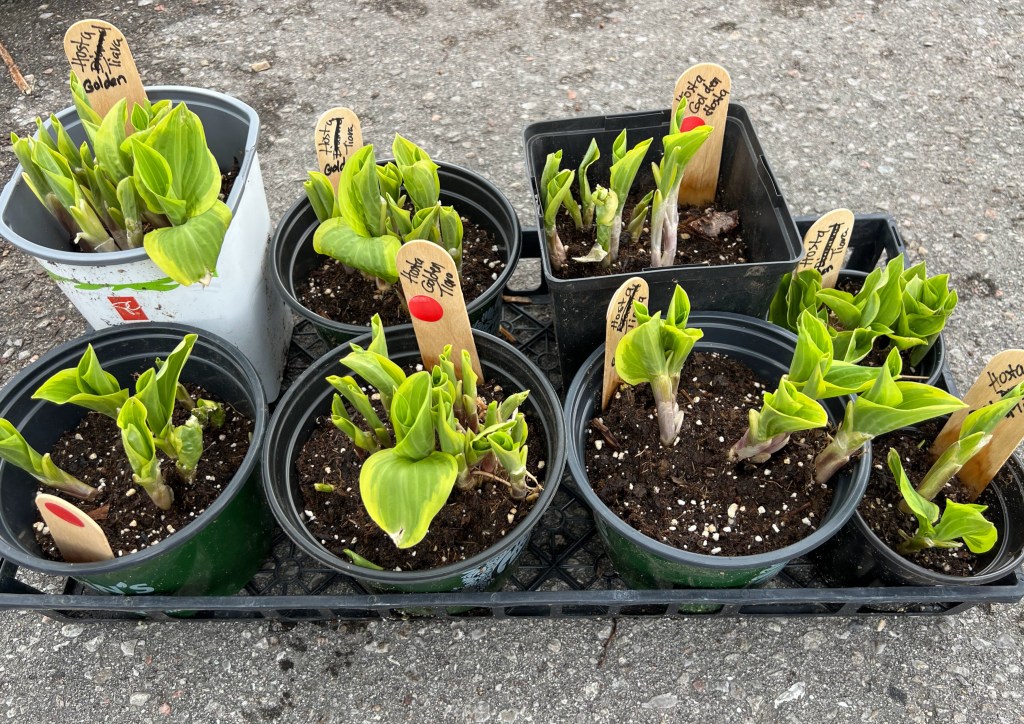
Photo: Silvia Strobl CC-BY NC SA A freshly root-washed hosta division ready for potting (that is sterile potting soil on the tarp and in the bin below the table).
What We Learned
A few practical lessons emerged from the day:
Root washing did not appreciably slow the potting process. Nine volunteers root washed more than 200 plants in 2.5 hours. It was not nearly as time consuming as we expected.
Root washing is easier for some plants than others.
Hostas tolerated the process very well; rhubarb and columbine cultivars did not.
Used toothbrushes are excellent tools for removing stubborn soil.
One volunteer root washed plants at home before arriving, leaving the soil behind in her own garden—an approach we may encourage in future years.
Safe Disposal of Soil and Wash Water
The removed soil was collected in heavy-duty plastic bags and disposed of through municipal waste collection. Surprisingly little soil accumulated after processing approximately 250 plants.
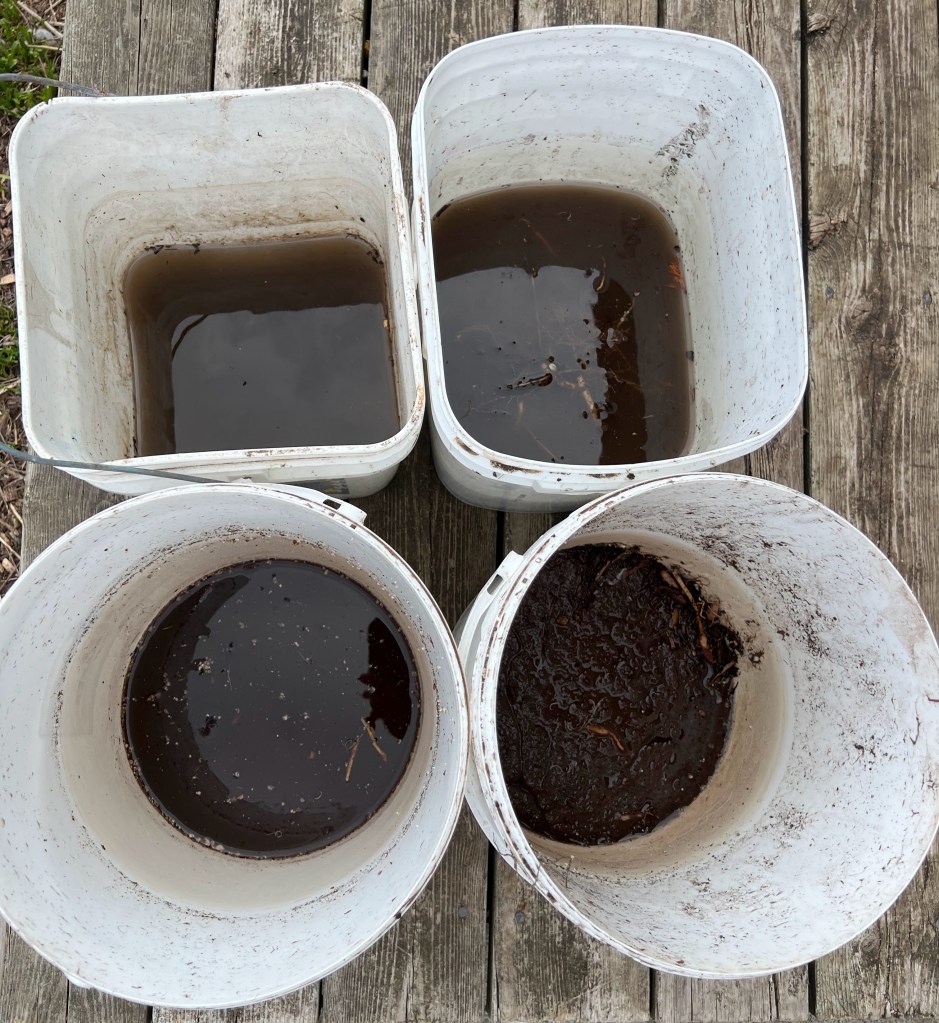
As rinse water became muddy, fresh pails replaced dirty ones. The used water was allowed to sit for several days so soil particles could settle to the bottom. Clear water was then poured into the municipal sewer system for treatment, while the remaining sediment could either be solarized (Master Gardeners of Ontario 2022) or disposed of through municipal waste collection.
Photo: Silvia Strobl CC-BY NC SA Pails with remaining sediment. We used about a dozen pails, switching ones with dirty water and others with clean water regularly.
Caution is advised when root washing in rural areas as I couldn’t find any information on whether jumping worm cocoons can survive in untreated waste systems.
Root Washing Benefits More Than Perennials
For trees and shrubs, root washing has benefits beyond decreasing the risk of invasive organisms. Removing potting soil encourages roots to grow outward into the surrounding native soil rather than remaining confined to the original potting mix. The result is better long-term establishment and survival (Chalker-Scott 2020).
Root washing also allows gardeners to identify and correct root problems such as girdling or spiralling, before planting. Woody roots can be pruned so they spread outward like spokes on a wheel, while fibrous roots can simply be straightened by hand (Hopton-Villalobos 2021).
Even nursery-grown perennials benefit. Potting mixes containing perlite and vermiculite drain quickly and are ideal for greenhouse production, but roots sometimes fail to expand into heavier garden soils after transplanting. By removing the potting mix and “mudding in” the roots directly into garden soil, plants often establish more successfully—and gardeners avoid introducing invasive pests at the same time (Wagar 2025).
A Small Step that Protects Your Garden
Root washing may add a little extra time to planting, but it is one of the simplest and most effective ways to protect your garden and local ecosystems from invasive species. As there is currently no proven treatment for jumping worm infestations, prevention is the gardener’s best defence.
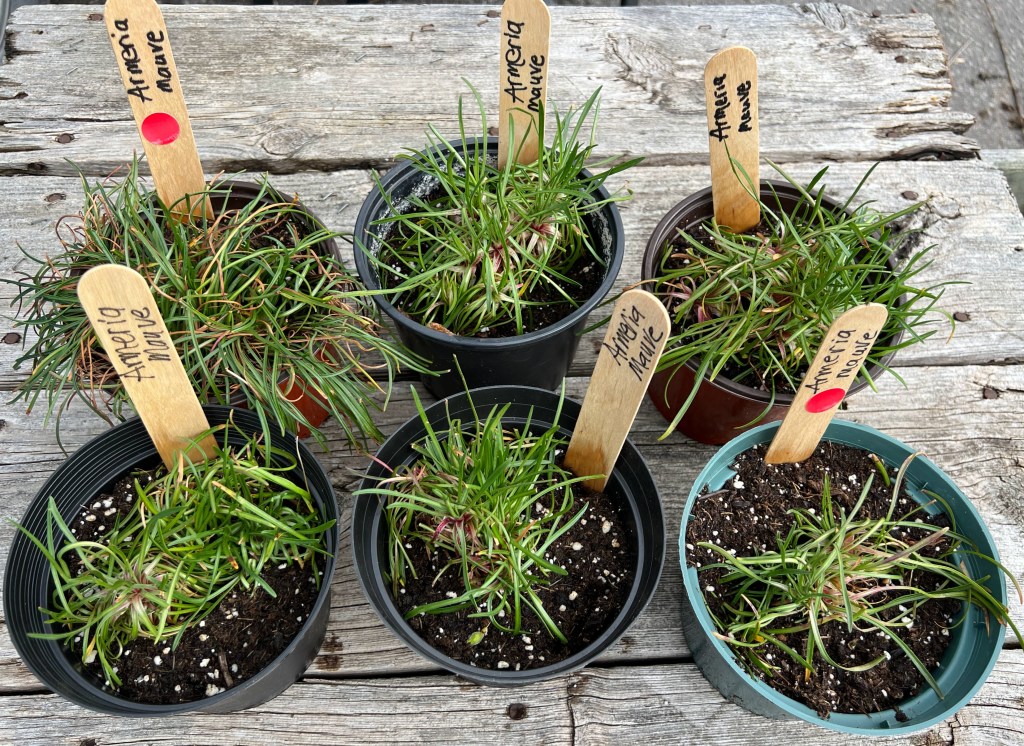
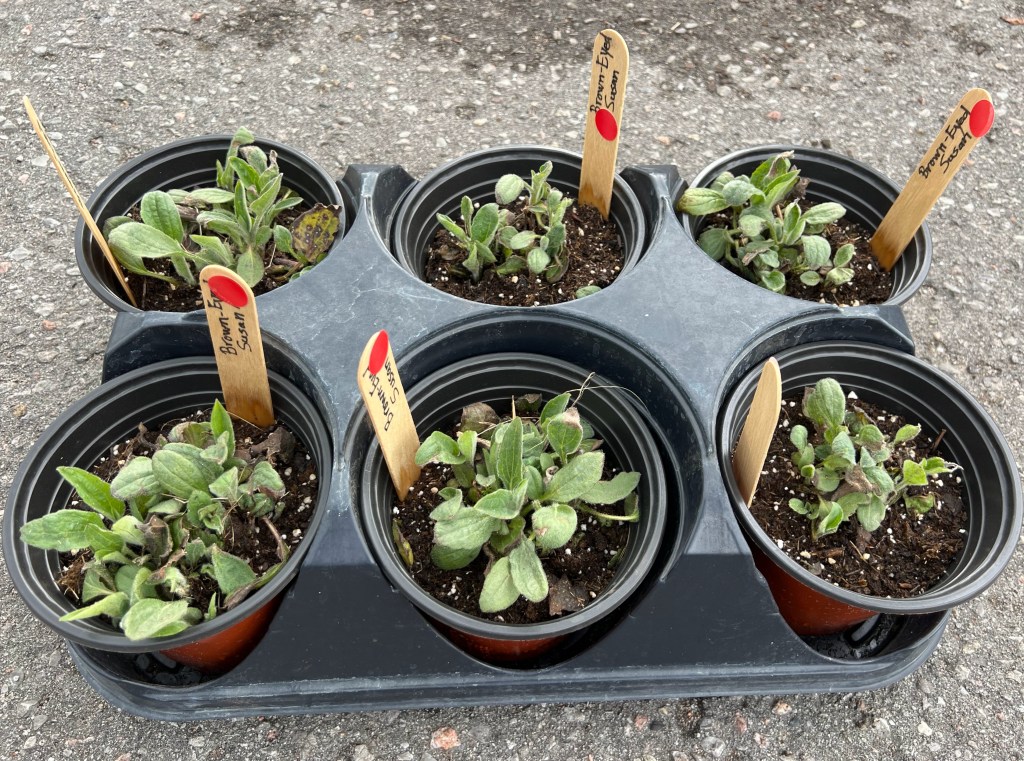
Photo: Silvia Strobl CC-BY NC SA Some of the potted plants two weeks after root washing. Clockwise from top left: Black-eyed Susan cultivar, Golden Tiarella Hosta, Armeria, and Columbine cultivar (these did not root wash well as can be seen in the pot on the left and several others not shown).
McTavish, M. Pers. Comm. 2025. Formerly Postdoctoral Fellow with the Daniels Faculty of Forestry, now Conservation Scientist with rare Charitable Research Reserve.
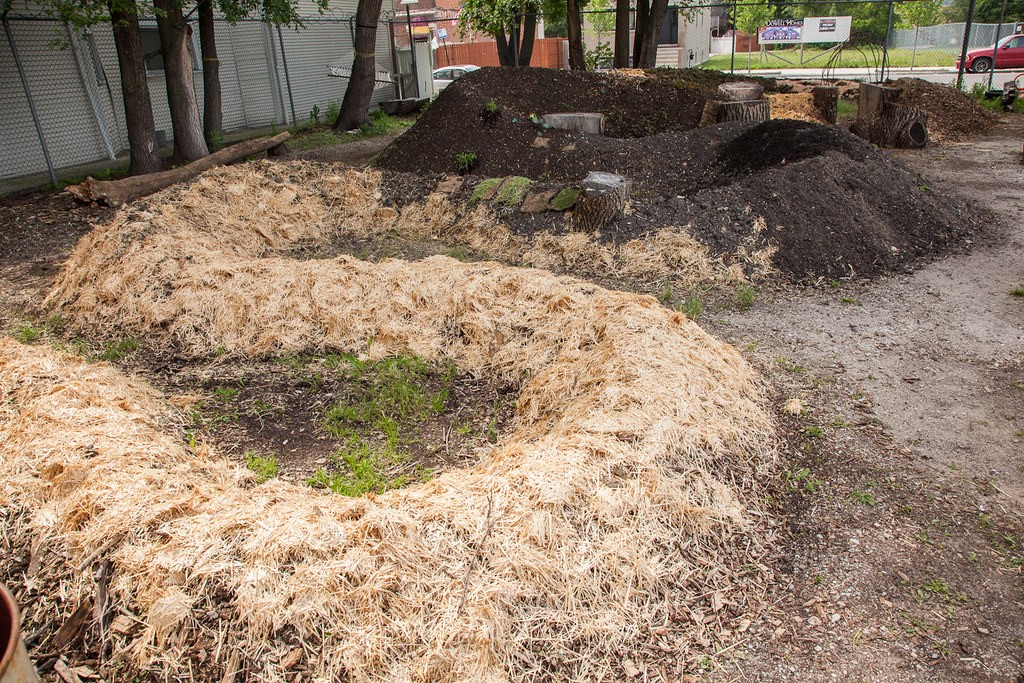
Hugulkultur is a German word meaning ‘hill culture’. It is a form of permaculture, a traditional way of building a raised bed using rotting logs and plant debris. Large logs form the base layer, subsequent layers of organic materials decompose over time creating a rich soil, perfect for many plants, especially vegetables.
There are many advantages to ‘hugelkultur’: it’s easy, affordable, low maintenance, it serves as a self-composting system, and conserves water when constructed in a location where it can capture surface runoff.
The concept is fairly simple. Placed on the lower elevation of a site with its length parallel to water flow, the hugel will catch and absorb moisture. An ‘S’ or serpentine shape positioned to capture runoff is a common shape, but a broken circle or several parallel squiggly strands are other ideas. Design choice is dependent on space available, water run-off, sun and light exposure, and easy access for the gardener. Most hugels are built slightly into the soil though deeper troughs, even completely raised hugels work as well. The width and length of the hugel are also dependent on space available and needs; 3’ wide x 6’ long x 3 – 5’ deep provides good area.
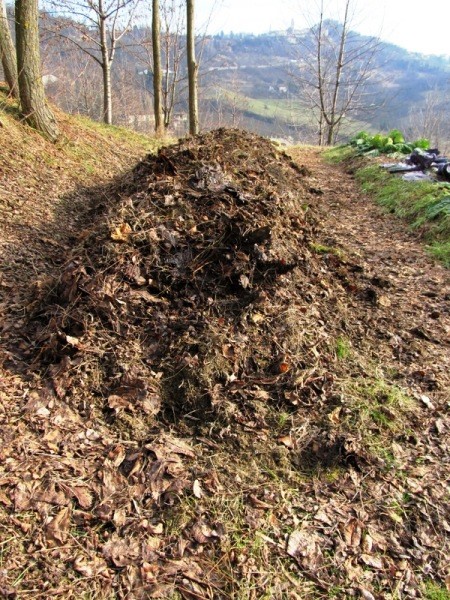
If the hugel is on turf, it’s worth the effort to scrape away the turf and rake some soil away before getting the biggest logs in place. Branches and leaves can be used to fill in the gaps, next comes kitchen and garden waste, manure, grass clippings and finally topsoil and some mulch (or the scraped away soil). Gaps can be filled in by stomping on the mound and moving things around a bit to allow leaves and small matter to slip through. Watering after the addition of each layer kickstarts the decomposition process and also helps things settle. Once things have settled, it’s ready for planting.
A border along the edges of the hugel creates more stability and reduces the risk of the shape collapsing and the top of the mound washing away. Different materials such as brick, wood, or stone can be used to create an edge.
Not all logs and branches are suitable: hardwoods are best; black walnut should be avoided (many plants are sensitive to it), willow as well (branches will sprout), and even cedar is not the best (slow to decompose).
The hugel will likely benefit from additional watering in its first stages; once decomposition starts, less water is required. Over time, as wood and other organic materials decompose, the hugel will sink and additional compost would be beneficial. There is some discussion about whether the decomposing wood takes up nitrogen to the extent plant growth is inhibited so adding compost or growing legumes are considered effective mitigation techniques.
As the snow melts and the first shoots of green push through the soil, spring invites us back into our gardens with optimism. It’s a season of planning and of imagining birds returning, pollinators buzzing, and life rebuilding after winter. But while we prepare our gardens for renewal, something far less hopeful is unfolding across Ontario: the quiet weakening of protections for the very wildlife we love.
At the center of this shift is Bill 5, a sweeping piece of legislation that is fundamentally changing how species at risk are protected in our province. Under Bill 5, the Endangered Species Act, once considered a global gold standard for conservation, is being removed. Bill 5 narrows the definition of “habitat,” focusing only on spaces where species physically are, rather than the full landscape the species needs to survive. It also removes certain prohibitions, such as protections against “harassing” species, making it easier for disturbance to occur.
For wildlife, especially birds, this matters enormously. Habitat loss is the primary driver of species decline. When protections weaken, landscapes become more fragmented, nesting sites disappear, and food webs begin to unravel. The spring chorus we look forward to each year depends on intact ecosystems, and those ecosystems are increasingly under pressure.
So where do gardeners fit into this? Right at the center of the solution.
If policy is stepping back provincially, stewardship must step forward. Your garden is no longer just a personal space, it is a piece of habitat in a much larger, increasingly fragmented system. And the choices you make this spring can directly support species that are losing ground elsewhere.
One of the most powerful actions is deceptively simple: leave some areas (especially the hard to get to ones!) wild. Resist the urge to clean everything up. Leaf litter, fallen branches, and standing stems provide critical overwintering habitat for insects. These insects are the foundation of the food web, feeding birds during breeding season when they need protein the most. Tidying too early can erase an entire generation of life before it has a chance to emerge.
Planting native species is another essential step. Native plants support significantly more insects than non-native ornamentals, which in turn support birds, amphibians, and other wildlife. Even a small patch of native plants can function as a high-value habitat.
Reducing harm is equally important. Avoid pesticides, which ripple through ecosystems. Make windows bird-safe to reduce collisions. Provide water sources and dense shrubs for shelter. These actions may seem small, but collectively they create real, measurable impact.
Bill 5 is a reminder that conservation cannot rely on legislation alone. As gardeners, we are not powerless observers. We are active participants in shaping the landscapes around us.
This spring, as you plan your garden, think about habitat. Think refuge. Think resilience.
Because in a time when protections are being pulled back, the spaces we cultivate may matter more than ever.
You just couldn’t resist the sign saying “Only $2” or you are confident that you can rescue that pathetic looking plant, after all you have a thriving garden so it shouldn’t be that difficult.
How many times have you bought a bargain plant and regretted it when it dies on you? Big box stores in particular often have a small section of rather sad looking plants looking for a home. End of season clearances are often a great place to pick up bargains.
However, these sad orphans may need a lot of tender loving care (TLC) to get them to flourish. These are some important things to think about before carting off your ‘bargain’ plant that you couldn’t resist.
Take time to inspect the plant and don’t be tempted if it has any of the following problems. Some of the problems may be easy to rectify but others may be too far gone.
Is it root bound? Ease the plant out of the pot – is it totally root bound? Are some of the roots brown and squishy?
Any sign of pests or disease? Check the leaves, stems and roots for pests.
Have you got the right spot in your garden for the plant? I have often been tempted only to get home and wonder where on earth I am going to put it. (more later on keeping the plant isolated)
Quarantine your bargain plants for a few weeks to see how they progress before planting in your garden. This way you can spot any further problems and not infect your other plants. This is a good idea before bringing in any new plants as it is all too easy to bring in goutweed or other invasives.
Does it need repotting? The plant may be too cramped and have used up all the nutrients in the soil. It is a good idea to wash the roots just to be sure that there are no other unwelcome passengers. Put it in a slightly larger pot, 1 or 2 sizes bigger and use fresh potting soil. Remove any dead roots and trim surplus.
Check the plant’s water requirements. Over watering can be just as bad as under watering,
Prune and trim back any dead or infected leaves and branches. Cut back into healthy, green wood and to a healthy outward facing bud. Do it immediately regardless of the correct time for pruning. It may look awful at first but it will encourage new growth.
Fertilizer – probably not a good idea for a sick or poorly treated plant Once it begins to recover, a light application would be helpful.
You can get some really good deals on ‘bargain’ plants if you check them carefully before handing over your money. Give them lots of TLC and they will reward you. We all love a bargain but it is worth inspecting the plants thoroughly before you decide to rescue them.
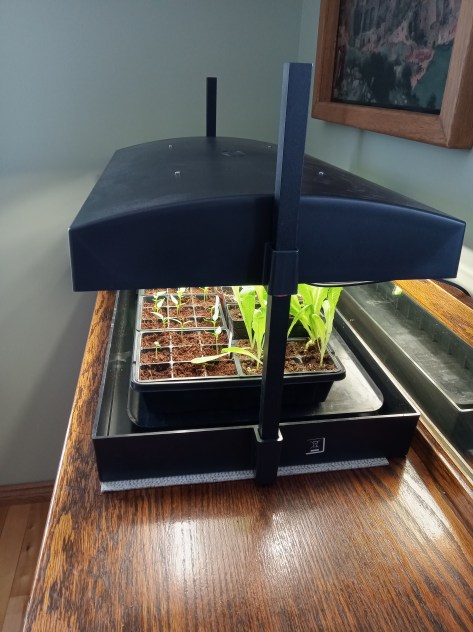
Starting seeds indoors by setting them in a bright window can get you started growing vegetables and flowers early. If you have windows that face south and get full sun all day, you will have better luck, however the winter months can often be dull and cloudy, making your young seedlings struggle and stretch for the light. If you are a serious indoor grower, you will want to invest in some type of light system.
Many gardeners still use shop light fixtures with warm white and cool white fluorescent 40 watt bulbs.This type of light system still works and may be a good first step. LED lights are very popular and available as light bulbs or strip lighting as well as tabletop lighting systems.
Fluorescent
LED
Less expensive to purchase Use more hydro May be phased out of production Need to be placed close to seedlings and raised as they grow to encourage more compact, bushier plants
Available in white (full spectrum) or red/blue combination which gives off a pinkish purple glow Don’t give off much heat Longer life Higher cost to purchase Less cost to operate Do not place really close to plants as bleaching may occur
Natural sunlight has all the colours of the spectrum, so having lighting with a full spectrum will be the best. Plants need light for photosynthesis and they like the red and blue which are at each end of the light spectrum. Blue light helps with plant growth and keeps your plants compact, while red light is important for leafy growth and flowering.
Most seedlings should get about 16 hours of light each day. Invest in a timer that will automatically come on around 6 am and shut off around 10 pm.
There are many types of lighting systems available with lots of price points.
Check out Nikki Jabbour’s article where she talks about her successes and a great variety of lighting options.
You can invest in a light meter or get the app on your phone to determine how much light is being given off and how far that light can reach. This is also good for testing what your houseplants are getting for natural light from your windows. Be aware that many of the plant lights available now in very stylish designs are not for seed starting but for growing happy, healthy houseplants.
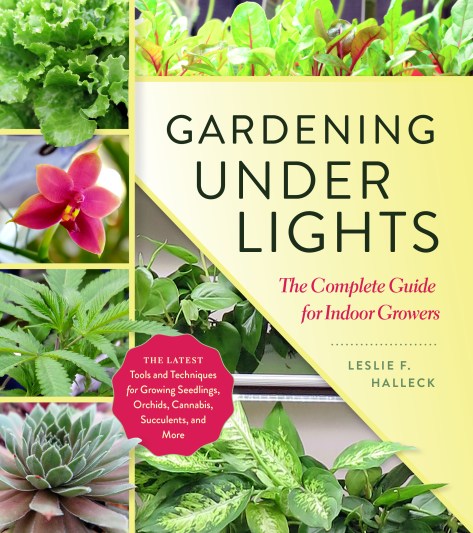
Leslie Halleck’s book Growing under Lights (published in 2018) has all the information you need about lighting for seed growing and plants. In her book, you can learn about kelvins, lumens, watts, footcandles, measuring light and photoperiods of specific plants you want to start indoors under lights.
I found her explanation of photoperiods interesting. This is basically how much light or darkness is needed for a specific plant to flower. For example, for poinsettia to bloom, they need a short day photoperiod, with 14 hours of darkness, while a perennial coneflower requires a long day and so doesn’t flower until days are longer in the summer. Peppers and tomatoes are both warm season vegetables from the nightshade family that many start indoors. They are day-neutral, which means they grow well with 14-18 hours of light. Check here for a book review.
With a renewed interest in food security and growing our own food, starting vegetables under lights is a good step forward.
“To plant a garden is to believe in tomorrow”. Audrey Hepburn
Gardening has been a part of my life for as long as I can remember. When I retired from social work in 2019, I made the decision to spend my time focusing on things that truly made me happy. While my list was lengthy, gardening without doubt hovered very close to the top.
Currently, I am a Master Gardener in Training, and this is my very first post for this blog. As I was deciding on a subject to write about, it occurred to me that while all of us enjoy different aspects of gardening, we share a similar outcome: we garden because it makes us feel good. So let’s spend a few moments discussing what research says about why gardening—even in small amounts—is good for us.
Given that this topic is vast and my word count is limited, I am going to break our discussion into two parts. This article will focus on a few of the mental health benefits gardening provides. In my next article, coming this June, I will focus on the physical benefits of gardening. Let’s get started!
Gardening Benefits for Our Mental Health
Being around nature lowers cortisol, our body’s primary stress hormone.
Soil contains beneficial microbes that help stimulate “feel-good” chemicals in the brain. When our bodies come into contact with these microbes—through our skin or lungs—chemicals such as serotonin, dopamine, and endorphins are triggered. All of these help regulate mood.
Exposure to natural light boosts vitamin D, which also plays a role in mood regulation and overall health.
Successfully growing plants—even small wins—creates feelings of satisfaction and accomplishment.
Problem-solving in the garden (soil issues, pests, timing) strengthens confidence and resilience while helping keep our brains stay active and engaged.
Gardening encourages creativity without pressure or judgment. Creativity itself also helps trigger the “feel-good” chemicals mentioned above.
Repetitive gardening tasks, such as weeding, pruning, or even logging plant progress, promote mindfulness by helping us stay present rather than focused on worries or fears.
Gardening promotes community in many forms—and community decreases isolation while improving connection.
The practice of gardening compels us to slow down and focus on the task at hand. It requires thoughtful planning, encourages creativity, and rewards us with beauty and bounty for our efforts. In a world that loudly demands we hurry, gardening asks us to be patient, reminding us that nature operates on its own timing and schedule
Slowing our pace in a busy world is crucial to our well-being. For me, one of the best parts of working toward becoming a Master Gardener is knowing that I am part of something bigger than simply growing plants. While the role of a Master Gardener typically focuses on public education and environmental stewardship, it also provides us with an opportunity to help improve people’s lives. For me, this is the perfect way to do something for myself while simultaneously helping others. Does it get any better than that?
It’s wintertime – the snow is high, the temperatures are low, and I’ve already completed my winter sowing. So what’s a gardener to do?
Other than catching up on my garden reading, I like to experiment with new things, and one thing I’ve been seeing for a couple of years now are “seed snails” or snail rolls – a clever, coiled method of starting seeds in tight spaces. I’m going to try it this week, so I did a little research.
So, what is a garden/seed “snail”?
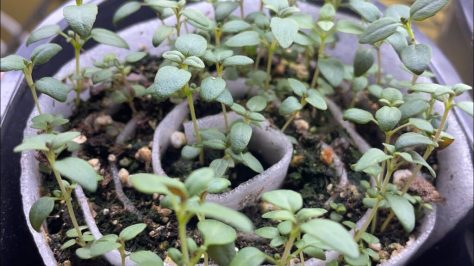
A garden snail is a roll of material lined with seed starter mix, then coiled so it looks like a snail shell. Seeds are sown into the exposed spiral of soil, where they sprout and grow until you unroll and transplant them.
Instead of dozens of trays, you stand the snails upright in a container, which makes this method very space efficient. It’s become popular with gardeners who want to start lots of plants indoors before the last frost and who have limited space.
Seed snails concentrate many seedlings in one compact, easy-to-move bundle. So, you can tuck them under grow lights, on a bright windowsill, or use them in winter-sowing containers outdoors.
The continuous column of soil encourages deep, downward root growth instead of circling in a small cell. When transplant time comes, you simply unroll the snail, tease the seedlings apart, and set them into pots or the garden once the risk of frost has passed.
How to make your own garden snails
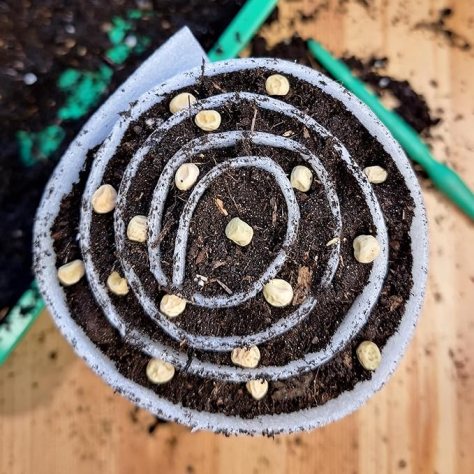
The basics – take a strip of plastic or bubble wrap, wax paper (or other suitable material) about 15–60 cm long and 10–15 cm high, quality seed-starting mix, elastic or tape, a tray, and labels. Spread moist seed starting mix along the strip, about 1–2 cm thick, leaving a bare section at one end so it will roll easily.
Roll it up gently into a spiral, secure it, then stand it on end in a tray. Firm the soil from the top and plant your seeds into the visible spirals at the recommended depth, misting lightly and covering with plastic to hold humidity until they germinate.
There are many sites on the internet to learn more about the process (some good, some not so good), so I’ve put two good Canadian ones below that really helped me. There are definitely some pros and cons to this method.
If you have used this technique yourself, please comment and let us know what you think?
I’m going to try some veggies, herbs, annuals (sweet peas), and native plants, all using different options, and I’ll report back on my experiments in a later blog.
I thought I’d list a few of the most common seed snail pitfalls I discovered so that hopefully you (and I) can avoid them.
1. Rolling or sowing the wrong way
Sowing seeds before rolling often leads to seeds shifting, spilling, or ending up too shallow or too deep in the spiral. A more reliable approach is to roll the snail first, then plant seeds from the top where you can control depth.
2. Planting too many kinds of seeds in one snail
Mixing different varieties or species in a single snail makes it hard to tell which seedling is which, especially when some don’t germinate. Use only one crop (and ideally one variety) per snail, making shorter rolls if you need fewer plants.
3. Overwatering and poor moisture balance
It’s easy to overwater snails, especially early on, causing poor germination and weak seedlings. Snails also dry out quickly because they contain little soil, so you need careful, even watering over the entire spiral rather than just one side or one edge.
4. Too little soil and wrong mix
Very thin snails or mixes with lots of perlite hold little water, so roots dry quickly and capillary action from the tray is limited. A slightly thicker layer of seed-starting mix with good water-holding but not heavy or compacted works better for this method.
5. Skipping labels and timing info
Label your snail with variety and sowing date. Knowing when you sowed helps you decide whether to wait longer or resow.
6. Letting seedlings stay in the snail too long
Because each snail holds so little soil, seedlings can become root-bound and stressed if not transplanted or potted up promptly. Unroll/pot on once seedlings have a couple of true leaves, rather than waiting until they are tall and leggy.
7. Covering or enclosing without checking
Covering snails with plastic for humidity is helpful but use clear coverings you can monitor and keep them on just long enough to maintain moisture until germination is underway.
Information about houseplant care is everywhere — online articles, social media, blogs, friends, and self-proclaimed plant experts. It’s easier than ever to find quick tips and tricks, whether it’s a two-minute TikTok or a viral Pinterest post promising the “secret” to healthier plants. But with so many voices out there, a lot of the information being shared is inaccurate or misleading. So what advice actually helps your plants and what might be doing more harm than good? Here are a few examples of care tips to avoid, and why.
Watering On a Schedule
When looking at plant care guides online, you will sometimes see “water once a week” or “water every 7 to 10 days” under watering directions. The problem is, plants don’t adhere to a schedule when it comes to water. Variables like soil, light and humidity can affect the amount of water required for a plant to thrive. In winter months when light is in short supply and photosynthesis slows, plants will naturally use less water than in summer months. It’s better to check the moisture levels in your soil to determine whether it’s time to water. Read more here: https://www.missouribotanicalgarden.org/gardens-gardening/your-garden/help-for-the-home-gardener/advice-tips-resources/visual-guides/how-to-water-indoor-plants
Banana in Your Watering Can
Place a banana in your watering can and your plants will love it! Here’s the problem – plants require specific minerals and nutrients to survive. A rotting banana peel in your watering can is not feeding your plants, it’s providing an anaerobic environment that promotes bacterial growth and can attract pests. Any nutrients that a banana has to offer need to be broken down into usable forms that your plant can absorb. That goes for coffee grounds and egg shells too. If you can’t compost those materials before use, you’re better off with a balanced fertilizer designed for houseplants. Read more here: https://www.gardeningknowhow.com/garden-how-to/soil-fertilizers/banana-peel-water-for-plants
Bottom Watering is Best
I’ve seen this trend a lot recently on TikTok, and it isn’t a bad method of watering if you include a caveat: you need to periodically flush salts that build up in your soil. The benefits of bottom watering include deterring fungus gnats and reaching the whole root system, but if you never top water and let your soil drain, you’re allowing harmful salts to build up over time. It’s ok to bottom water, but it shouldn’t be your only method. Read more here: https://holubgreenhouses.com/bottom-watering-vs-top-watering-which-method-is-best/
Misting Increases Humidity
I hate to break it to you, but misting your plants does not increase ambient humidity. When you mist, humidity surrounding the leaves may increase for a minute or two, but not enough to have an impact on your plant. Moisture sitting directly on your plant’s leaves can also increase the risk of fungal issues. If you want to raise humidity, use a humidifier. If you don’t have a humidifier, group your plants together. Plants release moisture when transpiring, and grouping your plants can create a micro climate with increased humidity. Read more here: https://www.gardensillustrated.com/plants/house-plants/misting-house-plants-necessary
With so much plant advice floating around, it’s easy to assume that popular means correct. The truth is, plants don’t care what’s trending, they care about light, water, nutrients, and environment. Learning the science behind plant care helps you filter out myths and make choices that actually support plant health. Keep asking questions, stay curious, and don’t be afraid to unlearn what you’ve heard. Have YOU ever followed a plant tip that turned out to be more myth than magic?
In this day and age, we spend so much time on our computers, googling all the information we want and need. But there is something about sitting by a sunny window on a cold winter’s day with a good book.
The winter months are a great time to pull out an old gardening book or invest in a new one. The days are now getting longer and spring is coming, but actual gardening is a few months away. Time to learn something new to help you improve your gardening skills. There are many good Canadian and zone appropriate books that can help you.
Below, I have listed a few of my favourite books on my bookshelf. I have also asked my fellow Master Gardeners to share their favourites. Some of the books are out of print, but check your local library, used book stores or online sites. Enjoy!
For the Houseplant Gardener
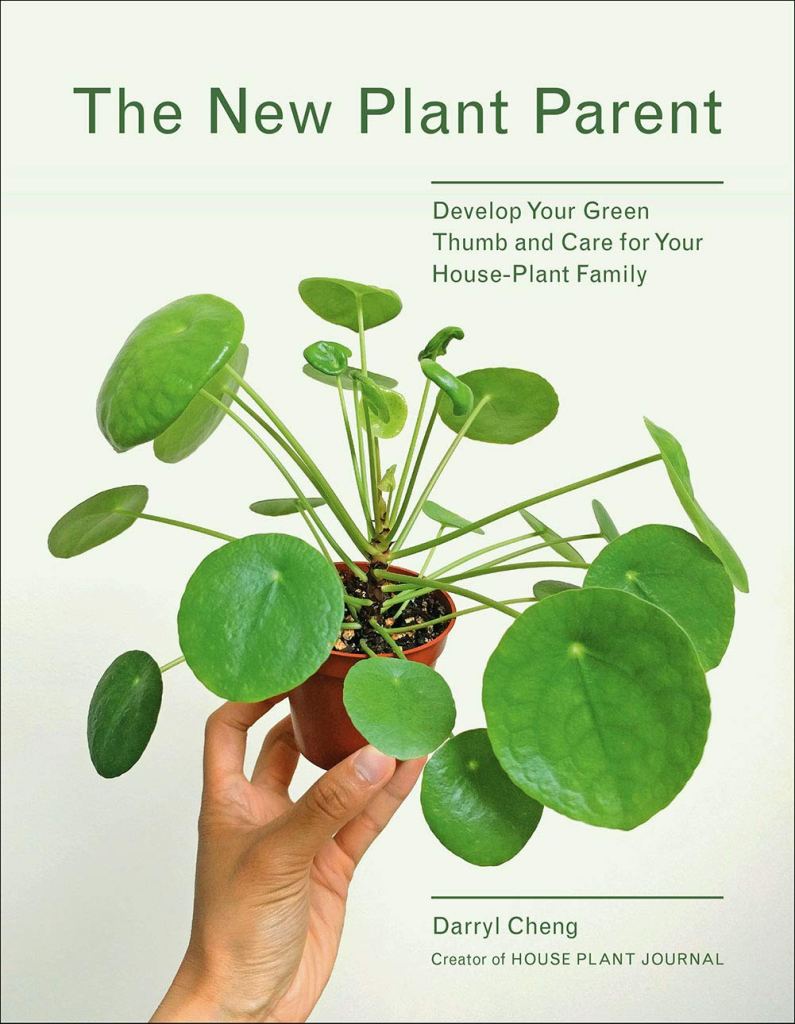
The New Plant Parent
Darryl Cheng gives advice that is full of common sense. He explains that leaves do die and plant care should be enjoyable, not a chore. He discusses basic requirements for healthy plants including the right light, soil care and proper watering. Great illustrations and nineteen plant varieties are listed in detail. Look for his newer books also.
For the Vegetable Gardener
Plant Partners
Companion planting has been around for years. Jessica Walliser gives us “science-based companion planting strategies” that help with disease and pests, improves soil and supports pollinators. Lovely illustrations throughout will have you dreaming of your next vegetable garden.
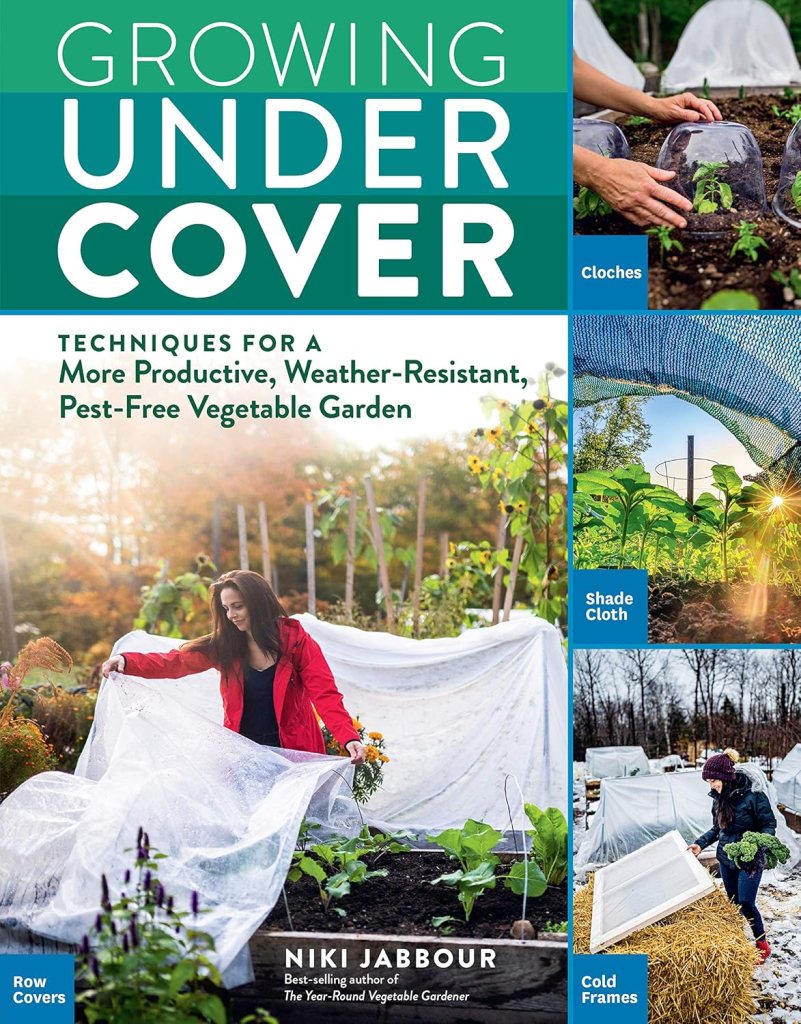
Growing Under Cover
Niki Jabbour is the Canadian half of the popular website Savvy Gardening (along with Jessica Walliser). She has several books out, but this one gives great information about how to reduce pests with row covers. Niki has several books out, so check them out.
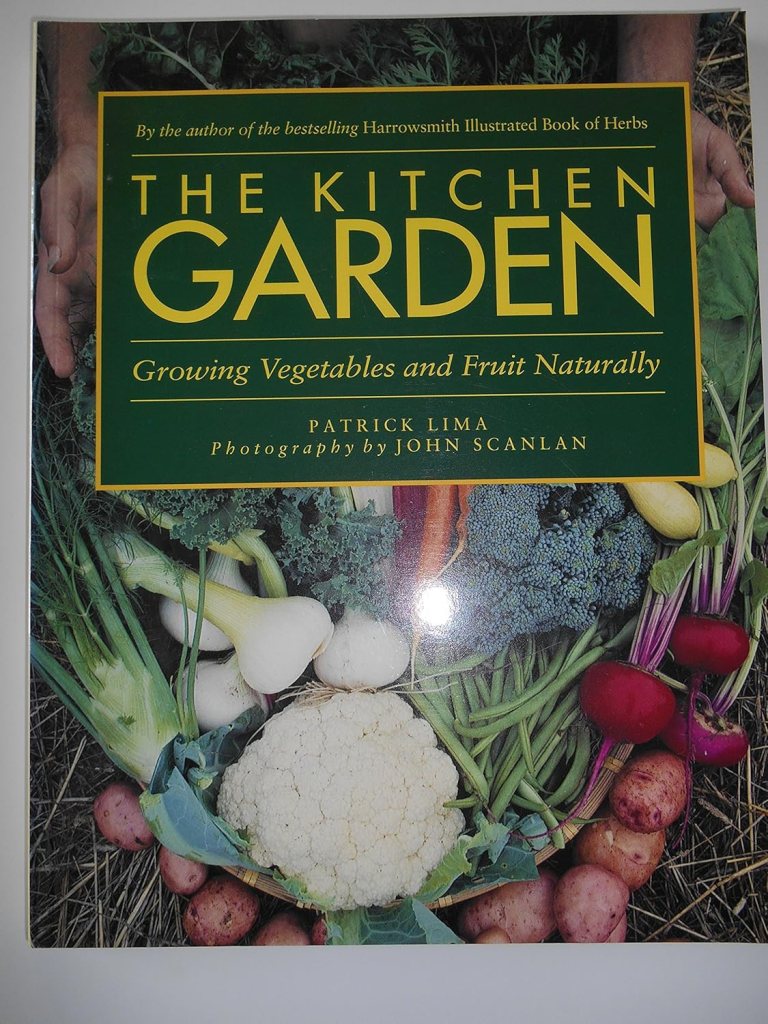
The Kitchen Garden
Peterborough MG Silvia Strobl first toured Patrick Lima and John Scanlan’s garden on the Bruce Peninsula over 40 years ago and was inspired by both their colourful perennial and productive vegetable gardens. Each spring, she still refers to this book’s excellent information to refresh her memory on time to sow, spacing, thinning, harvesting, etc. for the vegetable crops she grows! Unfortunately, this book is out of print, but you may find a used copy online.
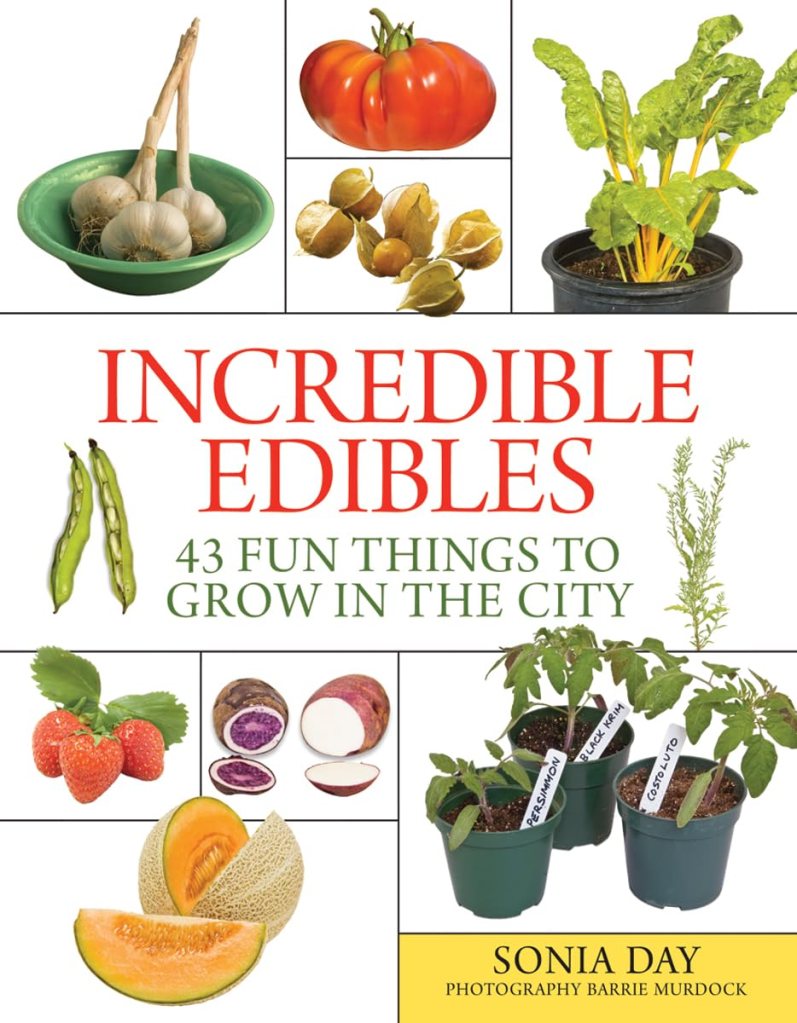
Incredible Edibles
This book by Sonia Day is recommended by Peterborough MG Deb Fraser. It is very basic for the beginner gardener. It answers when, where, how, as well as other questions for herbs and vegetables. She even gives a recipe for each plant. Another book that is out of print. Try used book sites.
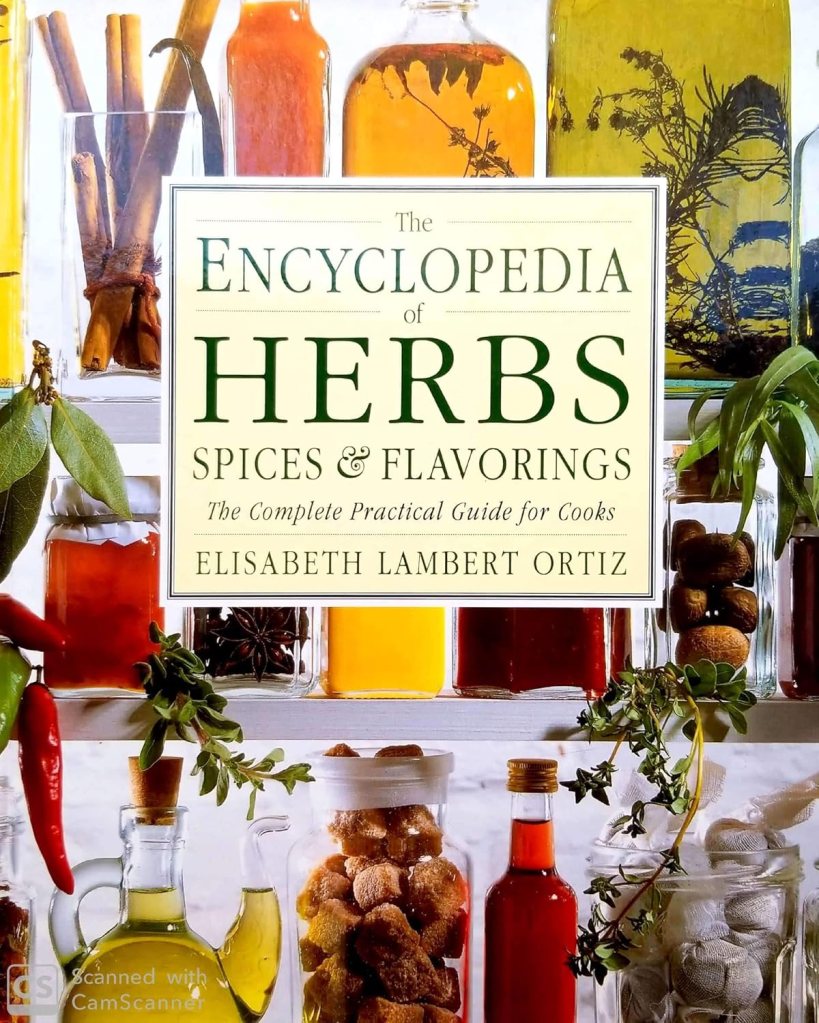
Encyclopedia of Herbs, Spices & Flavorings
Deb also suggests the Encyclopedia of Herbs, Spices & Flavorings, a cook’s compendium by Elisabeth Lambert Ortiz. Originally British but published in Canada by Readers Digest, 1992. It is beautifully illustrated and very detailed about the origin of herbs, spices, oils, sauces, coffees and teas around the world. She details the origin of these, how to cook with them and a recipe. When the weather is frightful with a nice warm drink in hand it makes for interesting reading, perhaps planning to add a few herbs to your garden next spring.
For the Perennial Gardener
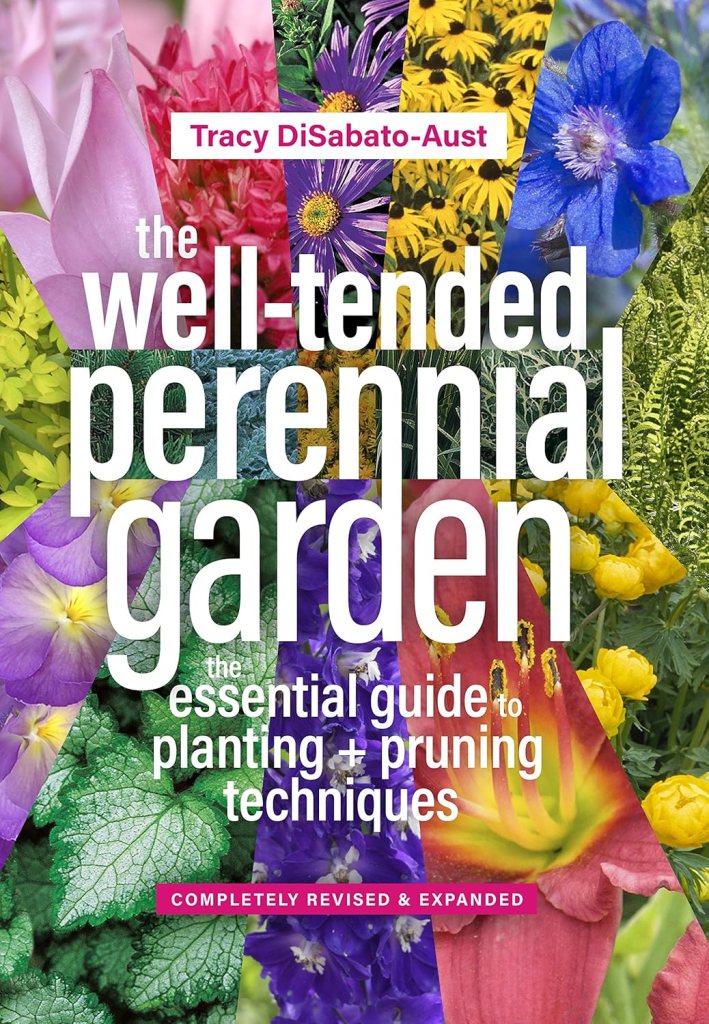
The Well-Tended Perennial Garden
Peterborough MG Gladys Fowler’s favourite book is the Well Tended Perennial Garden. Tracy DiSabato-Aust’s book has an extensive encyclopedia of perennial species and cultivars and she explains the maintenance and pruning needs of each plant. The explanations and illustrations are excellent.
For the Native Plant Enthusiast
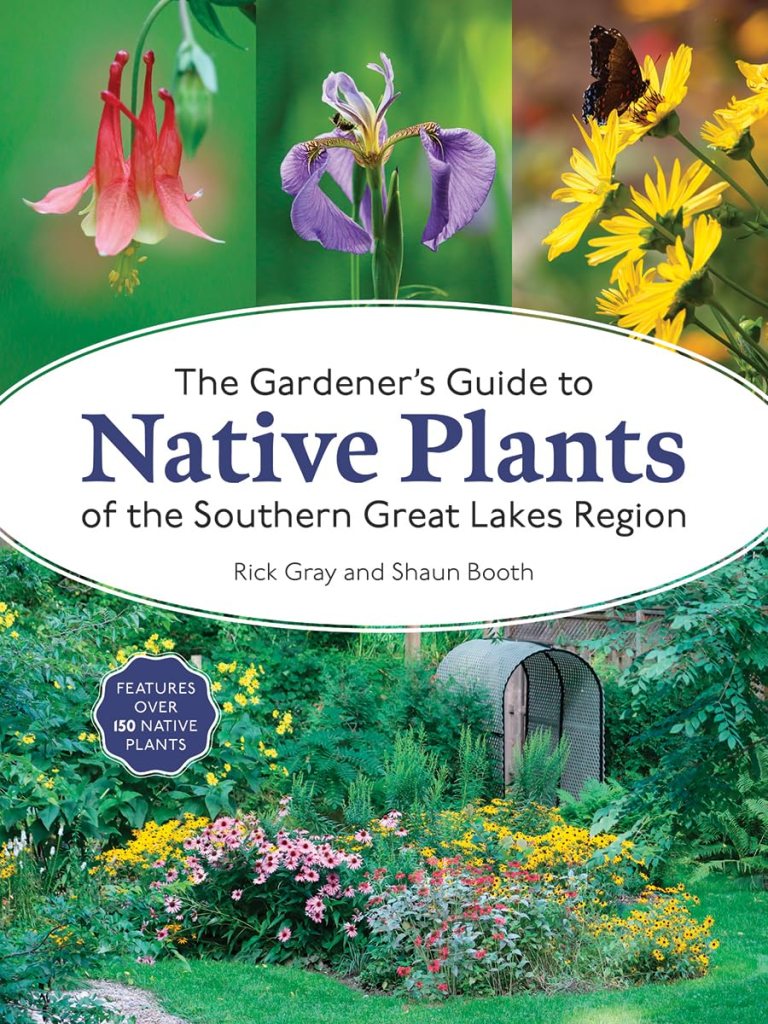
The Gardener’s Guide to Native Plants of the Southern Great Lakes Region
For Peterborough MG Emma Murphy, definitely this one on native plant gardening – for our region, gives everything you need to know about growing the plant, including propagation, wildlife value and what butterflies and moths it is a larva host for. For a full book review she did on Rick Gray and Shaun Booth’s book when it was published in 2024 click here.
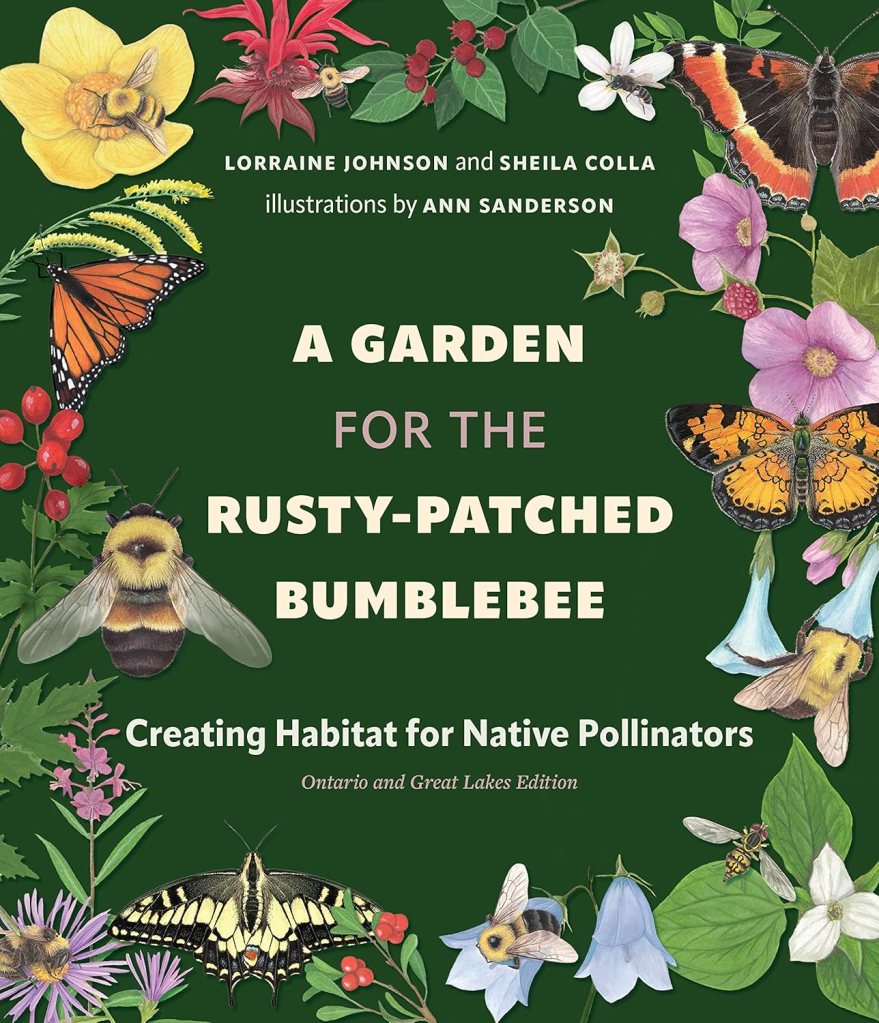
A Garden for the Rusty-Patched Bumblebee
Peterborough MG Sharleen Pratt says this book by Lorraine Johnson and Sheila Colla not only goes into great detail about Ontario native plants, vines, shrubs and trees, but it also encourages us all to think about the spaces we create so that pollinators can thrive.
For the Environmentalist
Our Green Heart
Peterborough MG Carol Ireland says it feels good to sit down and read something that requires absolute attention while at the same time causes you to make all the connections between what you are reading and the place trees have in the survival of our planet. This one by Diana Beresford-Kroeger is also on my reading list!
What is your favourite gardening book? What do you have on your list to find and read next? Eleven more weeks till spring!