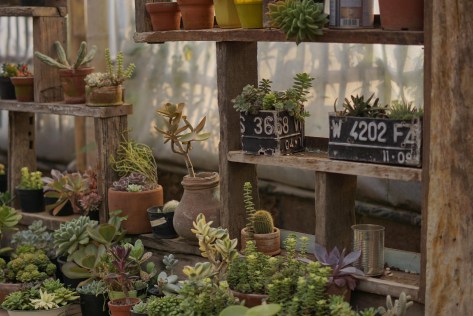
You just couldn’t resist the sign saying “Only $2” or you are confident that you can rescue that pathetic looking plant, after all you have a thriving garden so it shouldn’t be that difficult.
How many times have you bought a bargain plant and regretted it when it dies on you? Big box stores in particular often have a small section of rather sad looking plants looking for a home. End of season clearances are often a great place to pick up bargains.
However, these sad orphans may need a lot of tender loving care (TLC) to get them to flourish. These are some important things to think about before carting off your ‘bargain’ plant that you couldn’t resist.
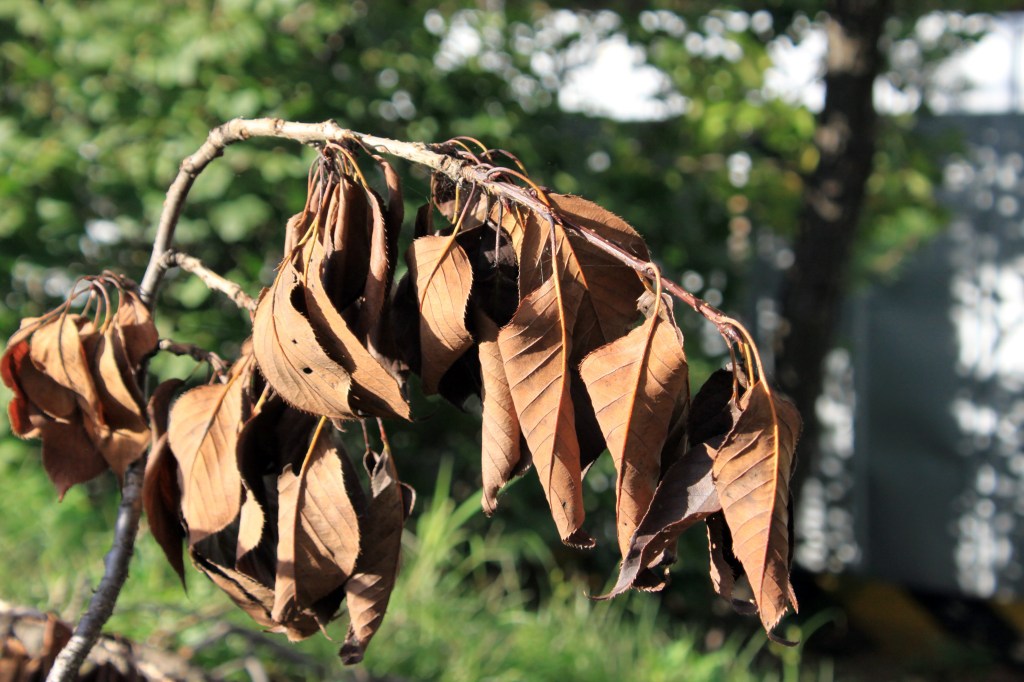
Take time to inspect the plant and don’t be tempted if it has any of the following problems. Some of the problems may be easy to rectify but others may be too far gone.
Is it root bound? Ease the plant out of the pot – is it totally root bound? Are some of the roots brown and squishy?
Any sign of pests or disease? Check the leaves, stems and roots for pests.
Have you got the right spot in your garden for the plant? I have often been tempted only to get home and wonder where on earth I am going to put it. (more later on keeping the plant isolated)
Quarantine your bargain plants for a few weeks to see how they progress before planting in your garden. This way you can spot any further problems and not infect your other plants. This is a good idea before bringing in any new plants as it is all too easy to bring in goutweed or other invasives.
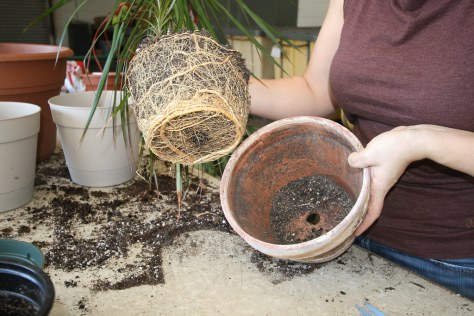
Does it need repotting? The plant may be too cramped and have used up all the nutrients in the soil. It is a good idea to wash the roots just to be sure that there are no other unwelcome passengers. Put it in a slightly larger pot, 1 or 2 sizes bigger and use fresh potting soil. Remove any dead roots and trim surplus.
Check the plant’s water requirements. Over watering can be just as bad as under watering,
Prune and trim back any dead or infected leaves and branches. Cut back into healthy, green wood and to a healthy outward facing bud. Do it immediately regardless of the correct time for pruning. It may look awful at first but it will encourage new growth.
Fertilizer – probably not a good idea for a sick or poorly treated plant Once it begins to recover, a light application would be helpful.
You can get some really good deals on ‘bargain’ plants if you check them carefully before handing over your money. Give them lots of TLC and they will reward you. We all love a bargain but it is worth inspecting the plants thoroughly before you decide to rescue them.
Information about houseplant care is everywhere — online articles, social media, blogs, friends, and self-proclaimed plant experts. It’s easier than ever to find quick tips and tricks, whether it’s a two-minute TikTok or a viral Pinterest post promising the “secret” to healthier plants. But with so many voices out there, a lot of the information being shared is inaccurate or misleading. So what advice actually helps your plants and what might be doing more harm than good? Here are a few examples of care tips to avoid, and why.
Watering On a Schedule
When looking at plant care guides online, you will sometimes see “water once a week” or “water every 7 to 10 days” under watering directions. The problem is, plants don’t adhere to a schedule when it comes to water. Variables like soil, light and humidity can affect the amount of water required for a plant to thrive. In winter months when light is in short supply and photosynthesis slows, plants will naturally use less water than in summer months. It’s better to check the moisture levels in your soil to determine whether it’s time to water. Read more here: https://www.missouribotanicalgarden.org/gardens-gardening/your-garden/help-for-the-home-gardener/advice-tips-resources/visual-guides/how-to-water-indoor-plants
Banana in Your Watering Can
Place a banana in your watering can and your plants will love it! Here’s the problem – plants require specific minerals and nutrients to survive. A rotting banana peel in your watering can is not feeding your plants, it’s providing an anaerobic environment that promotes bacterial growth and can attract pests. Any nutrients that a banana has to offer need to be broken down into usable forms that your plant can absorb. That goes for coffee grounds and egg shells too. If you can’t compost those materials before use, you’re better off with a balanced fertilizer designed for houseplants. Read more here: https://www.gardeningknowhow.com/garden-how-to/soil-fertilizers/banana-peel-water-for-plants
Bottom Watering is Best
I’ve seen this trend a lot recently on TikTok, and it isn’t a bad method of watering if you include a caveat: you need to periodically flush salts that build up in your soil. The benefits of bottom watering include deterring fungus gnats and reaching the whole root system, but if you never top water and let your soil drain, you’re allowing harmful salts to build up over time. It’s ok to bottom water, but it shouldn’t be your only method. Read more here: https://holubgreenhouses.com/bottom-watering-vs-top-watering-which-method-is-best/
Misting Increases Humidity
I hate to break it to you, but misting your plants does not increase ambient humidity. When you mist, humidity surrounding the leaves may increase for a minute or two, but not enough to have an impact on your plant. Moisture sitting directly on your plant’s leaves can also increase the risk of fungal issues. If you want to raise humidity, use a humidifier. If you don’t have a humidifier, group your plants together. Plants release moisture when transpiring, and grouping your plants can create a micro climate with increased humidity. Read more here: https://www.gardensillustrated.com/plants/house-plants/misting-house-plants-necessary
With so much plant advice floating around, it’s easy to assume that popular means correct. The truth is, plants don’t care what’s trending, they care about light, water, nutrients, and environment. Learning the science behind plant care helps you filter out myths and make choices that actually support plant health. Keep asking questions, stay curious, and don’t be afraid to unlearn what you’ve heard. Have YOU ever followed a plant tip that turned out to be more myth than magic?
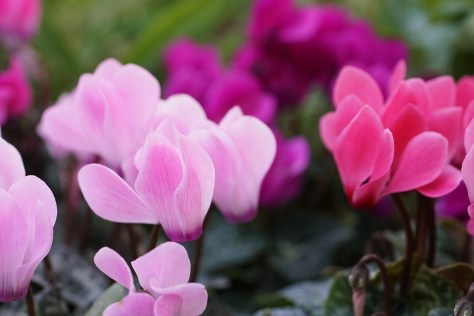
I always enjoy flowers in the house at this time of year and Cyclamens (Primula family) are a lovely and available plant option to satisfy that desire. Readily available for the holiday season these plants may continue to bloom for weeks afterwards.
The florist plant that is sold during the winter is a hybrid of Cyclamen persicum originating in southern Europe, and the Mediterranean to Iran. In its native range it comes into bloom in the cooler temperatures of autumn going dormant in the summer.
Cyclamen is a lovely plant that you may find in sizes ranging from 15 to 30 cm. Its heart shaped leaves may be dark green or mottled white or silver and bears flowers of white, pink, mauves or reds. Flowers may be double, bicoloured or frilly. The flowers have five petals that reflex back looking somewhat like badminton birdies. Very charming!
As an indoor plant it does prefer a cooler environment ranging from 15 to 18C and although I have read and experienced the fact that today’s hybrids will tolerate warmer temperatures, a cool windowsill for example would be ideal. Cooler temps will help prolong blooming time.
Cyclamen like a brightly lit spot and our winter sun is tolerated. Keep the soil moist by bottom watering to avoid getting water in the crown as that may cause rot. Fertilize with diluted houseplant fertilizer every 2 weeks. Deadheading will encourage continuous blooming. To deadhead twist the stem and pull sharply to remove it from the crown.
Cyclamen will naturally stop blooming in late spring and go into dormancy for 2 to 3 months. Dormancy means that the leaves will fade and drop off. If you want to save the tuber you can plant it outside for the summer in a shady spot or store it in vermiculite for 6 to 12 weeks. Repot your stored tuber with the upper half of the tuber above the planting medium. Water as the tuber starts forming new leaves and fertilize until flower heads form.
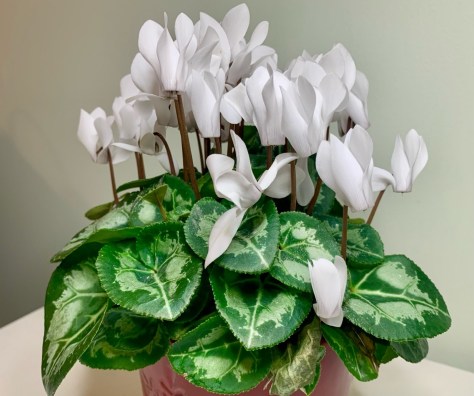
Typically, cyclamen is treated as a short-lived plant if one doesn’t have the right light conditions to get it to rebloom. The photo below with the bicoloured petals was purchased in December 2024.
Source: Lois Scott
After blooming it sat dormant in a pot, was not watered and then started sprouting in late 2025. Watering was resumed and it has been blooming since then.
Second year cyclamen can be a bit leggy with perhaps fewer blooms but can still provide a colourful accent which is always appreciated at this time of year!
In this day and age, we spend so much time on our computers, googling all the information we want and need. But there is something about sitting by a sunny window on a cold winter’s day with a good book.
The winter months are a great time to pull out an old gardening book or invest in a new one. The days are now getting longer and spring is coming, but actual gardening is a few months away. Time to learn something new to help you improve your gardening skills. There are many good Canadian and zone appropriate books that can help you.
Below, I have listed a few of my favourite books on my bookshelf. I have also asked my fellow Master Gardeners to share their favourites. Some of the books are out of print, but check your local library, used book stores or online sites. Enjoy!
For the Houseplant Gardener
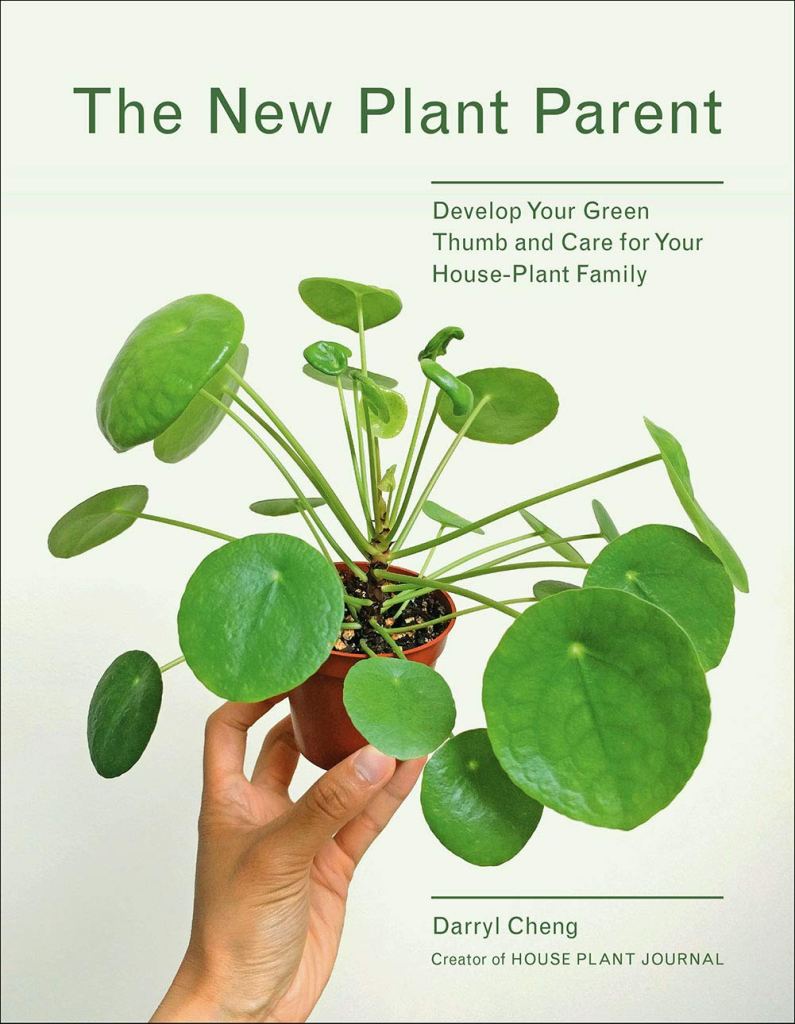
The New Plant Parent
Darryl Cheng gives advice that is full of common sense. He explains that leaves do die and plant care should be enjoyable, not a chore. He discusses basic requirements for healthy plants including the right light, soil care and proper watering. Great illustrations and nineteen plant varieties are listed in detail. Look for his newer books also.
For the Vegetable Gardener
Plant Partners
Companion planting has been around for years. Jessica Walliser gives us “science-based companion planting strategies” that help with disease and pests, improves soil and supports pollinators. Lovely illustrations throughout will have you dreaming of your next vegetable garden.
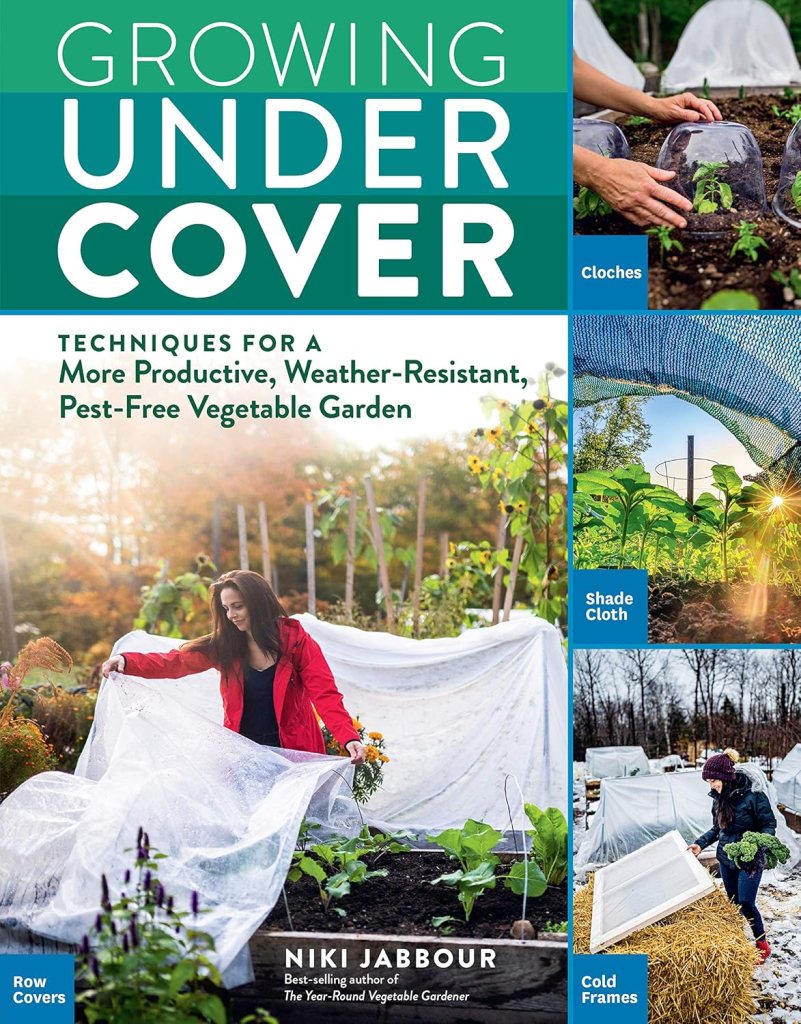
Growing Under Cover
Niki Jabbour is the Canadian half of the popular website Savvy Gardening (along with Jessica Walliser). She has several books out, but this one gives great information about how to reduce pests with row covers. Niki has several books out, so check them out.
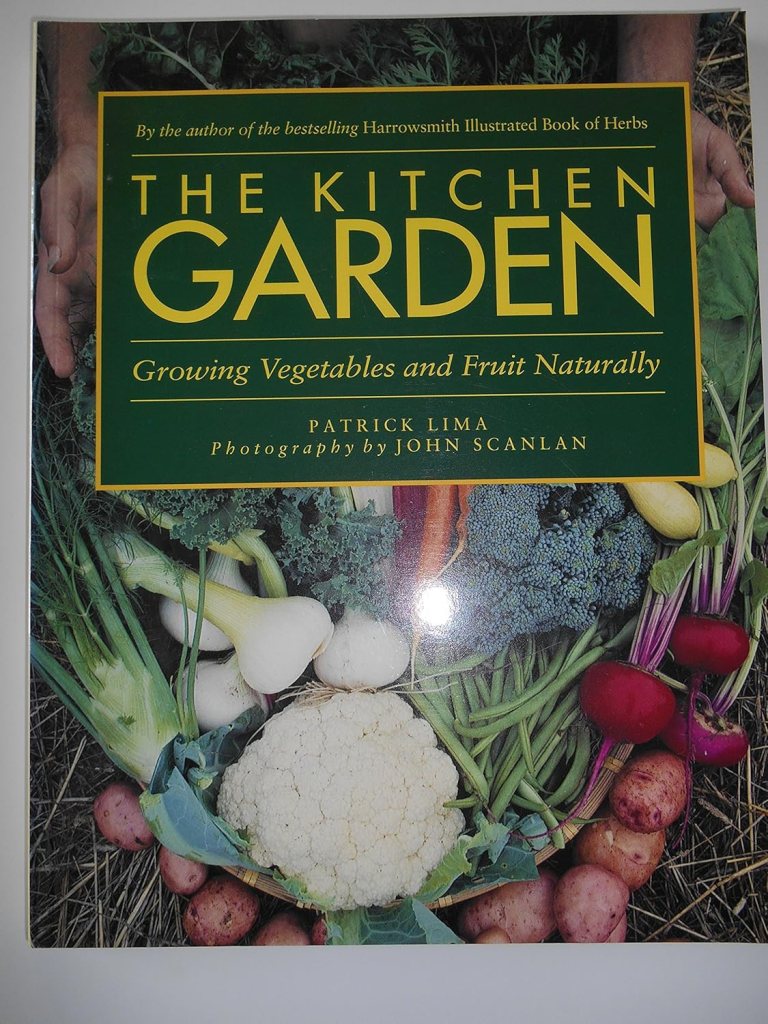
The Kitchen Garden
Peterborough MG Silvia Strobl first toured Patrick Lima and John Scanlan’s garden on the Bruce Peninsula over 40 years ago and was inspired by both their colourful perennial and productive vegetable gardens. Each spring, she still refers to this book’s excellent information to refresh her memory on time to sow, spacing, thinning, harvesting, etc. for the vegetable crops she grows! Unfortunately, this book is out of print, but you may find a used copy online.
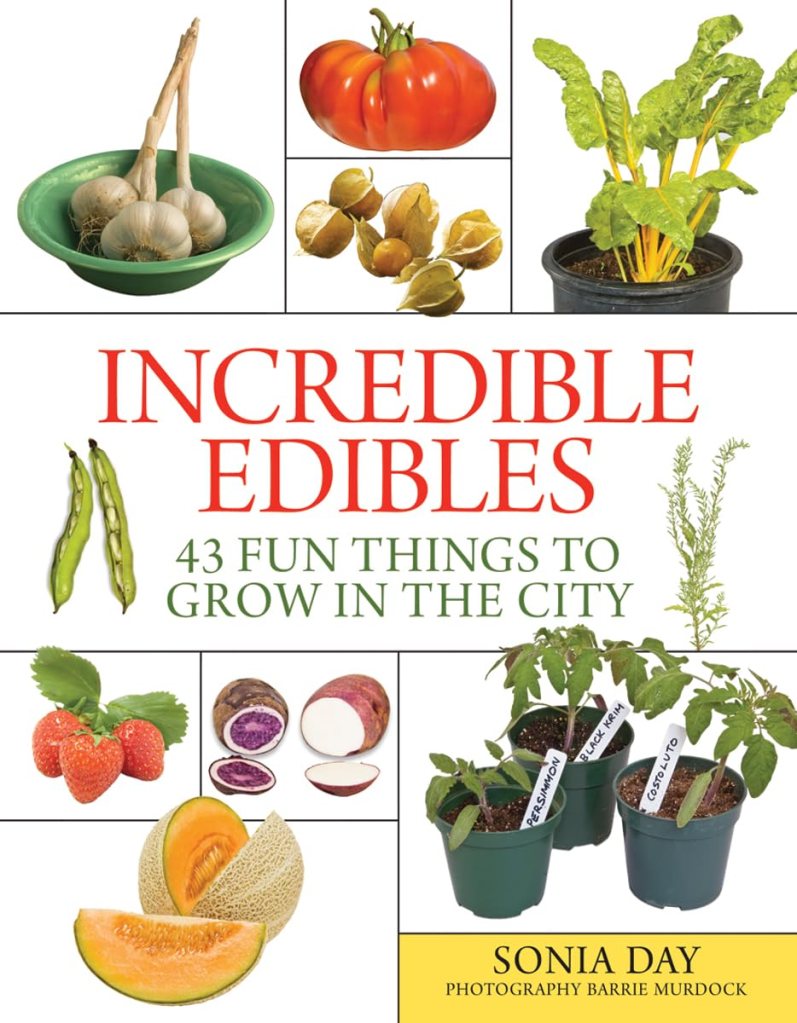
Incredible Edibles
This book by Sonia Day is recommended by Peterborough MG Deb Fraser. It is very basic for the beginner gardener. It answers when, where, how, as well as other questions for herbs and vegetables. She even gives a recipe for each plant. Another book that is out of print. Try used book sites.
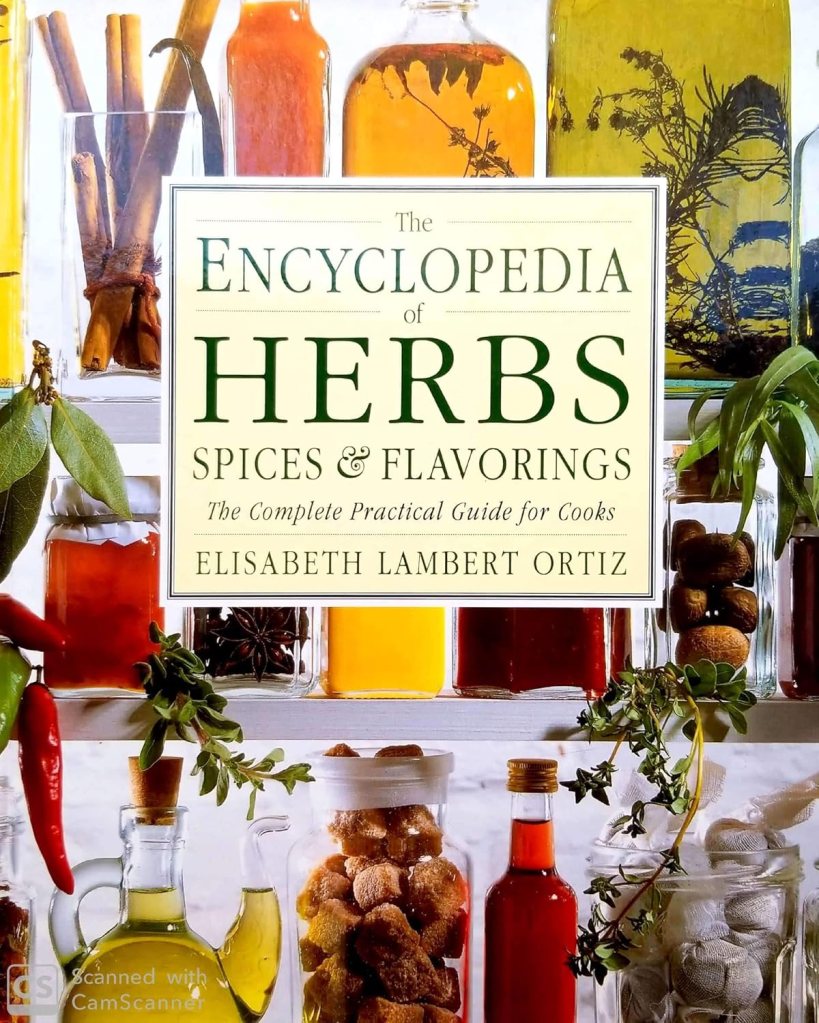
Encyclopedia of Herbs, Spices & Flavorings
Deb also suggests the Encyclopedia of Herbs, Spices & Flavorings, a cook’s compendium by Elisabeth Lambert Ortiz. Originally British but published in Canada by Readers Digest, 1992. It is beautifully illustrated and very detailed about the origin of herbs, spices, oils, sauces, coffees and teas around the world. She details the origin of these, how to cook with them and a recipe. When the weather is frightful with a nice warm drink in hand it makes for interesting reading, perhaps planning to add a few herbs to your garden next spring.
For the Perennial Gardener
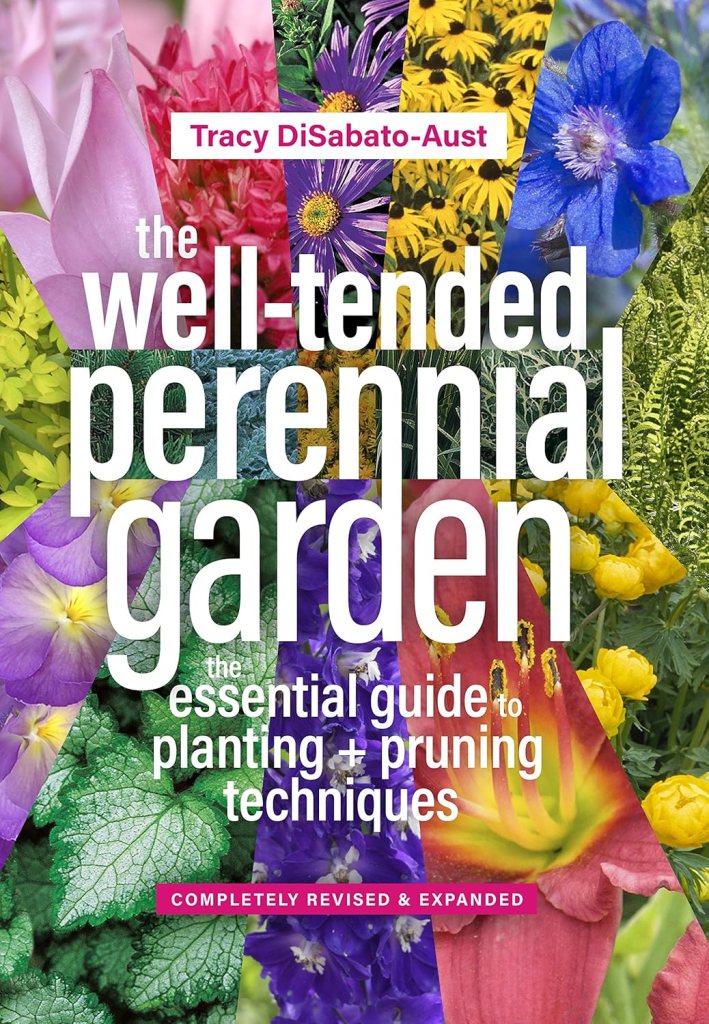
The Well-Tended Perennial Garden
Peterborough MG Gladys Fowler’s favourite book is the Well Tended Perennial Garden. Tracy DiSabato-Aust’s book has an extensive encyclopedia of perennial species and cultivars and she explains the maintenance and pruning needs of each plant. The explanations and illustrations are excellent.
For the Native Plant Enthusiast
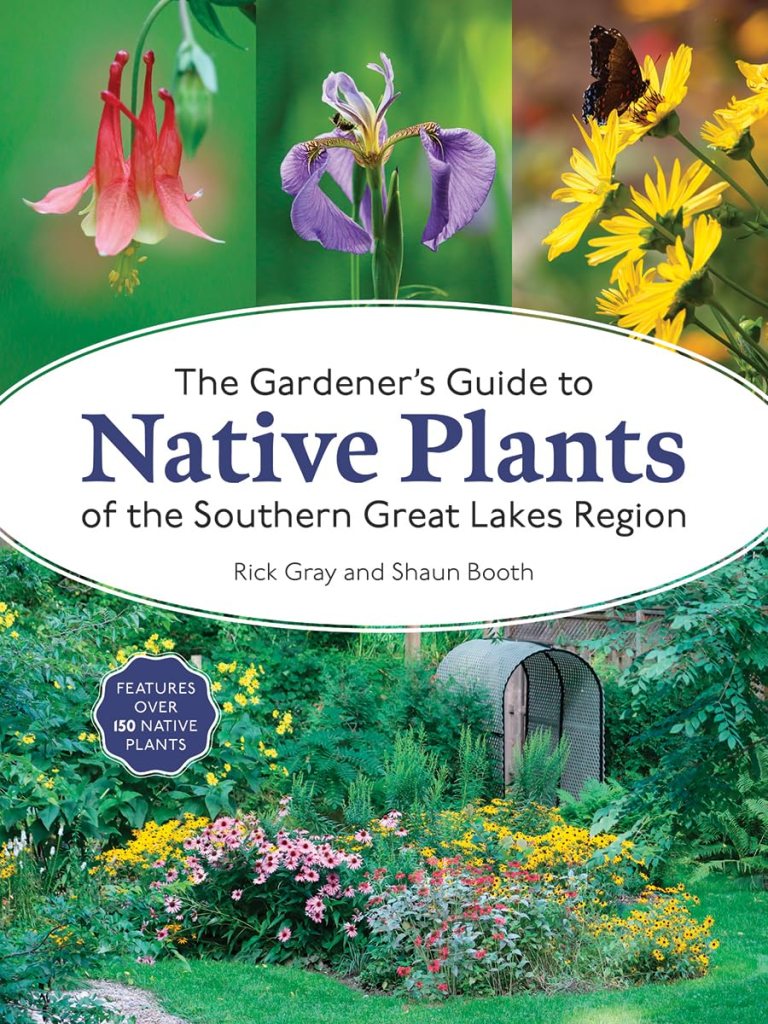
The Gardener’s Guide to Native Plants of the Southern Great Lakes Region
For Peterborough MG Emma Murphy, definitely this one on native plant gardening – for our region, gives everything you need to know about growing the plant, including propagation, wildlife value and what butterflies and moths it is a larva host for. For a full book review she did on Rick Gray and Shaun Booth’s book when it was published in 2024 click here.
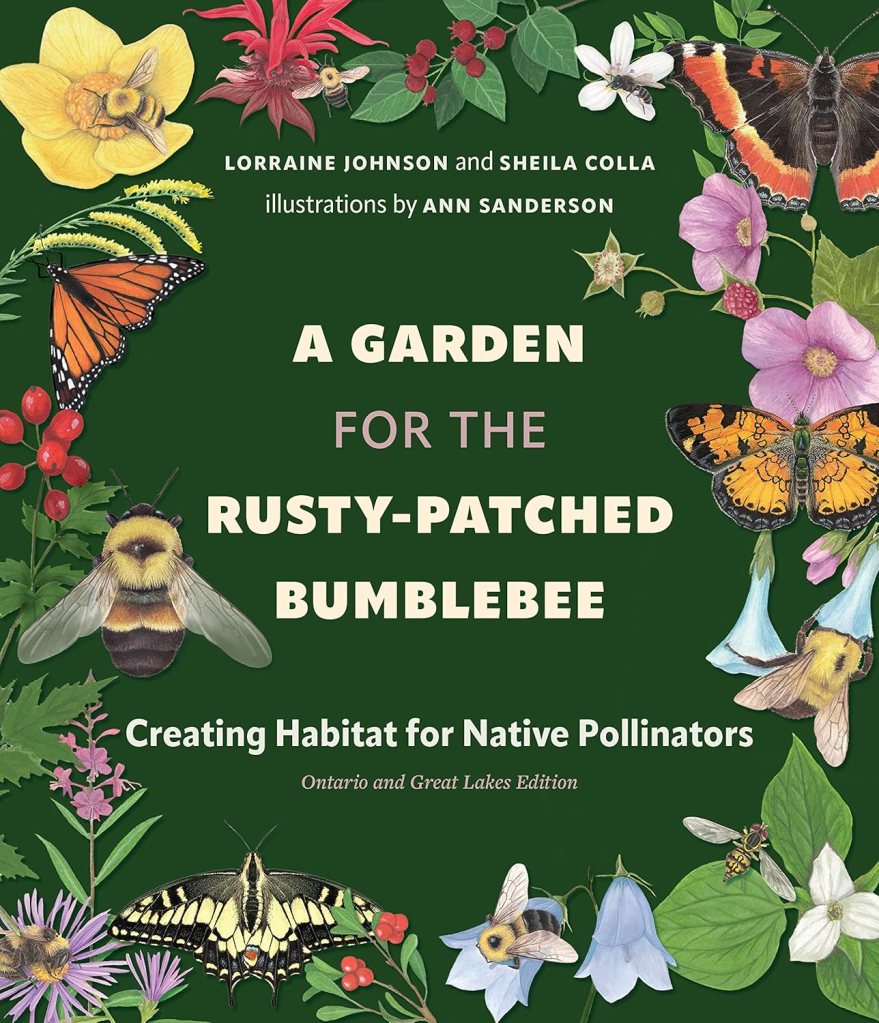
A Garden for the Rusty-Patched Bumblebee
Peterborough MG Sharleen Pratt says this book by Lorraine Johnson and Sheila Colla not only goes into great detail about Ontario native plants, vines, shrubs and trees, but it also encourages us all to think about the spaces we create so that pollinators can thrive.
For the Environmentalist
Our Green Heart
Peterborough MG Carol Ireland says it feels good to sit down and read something that requires absolute attention while at the same time causes you to make all the connections between what you are reading and the place trees have in the survival of our planet. This one by Diana Beresford-Kroeger is also on my reading list!
What is your favourite gardening book? What do you have on your list to find and read next? Eleven more weeks till spring!
While shopping for plants at my local big box store recently, I came across a beautiful Monstera Thai Constellation at a reasonable price. If you’re a plant collector like me, you might think, that’s awesome! If you’re not, you might ask, what’s a Thai Constellation, and what’s the big deal?
Serious plant collectors can tell you what’s trending in the market and the crazy prices these plants sell for. Thai constellations are a natural sport of standard Monsteras, with showy variegated leaves (whereas the standard plant is solid green).
In the last few years, specimens have been selling for hundreds of dollars in specialty shops – but now they are readily available in large quantities at relatively low prices in big box stores. Why the change? To understand this, you need to understand propagation techniques.
Seed Starting
When you purchase your annual flowering plants in the spring, chances are they were started from seed at the nursery. Many plants (marigolds, zinnias, and celosia) are easy to start from seed and grow quickly, making seed starting a cost effective method of propagation for nurseries. So easy in fact, that many people start their own at home using this same method.
Division
Some plants are propagated using division. Think of your garden in the Spring when hostas begin popping up. You can use a spade to cut the plant in two, instantly doubling your plants. Some tropical plants are propagated using this method, including snake plants and calathea.
Grafting
Grafting is the horticultural technique of joining two different plants to grow together as one. When you purchase a Honeycrisp apple tree from a garden center, the tree is a Honeycrisp stem (scion) grafted onto the rootstock of another apple variety. Honeycrisp won’t grow true to seed and must be grafted in order to produce true fruit.
Cuttings
Have you ever cut a stem from a house plant and rooted it in water on a windowsill? Nurseries use this technique on a much larger scale. Using stem cuttings and growing medium, nurseries can produce large quantities of plants for sale (although this does require time to allow the cuttings to grow into small plants). Pothos are a great example of plants that are easily propagated through stem cuttings.
Tissue Culture
This brings us back to the Thai Constellation. Monsteras are easily propagated through stem cuttings, but growing one variegated offshoot for stem cuttings takes time. Tissue culture is a relatively new practice in the houseplant industry, where plant tissue is grown in a nutrient rich medium to produce a large volume of plants in a laboratory setting. These plants are a clone of the mother plant, ensuring consistent characteristics within large scale production. Tissue culture can produce plants on a large scale fairly quickly, driving down the cost of new, rare variations.
One plant can take years to grow into a small, steady supply of plants. Low supply and high demand results in high prices for buyers.
With advancements in propagation methods like tissue culture, the once-exclusive world of rare plants is becoming more accessible to everyday plant lovers. What was once only available to collectors willing to pay top dollar can now be found in the garden section of your local store.
Understanding how propagation influences both supply and cost helps explain market trends and reminds us that behind every “rare” plant, there’s often a bit of science making it possible for more people to enjoy its beauty.
While I like to think of myself as a decent outdoor gardener, the same cannot be said of my indoor houseplant expertise.
However, I have worked hard at it over the years and we’ve had some lovely Clivia, various cactus, some Pothos, a Norfolk Island pine, and a goldfish plant (Columnea gloriosa) in my office at various times.
My pre-2018 houseplants (my Mum’s cat Cleo showed no interest at all)
This was pre-2018, when my indoor kitties had no interest in my houseplants, and no nibbles were had.
That all changed when these two arrived in October 2018 – meet Lulu and Roxy.
Meet Lulu and Roxy – our tuxedo and ginger and white female cats (respectively).
While I love both of them, Lulu’s favourite activities are digging in the dirt and chewing on plants. Roxy just likes to rub up against them, knock them over and then maybe have a nibble.
While indoor plants can add beauty and life to your home, it’s essential to be aware of their potential toxicity to our furry friends. Certain plants can be harmful or even fatal to pets, especially cats and dogs. Understanding which plants are safe and which to avoid is crucial for ensuring a pet-friendly environment.
Many common indoor plants are toxic to pets, such as Pothos (Devil’s Ivy), which causes vomiting and oral irritation in cats and dogs, lilies (which are particularly dangerous for cats) and sago palms, which are extremely toxic, especially to dogs, causing severe liver damage. The Ontario SPCA has a list of the 17 most poisonous plants, but it’s not an exhaustive list.
If you suspect your pet has ingested a toxic plant, it’s best to consult a veterinarian immediately. Look for signs such as difficulty breathing, vomiting, diarrhea, or lethargy. It’s always better to be safe than sorry.
Reliable Resources on Plant Toxicity for Pet Owners
Here are some reputable websites offering advice on pet safety and plant toxicity:
If you’re looking to enhance your home with pet-friendly plants, here are a few options for you to consider. Personally, I find the palms, ferns and spider plants still tough to have in our house because I think our cats will gravitate to anything that is grass-like.
Unfortunately if your cat or dog is a habitual nibbler, you might be better off without houseplants altogether. We love our kitties more than we love our houseplants. For now I’ll just stick to my Phalaenopsis orchids and my various seasonal cactus and focus my gardening efforts on the outside of our house.
Last night I dreamed of green, lush tropical gardens. It was yet another sign I am suffering from the February winter blues or as I call it “Garden Deficit Disorder”.
Yes, the days are getting a little longer with every sunrise, and we have had a fair bit of sun over the past month (which helps a lot) but I have more than half a metre of snow blanketing my gardens while my English cousins are sending photos of snowdrop drifts after their ‘long winter’.
I do like the winter season, if for no other reason than my aging body needs a rest from the garden. But it’s also the only downtime I have to plan for next year’s garden, order seeds and attend garden workshops, because I know once spring arrives I will not have a minute to spare.
So I’ll offer up a few gardening related activities for the wintertime that may help you through the blues…
Browse those Seed Catalogues
Whether you get paper copies or just look at them online, seed catalogues will bring a smile to your face, even if you don’t buy anything. The wonderful folks at Seeds of Diversity have put together an great map of Canadian seed companies. Some of my favourites are Northern Wildflowers (Sudbury), William Dam Seeds (near Dundas), Floribunda Seeds(near Peterborough) and Hawthorn Seeds (Mount Forest).
Credit: Joseph Tychonievich
Catch Up on Your Reading
Winter is the only time (and my favourite time) to cuddle up with my newest garden book, while enjoying beautiful photos and deciding which new plants will be my garden next year.
If you’re interested in native plants I highly recommend The Gardener’s Guide to Native Plants of the Southern Great Lakes Region (I did a book review here) and A Northern Gardener’s Guide to Native Plants and Pollinators: Creating Habitat in the Northeast, Great Lakes and Upper Midwest by Lorraine Johnson.
Another favourite I’ll be drooling over (it’s visually stunning) is Planting – A New Perspective by Piet Oudolf and Nigel Kingsbury.
Or even a fictional book involving gardening makes me happy – highly recommend The Last Garden in England by Julia Kelly.
Buy a New Houseplant (or 2, or 10)
While I love seeing colourful houseplants over the winter, our harsh interior conditions (furnace heat and low humidity) are not ideal for them. I will confess – I am a much better gardener outside than inside, plus I have the additional challenge of two cats that like to nibble. But do a little research and find the right plant for your space, or if you’re not ready for that investment, just pick up some fresh cut flowers to brighten your day.
Review your Garden Photos
On dull winter days I try to review and organize the zillions (ok maybe a slight exaggeration) of garden photos on my phone (I even have a gardening folder). I download the photos to my computer and organize them, all the while just enjoying the memories and seeing the colour! It’s wonderful that digital cameras and our smart phones now make it so much easier these days to capture our gardens in all their glory.
Here’s one of my chipmunks munching on some Green-headed/cutleaf coneflower (Rudbeckia laciniata) buds this summer.
Attend a Seedy Saturday or Sunday
If you’d like some more social interaction with likeminded gardeners or even just some advice, finding a local Seedy Saturday or Sunday is perfect. They occur across Canada, mostly in February and March. Seeds of Diversity have a comprehensive list– use the menu on the right of the page to filter by province. Peterborough’s Seedy Sunday is March 9th.
Find Gardening Seminars (online or in person)
If I can think of anything positive about the pandemic, it’s that we all transitioned to more online learning, and platforms like Zoom made it easy for garden experts to reach large audiences. While it’s always wonderful to see speakers in person, online presentations mean I can watch gardening experts that I might otherwise never have the chance to see in person.
Our Grey County Master Gardeners offer a great series, as does Mississauga-based Blooming Boulevards, and I’ve also been attending the Home Gardening seminars offered by the Iowa State MG Programand some by the Wild Ones organization in the US.
An upcoming in-person gardening event in Peterborough is the very popular A Day for Gardeners – save the date!
Gardening Blogs and Websites
Personally I tend to follow those who have similar growing conditions to me (Zone 4b, harsh winters, Central Ontario) but I do have several (including a few in the UK) which I like to just view and enjoy.
You should of course sign up to receive the weekly Peterborough Master Gardener blog, delivered straight into your email on Monday mornings. Our members cover various topics and issues which will be of interest to gardeners, and you can also search older blogs for specific information using the search function.
Here are a few of my favourite blogs/newsletters. Many of these folks also have YouTube channels and extensive information on their websites.
Full disclosure: Just a few short years ago, before Master Gardener training, I considered my house the place where houseplants came to die. Changing my plant care routines has saved plant lives but winter has its challenges.
Watering
As a Master Gardener in training, I learned that 80% of house plant “failures” were due to over-watering. That was empowering for me and changing watering practices has led to success. In winter, plant growth is decreased and house plants need less water. Before watering check to see if the top 1-2” of soil is dry. With smaller plants you can also get to know the weight of a saturated pot relative to a dry pot by lifting them a few times between waterings. Water thoroughly only when your plant feels dry. Underwatering is much better than overwatering. Signs of overwatering include the wilting or yellowing of lower leaves and inner leaves advancing to scorch, leaf drop and plant death.
Fertilizing
During the winter when houseplants may not be actively growing, they do not need fertilizing.
Humidity levels are lower in our homes during the winter. For house plants that prefer higher humidity the only sure way to provide this is by increasing the humidity in your home which may be problematic. Some people advocate misting plants, placing them on a pebble tray filled with water or clustering plants so that they can benefit from the water that each plant transpires. The effectiveness of these methods is questionable. Choosing plants that tolerate less humid conditions, like succulents is another option. Plants suffering from low humidity may develop drying and browning around leaf edges.
Light
As light levels drop in winter some plants may need to be moved to increase the amount of light they receive or have supplemental light provided such as fluorescent grow lights. Symptoms of not enough light include pale green, yellow to white leaves, leggy stems, dropping leaves, variegated leaves becoming solid green or flowering plants not flowering. Lighting for plants is an involved discussion but this article https://extension.umn.edu/planting-and-growing-guides/lighting-indoor-plants has good information.
Houseplants are a beautiful indoor feature providing pleasure for many. Mastering winter care for your house plants will keep them healthy and beautiful, a wonderful touch of green in our winter world.
Yes, it is finally spring! We can feel the sun getting warmer and see the light lasting longer and so can your orchids.
Before the outdoor gardening season starts, have a look at your Phalaenopsis orchids … actually check all of your houseplants but I am going to stick with just Phalaenopsis orchids for now. Your orchids may have already started to bloom. I have 5 Phalaenopsis orchids and one of them has been in bloom for a couple of weeks. The others are not in bloom but, after inspection, I realized that they all needed to be repotted. How do I know that??
Orchids are epiphytes which means that they grow on other plants but are not parasitic so do not hurt the other plants. Epiphytes have aerial roots to anchor themselves to a tree, for example, or in a pot. The aerial roots pull minerals, moisture and nutrients from the air. They are not growing in soil. When I checked the medium in the pots of my Phalaenopsis, by gently lifting the plant from its pot, the medium had broken down and looked more like soil than the appropriate mixture of bark, perlite and sphagnum moss (or renewable coconut chips).
Phalaenopsis orchids often need to be repotted after purchase because they may have been in the pot for quite some time and the potting medium has decomposed or they may be in an incorrect potting medium. Incorrect potting mediums include anything that holds too much moisture and/or is compacted around the plant’s roots e.g. regular potting soil or a ball of sphagnum moss. They also need to be repotted every 2 to 3 years because again, the medium in their pots will have decomposed, begun to become compacted around the roots and hold too much water. Too much water will lead to root rot followed by a decline in plant health and subsequent plant death.
The other indicator that repotting may be needed with Phalaenopsis orchids occurs because the plant is monopodial which means that it grows taller with new leaf growth at the tip of the stem. The plant can end up top heavy and if not well anchored in its pot, it can fall over as flowers, stem and leaves are pushed up out of the pot by the roots. With repotting, you can settle the plants roots back down into the pot. If the potting medium is still in good shape, then it does not need to be replaced but if you are repotting the plant anyway then it may be a good time to replace the medium.
I have collected my supplies to repot my plants. Note that I am not going to disturb the one that is blooming. I will leave it until it is done blooming then repot because I do not want it to drop its flowers with the shock of being repotted. The flowers are way too pretty!
Now you know why my Phalaenopsis orchids need to be repotted, so check your plants before you get too busy with the start of outdoor gardening season … it’s spring!
I recently acquired a Clivia miniata. This plant was new to me which, of course, was part of it’s appeal. It also has dramatic long strappy green leaves and flowers during our cold, gray Ontario winter.
When you bring a new plant home, be sure to carefully inspect it for hitchhikers; you do not want to bring in disease or insects which could be problematic for your current houseplants . For example, Clivia may occasionally suffer from scale or mealy bug. Thankfully, my new plant is lovely and healthy!
Clivia are part of the Liliaceae family. Amaryllis is in the same family. Clivia flowers are similar in shape to Amaryllis but smaller. Clivia form a large ball of flowers so have lots of impact… colours range from yellow to red. My plant has orange flowers. Clivia may grow to be 2 to 3 feet (60-90 centimetres) tall and almost as wide. This means that it requires a heavy pot to balance the top growth or it may tip over. They like to be root-bound so may stay in the same pot for up to 5 years.
Clivia is native to South Africa. The common name is flame lily, Natal lily or bush lily. The plant was named after Lady Charlotte Florentine Clive, Duchess of Northumberland in England. Clivia was very popular during the Victorian era. If you would like to know more about the history of this plant, check here.
This plant is the ideal house plant. It could be placed in a North window or in indirect light from an East or West window. High humidity is not required so no misting is needed. Clivia prefers rich, well drained organic soil. A half strength dilution of 20-20-20 fertilizer may be applied monthly in the summer. This plant’s large fleshy roots will rot if watered too much so allow the soil to become dry to the touch between waterings.
Clivia may be placed in bright shade outdoors in the summer but does not like cool temperatures so must be wintered indoors. In fall, when you bring your plant indoors, it needs a rest period to encourage that wonderful winter bloom. Reduce watering but give it just enough water to keep the leaves hydrated and place the plant in a cool area for 6-8 weeks. Then, place your plant back in its usual spot and water as described above. Your plant should flower but this may take up to 8 weeks. Clivia may flower 2-3 times per year but note that the plant is slow growing and needs to mature before it blooms. This may take 3 to 5 years if you have purchased a young plant. For more Clivia information, please see here.
I encourage you to welcome the easy to grow Clivia into your home! Their beautiful leaves, and eye-catching blooms make them a striking plant to add to your houseplant collection.