Category Archives: Perennials

Monocarpic Succulents: The Plant That Blooms Once and Says Goodbye

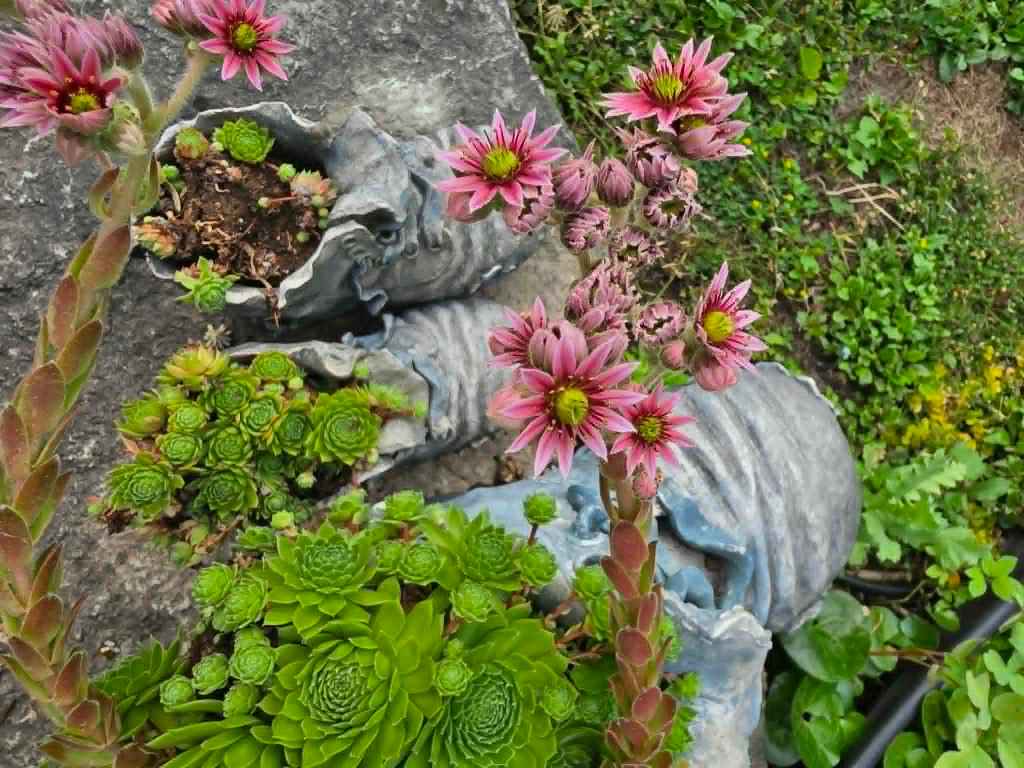
If you’ve ever had a succulent like “Hens & Chicks” Sempervivum that suddenly produces a tall flower stalk and then begins to die, don’t panic—you probably didn’t do anything wrong. You may have discovered a monocarpic plant.

The word monocarpic simply means “flowers once.” These plants spend years growing into beautiful rosettes, storing energy in their thick, fleshy leaves. When conditions are right, they put all that energy into one spectacular flowering display. After the flowers fade, the main plant dies.

It may sound sad, but it’s actually a perfectly normal part of the plant’s life cycle.

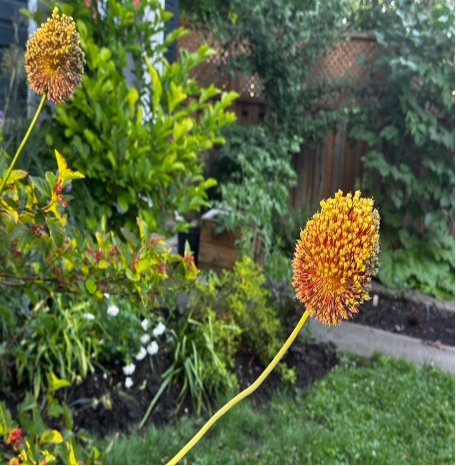
Many popular succulents are monocarpic, including the already mentioned hens-and-chicks (Sempervivum), but also some Aeonium species (non-hardy succulents), and many Agave varieties (tequila, anyone?). The good news is that these plants often produce offsets, or “pups,” around their base before or during flowering. These baby plants continue growing long after the parent plant has finished its life.

If your monocarpic succulent starts to flower, enjoy the show if you appreciate them! Once the main rosette has completely died, simply remove it and allow the pups to fill in the space. Before long, you’ll have a healthy new generation of plants.

BUT if you’re like me and find the flowers messy, feel free to cut all of the flower stalks out — you aren’t removing anything that isn’t already on the way out. While you’re pruning, keep an eye out for the new offsets that will take their place and push them back into the soil if they pop out with the parent.

Nature has many surprising strategies, and monocarpic succulents remind us that sometimes the grandest finale is also a last hurrah!

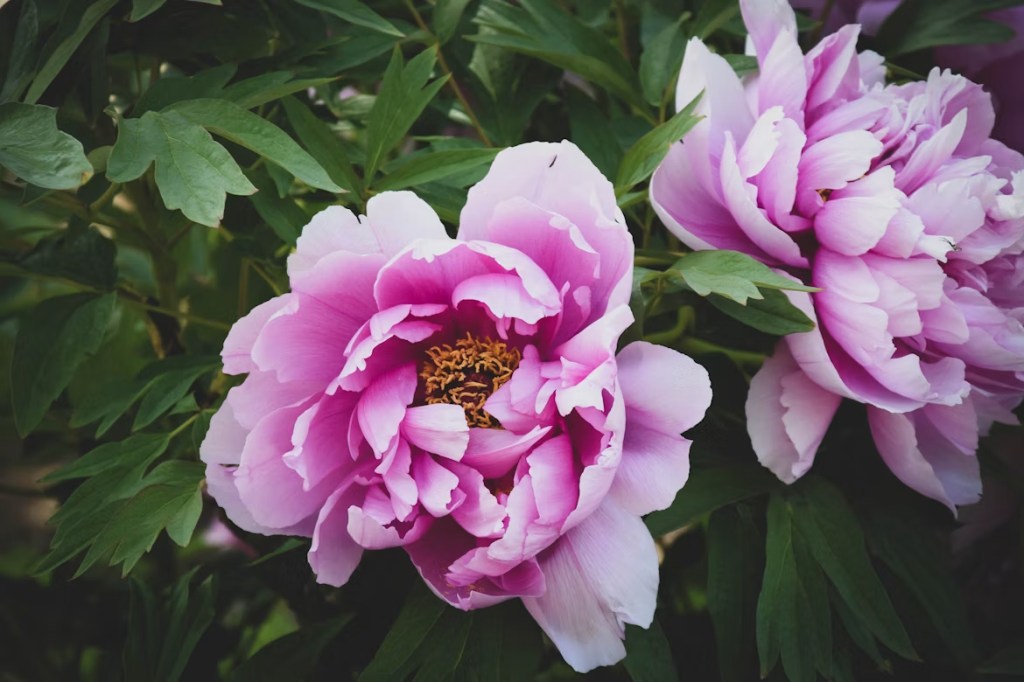
Peonies, one of my favourite perennials

By Rachel Burrows, Master Gardener

I love some of the old fashioned perennials that have been around for a very long time. One of them is the peony, and as you drive around you can often see abandoned farms surrounded by flowering peonies, often in the burgundy shade. Some peonies can bloom for 100 years if planted in the right place.

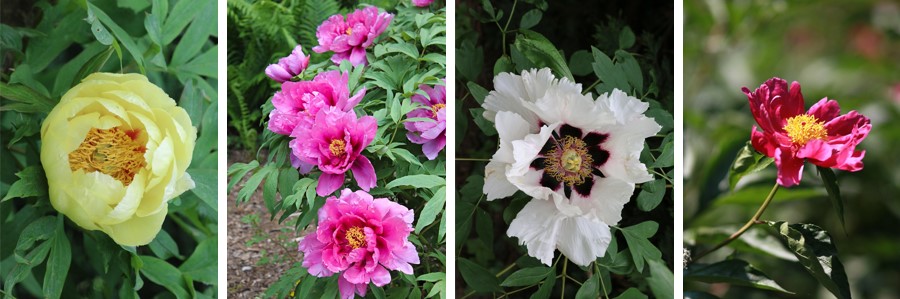
There are over 30 species of peonies and 3 different types:

Herbaceous – the one that we are most familiar with and native to eastern Asia.

Tree peonies  – they resemble a shrub and have woody stems.

Itoh peonies –  are an intersectional peony and native to Japan. It was bred by crossing an herbaceous  peony with a woody tree peony and has characteristics of both peony types.

Herbaceous peonies are cold hardy and require a cold season to bloom. The rhizomes do not like to be buried too deep, ½ inch to 2 inch only. Plant the eyes ( next year’s buds) no more than 2 inches below the soil surface. If you mulch them , ensure that the mulch is set back from the rhizomes to ensure that they are not buried too deeply. The stems die back in winter and emerge in the spring. They do not like to be moved so think carefully about the right site. They like full sun and require good drainage.

Herbaceous peonies — will do better if they are staked or supported with peony rings early in the season. This keeps their gorgeous blooms upright and also provides better air circulation.

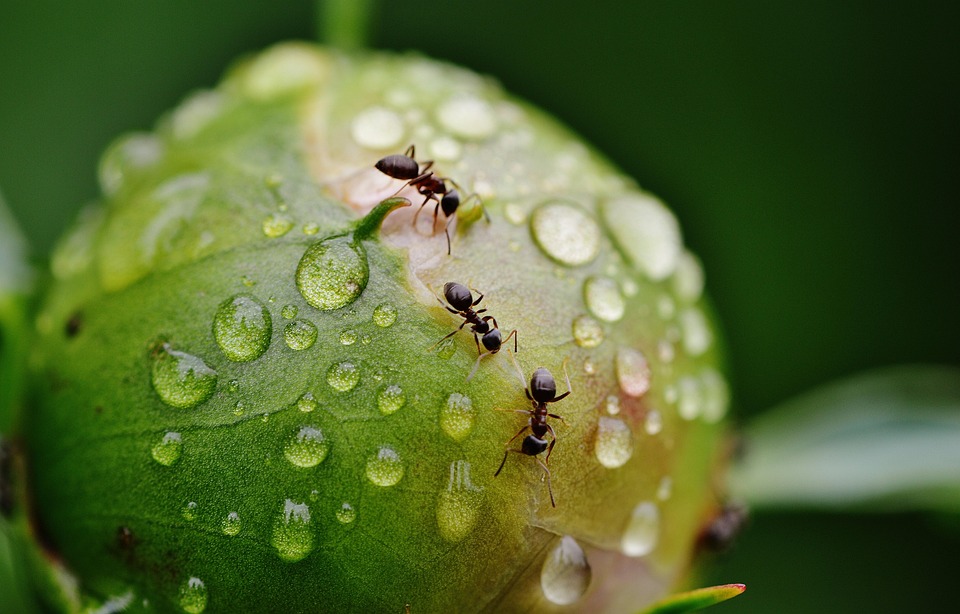
Peonies resist most pests and don’t worry if you see ants on the buds. Peonies secrete sweet nectar on the buds and that attracts ants. In fact ants will help protect the buds from other flower eating insects. This is called “mutualism”.

Tree peonies – require a large hole 2 feet deep and 1 foot wide as they  will grow into a 4 to 6 foot shrub . Amend the soil with organic matter and position the graft 4 to 6 inches below ground level. They have permanent, woody stems and don’t die back in the winter. I wrap mine with burlap to protect the buds.

Itoh peonies – thy have the best characteristic of both the other peonies. Plant them just below the soil surface. They bloom on old wood so don’t cut them back.  Itoh’s are shorter than the other 2 and don’t need staking. They can have a second bloom cycle later in the season.

If you do plan to divide your peonies the best time is late summer or early fall. Make sure that there are 3 to 5 eyes on each divided section. Make sure that you plant the new section at the same level as it was planted previously

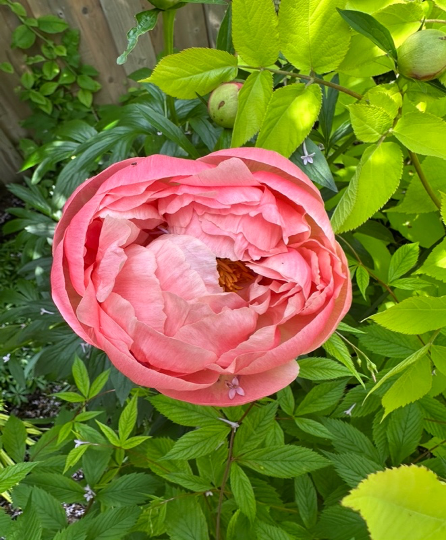
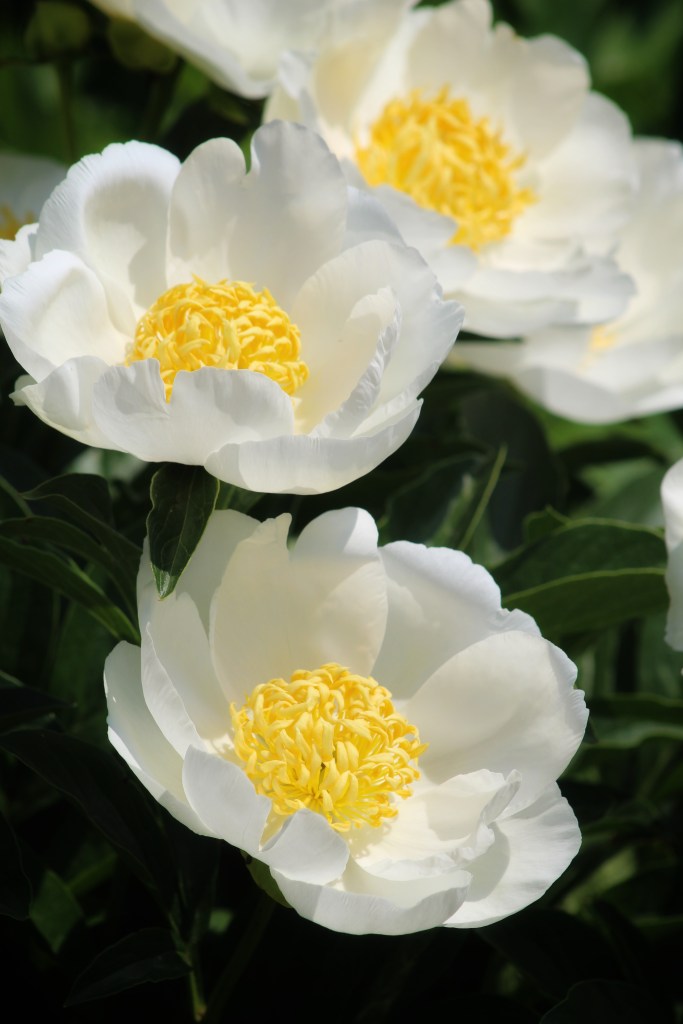
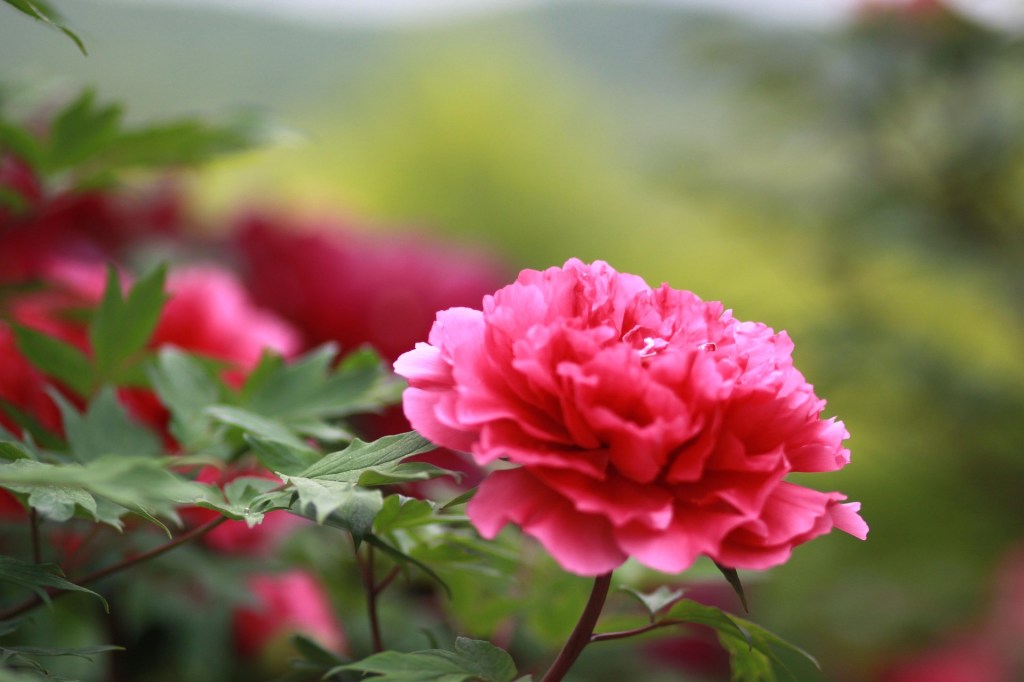
Peonies come in many shapes and forms, single, double, some with amazing centres and many, many colours. These include white, cream, many shades of pink, burgundy, purple, red, coral and yellow. Most peonies are very fragrant.

We are extremely fortunate to have Joe and Hazel Cook of Blossom Hill Nursery in our area. They have hybridized and grown many, many prize winning peonies. Check online for their opening hours.

My peonies are just coming into bloom and make wonderful cut flowers. If there any ants on the buds just swish them through water and shake gently to remove the ants.

Generally speaking, peonies are low maintenance and drought resistant. Once established  they will give you many years of amazing blooms and gorgeous fragrance.

Container Gardening with Native Plants

By Lois Scott, Master Gardener

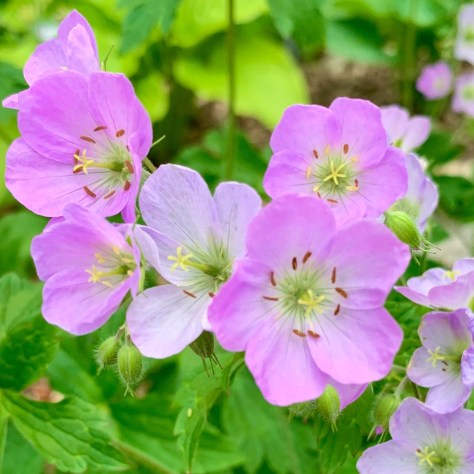
Wild Geranium

Have you ever considered container gardening with native plants?  If you are keen to hear the buzz of pollinators on your balcony, or in a limited gardening space or around the accessibility of a raised bed this is a viable way to add native plants to your environment.  What brought me to this topic was being asked twice in one afternoon for advice on using perennial native plants in containers.  So yes, I am talking about native plants but the practice would be similar to planting any perennial in a container.  The hardiness of your chosen plant is an important consideration so avoid plants that are borderline hardy for your hardiness zone

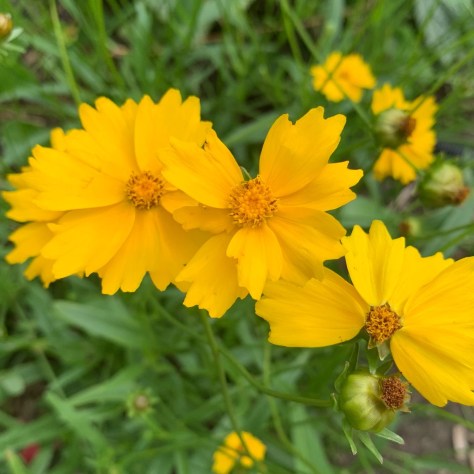
Lanceleaf Coreopsis

Containers can be wood, ceramic, fibreglass or textile grow bags.  Metal may absorb too much heat in summer and terra cotta may crack in winter.  If you plan on moving them, weight will be an important consideration.  Ensure there are drainage holes in the bottom.  It is not advised to use stones or clay shards in the bottom of your container as this practice of adding rubble can actually hinder drainage.  The planting material should be light and fertile and can include potting soil with compost and perlite.  The size of your container will determine the number of plants you can include and bigger is probably better.  The larger the container the more your plants will be protected from the damaging effects of the freeze thaw cycle we experience in winter.  To help overwinter, keep them in a shady spot if possible and mulch heavily with organic material such as dead leaves.

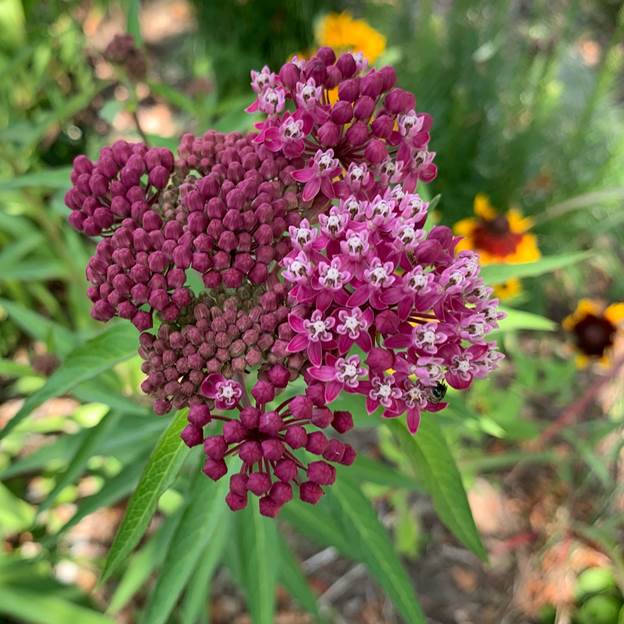
Swamp Milkweed

Watering a container is definitely a commitment over the growing season and native plants are no different, requiring ongoing attention to their moisture needs until winter.

When it comes to plant choice, it is the same as choosing plants for a garden.  Right plant, right place!  Plants preferring the same conditions of light and moisture will make it easier to care them.  Blooming Boulevards has an excellent guide on this topic including plants for all conditions.

Another place to start looking for suitable native plants for containers is The Wildflower Seed Library.   The excellent book The Gardeners’s Guide to Native Plants of the Southern Great Lakes Region by Rick Gray and Shaun Boothe includes an appendix for landscape use of native plants including plants for containers.

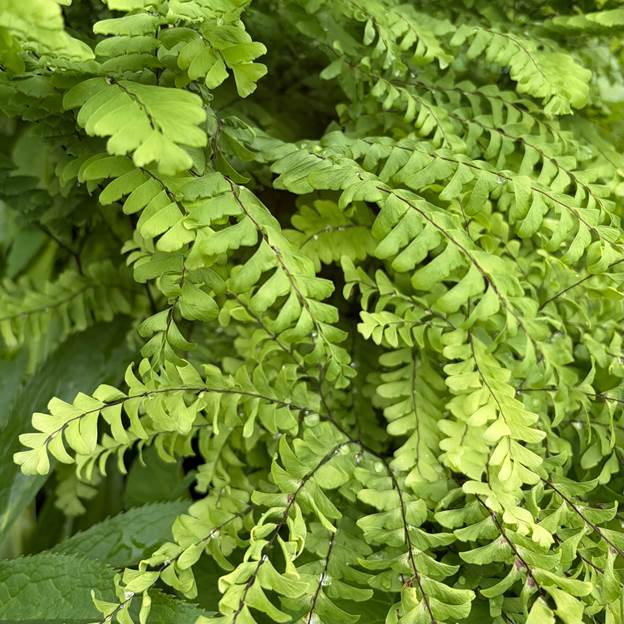
Maidenhair Fern

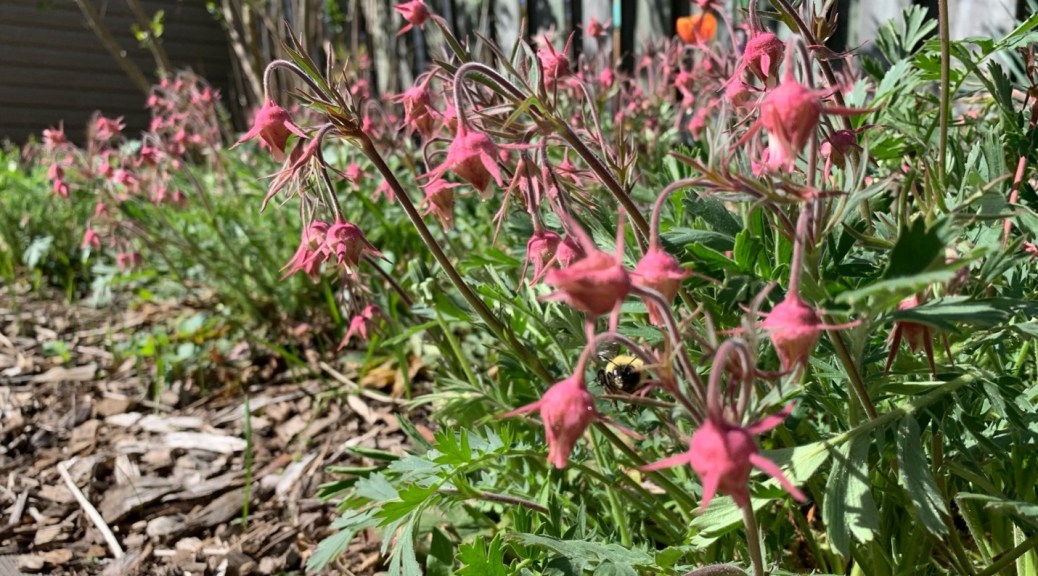
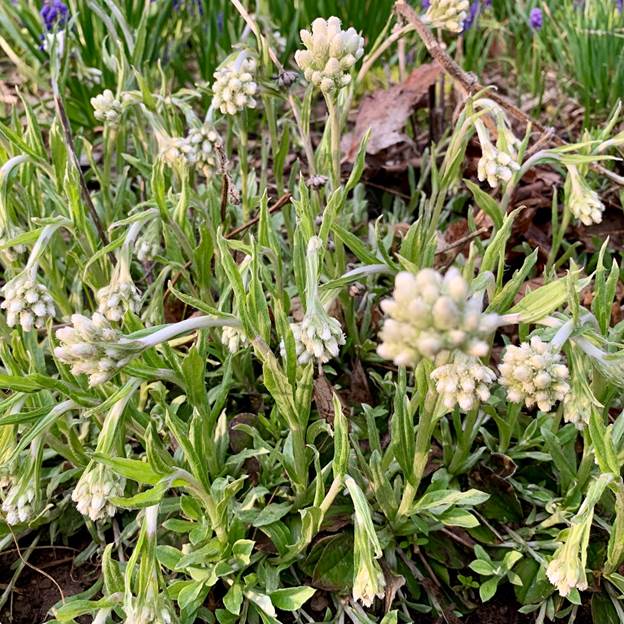
My photos which I have included are just a few of the many beautiful options for creating a beautiful container display that will be bring a buzz to your life!

Pussytoes

Resources

www.torontomastergardeners.ca/gardeningguides/container-gardening-a-toronto-master-gardeners-guide

Wash the Roots, Protect Your Garden: A Simple Step That Stops Invasive Pests

By Silvia Strobl, Master Gardener

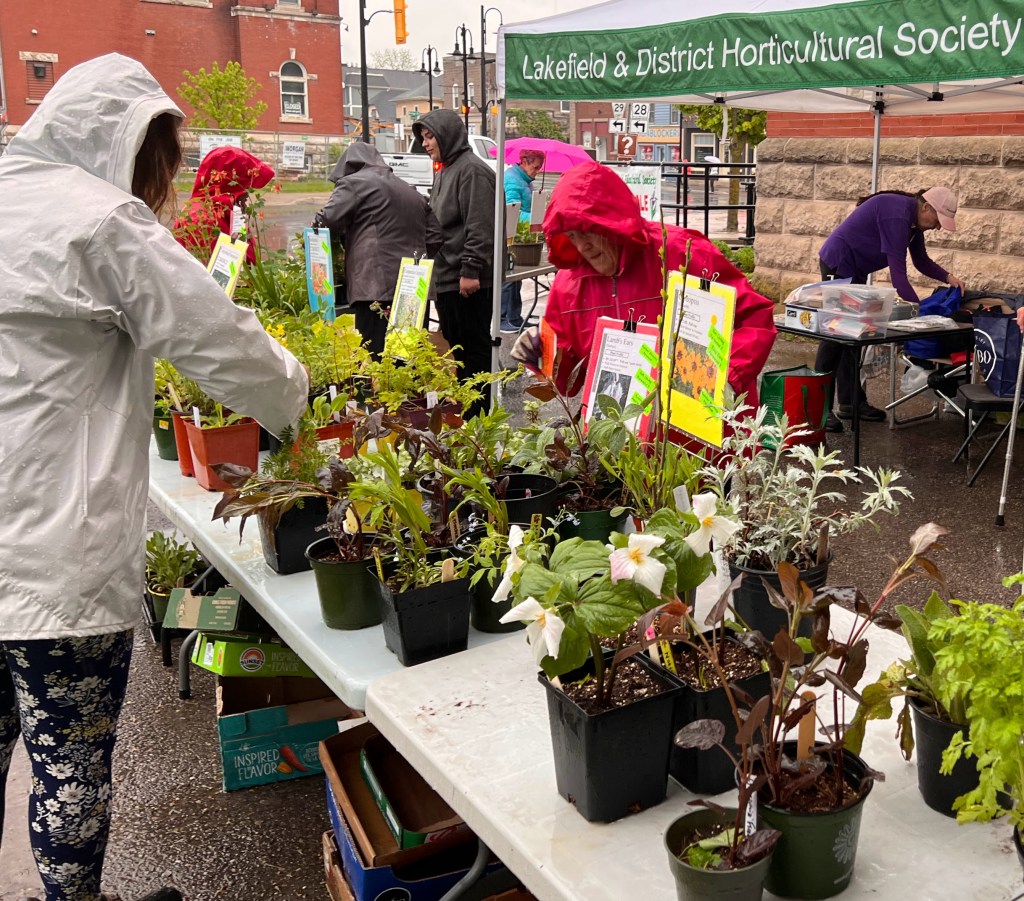
This May, gardeners will once again flock to community plant sales in search of bargain perennials and unusual finds. These sales support worthwhile causes and help plants find new homes—but they can also unintentionally introduce invasive species into your garden. Before planting that exciting new addition, consider one simple precaution: root washing.

Why Root Wash New Plants?

Many gardeners have unknowingly introduced invasive plants through seeds hidden in the soil of donated or purchased plants. An even greater concern today is the spread of invasive jumping worms that I wrote about in a previous blog. Their tiny (1 – 3 mm), soil-coloured cocoons—about the size of a sesame seed—can easily hitchhike in the soil around plant roots.

Since 2016, jumping worms have been confirmed at 63  locations across southern and eastern Ontario (EDDMaps 2026). Although the adult worms die during winter, their cocoons survive and hatch over the next one or more years (Dobson et al. 2022). Dr. Michael McTavish, who has confirmed many infestations in Ontario, notes that by the time gardeners notice the tell-tale “coffee ground” soil texture or spot an actual worm, the infestation has usually been present for years (McTavish, 2025 pers. comm.). 

In gardens, jumping worms quickly consume organic matter in the upper soil layer resulting in soil drying, erosion, loss of nutrients, and ultimately decreased plant growth. Root washing greatly reduces the risk of introducing jumping worms, invasive seeds, and other unwanted organisms in your garden.

Root Washing at the Lakefield Horticultural Society Potting Day

The Lakefield Horticultural Society holds a Potting Day several weeks before its annual plant sale so divisions can become established before sale day. This year, we added root washing to the process.

Our revised assembly line included:

  1. Plant division
  2. Soil removal
  3. Root washing
  4. Potting into clean containers with sterile soil
  5. Labelling
  6. Moving plants outdoors onto tarmac

Fortunately, we worked in a cool, shaded area, since root washing is not recommended in strong sun or hot weather.

How to Root Wash Plants

Step 1: Remove Excess Soil

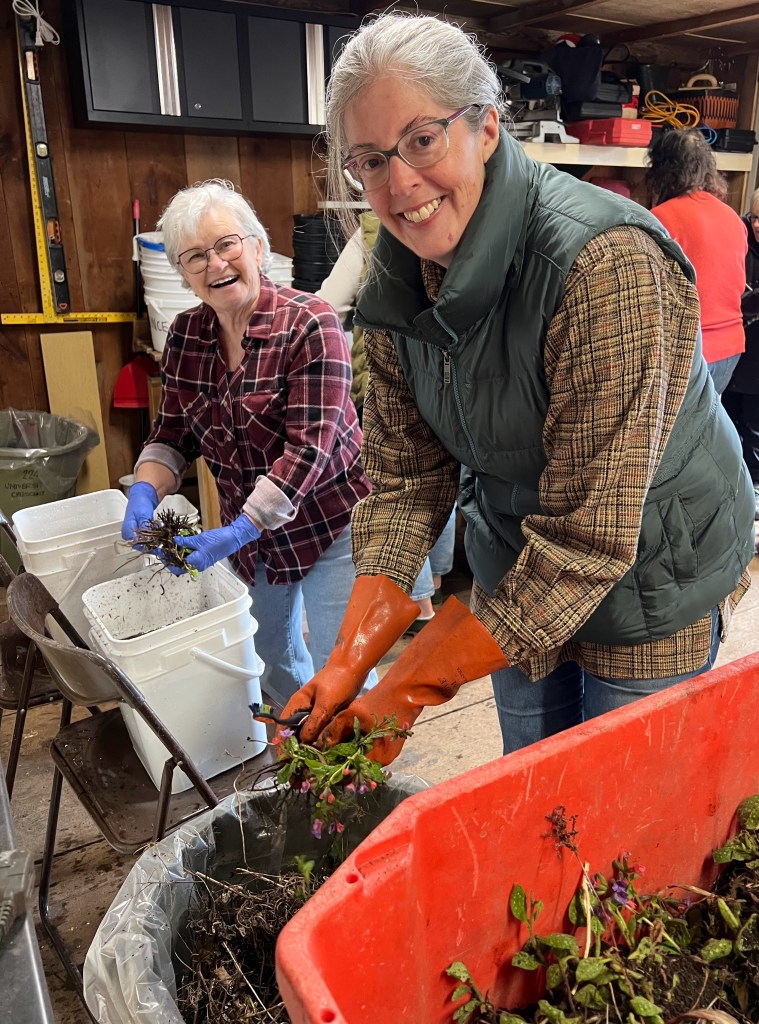
Gently tap plant roots against the inside of a garbage bin lined with a heavy-duty plastic bag to dislodge as much soil as possible.

Step 2: Rinse the Roots

Swish the roots in a pail of cold water, then transfer them to a second pail of clean water and repeat.

An old toothbrush proved surprisingly useful for gently removing stubborn soil particles from roots and iris rhizomes.

Photo: Silvia Strobl CC-BY NC SA Root divisions in the red bin are gently tapped against the inside of a garbage bin to remove as much soil as possible. Then the division is successively swished in two pails of cold water, removing more soil particles.

 Step 3: Final Rinse

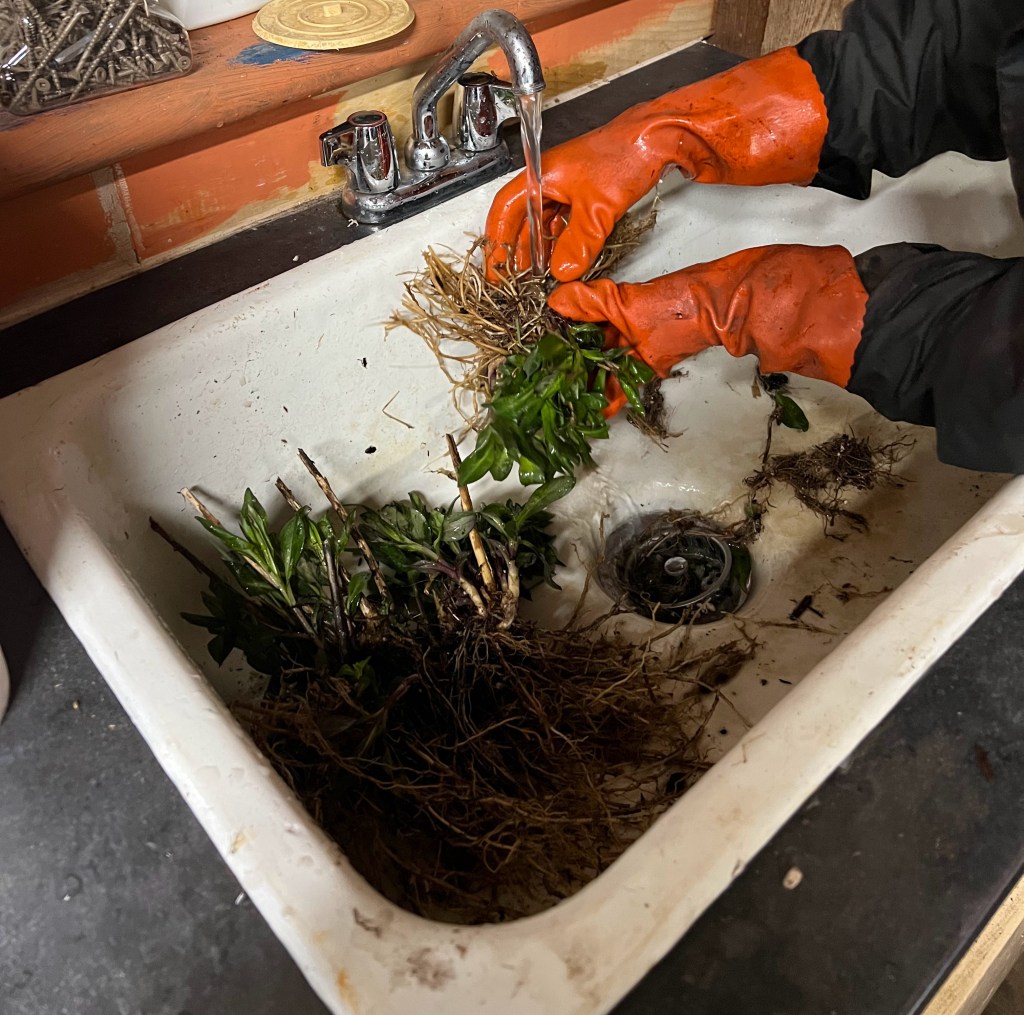
Use a gentle spray of water over a sink with a drain catcher—or over another pail—to remove the remaining soil particles. The plant can then be potted in sterile soil or planted directly into the garden.

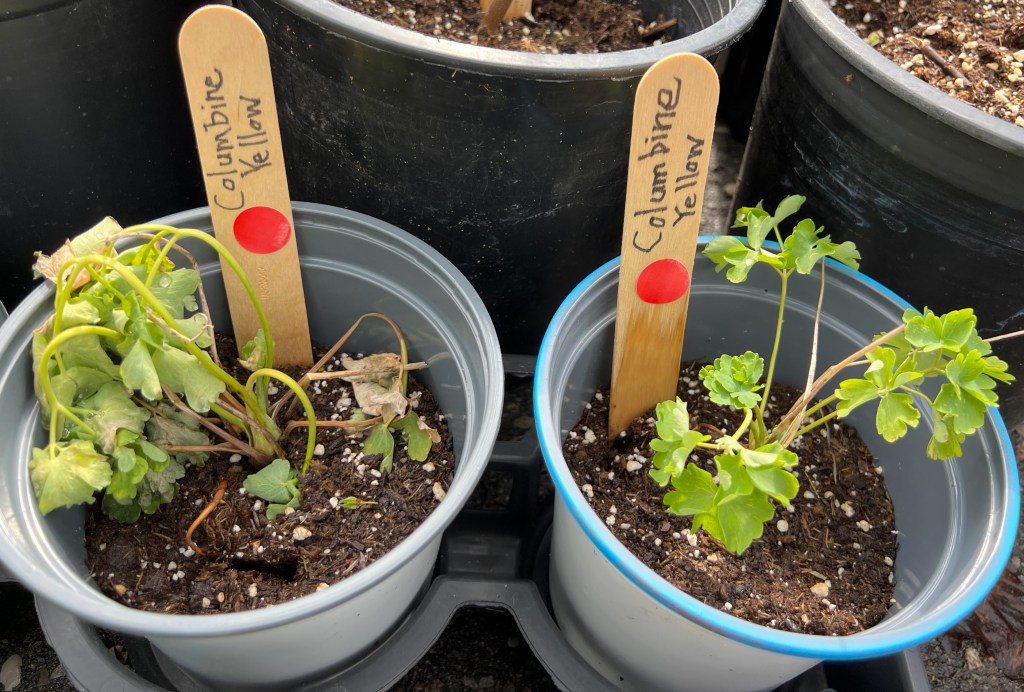
Hostas washed particularly well, while larger rhubarb divisions and some columbine cultivars struggled after treatment.

Photo: Silvia Strobl CC-BY NC SA Final rinsing of roots to remove remaining soil particles.

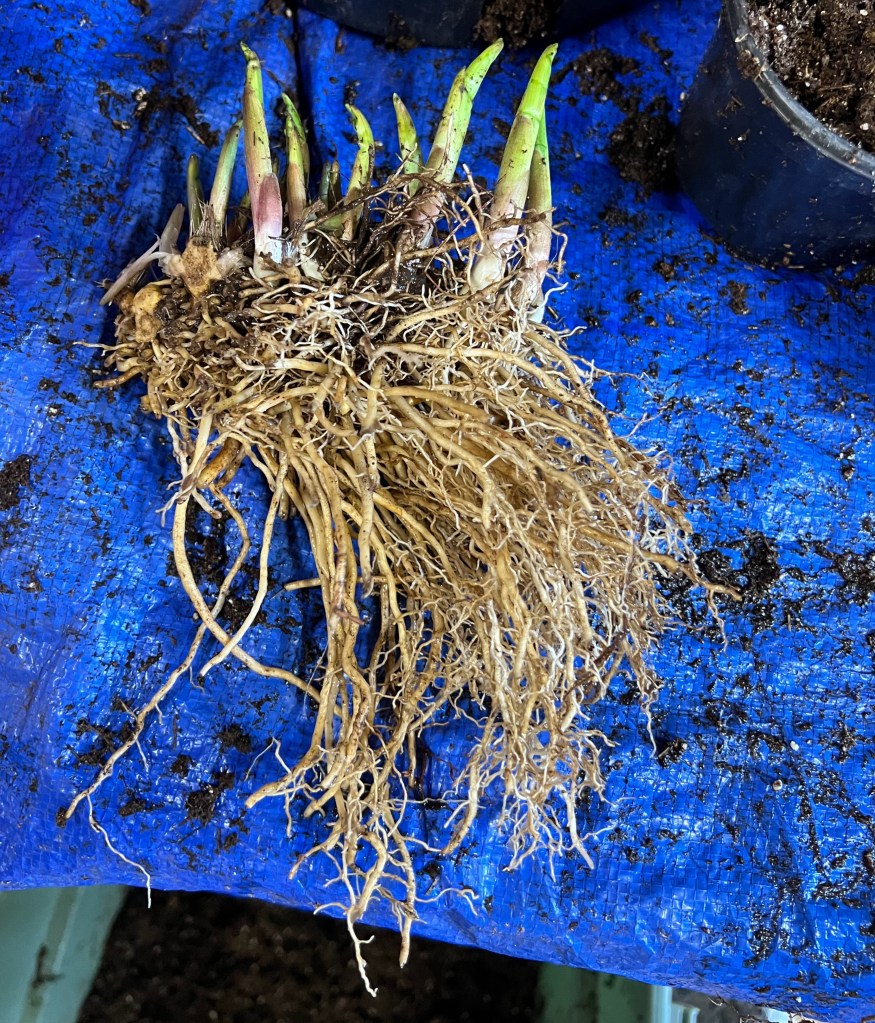
Photo: Silvia Strobl CC-BY NC SA A freshly root-washed hosta division ready for potting (that is sterile potting soil on the tarp and in the bin below the table).

What We Learned

A few practical lessons emerged from the day:

  • Root washing did not appreciably slow the potting process. Nine volunteers root washed more than 200 plants in 2.5 hours. It was not nearly as time consuming as we expected.
  • Root washing is easier for some plants than others.
  • Hostas tolerated the process very well; rhubarb and columbine cultivars did not.
  • Used toothbrushes are excellent tools for removing stubborn soil.
  • One volunteer root washed plants at home before arriving, leaving the soil behind in her own garden—an approach we may encourage in future years.

Safe Disposal of Soil and Wash Water

The removed soil was collected in heavy-duty plastic bags and disposed of through municipal waste collection. Surprisingly little soil accumulated after processing approximately 250 plants.

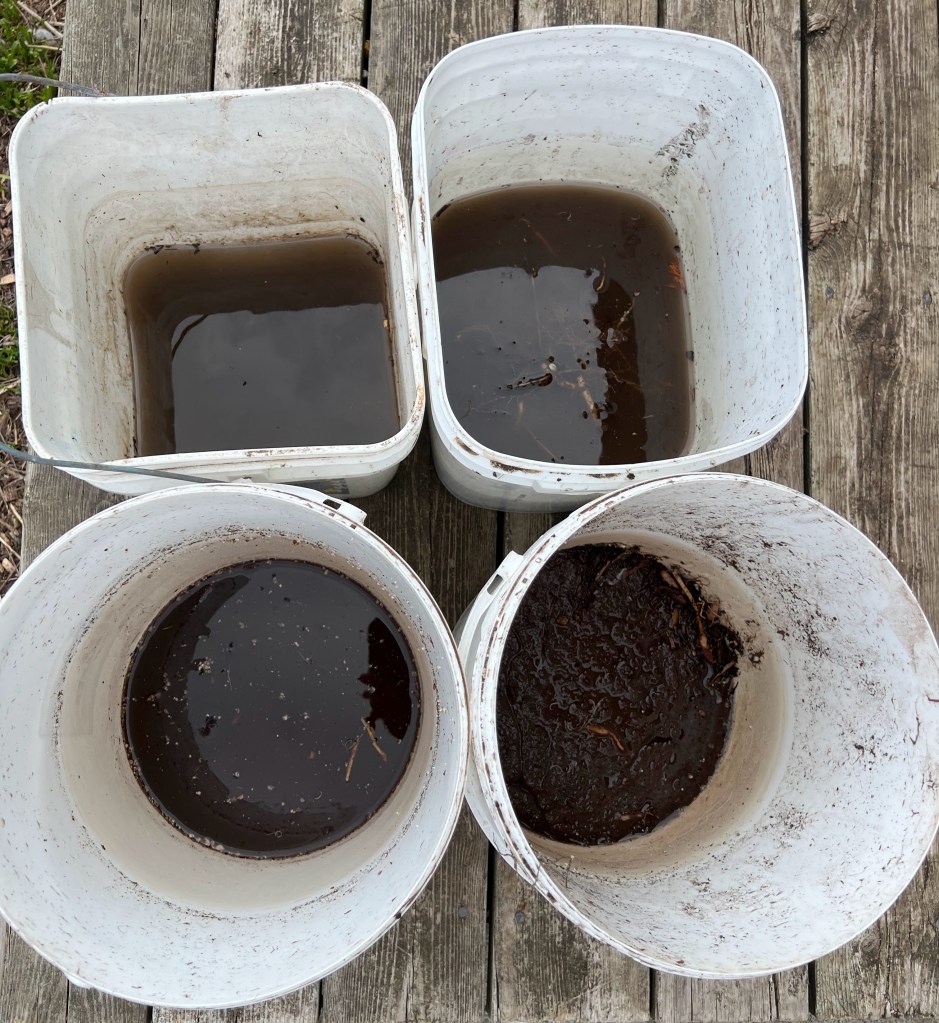
As rinse water became muddy, fresh pails replaced dirty ones. The used water was allowed to sit for several days so soil particles could settle to the bottom. Clear water was then poured into the municipal sewer system for treatment, while the remaining sediment could either be solarized (Master Gardeners of Ontario 2022) or disposed of through municipal waste collection.

Photo: Silvia Strobl CC-BY NC SA Pails with remaining sediment. We used about a dozen pails, switching ones with dirty water and others with clean water regularly.

Caution is advised when root washing in rural areas as I couldn’t find any information on whether jumping worm cocoons can survive in untreated waste systems.

Root Washing Benefits More Than Perennials

For trees and shrubs, root washing has benefits beyond decreasing the risk of invasive organisms. Removing potting soil encourages roots to grow outward into the surrounding native soil rather than remaining confined to the original potting mix. The result is better long-term establishment and survival (Chalker-Scott 2020).

Root washing also allows gardeners to identify and correct root problems such as girdling or spiralling, before planting. Woody roots can be pruned so they spread outward like spokes on a wheel, while fibrous roots can simply be straightened by hand (Hopton-Villalobos 2021).

Even nursery-grown perennials benefit. Potting mixes containing perlite and vermiculite drain quickly and are ideal for greenhouse production, but roots sometimes fail to expand into heavier garden soils after transplanting. By removing the potting mix and “mudding in” the roots directly into garden soil, plants often establish more successfully—and gardeners avoid introducing invasive pests at the same time (Wagar 2025).

A Small Step that Protects Your Garden

Root washing may add a little extra time to planting, but it is one of the simplest and most effective ways to protect your garden and local ecosystems from invasive species. As there is currently no proven treatment for jumping worm infestations, prevention is the gardener’s best defence.

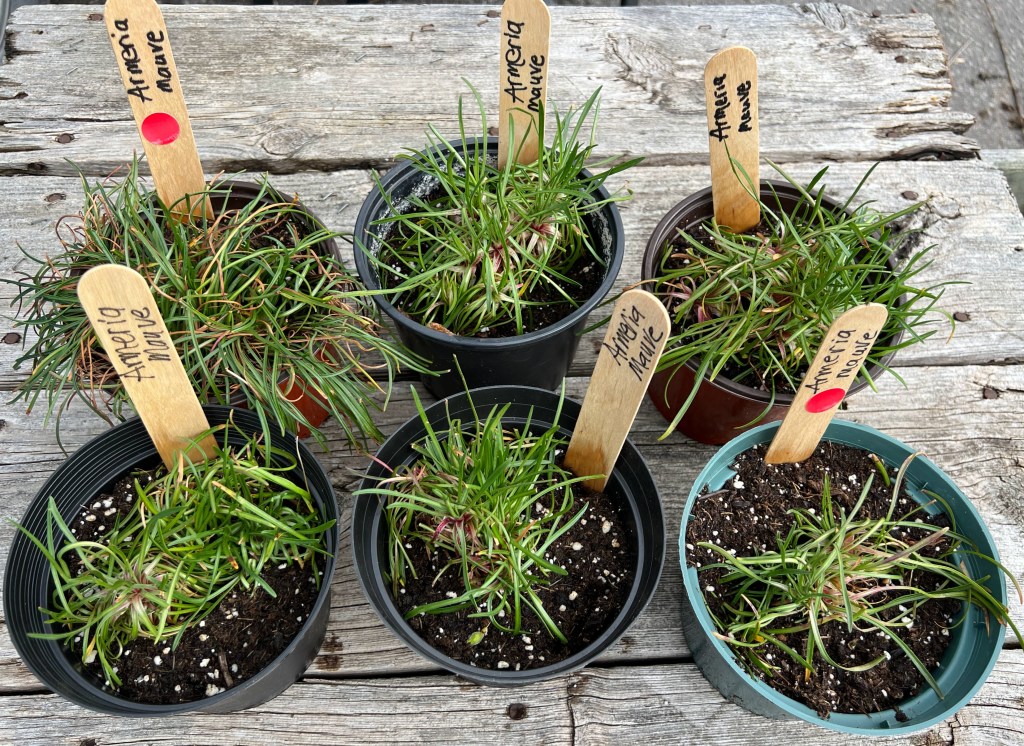
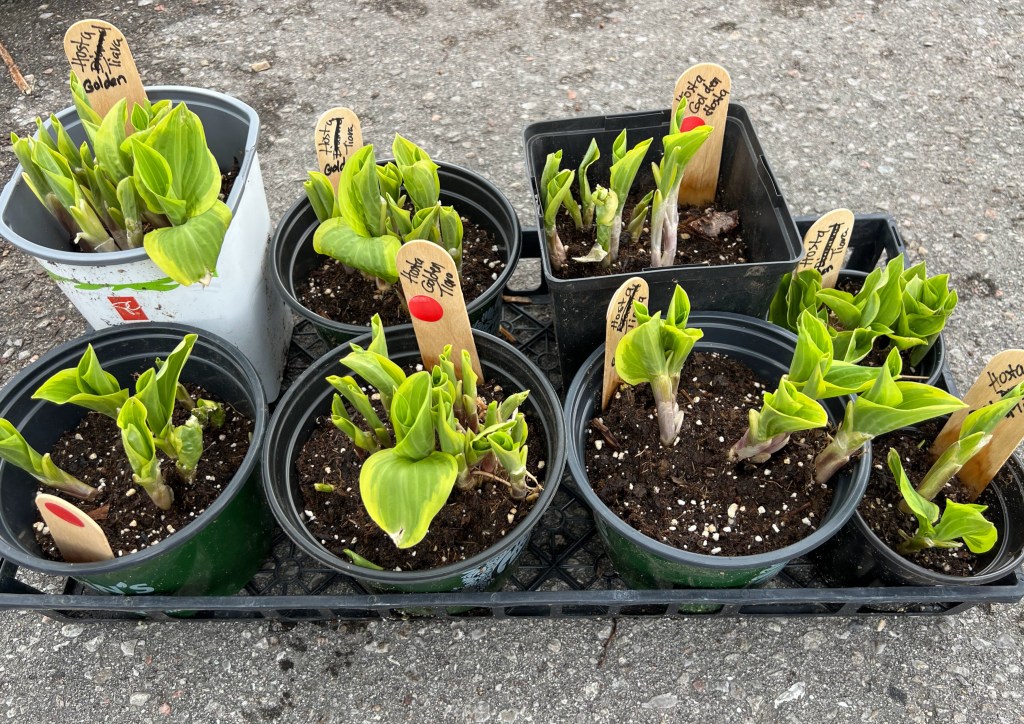
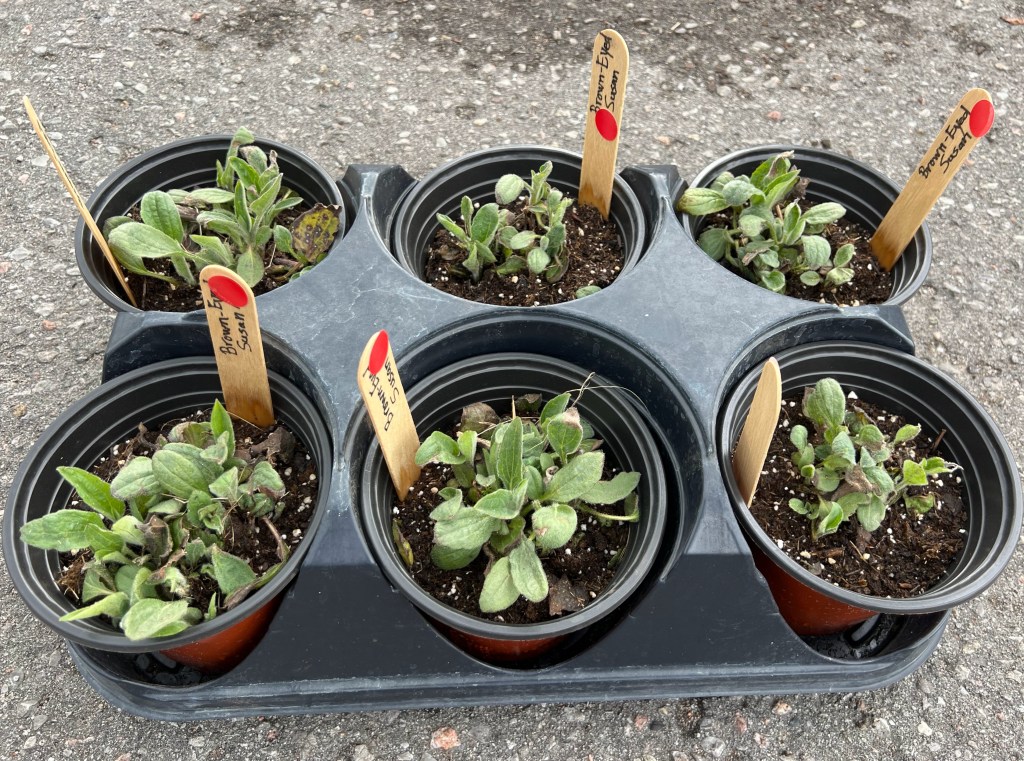
Photo: Silvia Strobl CC-BY NC SA Some of the potted plants two weeks after root washing. Clockwise from top left: Black-eyed Susan cultivar, Golden Tiarella Hosta, Armeria, and Columbine cultivar (these did not root wash well as can be seen in the pot on the left and several others not shown).

REFERENCES:

Chalker-Scott, L. 2020. Root Washing: Why and How to Wash Roots. Fine Gardening.https://www.finegardening.com/article/root-washing-why-and-how-to-wash-roots

Dobson, A., J. Görres, J. Richardson, A. Kostromytska. and T. Simisky. 2022. Invasive Jumping Worm Frequently Asked Questions. University of Massachusetts Amherst. https://www.umass.edu/agriculture-food-environment/landscape/fact-sheets/invasive-jumping-worm-frequently-asked-questions

EDDMaps. 2026. Distribution of Jumping Worms (Family Megascolecidae) in southern Ontario. https://www.eddmaps.org/distribution/viewmap.cfm?sub=91199

Hopton-Villalobos, J. 2021. Wash First: Successful Strategies for Replanting Natives. Florida Native Plant Society. https://www.cupletfern.org/articles/wash-first-successful-strategies-for-replanting-natives

Master Gardeners of Ontario. 2022. Invasive Jumping Worms – Information for Home Gardeners. https://gardenontario.org/wp-content/uploads/JWS-Information-for-Gardeners.pdf

McTavish, M. Pers. Comm. 2025. Formerly Postdoctoral Fellow with the Daniels Faculty of Forestry, now Conservation Scientist with rare Charitable Research Reserve.

Wagar, Beverley. 2025. “Mudding In” and other planting tips. 1000 Islands Master Gardeners. https://1000islandsmastergardeners.ca/2025/11/13/mudding-in-and-other-planting-tips/

RELATED:

Act Now to Keep Jumping Worms Out!

The Myth of Fragile Roots Planting Trees and Shrubs

Ayad, N. 2026. Why Earthworms aren’t always good for the soil. CBC Ideas episode. https://www.cbc.ca/listen/live-radio/1-23-ideas/clip/16206081-why-earthworms-always-good-soil-planet

Plant Myth Busters — Garden Edition

By Brandi McNeely, Master Gardener in Training

Every spring, when the soil warms and seed packets start calling our names, gardeners everywhere prepare for another growing season filled with hope – and advice. Lots of advice. From relatives to viral social media tips, it can feel like everyone has a “tried and true” gardening trick to share. But not all advice is rooted in fact. Let’s dig into some common garden myths.

Treated wood is toxic for vegetable gardens

This advice used to be true. Using railway ties treated with creosote or pressure treated lumber that contained arsenic-based preservatives could introduce harmful chemicals into your soil. Fortunately, since 2003 pressure treated wood in Canada now typically uses a copper based preservative called Copper Azole. This compound is generally considered safe for building vegetable garden beds. Don’t be afraid to shop at your local lumber yard or big box store when designing your garden.

Read more here: https://woodpreservation.ca/wp-content/uploads/2021/09/BulletinTreated-Wood-In-Raised-Bed-Gardening.pdf

Watering in the afternoon burns plants

If this was true, we would all be in trouble when it rains! The truth is, there are benefits and drawbacks to watering at certain times of day. Watering in the early morning allows plants to use available water before the heat of the day hits. Watering in the evening can allow water to sit on leaves for extended periods of time, encouraging fungal growth. Watering in the afternoon can be more wasteful as some water will evaporate instead of reaching your plants’ roots. So when should you water? When your plants need it. Early morning is best, but if your plants are thirsty in the afternoon, water them.

Read more here: https://wpcdn.web.wsu.edu/wp-puyallup/uploads/sites/403/2015/03/leaf-scorch.pdf

Planting Lavender repels mosquitoes

It’s true that some plants (lavender, lemongrass, citronella) contain natural oils that may repel mosquitoes, but they are only effective when their leaves are crushed and the oils are applied directly to your skin. Even then, the benefits are short lived. Just planting these plants in your garden does not show any real repellent qualities. They do, however, smell lovely to us!

Read more here: https://blogs.ifas.ufl.edu/news/2025/08/06/florida-experts-break-down-the-buzz-on-the-myth-of-mosquito-repelling-plants/

Companion planting solves garden problems

Okay, don’t freak out… I’m not saying that companion planting is bad. It’s just not a magical cure-all for garden issues. The three sisters method (https://parks.canada.ca/lhn-nhs/mb/fortgarry/culture/blog/soeurssisters) is a companion planting method that has been used by indigenous people for hundreds of years with real benefits. But planting basil next to your tomatoes to improve flavour? You might hear some anecdotal evidence, but the science doesn’t back it up. While some companion planting claims are exaggerated, some pairings can still provide indirect benefits, such as attracting pollinators or improving space use.

Read more here: https://www.gardenmyths.com/companion-planting-truth-myth/

Gardening is part science, part tradition, and a whole lot of
learning as you grow. While not every myth will harm your garden,
understanding the “why” behind common garden advice can help
you make more informed choices and grow with confidence. As
you head into the season, stay curious, keep asking questions,
and don’t be afraid to dig a little deeper. Your garden will thank
you for it.

Ten Things I Didn’t Get Done In Time

by Rachel Burrows, Master Gardener

In December, 2025, winter came in early with freezing temperatures and lots of snow plus a little freezing rain for good measure. I wasn’t prepared and some garden jobs slipped through the cracks. A few can still be done but alas it is too late for some of them.

Mother Nature has outwitted me again!

  1. I like to do a last weed through my perennial bed. Spring is always so busy and I find that a good fall weed keeps the weeds down and it is not such an arduous job in the spring.
  2. I like to spread compost on my beds in late fall. The worms do a great job of mixing it into the soil and it makes more room in the compost bins.
  3. Several bulbs didn’t get replanted after they were dug up when I was redoing the perennial beds. I was listening to Paul Zammitt on CBC and he suggested potting up these bulbs in containers with fresh potting soil. Cover these pots and put  in a cold, frost free area and bring them into the light in late winter/early spring. When I first moved to the Peterborough area, I had no garden to speak of, so I decided to pot up several containers of bulbs but failed to cover them. The mice and chipmunks thought that had won the lottery and ate every single bulb! Be warned! It is a job that I can still get done.
  4. My seeds need sorting out – what is still viable and what should be thrown or given to the birds. I still have time to do this.
  5. I like to dismantle my outdoor evergreen decorations and place them over tender plants. If this snow ever goes down, I could still do this.
  6. I have 2 large bags of leaves all ready in the garage ready to protect new shrubs and plants. For now, I just have to hope that the deep snow is doing the job.
  7. If I could get into my shed, I could sort out all the pots and recycle many of the smaller ones. Alas, the shed is snowed in.
  8. Every fall I clean all my garden tools, sandpapering any rust before oiling the blades and rubbing linseed oil into the wooden handles. Another job that I can still do. I did take out the battery from my lawn tractor and it is stored in my basement.
  9. I should have checked and repaired some of my trellis before growth starts in the spring.
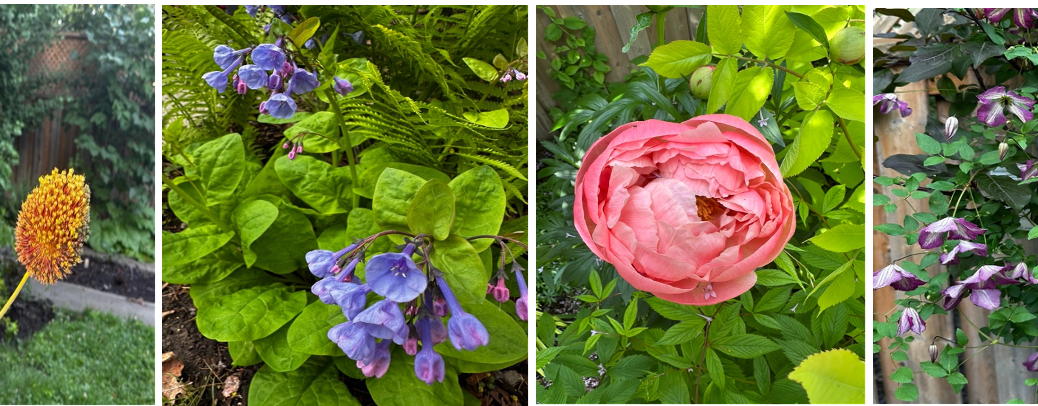
  10. I have had several amaryllis that I have had for several years. They spend the summer outdoors and come inside to my basement before the last frost. I did do this but forgot to put a couple of them under lights in time to bloom for Christmas. Oh well I will have lots of colour for Easter.

Now that the new year is here, I have no excuse for not doing as many of these jobs as possible.

Meanwhile, I am enjoying all the birds that come to my feeders. I even have a pileated wood pecker that pecks away at my suet feeder. Happy New Year!

Time for Reading Garden Books

by Christine Freeburn, Master Gardener

In this day and age, we spend so much time on our computers, googling all the information we want and need. But there is something about sitting by a sunny window on a cold winter’s day with a good book.

The winter months are a great time to pull out an old gardening book or invest in a new one. The days are now getting longer and spring is coming, but actual gardening is a few months away. Time to learn something new to help you improve your gardening skills. There are many good Canadian and zone appropriate books that can help you.

Below, I have listed a few of my favourite books on my bookshelf. I have also asked my fellow Master Gardeners to share their favourites. Some of the books are out of print, but check your local library, used book stores or online sites. Enjoy!

For the Houseplant Gardener

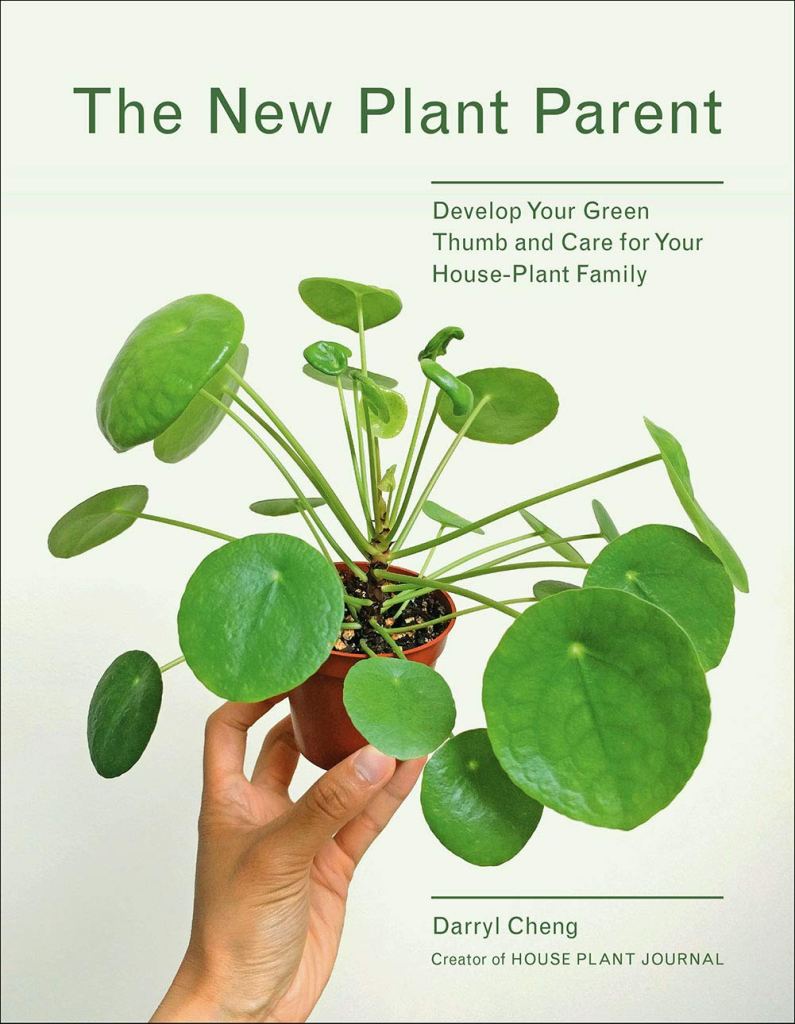
The New Plant Parent

Darryl Cheng gives advice that is full of common sense. He explains that leaves do die and plant care should be enjoyable, not a chore. He discusses basic requirements for healthy plants including the right light, soil care and proper watering. Great illustrations and nineteen plant varieties are listed in detail. Look for his newer books also.

For the Vegetable Gardener

Plant Partners

Companion planting has been around for years. Jessica Walliser gives us “science-based companion planting strategies” that help with disease and pests, improves soil and supports pollinators. Lovely illustrations throughout will have you dreaming of your next vegetable garden.

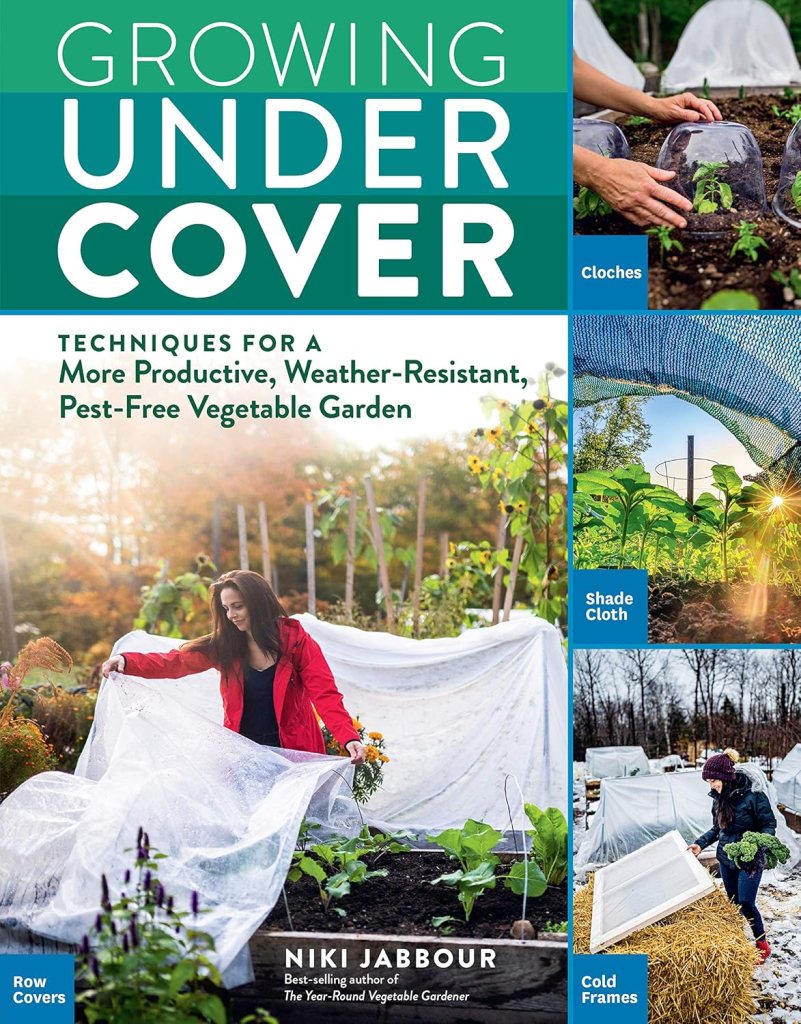
Growing Under Cover

Niki Jabbour is the Canadian half of the popular website Savvy Gardening (along with Jessica Walliser). She has several books out, but this one gives great information about how to reduce pests with row covers. Niki has several books out, so check them out.

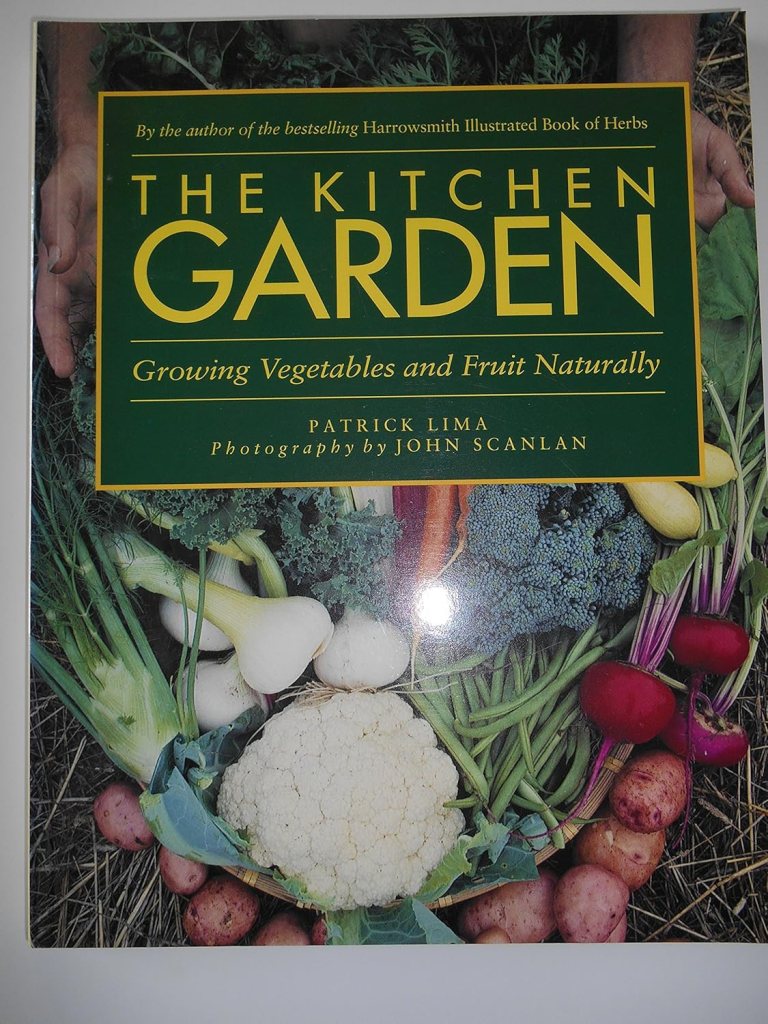
The Kitchen Garden

Peterborough MG Silvia Strobl first toured Patrick Lima and John Scanlan’s garden on the Bruce Peninsula over 40 years ago and was inspired by both their colourful perennial and productive vegetable gardens. Each spring, she still refers to this book’s excellent information to refresh her memory on time to sow, spacing, thinning, harvesting, etc. for the vegetable crops she grows! Unfortunately, this book is out of print, but you may find a used copy online.

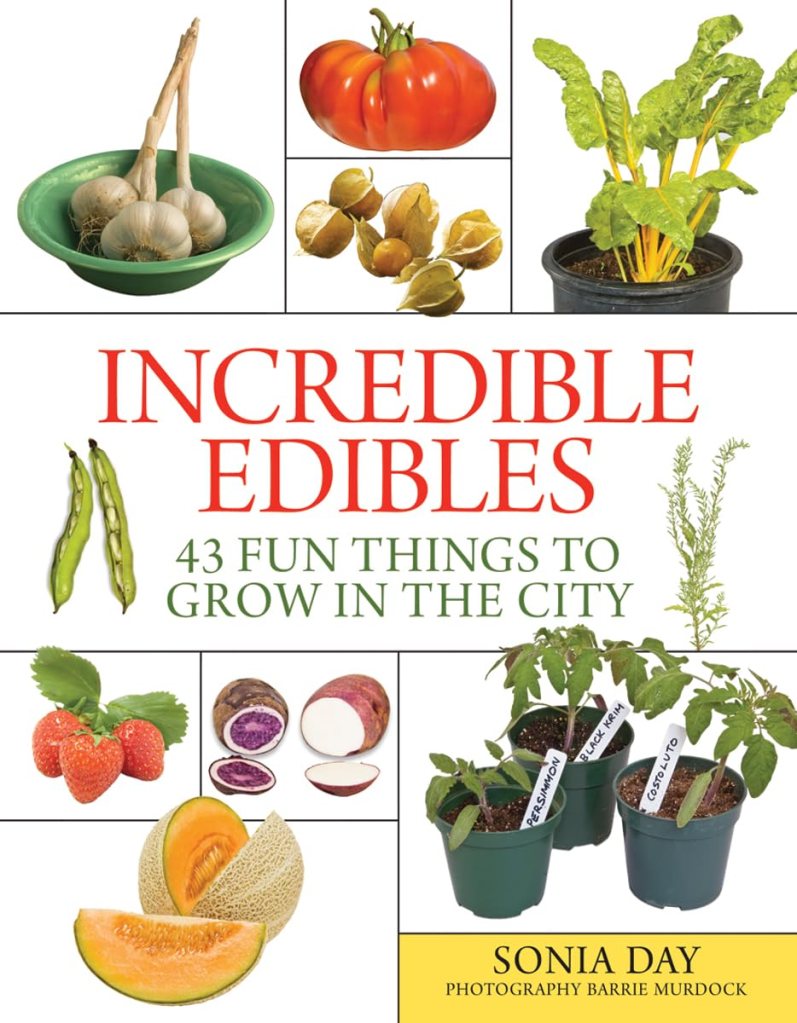
Incredible Edibles

This book by Sonia Day is recommended by Peterborough MG Deb Fraser. It is very basic for the beginner gardener. It answers when, where, how, as well as other questions for herbs and vegetables. She even gives a recipe for each plant. Another book that is out of print. Try used book sites.

Encyclopedia of Herbs, Spices & Flavorings

Deb also suggests the Encyclopedia of Herbs, Spices & Flavorings, a cook’s compendium by Elisabeth Lambert Ortiz. Originally British but published in Canada by Readers Digest, 1992. It is beautifully illustrated and very detailed about the origin of herbs, spices, oils, sauces, coffees and teas around the world. She details the origin of these, how to cook with them and a recipe. When the weather is frightful with a nice warm drink in hand it makes for interesting reading, perhaps planning to add a few herbs to your garden next spring.

For the Perennial Gardener

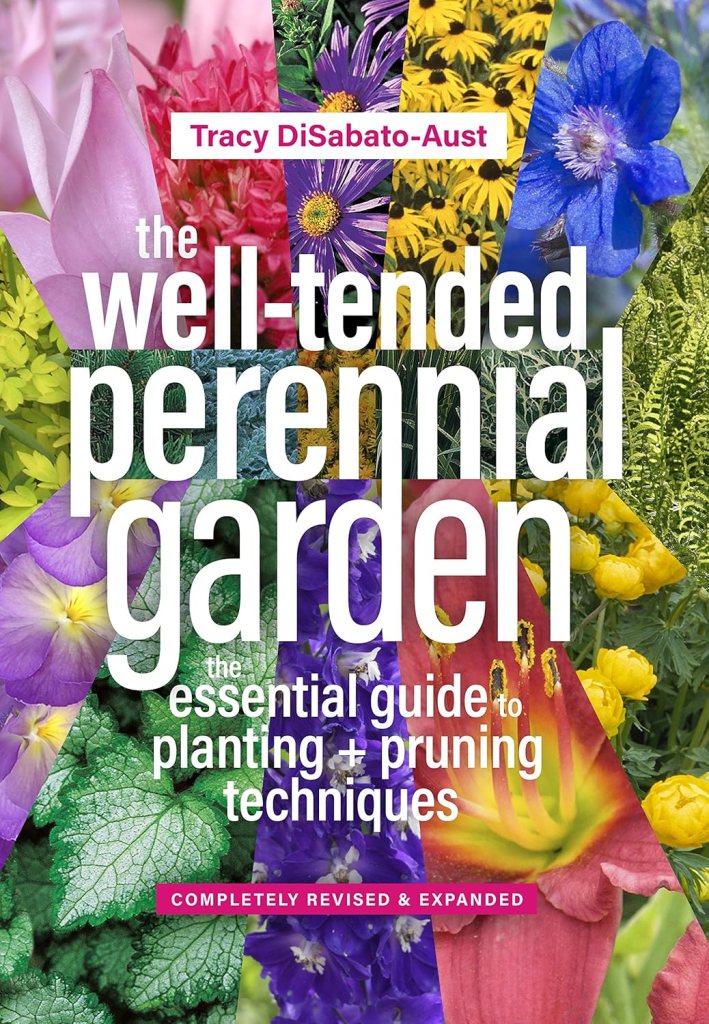
The Well-Tended Perennial Garden

Peterborough MG Gladys Fowler’s favourite book is the Well Tended Perennial Garden. Tracy DiSabato-Aust’s book has an extensive encyclopedia of perennial species and cultivars and she explains the maintenance and pruning needs of each plant. The explanations and illustrations are excellent.

For the Native Plant Enthusiast

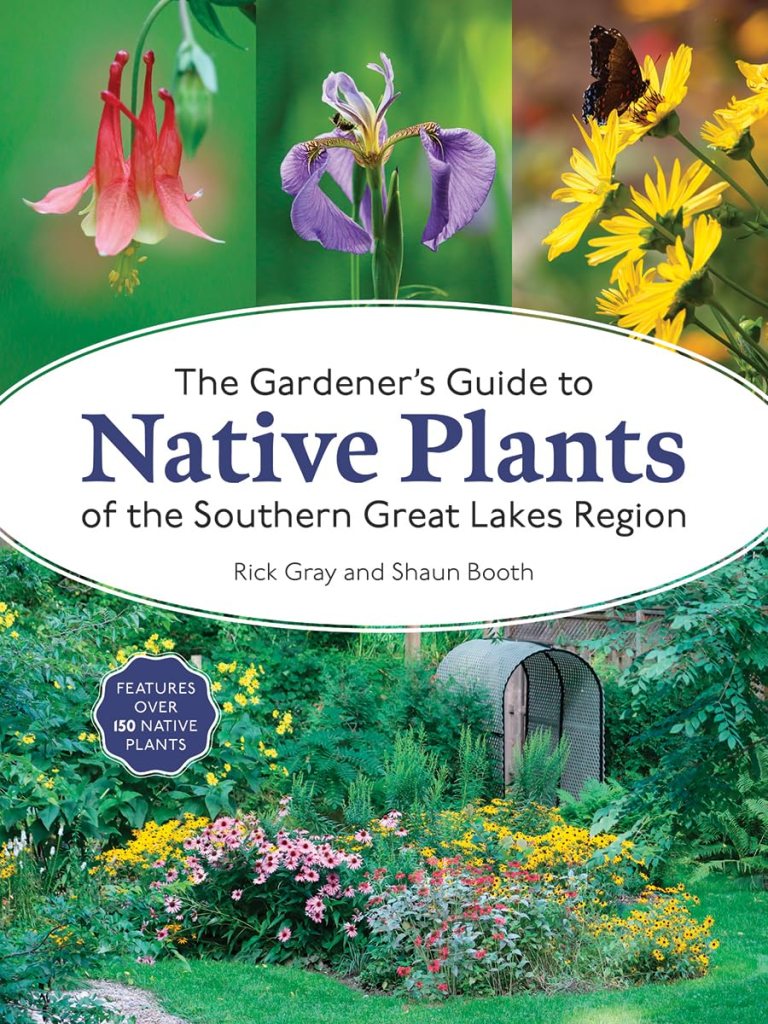
The Gardener’s Guide to Native Plants of the Southern Great Lakes Region

For Peterborough MG Emma Murphy, definitely this one on native plant gardening – for our region, gives everything you need to know about growing the plant, including propagation, wildlife value and what butterflies and moths it is a larva host for. For a full book review she did on Rick Gray and Shaun Booth’s book when it was published in 2024 click here.
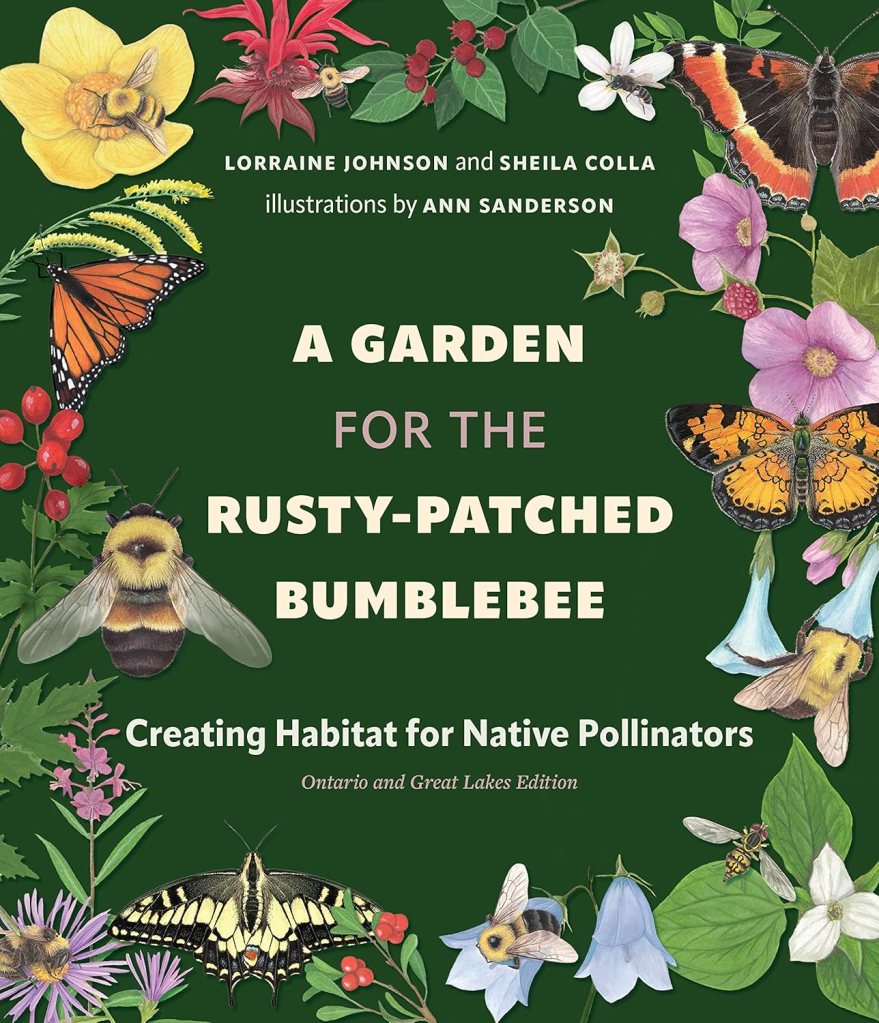
A Garden for the Rusty-Patched Bumblebee

Peterborough MG Sharleen Pratt says this book by Lorraine Johnson and Sheila Colla not only goes into great detail about Ontario native plants, vines, shrubs and trees, but it also encourages us all to think about the spaces we create so that pollinators can thrive.

For the Environmentalist

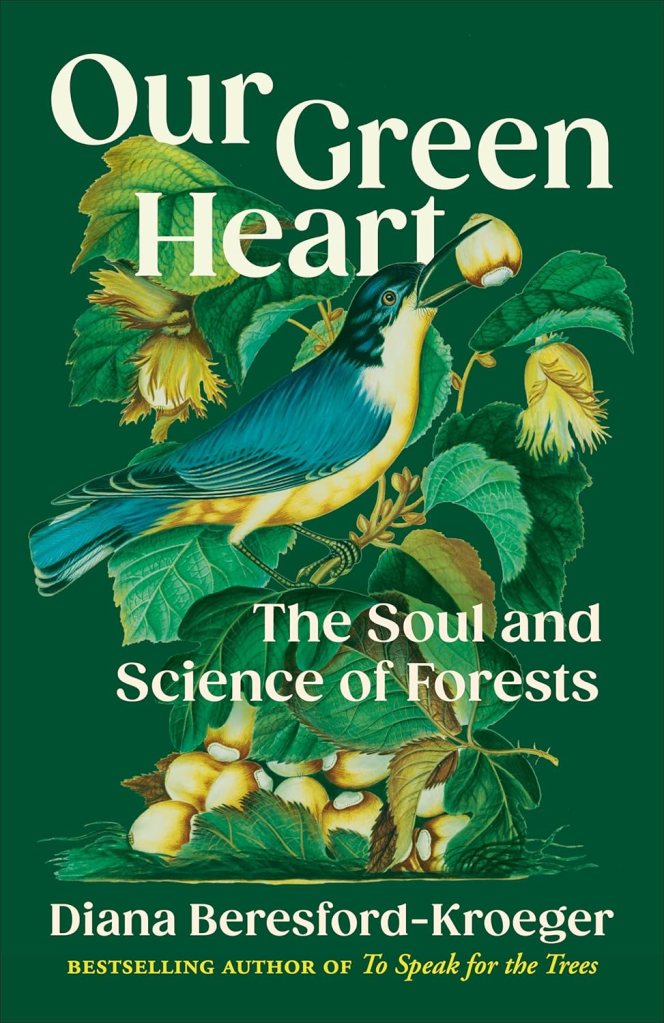
Our Green Heart
Peterborough MG Carol Ireland says it feels good to sit down and read something that requires absolute attention while at the same time causes you to make all the connections between what you are reading and the place trees have in the survival of our planet. This one by Diana Beresford-Kroeger is also on my reading list!

What is your favourite gardening book? What do you have on your list to find and read next? Eleven more weeks till spring!

Check out previous reviews on our website

Favourites From My Bookshelf

Four Great Books

Creating a Garden Journal

by Emma Murphy, Master Gardener

Full confession – I have never kept a garden journal. I have been given one from time to time as a gift, but I’ve never got round to using them.

This winter I’m thinking about finally using one (because my memory isn’t getting any better with age!) and because I’d like to record my gardening experiments in our main perennial beds year over year, as well as my experiences with native plants in my small native plant nursery in Lakefield, Ontario.

Keeping a garden journal is a valuable practice for both novice and experienced gardeners. It helps you document your gardening journey, learn from your experiences, and plan for the future.

So Why Keep a Garden Journal?

To Track Progress – A journal can help document plant growth, flowering times, and harvest yields to see how your garden evolves over time.

Record Weather Conditions – Noting temperature, rainfall, and seasonal changes that affect your plants will help you understand their influence on growth.

For Inspiration – A journal is a great place to document ideas, designs, and observations that inspire your gardening, serving as a creative outlet.

For Improved Planning – Use your past experiences to inform future planting decisions, such as choosing the right plants for specific locations.

Pest and Disease Management – It’s great to keep a record of any pest issues or diseases, along with effective treatments, to reference in the future.

For Budgeting Purposes – Keeping track of expenses related to your gardening supplies and plants allows you to manage your gardening budget effectively.

Some Thoughts on Creating a Garden Journal

I found some great ideas on how to have a successful garden journal.

Choose the Right Format – Decide between a physical notebook, a binder, or a digital platform that suits your preferences. You might want to keep several different journals – one for your vegetable garden, one for seeds etc. It’s up to you.

Include Essential Information – Record planting dates, plant names, care instructions, and observations on growth and health. This allows you to compare information year to year.

Photos – Incorporate photos of your garden at various stages, including bloom times and harvests.

Be Descriptive – Use descriptive language to capture your feelings and thoughts about your garden’s progress and challenges. Think about how your garden makes you feel during different times of the seasons.

Create Seasonal Sections – Consider organizing your journal by seasons or gardening phases (preparation, planting, maintenance, and harvesting) for easier reference.

Set Goals and Then Reflect – Write down your gardening goals for each season and include reflections on what worked well and what didn’t.

Add Design Elements – Include sketches or diagrams of your garden layout. Use colour, stickers, or drawings to make it visually engaging.

Maintain Regular Updates – Set a schedule to update your journal regularly, such as weekly or monthly, to maintain consistency. This is one thing I will have to do in order to successfully use a journal.

Experimentation Section – Dedicate a space to document any new gardening techniques, experiments, or plant varieties you try.

Review and Revise – Regularly review your entries to spot trends and adjust for future growing seasons.

Resources and Inspiration

Toronto & Golden Horseshoe Gardener’s Journal (now Canada Gardener’s Journal)
This journal has been reimagined for gardeners across Canada, providing tools, resources, and tips for successful gardening. Started by Margaret Bennet-Alder to aid Toronto area gardeners, in 2017 she transferred ownership to Helen and Sarah Battersby and now it’s run by Steven Biggs of Food Garden Life. (might make a great Christmas gift?)

Garden Therapy
This site has several articles about the importance of keeping a gardening journal and shares tips.
How to Start Keeping a Garden Journal (and Why You’ll Thank Me)
Keeping a Gardening Journal: Reflecting on Growth and Healing

Lee Valley 10 Year Gardening Journal
A very detailed 10 year perpetual diary, where each diary page is for one day of the year, and each page is divided into 10 sections. There is a diary, a section on gardening techniques, reference material, many charts, and places to record your inventory of perennials, a place to sketch etc.

DIY Garden Journal and Planner
Discusses the importance of a garden journal and provides printable pages and organizing tips. 

Purdue University – County Extension
Consider a garden journal – discusses the benefits of keeping a garden journal and what to include.

Penn State University – County Extension
Offers insights into Keeping a Garden Journal.

The Garden Continuum
Why a Journal is a Gardener’s Best Friend – explains the benefits of and tips for choosing the right format. This last link I found interesting as it explained the benefits of a digital vs hard copy journal.

“A digital journal can offer several advantages. First, it’s easily searchable so you can quickly find information on specific plants, techniques or projects. Second, you can easily add photos and other digital media to your entries, which can help you document your garden’s progress visually. Third, a digital journal can be accessed anywhere and from multiple devices so you can update it from your computer, tablet or phone. 

Writing by hand, however, can be a meditative and reflective experience, and it may help you to connect more deeply with your garden. Additionally, a handwritten journal can serve as a keepsake or heirloom that can be passed down through generations or to the future owners of your home.”

What I learned from my research on starting a garden journal (for this blog) is that you have to think about what YOU want to get out of your journal – inspiration, documentation, templates, a diary…whatever that is. So find a journal (or create your own journal) that meets your needs. If you find a great resource, please share it in the comments!

For now our garden in asleep for the winter, but it doesn’t mean we can’t start our journal and dream of springtime!

Understanding Garden Dormancy

By Mary-Jane Pilgrim, Master Gardener

Do you ever wonder what’s going on in the garden when temperatures drop below freezing? How do perennials, shrubs and trees withstand the cold and dehydration of winter?  As we prepare for the colder season above ground, a process of adapting to this change is also going on below ground.

What is Garden Dormancy?

Dormancy is a period of reduced growth in plants, allowing them to survive intense conditions such as cold temperatures or drought. During dormancy:

  • Trees and shrubs shed their leaves, reducing water loss and protecting against freezing temperatures.
  • Perennials retreat underground, focusing their energy on the roots rather than above-ground growth.

Dormancy is essentially a plant’s version of hibernation. Even though the plant may appear lifeless, it’s very much alive, just in a resting state.

Why Do Plants Go Dormant?

  • Survival Mechanism: Dormancy helps plants endure harsh conditions, preventing them from growing in unseasonal warm spells only to be killed by a subsequent freeze. 
  • Rest and Rejuvenation: It allows plants to rest, develop stronger root systems and trunks, and accumulate the energy needed for vigorous growth in the spring. 
  • Timing and Environmental Cues: Plants respond to environmental cues like shorter day lengths, decreasing temperatures, and reduced light to signal the onset of autumn and the need to prepare for dormancy. 

The Gardener’s Role During Dormancy

  • Understanding the Cycle: Gardeners learn to recognize the signs of dormancy and understand its importance for plant health and the overall garden ecosystem. 
  • Winter Protection: Proper care during dormancy, such as using mulch or wrapping to protect against frost, helps safeguard plants from potential damage. 
  • Be patient: In spring, don’t panic if some perennials take longer to re-emerge. Late risers like perennial hibiscus, Rose of Sharon and some ornamental grasses may take several weeks longer than others to show signs of growth.
  • Rest and Relaxation: Just like the plants in their gardens need rest, so too does the gardener. The slower seasons of fall and winter allow us to take stock of our gardens — what worked, what didn’t work, what needs to change — so that we approach next spring and summer rejuvenated!

Resources

Dormancy: A Key to Winter Survival

When Plants Go Dormant: How Hibernating Helps Them Survive

Understanding Plant Dormancy

Yes, You Can Still Plant Tulips!

By Christine Freeburn, Master Gardener

Unlike daffodils, which should be in the ground by Thanksgiving, tulip bulbs can be planted anytime from September until when the ground freezes in December. When you plant later in the season, squirrels are not as active, so may not discover and dig up your bulbs.

Planting in circles or groups rather than in a straight line is more pleasing to the eye.  Plant tulips in well drained soil at least 6-8 inches deep and 2-3 inches apart.

Hen manure is a good fertilizer and it will also deter squirrels. For 5 or 6 bulbs, dig your hole (digging that 8” deep will also deter squirrels), put in a couple tablespoons of fertilizer in the hole, place bulbs (one in middle with the rest around), cover with soil, pat firmly, sprinkle more fertilizer, cover bare earth with leaves or mulch (to disguise it from squirrels) and water thoroughly.

You can also use heavy wire to cover the area to keep squirrels from digging or place a board or rock over the area, removing it when the ground has frozen.

After your flowers fade in spring, you can cut back the flower stem but let the leaves die back naturally. This allows photosynthesis to continue, giving food back into the bulb so it will produce again the next year. Plant perennials close by so they emerge and hide the tulip leaves as they decline.

There are thousands of different tulip varieties in many colours, shapes and sizes. Below is a list of some of the main tulip varieties with their characteristics.  

NOTE: Don’t forget our first ever Peterborough Master Gardener Spring Blooming Bulb sale still has tulips (and other beautiful spring bulbs) available. Click here for more information and to order! Pickup is in Peterborough.

Single early tulip

Single Early     

  • blooms in cooler weather with daffodils              
  • cup shape with 6 petals
  • average height of 10-18 inches
  • live for 3-4 years
Single late tulip

Single Late

  • also called Cottage tulip
  • tallest varieties standing 18-30 inches tall          
  • bloom when temperatures warm           
  • long lasting blooms but shorter life
Double early tulip
Double late tulip

Double Early and Late

  • also known as Peony tulips because of their multi-petaled structure       
  • can be early or late varieties     
  • blooms can be 6 inches on 10-16 inch stems     
  • sensitive to rain and may flop
  • shorter lived type
Darwin hybrid tulip

Darwin Hybrid

  • cross between Fosteriana and late blooming single tulips
  • tall sturdy stems 22 to 34 inches                       
  • large blooms    
  • perform year after year
Triumph tulip

Triumph

  • sturdy stemmed variety growing 16 to 24 inches tall       
  • cross between single early and Darwin  
  • blooms mid season      
  • edges on petals are often a different colour        
Parrot tulip

Parrot

  • vibrant colours and feathery or ruffled petals      
  • long stems and large blooms make them tend to be more delicate          
  • tend to be later blooming
  • not long lived, but showy
Fringed tulip

Fringed

  • also known as Crispii tulips       
  • nice frilly edges which can sometimes contrast with rest of bloom           
  • often late bloomers
  • will only live a few years
Fosteriana tulip

Fosteriana

  • also known as Emperor tulips    
  • early to mid season bloomer with big blooms and large narrow leaves     
  • perform year after year 
Greigii tulip

Greigii

  • also known as Turkestan tulips 
  • big colourful flowers tend to be on shorter stems
  • mid season bloomer     
  • leaves are streaked or spotted maroon  
  • perform year after year
Kaufmanniana tulip

Kaufmanniana

  • early to mid season blooming time        
  • blooms resemble waterlilies as they tend to open float in bright sunlight  
  • usually short stemmed, about 6 to 10 inches tall
  • perform year after year 
Lily flower tulip

Lily Flower

  • late blooming   
  • long pointed petals which arch outwards
  • 14 to 30 inches tall
Viridiflora tulip

Viridiflora

  • known as a green tulip for the green markings on the petals       
  • late season but long blooming
  • 16 to 24 inches tall
Rembrandt tulip

Rembrandt

  • variegated petals in deep purple or reddish streaks                    
  • 18 to 26 inches tall       
  • original cultivar no longer available, but you may find Rembrandt type
Species tulip

Species

  • known as botanical
  • smaller and shorter but prolific  
  • naturalize well  
  • perform year after year
  • squirrels do not dig or eat
  • (If you’ve read this far, this is my favourite tulip…long lived, squirrel-proof, multiply well)

References

Toronto Master Gardeners Gardening Guide for Growing Tulips

Best Tulips Guide