It was my sister that put the notion in my head that I would like a snag in my garden and the recent ice storm provided the opportunity. A standard Serviceberry cultivar was too broken to save but it left a reasonable and safe trunk for my smallish garden. It also left some small logs to tuck under shrubs.
Dead wood provides positive impacts to biodiversity as many beneficial species are on the search for dead wood. ‘Some of these species include cavity nesting birds and mammals, beetles, fungi and other plants and beneficial insects. Decaying wood positively impacts soil keeping your garden sustainable for years to come’. https://ecologicaldesignlab.ca/site/uploads/2024/12/04_good-garden-practices.pdf
Ecologically speaking a snag refers to a standing dead or dying tree, often missing a top or most of the smaller branches. A snag is also known as a den, cavity or wildlife tree. The following link (Ottawa Field Naturalists’ Club) provides an excellent description of the importance of wildlife trees to wildlife. They provide food, safe cavity nesting sites and platforms, roosting and denning sites, hunting perches, display stations and foraging sites for a wide variety of species. https://ofnc.ca/conservation-how-to/the-importance-of-snags-and-downed-logs-to-wildlife.
Safety first so have a certified arborist advise you on the appropriateness of a potential tree.
Photo: Top of the snag in author’s garden
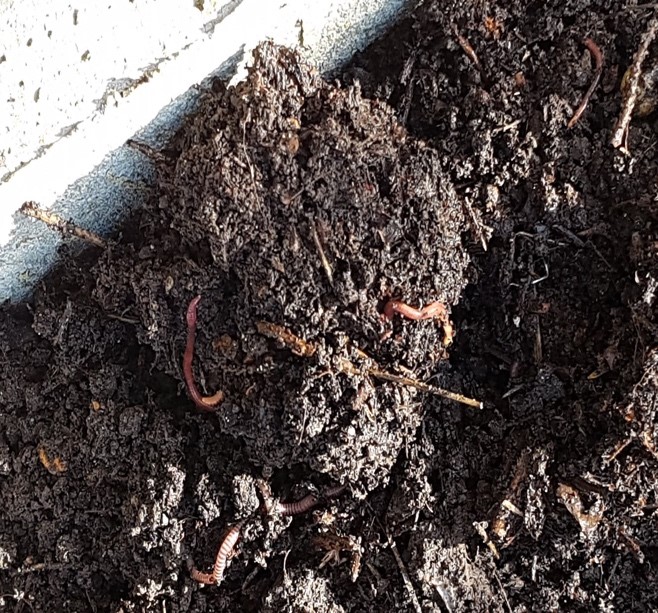
Dead wood that is lying in your garden is an excellent addition. It will be quickly colonized by natural decay fungi known as saprophytic fungi, my new word of the day! These fungi help recycle the carbon and nutrients stored in woody tissue back into the garden soil which benefits your plants. A small pile of logs can support many different insects and provide shelter for small mammals, reptiles and amphibians and shelter for over-wintering and hibernating wildlife. https://www.rhs.org.uk/wildlife/dead-wood-compost-heap-habitats This may not make everybody’s heart sing but I like the idea.
Photo: A favourite chunk of wood in author’s garden
The small snag I now have may be more ecologically beneficial as a log on the ground but I have some ideas for it. I plan on providing some support on it for a vine, maybe a Apios americana (American Groundnut). There will probably be a small birdhouse attached. The new logs have joined other decaying wood that I use as garden edging and garden decoration.
At times, these blogs seem a little like an Instagram Post. We show our successes in the hope of inspiring you and in turn, provide something of value to you. However, that can be a little intimidating to less experienced gardeners. Today, I thought I would showcase some of my 2025 failures (so far).
Lisianthus germination (or not)
Lisianthus
This one is a heartbreaker! In January, I had almost 100% germination of my lisianthus. A couple weeks after germination, they looked like this.
What happened? After reading somewhere that cinnamon prevents growth of algae, this grower overzealously applied cinnamon (I had purchased a large bottle at Costco). The covering of spice initially smothered some of the young seedlings. I then tried to rectify the situation by wetting the plants (cinnamon is extremely hard to wet).
The overwatering led to a slow decline, killing more seedlings by rotting the roots. All was not lost however, I potted up the remaining seedlings into other containers and they have been growing on. Hopefully they will catch up in size over the long growing season.
As Julia Child was fond of saying “everything in moderation….including moderation”
Bells of Ireland
Bells of Ireland
These seeds are notoriously hard to germinate. They need to be stratified by exposing the seed to cool, moist conditions to help to break dormancy. The seed is placed on moistened paper towel that is then folded and placed into a Ziploc bag. Then placed into the fridge for a couple of weeks. After that, remove to a warm place (I use a heat mat).
After a period of time, the seeds are checked for germination and placed on the surface of prepared soil. The daily checking goes on for a few days and hopefully you get enough germinated seeds. This years’ results speak for themselves. Hard to know what went wrong but it may be the seed source. My usual source (that does germination testing on every lot) was out of seed so I purchased from another.
Dahlia Splitting
Last fall I used a new method of splitting dahlias that saved time. I use flagging tape to identify the plants dug up and the tubers being stored. As the dahlia afternoon wore on, some of the tubers seem to get mixed up and the quality of the labeling seemed to decrease. This tuber might be a Ferncliff Copper and then again, it might not be. Note to self – Take a little more care with the labelling.
Forcing Tulips in Bulb Crates
Seemed like a great idea last October. I do not have a cool place that does not freeze so I opted to chill my bulbs in the refrigerator. Bulbs in paper bags went into the crispers of the fridge for over 14 weeks. During that time ethylene producing produce could not be kept in the fridge as ethylene can negatively affect bulbs and their bloom.
After the chill period, bulbs were planted in soiless mix in bulb crates and kept dark for a couple of weeks to develop roots. The crates were then placed in a sunroom to grow.
I got a total of 20 lovely tulips from about 150 bulbs. Other bulbs did grow leaves but produced no flowers, some did not grow at all. When I removed the bulbs from the soil, I did notice reduced root growth on many of the bulbs. This may be from inadequate chilling.
The crate method is clearly more successful when you can plant the bulbs up in the fall and place in a very cool spot that does not freeze (or a cooler like the flower farmer). Bulb crates full of soil is messy in the house even if they are on tarps!
Despite these hiccups, I have a roomful of healthy seedlings and large landscape beds awaiting more garden gaffes.
In the words of Janet Kilburn Phillips “There are no gardening mistakes, only experiments.”
Having just come back from places where tropicals are growing wildly and flowers are blooming, I wanted to discuss growing zones and the importance of knowing your zone for overwintering plant success of perennials, trees and shrubs.
Plant hardiness zones can be a confusing subject. In Canada, we generally use the USDA (United States Department of Agriculture) system because it is the one we often see on labels of the potted plants we purchase at greenhouses and big box stores.
The USDA system was designed in 1960, updated in 2012 and again in 2023. These hardiness zones are determined as “geographic areas that have an average annual minimum temperature of a certain degree.” No other factors are taken into consideration. There are 13 zones with zone 1 being the coldest and zone 13, the warmest.
Natural Resources Canada has their own system which uses factors that include the number of frost free days, amount of rainfall, snowfall, and wind as well as mean temperatures in the coldest and warmest month. There are 9 zones. Interestingly, Ontario has 7 of these zones.
To complicate things further, there are also ‘a’ and ‘b’ zones. Zone 3a is colder than Zone 3b.
When you look at the government of Canada site, you will see zone dates from 1961-1990 and then an update of 1981-2010. In most cases, zones have moved by at least half a zone. In 2024, Natural Resources Canada was to release an updated version. At press time, I did not find an update.
Plants are described as being hardy to a zone #. If a plant is listed as zone 6, it will survive in Zone 6 or higher. If you live in Zone 4, and try to grow and overwinter a Zone 6 perennial, you will probably not be successful. You are better off to look at lower numbered zones from what your area suggests, to be sure a plant is going to survive and be robust.
Reading plant labels and buying plants that are zone appropriate will help you to have more overwintering success. You will notice on most labels the zone is the USDA system. The label may say “perennial” but look at the zone. A plant can be a perennial…..but only in Florida (Zone 8 or higher).
Other factors for overwintering success include snow cover, wind, and humidity. Snow cover is a great insulator, wind can cause windburn, humidity will help plants stay hydrated.
With climate change happening, our Peterborough area has changed from 5a to 5b which means our average annual minimal temperature has moved from -26.1C to -23.3C.
Below are some towns and cities and their current zones:
Bancroft – Zone 4a ( interesting to note, this zone did not change in the update)
Haliburton – Zone 4b
Port Hope – Zone 6a
Pickering – Zone 6a
Hamilton – Zone 6b
Thunder Bay – Zone 3b
Lakefield, Lindsay, Norwood, and Ennismore are all the same as Peterborough’s – Zone 5b
Things to Remember
Canadian and American systems are not the same. For instance, Zone 5 under the USDA system should be considered Zone 6 in Canada
You can stretch the zones, if you have a micro climate or spot protected from wind, good snow cover and a milder winter
So depending on your gardening confidence, you can stick to Zone 3 or 4 perennials for zonal success or be adventurous and try that beautiful Zone 6 perennial. Just remember to read your labels and check your zones.
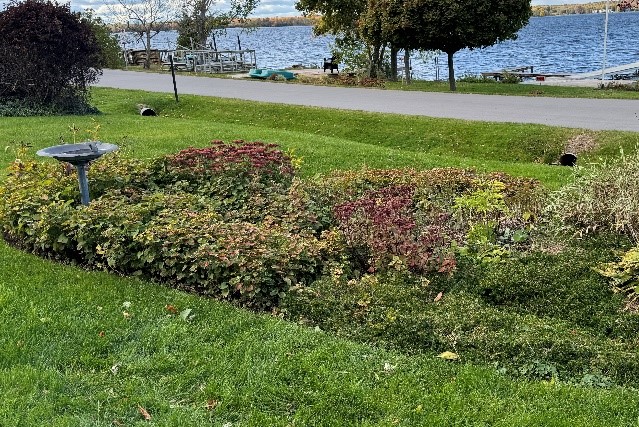
What else is there to do in February, other than shovel … so why not begin planning your spring gardening clean-up? In my last blog, I shared with you my invasive ground cover plight and promised to update you in the early summer with my progress on eradicating and controlling the many species on my property. But I didn’t share with you the whole story – that in my excitement over my new home, I failed to look at the overall state on my gardens … more specifically my shrubs. It would appear that the previous homeowner planted somewhere between 20-30 shrubs about 17 years ago … and then forgot about them! So in addition to my “ground cover grievances”, I also have some “bothersome bushes”! Let me share with you my plan-of-attack to address overgrown flowering shrubs in my garden using a few examples that you will recognize.
Although pruning supports the growth of healthy and robust plants, it is one of the most inconsistent and often poorly executed garden techniques. Pruning is not only essential to maintaining plant health, but also an essential practice used to improve the quality of the plant (e.g. flowers or yield), “train” plants (shape and structure), and control their size. Perhaps the reason that pruning is avoided by many gardeners is because proper pruning takes careful planning and execution; knowing your plants growth patterns and life cycle will determine pruning time and technique to be used. The general rule of thumb, as you likely know, is that if the shrub blooms in the spring (e.g. common lilac, bridal wreath spirea, some ninebark), then most likely the flowers bloom from buds formed on last years’ growth. Therefore, pruning after flowering enables new growth to become established in preparation for flowering the following year. In contrast, most summer blooming shrubs (e.g. hydrangea, hibiscus) will flower on “new growth”, therefore they require a late winter/early spring prune to stimulate new growth for flowering in the same year.
In general, your garden pruning is undertaken as follows
Step 1.
Create a pruning plan based on each shrub’s needs and growth habits. Include timing and any specific needs of the shrub and any notes you made from last year’s observations.
Step 2,
Sanitation pruning (removing dead, dying and broken branches) should be carried out on all shrubs in the spring and fall and as needed throughout the growing season, regardless of the flowering time.
Step 3.
Pruning approach. The approach will depend upon the objective. Thinning (removing older branches to their point of origin) is used to improve vigour by stimulating growth throughout the plant, as well as air and light penetration. This is most often done when the shrub is overcrowded. Heading back (pruning back to a lateral branch or node with an outward facing bud lower on the stem) is used to improve overall vigour and bushiness (by diverting energy to the new growth) and to enhance flowering.
However, given that most of my flowering shrubs are overgrown and will likely not produce as they should, I need to utilize additional (more drastic) pruning techniques as follows:
Group 1. Very overgrown, dense mat of old growth, minimal flowering and damaged branches/potential for disease.
e.g. Common ninebark (Physocarpus opulifolius), Bridal wreath spirea (Spirea prunifoloia), and Common Lilac (Syringa vulgaris)
Reserved for only the most neglected and problematic shrubs … Extensive Rejuvenation (or Renewal) Pruning! This technique requires pruning the entire shrub down to 6-10” from the ground in the Spring and then pruning out ½ of the new growth mid-summer and heading back the other ½ of the new growth to encourage bushiness. Not all flowering Shrubs can tolerate this. If these shrubs show signs of disease, they will be removed.
Group 2. Flowers evident, branches spindly/lack vigour/bushiness.
e.g. Panicle hydrangea (Hydrangea paniculata)
Gradual Rejuvenation (renewal) Pruning. This method is intended to truly rejuvenate a plant, while maintaining its’ overall appearance, making it more attractive during the renewal process. The technique requires 3 years, removing 1/3 of the oldest growth each year.
Group 3. Shrub has foliage but limited flowering and stunted growth.
e.g. Rose of Sharon (Hibiscus syriacus)
Although a Rose of Sharon does not usually need regular pruning (unless to manage shape or size), it would appear that heading back would be beneficial to stimulate vigour, new growth and budding. It is likely that this shrub may also need some specific fertilizer in Spring to stimulate growth and bud formation or soil amendments to acidify the soil.
As always, stay tuned and in my next blog I will update everyone on my invasive groundcover and overgrown shrub approaches (what worked, what didn’t and what next)!!!
With the new year days away, resolutions for 2025 might be on your mind. Here are a few easy garden practices you might want to include in those New Year’s Resolutions.
Keep a record.
Have a file, record on your computer, write in a journal, put plant tags in a zip lock bag by year. Write on your tags the year & where you planted. It is important to know which hydrangea you planted, so if you need to research how to prune or how large it should get or if you want to purchase another, you will have that information. When you keep tags or record what annuals you plant, if it is something you want to repeat, you will have the exact variety when you go shopping the next spring. There are so many varieties of so many plants.
Keep things clean.
Disease is often spread through the tools we use. Have a pack of wet wipes in your tool box & clean tools after each use. Sharpen tools at the end of gardening season, so they are clean & ready to go in spring. Although you should use leaves as compost, don’t leave diseased plants in your gardens. Place them in your green garbage. Keep houseplant soil free of fallen leaves as well.
Keep yourself healthy.
Stretch before going into the garden to do manual work. Limit yourself to an amount of time that is good for you and your body and stop when your time is up….your garden will be there when you come back. Take your water bottle with you. Wear gloves & hat to protect yourself. Don’t work in the blazing sun…. bad for you & your plants.
Do your research.
Right plant in the right spot will give you more chance of success. If you plant a water loving perennial in a dry sandy spot, the plant will suffer or fail. Planting a tall annual at the front of your bed will obscure the pretty ones behind it. Use the internet, but make sure you are using reputable sites where knowledgeable gardeners are sharing good information. Look for articles written by Master Gardeners or university professors or scientists. Look for websites that end with “edu.” You can also contact Peterborough Master Gardeners online (peterboroughmastergardeners.com) to ask questions or check out what events we will be at in 2025.
Enjoy your gardens.
Remember, you garden because you get enjoyment from your hard work. Wander through your garden, peaking at the new sprouts coming up or the gorgeous flowers opening. Breath deep. Enjoy the birds, insects and wildlife that visit. Research shows that gardening and being in nature help our minds, bodies & souls.
Happy New Year! From Peterborough Master Gardeners
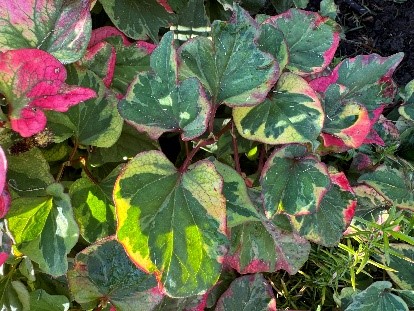
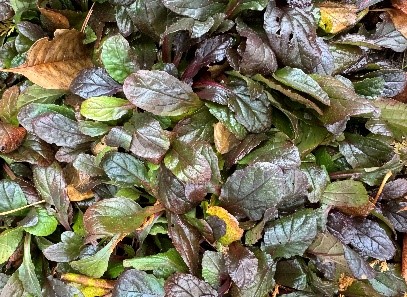
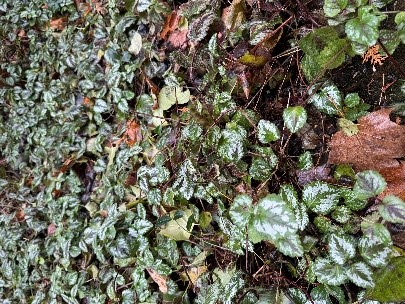
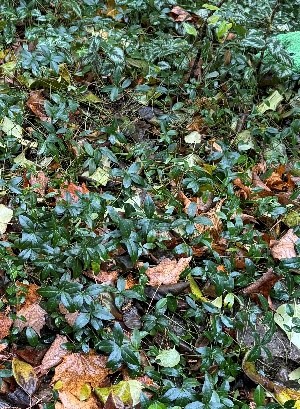
When I recently purchased a new home, I was too preoccupied with the beautiful lake view to truly notice some of the gardening challenges that lay ahead for me. Once I began the process of itemizing what garden treasures I had, I became acutely aware of the gardening style of my predecessor … a style that included utilizing ground cover plants to “fill in” raised beds … and apparently the faster they spread, the better!!! The challenge I have ahead of me is the removal or containment of numerous ground covers that have invaded every inch of the property. In this segment I will briefly touch on the management and/or extraction of 4 different commonly used ground covers that range from just “annoying” to outright invasive.
Although not considered invasive, Bugleweed can become problematic if left on its own without management, as it has a tendency to spread into adjacent lawn areas. I personally like the dark burgundy-red foliage, however, on my property it has spread across an entire garden and into the lawn. Bugleweed spreads through “shallow” underground runners with new baby plants popping up at the end of the runners. As a result, it is not impossible to remove nor contain. In the spring, I will be digging up the new plants all around the edge of the garden border and installing edging below the garden surface to stop the spread into the lawn. Periodic thinning (by digging up and removing some of the parent plants in the clump) will help to keep it manageable as well.
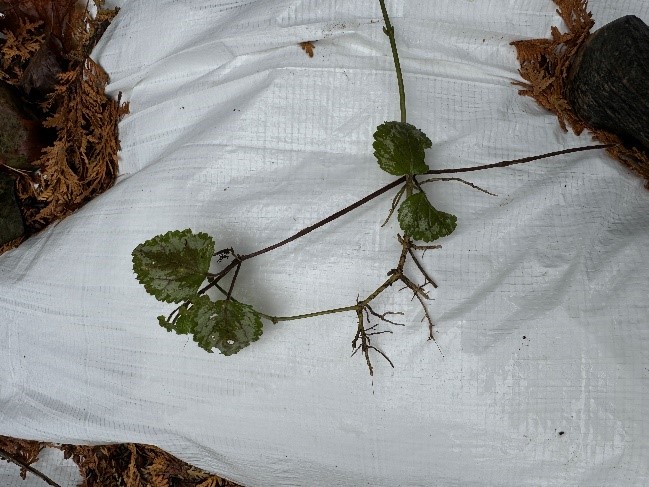
Yellow Archangel or Golder Deadnettle (Lamium galeobdolon):
Although Lamium is a common ground cover used in many garden applications, it is invasive in Ontario. It has infested natural areas and will out-compete native groundcovers in the wild. Lamium spreads by plant fragments, rooting along the surface on the stems (see photo below). However, it also can spread by seed which can then be carried into natural environments by birds. For this reason, I will be completely removing it from several of the large shade gardens on the property and replacing with native species. Luckily it spreads along the surface and can be removed by mechanical means. This will be another spring project in the garden and once fully extracted, I will begin investigating other options such as anemone, wild ginger, bunchberry dogwood and ostrich fern for the heavily shaded areas of the garden.
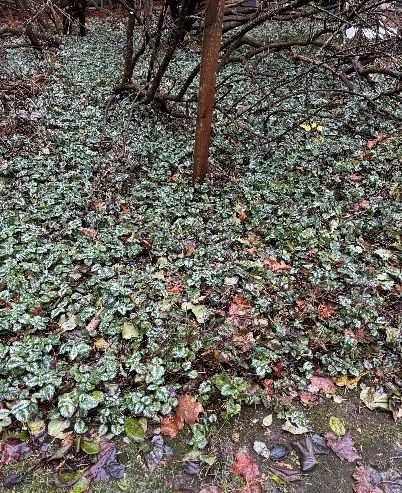
Periwinkle (Vinca minor):
Periwinkle is a very common shade groundcover used by gardeners. It is considered to be invasive as it spreads quickly given the right climatic conditions. It poses a threat to natural biodiversity as it can out-compete other forest understory plants. However, because it spreads by rooting along the stems on the surface of the ground (stolons), it can be contained through proper management of the plant. I plan to dig up the roots and plants and cut back the excessive amount of Periwinkle in the garden, interspersing it with other shade loving plants. This will require ongoing observation and management on my part.
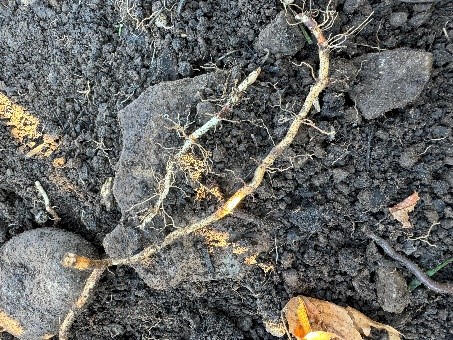
Chameleon Plant (Houttuynia cordata):
Avoid, avoid, avoid. Although an attractive groundcover, chameleon plant will invade your garden and lawn very quickly and became completely unmanageable. It is a non-native that spreads by a highly dense deep underground network of roots (rhizomes)(see pics below). Even a small segment of root left behind will live and spread for years to come making eradication very difficult. This fall, I began digging around the perimeter of the patch well outside of where the plant is visible on the surface. I dug down 12 inches and was still running into dense mats of roots!!! I then sifted through the soil to remove all plant segments and put the soil back. At this point I have just begun the process of eradication (Step 1) and will keep you posted on my progress in my blog next spring. If I need to resort to solarization (using the sun’s heat to kill the plants under plastic), then this might be the next step for me. Stay tuned!!!
If you are a fan of using plants as groundcover in your gardens and raised beds, proceed with caution. If it spreads quickly, filling in bare areas, then it is likely invasive at worst and hard to manage at best. Proceed with caution and be prepared to observe and manage the groundcover to avoid the situation where the plant literally takes over the garden, eliminating all other species. In addition, there are many native Ontario alternatives to the traditional groundcovers…try them out and enjoy (https://www.inournature.ca/native-groundcovers).
Five years ago I moved from a large rural garden outside Ottawa to a small urban lot in downtown Peterborough. One of the biggest changes in my gardening practice was making the switch from large, multi-bin composting to a single, small, black plastic bin. Over the years in my Ottawa garden I had developed a good system for adding kitchen and garden waste, turning the compost, adding leaf mulch, then spreading the compost over the gardens. Here in Peterborough, my small plastic bin was productive on a smaller scale but the raccoons, bunnies, and rats managed to chew through the plastic and serve themselves. It was more of a mess than a benefit. They defeated me. Thankfully, the municipal kitchen waste program kicked in about the time the racoons moved in, giving me a reasonable alternative for kitchen waste. My garden wasn’t getting much benefit except for the fall leaves that I mulched and put over the beds.
I realized that I really miss composting and I would prefer to be putting my own food scraps back into my garden. I started looking into composting systems for small spaces and came across bokashi composting. It’s not really composting, rather a fermentation process, and described as perfect for small spaces. Sometimes called a ‘pre-compost’ process, the fermented results are added to worm compost or outdoor compost where decomposition is completed. It’s also anaerobic so there’s no need to turn the compost or layer materials. The process is fairly fast, about two weeks for the initial fermentation step. Any kitchen waste, including meat, cheese, oil, can be added. Bokashi is a Japanese word meaning fermented organic matter; the practice originated in Japan.
The anaerobic fermentation process requires an accelerator, something like a starter for sourdough baking. It is often referred to as ‘bokashi bran’, the bran inoculated with microorganisms – fungi, lactobacteria, phytobacteria. It’s easy enough to put together a homemade system with a few 5-gallon buckets – one with a tight sealing lid – and other household items. One bucket should have holes drilled in the bottom; this bucket is placed inside the other; the holes allowing any moisture from the fermenting food to drip into the bottom bucket. Fill the top bucket with layers of small 2 – 3” kitchen scraps and bokashi bran until the bucket is almost full, cover and press with a layer of waxed paper, a cloth, or even some foam before sealing the bucket with the lid and leaving for a few weeks to ferment. After about one week some white mold with develop, after two weeks the bucket will smell like pickles and the fermented material can be buried in the garden about 6-12”deep. It will decompose fairly quickly in the garden and planting can be done around the fermented trough after a few weeks. Alternatively, it can be added to the compost heap or even into a large tub of soil indoors where it will continue to decompose. Any liquid – the ‘tea’ in the bottom bucket can be added to the compost or garden as well.
Bokashi bran is widely available online and at some garden centres; it’s also possible to buy a kit that includes bran, several buckets, and instructions. The buckets in the kits often have a tap and reservoir so the ‘tea’ can be collected at the bottom of the bucket. Like sourdough starter, the bran can be made at home, though some starters work more quickly than others. It’s worth experimenting to test a few products and compare results. I’ve learned that a few cities in western Canada have municipal bokashi programs so it is possible in colder climates. On a large scale, it is also being trialled at Sissinghurst, a famous garden in the UK.
The image on the left shows bokashi bran sprinkled on kitchen scraps.
The image on the right shows soil with fermented kitchen scraps after a few weeks in soil.
I confess to LOVING this time of year. The heat and humidity of the summer is gone, and our gardens are still looking lovely. Although my established gardens are beginning the slow process of fading and getting settled in for their winter sleep, fall is a wonderful time to plant for so many reasons.
They may not look perfect but they’ll be going to sleep soon and will wake up next spring in their new homes.
You Have Time
Unlike your annuals or tender perennials, most perennials (and native plants in particular) can be planted in September and well into October (depending on where you live in Ontario).
Smaller trees and shrubs in particular are fine to plant once they have gone dormant and leaves have dropped, as long as they are well watered until freeze up.
I love the fall as it seems less frenzied than the spring gardening season, with time to reflect on the summer that has passed. Unlike spring and summer, temperatures moderate during fall, not only for the plants but also for us! It’s terrific working weather – you start with your sweatshirt on in the morning, but by the afternoon the temperatures have warmed up considerably and you might be in a t-shirt. During July and August I can only work in my gardens in the early morning or late evening due to the heat. Your plants don’t like to be planted in the heat of summer either. So fall is my happy time.
Assessing and Dividing
Fall is the perfect time to look around your garden – do you have holes, bad-looking spots, poorly performing plants? Are there places that need something new or something moved?
I need to revamp this garden and think about moving some perennials around.
Fall is a great time to divide overgrown perennials, especially those that bloom in the spring. I just dug up all of my fragrant hostas the other day and moved them to a new location so that I can expand my shade native plant garden. Next up – planting a hedgerow.
Hostas at the front of the bed were removed to put in more native plants
Warmer Soil Temperatures
During fall, soil temperatures remain warm from the summer sun, so conditions are ideal for root growth.
Cooler Air Temperatures
Gone is the humidity and heat of the summer and the unpredictability of spring weather (and worries about frost). Daytime high temperatures are nice and there is less water evaporation from leaves.
More Rain, Less Work
With fall also comes more frequent rainfall and less need to water new plantings. There aren’t crazy swings in moisture levels – fall rains are warm and welcome and moisture levels are perfectly balanced, encouraging root growth.
When you plant in spring and early summer, the weather can be very variable, especially with regard to temperatures and rainfall. The soil is still cool, and plants take a while to get established.
Fall rains rejuvenate our gardens
Some Challenges
It can be challenging to plant new perennials in the fall – stock and selections at nurseries may be less (however the prices may be better!) and some plants have been sitting in plastic pots for months and look less than perfect. Be sure to purchase new plants at a nursery that takes good care of their plants over the gardening season (that generally does not include big box stores – shop local where you can) and pull the plant out and check for a healthy root mass in the pot.
Ideally, give your plants at least 6 weeks of optimal growing weather of fall before the colder winds start blowing in.
One Last Note
It’s a really good idea to add mulch to your fall gardening – it helps insulate the ground and maintains warm soil temperatures even during early winters. So, you are providing a nice warm area for young plants to establish their root systems before the frost.
A Special Note on Native Plants
They might look a little sad in the nursery, with not much top growth and it may be browning. However, under that soil are roots, lots of roots, and that is what you are buying when you purchase a native plant.
Although a bit brown on top, this native plant has great roots just ready for a new home.
So when you see a small three inch plant with roots coming out the bottom, recognize that it’s the perfect size to plant, and don’t worry about its ability to survive the winter.
Sleep, Creep, Leap
You may have heard the phrase “sleep, creep, leap” with respect to many plants, and especially native plants. Unlike most perennials, native plants just want to get their roots established during the first year (which is why they appear to ‘sleep’).
So if you plant in the fall, the roots are growing furiously, pushing south to grab moisture and nutrients to sustain them through the heat of summer next year. In the second year native plants creep, with more top growth and maybe even flowering. Watch out in the third year! They leap to their full size and blooming capacity.
So, if you can plant in the fall, the sooner your native plants can put down their roots in their new home, and be ready to grow in the spring season.
Bottom line? Fall weather is optimal for growth.
The perfect combo of warm soil temperatures near the root and cooler air temperatures on the top offer the ideal growing conditions for any new plantings or dividing existing perennials.
So get out in your gardens! (It’s also time to think about planting your spring flowering bulbs. Check out Master Gardener Cheryl Harrison’s excellent blog on how to do this.
Welcome to the second edition of Garden Jeopardy featuring a number of smaller native trees.
I do love trees and in my suburban garden the opportunity to grow multiple smaller varieties is appealing. The choices are many and discovering an interesting characteristic or benefit about a particular species inspires my choices. Hopefully this edition will be inspiring for gardeners looking to add more trees to their gardens this fall. You can confirm your responses at the end.
A shade-tolerant tree with smooth, blue-tinged bark and a fluted trunk sometimes known as ‘musclewood’.
A tree that bears white, showy clusters of flowers in June or July that develop into orange or red fruits that are persistant throughout the winter and much loved by birds.
A small evergreen tree that is resistant to insects and rot, rarely requires pruning and produces dark blue, berry-like cones that are a food source for Cedar Waxwings.
A species at risk tree for part to full shade that is a host tree for the Giant Swallowtail butterfly, the largest butterfly found in Canada.
An understory tree with branches in distinct layers that produces clusters of white flowers in spring, red leaves in the fall and is an important butterfly larval host.
A tough, adaptable and urban friendly tree with a distinct upright trunk, wide-spreading crown and the densest Canadian wood.
A tree bearing pea-flower shaped intense pink flowers in spring prior to leafing out, that is not native to Peterborough but will thrive here in a protected area.
An excellent Peterborough source for the aforementioned trees.
A bedraggled Giant Swallowtail in my garden.
What is the Blue Beech; Carpinus caroliniana?
What is the American Mountain Ash; Sorbus americana?
What is the Eastern Redcedar; Juniperus virginiana?
What is the Common Hoptree; Ptelea trifoliata?
What is the Alternate-Leaf Dogwood; Cornus alternifolia?
What is the Ironwood, Hop-hornbeam; Ostrya virginiana?
In the world of vegetable gardening, the fall garden starts about mid to late summer. This is an unusual time to think about starting seedlings or putting seeds in the ground for many.
Busy summer schedules, hot dry weather and maybe even lack of interest in the garden at this point in the year make the fall garden less popular. Perhaps gardening is not a project that’s high on your list in the middle of summer vacation.
Here is why I think you should do it anyway!
A chance to try some cool weather crops that don’t like the heat of summer.
Many fall garden vegetables taste better or sweeter in the cooler weather or after a frost.
Tasty herbs that can be enjoyed fresh and brought inside for winter.
Making use of available space after harvesting a summer crop.
Fewer bugs and weeds to contend with (in theory).
Helps the garden to look fresh and tidy and less like a shaggy jungle this time of year (if you’re anything like me).
How To Get Started
In general, you learn the first frost date for your area and count backwards based on the number of days your fall garden varieties need to reach maturity. In the Peterborough area, we can expect our first frost around the end of September or early October. This means there are about 40-50 days to work with from the day of this post (mid-August). Keep in mind, a lot of fall- friendly garden varieties can easily survive light frosts. This means you have more than enough time to grow some delicious food.
Here are some sources to help determine your growing zone’s last frost date:
Below is a list of plants that can be harvested 40-50 days from germination and tolerate light frosts. (The numbers can vary depending on the variety. Choose short season varieties if possible.)
Spinach
Lettuce (greens, not head)
Bok Choy
Cilantro
Turnips
Radishes
Green Onions
Mustard Greens
Swiss Chard
Arugula
This website has some more unique varieties to suggest:
Additionally, here are some vegetables that take longer to reach maturity but can also handle light frosts:
Carrots (70-80 days, depending on the variety – can be stored in the cool soil until snow comes)
Leeks (100-120 days – can be harvested as early as 60 days)
Parsley (60-70 days – these can be slow to germinate, so if you can find a plant, perfect!)
Some late season carrot seedlings popping up in the bed I recently harvested my garlic from.
You can also consider some cool weather crops with a slightly longer growing time by starting your fall garden a little earlier next year. Examples: Broccoli, Cauliflower, Cabbage, Potatoes.
Get Planting!
You can start your seeds in trays in a sunny window or sow right into the garden, outdoor pot, window box, etc.
Amend your soil with compost if you have it available.
Plant your seeds and water daily to ensure the seeds have a good chance to germinate. Decrease the frequency as sprouts appear.
Don’t forget to leave space to plant your garlic in the fall!
Trouble Seed Sourcing in Late Summer?
Use any extra seeds from spring.
Look for seed sales as companies look to clear out their seeds that can’t be sold next year.
Learn to seed save. It’s easier than you might think!
Allow your spring/summer plants to self seed. Ex. kale, cilantro, lettuce, spinach, etc.
Some kale seed pods from my spring plants that I can use for a fall crop.
A few trays of greens to go out into the garden for fall eating.