Category Archives: Perennials

Low Maintenance Gardening

By Marilyn Homewood, Master Gardener

Sound too good to be true??  Years of trial and error on a property with a (shallow) dug well has taught me the value of adequate bed preparation for long term success of the landscape garden that consists primarily of perennials, shrubs and bulbs (with the odd annual and biennial tossed in).  I have large landscape beds and could not keep up without some kind of strategy. 

It may seem somewhat discordant to be discussing bed preparation in July but a little planning and preparation can go a long way towards achieving a garden that requires less maintenance, is easier to work in, requires little to no supplemental water or feeding all while looking attractive. The solution lies under our feet. 

My beds have all been dug to a depth of 18 inches.  This one time initial dig allows for loosening of compacted earth, removal of rocks (or boulders) and generous amendment of the soil with organic matter such as rotted manure or leaf or mushroom compost. This preparation will allow plant roots to reach deeper into the earth (especially those with large fibrous roots or tap roots) where residual moisture is still available during drought. Plants will become more resilient and able to survive on the rainfall alone.  In my garden, I have not watered the landscape beds since they were begun with the exception for first year plants that are getting established.  In dry spells, the blooms may be somewhat smaller but are still found in abundance.   
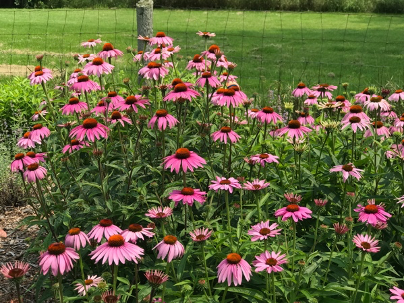
Coneflowers blooming well despite drought

The loosening of the soil also creates a better-draining soil makes it less likely that plants become water-logged or oxygen-deprived in those times when water is abundant.  This also minimizes loss of plants/bulbs to rot.   

The use of organic matter amendments helps the soil to retain the water that is provided by the rainfall by increasing the porosity of the soil.  And finally, an application of a thick layer of mulch (I use shredded bark) on the surface of the soil helps prevent evaporation of moisture from the ground and well as inhibiting the greedy weeds that will compete for moisture.
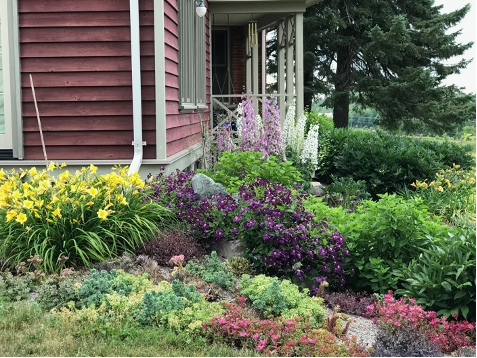
Second year delphiniums are 6-7 feet despite no water

Organic matter (OM) amendments provide a number of other benefits which ultimately gives healthy plants while saving us labour.  It enhances soil structure which increases the porosity of the soil leading to improved water infiltration, better drainage/aeration and help soils to resist compaction.  This makes soil more friable and easier for the gardener to work in as well as easing root penetration in the soil profile.  

OM helps to store and supply macronutrients (ex. nitrogen) and makes micronutrients (calcium, magnesium and potassium) available to the plant by increasing the soils’ ability to hold onto these elements (prevents leeching).  Also binds metal micronutrients (iron, aluminum, zinc, copper, manganese) and increases their availability to the plant.  All this means that your need for chemical fertilizers will be reduced or not required. 
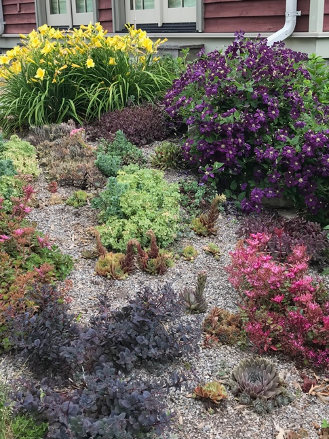
Despite my best efforts, I had to make a succulent only garden in a difficult spot

OM also enhances soil microbial diversity that assists in the suppression of disease so plants are healthier. 

Deep beds mean deep roots; improved soil structure means better drainage and water holding capacity; increased biological activity mean more nutrients released for plant use and microbial diversity means less disease.  The result is healthy, vigorous plants that need less watering, less additional feeding/supplementation and less treatment for disease. 

Resources: 

Cornell University Cooperative Extension, Agronomy Factsheet 41, “Soil Organic Matter”, http://franklin.cce.cornell.edu/resources/soil-organic-matter-fact-sheet 

Leslie Cooperband (2002), “Building Soil Organic Matter with Organic Amendments” University of Wisconsin-Madison, 

Lois Berg Stack (2016), “Soil and Plant Nutrition: A Gardener’s Perspective” University of Maine Cooperative Extension: Garden & Yard, https://extension.umaine.edu/gardening/manual/soils/soil-and-plant-nutrition/ 

Gardening in July

by Cheryl Harrison, Master Gardener

July is the month that I tend to really enjoy the garden….most of the work is done! The planting of seeds, and plants into pots and garden beds, dividing and thinning and garden creating is behind me for now. However, there are still a few garden tasks.

I try to keep up with weeding because weeds can quickly overrun your garden as they begin to set seed. Weeds take nutrients from the soil which your plants need and can smother out young plants. And I am one of those gardeners who enjoys weeding. I feel a great sense of accomplishment when I finish weeding a garden bed and when I pull out a weed and get the root….well that is simply thrilling.

Early July is a good time to trim back your annuals in order to encourage bushier growth and to trim off the spent blooms of your perennials to prevent seed production and allow the plant to put its energy into its roots. You may want to start fertilizing your potted plants because any fertilizer that was contained in the potting soil has probably been used up by now. There are lots of choices when it comes to fertilizers so talk to the staff of your favorite local nursery. They will be able to advise you and will likely carry the best products.

July is also the month when that garlic that you planted last fall is ready to harvest. We grow hard neck garlic that a kind neighbor started us on a few years ago. I removed the curled scapes last week and froze them for future use. I will keep an eye on the leaves on the garlic because when a few leaves have started to turn brown then the garlic is ready to harvest.

The rest of your vegetable garden may be starting to produce now as well. We have harvested some tomatoes already which is a bit earlier than usual for us. It is a good idea to check your vegetable garden daily so that you harvest and enjoy the results at their peak and to respond quickly to any issues that may arise.

I evaluate the appearance of my ornamental gardens in July. It is interesting to see if the garden looks the way that I had planned. I do not mean, “is it perfect” but how close is it this year to the feeling that I would like to achieve when someone walks through the gardens for the first time. I look at how the colours and textures work together. I ask myself if there are any bare spots or areas that I will need to renovate soon (eg. crowded and/or overgrown plants).

I am starting to plan my fall and next spring projects now. This year, two smaller gardens were joined and planted with mainly annuals for quick impact. I know that I plan to fill this garden with perennials and native woodland plants. This means keeping this garden in mind when I am shopping at the local nurseries.

Spring, and early summer, gardening can be a very busy time. July is the month to really enjoy your gardens and dream about what you might like to do next!

Peonies: The Stars of the Show at Present

By Mary-Jane Pilgrim, Master Gardener

Peonies are like the royalty of the flower world, with their lush petals and captivating fragrances. If you’re itching to grow more of these stunning beauties in your garden, you’re in luck!

Peony plants fall into one of three categories: herbaceous peonies, tree peonies, and intersectional/Itoh peonies (modern crosses between herbaceous and tree types). This article addresses the propagation of herbaceous peonies by seed and by division.

  1. Growing Peonies from Seeds: Starting peonies from seeds is like embarking on a rather long gardening adventure. First, collect ripe seeds from mature peony plants once the flower heads have dried. Give them a good soak in water for a day to help with germination. Then, plant the seeds in well-draining soil in a pot or tray. Cover the container with plastic wrap to create a cozy greenhouse effect.

Now, it’s time for a little winter simulation. Pop the container in a cool spot like your fridge for about three months. After the chill period, move the container to a warmer spot with indirect sunlight. Keep the soil moist, and be patient. It might take a while, but soon you’ll see those precious seedlings sprouting. Once they grow bigger, you can transplant them into individual pots or your garden. Remember, it may take a couple of years for them to bloom.

  1. Dividing Peonies: Dividing peonies is like giving them a fresh start and making more peony magic happen. Autumn or early spring is the perfect time to divide these beauties. Carefully dig up a mature peony plant, making sure to keep as many roots intact as possible. Gently shake off excess soil and look for natural divisions or “eyes” on the plant – these are the points where new shoots will emerge.

Grab a clean and sharp knife, and cut the plant into sections, making sure each division has a few healthy roots and eyes. Then, replant these divisions in well-prepared soil in a sunny spot. Give them a good drink of water and watch as they settle in and grow. Don’t be surprised if it takes a year or two for the divided peonies to bloom, but when they do, it’ll be worth the wait!

With these two propagation methods, you can expand your peony collection and enjoy a blooming paradise in your garden. Whether you choose seeds or division, the joy of growing peonies will reward you with breathtaking blossoms and a sense of accomplishment. Happy gardening!

Why are my Columbines Changing Colour?

by Emma Murphy, Master Gardener

Columbines (Aquilegia spp) are lovely perennials. I have had them in my garden for many years, and they always offer a pop of colour in the late spring/early summer garden here in Lakefield, Ontario.

These easy care perennials come in a variety of colours, shapes and sizes – most are bi-coloured, ranging from pastel shades to vibrant hues. Columbines have distinctive five-petaled flowers with long backward-extending spurs as pouchlike extensions of the petals, containing nectar. Sepals and petals are brightly coloured. The leaflets of the compound leaves are usually rounded and notched.

In my garden I have both cultivars and straight species (native) columbines, but it was a query on our Master Gardener of Ontario’s Facebook page about someone’s columbines changing colour from year to year that caused me to go down the research rabbit hole to try and find an answer for them.

What Did I Find Out?

Well, apparently columbines really like to hybridize with other columbines. They really do. They are also sensitive to their soil conditions and a number of other factors.

There has been some fascinating research done at universities like UC Santa Barbara (here and here). In one study they used two columbine varieties – red columbines pollinated by hummingbirds, and white or yellow columbines pollinated by hawk moths. Apparently hummingbirds prefer medium length nectar spurs (the ‘tails’ on the columbines), while hawk moths prefer the relatively longer-spurred species.

The study also noted that columbines can change from blue to red, then white to yellow. According to the researchers, the colour shift from red to white or yellow in columbines has already happened at least five times in North America.

So Why Do They Change?

There are several reasons why columbines change colours:

  • DNA mutation
  • Natural selection
  • Adaptive radiation
  • Hybridization
  • Changes in soil conditions

DNA Mutation

Based on the UC Santa Barbara findings, at least 34 genes produce different columbine flower colours. Because of the presence of various genes, there’s an increased likelihood that the colours will change simply due to gene mutation. It doesn’t happen because of creation of new genes, but just because of current gene mutation.

Natural Selection

In the studies and mentioned above, if most pollinators are hummingbirds, most of the columbine colours are red. However, when the population shifts and most of the pollinators become hawkmoths, there’s a potential for the colour to modify. The resulting blooms can be white or yellow.

Adaptive Mutation

Another concept explored in the study of the columbine colour changes is adaptive radiation, based on Charles Darwin’s Theory of Evolution, which assumes that living organisms change their structures to better adapt to the changes in their surroundings. For columbines, flowers develop new traits as a response to changes in their environment. In this case, the changes include the pollinators. 

Research shows that columbine flowers are tailored to the tongues of their pollinators, which shows an example of how they evolve based on their environment.

Hybridization

Columbine colour change can also be due to cross-breeding, when male and female parts are pollinated. The goal? Combining the positive attributes of two species, changing the physical characteristics, resulting in a better yield and disease resistance, among others. 

Hybridization can also occur non-deliberately – for example when we plant two columbine varieties near each other, this will often create colour changes from the original plants.

To prevent problem hybridization, especially with our native Eastern Red columbine (Aquilegia canadensis), the best thing you can do is plant the native species as far away from the cultivars as you can – not foolproof but an important thing to consider. Or don’t have any cultivars on your property, but that doesn’t guarantee they will stay the same as pollinators move from garden to garden.

Changes in Soil Conditions

It’s common for columbine colours to shift because of slight changes in the soil’s pH, as well as the presence or absence of metal ions in the soil. A pH lower or higher than 6.0 to 6.5 can result in nutrients being unavailable, which in turn can affect colour.

Our beautiful native Eastern Red Columbine (Aquilegia canadensis)

Colour change in columbines is a fascinating phenomenon, as you can see from my “rabbit hole research”.

But here’s the bottom line – if you want to keep your native columbines from hybridizing with cultivars you have to keep them as far away from each other as possible. If you like the idea of them changing colours (for a variety of reasons) just sit back and enjoy!

MORE READING

Sudden evolutionary change in flowers (2022)

Biologists discover a gene critical to the development of columbines’ iconic spurs (2020)

‘A Hopeful Monster’ (2022)

Dramatic diversity of columbine flowers explained by a simple change in cell shape (2011)

Where are the weeds?

By Mary-Jane Pilgrim, Master Gardener

I was honoured to be part of the Lakefield Horticultural Society’s Garden Tour last summer, along with fellow MG Emma Murphy. It was a glorious day, and I loved the wide range of people who came to tour — each with different backgrounds and gardening styles.

The one question I fielded more than once is “where are the weeds”?

First of all, what’s a weed? To me, a weed is a plant that is growing where it is not wanted. My weeds could be your prized “Lubauchnia” (my hubby’s fabricated word for plants he doesn’t know the name of, which includes most plants).

Disclaimer: I didn’t inherit a bunch of the nasty weeds as there were no gardens at my house when we bought it 32 years ago. I do deal with the nasties at my gardening clients’ homes weekly, though!

For plants that are growing where they’re not wanted in my gardens, here’s what works for me:

  1. Don’t wait — smaller weeds are easier to get rid of than larger ones. This applies to spring and fall when we’re often not as diligent in getting outside. Sometimes it seems like a full grown weed can appear overnight during those seasons!
  2. Use mulch — I love my leaf mulch, and it seems to be very effective in suppressing weeds. A chipper makes short work of a pile of leaves. Mulch also conditions your soil and encourages earthworms and microorganisms, a win-win situation.
  3. It’s especially important to weed BEFORE the seed heads develop — you’ll save yourself a LOT of trouble getting them early in their life cycle.
  4. Cut back perennials after they’ve finished blooming, and check for the inevitable “weeds” underneath.
  5. Weed when the soil is moist, so that the maximum amount of root comes with the weed. Weeding in dry/hard soil results in small pieces of the root being left behind, which can usually regrow. I rarely weed without my trusty Lee Valley Root Knife — loosening the soil around the root before pulling.
  6. Watch newly planted perennials closely, especially natives. If they send out runners or if they are very proficient at casting seedlings, they get “shovel pruned” at my place. You can do you at your place.
  7. Lastly, “know your garden“. The more time you spend out there, the fewer undesirable plants there will be.

Simple knife-in then pulling works well for most regular weeds. However, some types such as japanese knotweed, lily of the valley, bindweed, cow vetch, DSV or creeping bellflower will require more diligence as their mother-roots are buried deep underground. Eradicating those weeds involves a lot of deep digging, soil sifting, and extreme diligence. There are actually support groups on Facebook for those truly invasive plants. May actually be easier to move!

Weeds that contain viable seeds should be “solarized” — left in a black plastic bag on the driveway for a couple weeks. The heat will fry the seeds. Dispose of the bag in the garbage. Don’t put seed heads attached into your composter.

There’s a new thought process that suggests that repetitively cutting difficult weeds at soil level is more effective than pulling them. It’s true that if it’s done often enough, those roots will eventually die for lack of nutrient supply from any top growth — however the weeds are usually much more persistent than the weeders! I read that cutting bindweed every 2 weeks will still take multiple years to make an impact. Sigh.

What are your tricks?

Pruning Herbaceous Perennials “The Chelsea Chop”

By Marilyn Homewood, Master Gardener

As the spring bulbs fade and we move past our “last frost” date (or so we hope!), the perennials are starting to grow by leaps and bounds. This can lead us to consider ways to manage their size or bloom time. The Chelsea Chop is a method of pruning that limits the size of a plant, controls the flower season (which can assist in creating peak season bloom combinations) and often decreases the floppiness of a number of herbaceous perennials.

In England, the time for this type of pruning is carried out now which is around the same time as the Chelsea Flower Show is held, hence the name.  In our neck of the woods, timing would be most appropriate in late spring or very early summer when the plant has a fairly substantial amount of vegetative growth.  When I am going to do this, I like to have it done before the onset of our hotter, drier weather so that it does not stress the plant overly (on average by mid June).

Phlox chopped in front to extend blooming season

Plants that have received the Chelsea Chop are not as tall or leggy, so that they may not need supporting.  Flowers are smaller but are more numerous (removal of top shoots encourages branching of laterals).

It should be noted that you can not chop all summer blooming plants.  Woody sub-shrubs do not respond well.  If the spring has been dry, drastic pruning could shock your plants so a light hand is recommended in those years.

Many summer and autumn flowering perennials are good candidates for the chop.  These plants include:

  • Garden phox (Phlox paniculata)      
  • Yarrow (Achillea spp.)
  • Bellflower (Campanula spp)
  • Aster (Symphyotichum spp)
  • Coneflower (Echinacea spp)
  • Black-eyed Susan (Rudbeckia spp)
  • Upright Sedum Hylotelephium spp)
  • Penstemon (Penstemon spp)
  • Goldenrod (Solidago spp.)
  • Shasta daisy (Leucanthemum superbum)

This list is not complete.  Try experimenting with some of the vigorous plants in your garden.  I have a cultivar of catmint (Nepeta “Six Hills Giant”) that is large and spreading.  In one area of my garden, I prefer it to stand a little more to show the blooms to effect so I chop it back by about one third in the last week of May.

Nepeta more upright and floriferous due to chopping

The chop is done in two ways depending on the effect one desires.  In the first method, clumps of perennials are cut back by one third to one half.  This will delay flowering and keep plants shorter and more compact.  The second method involves cutting back only half of the stems on a plant, this has the effect of extending the flowering season over a longer period.  I commonly used the second method on my Garden Phlox keeping the plants in bloom for a longer time. Pruning can be done with sharp shears or with secateurs.  Garden shears are often faster when there is a large volume of pruning to be done.  Try out the chop and see if you can alter the form or flower of some of your favourites!

Resources

https://www.gardenersworld.com/plants/11-plants-to-chelsea-chop/
https://www.bethchatto.co.uk/discover/our-blog/guides/the-chelsea-chop-how-to-do-it.htm

Patience in the Garden

By Chris Freeburn, Master Gardener

When spring finally arrives, gardeners are outside daily looking for signs of life in our flower beds. Snowdrops, crocus, tulips and daffodils along with many other spring bulbs give us that pop of colour we have missed. Hellebores, primula, magnolia, Iris reticulata, lungwort are all beginning to bloom. Spring perennials like ground phlox, poppies, pasque flowers, daylilies are showing their green shoots and will soon be flowering. Bleeding Hearts, trilliums, lupins and salvia are all growing in leaps and bounds. 

Bleeding heart is well on its way

This past April, we experienced a week of abnormally hot weather that encouraged plants like peonies to jump up. Note to self – get peony rings up. The return to “normal” temperatures is better for all the plants. And it reminds us that spring is an unpredictable season and we can’t rush it.

As gardeners, we need to practice a bit of patience. We need to leave our gardens to thaw, give the soil time to warm up and give the overwintering insects time to awaken from the garden litter we are so excited to “clear up”. We also need to be aware that not all perennials show life at the same time.

Hostas show their poking dark shoots just as we are getting into the flower beds, so we need to watch when stepping around or moving mulch in those gardens. Perennial Hibiscus are probably one of the the later showing perennials that will look dead until mid June. Be patient! When Hibiscus decide to begin growing, they grow quickly, inches in a day. Lilacs are making buds and maples are leafing out, but hydrangeas are still looking asleep. Although early flowering clematis like Blue Bird and other group 1 types will be popping up, later bloomers with still be sleeping. Don’t despair. Be patient!

Hibiscus is very late to show growth

Grasses can also be deceptive. Cool season grasses begin to grow in early spring and have reached their best by mid summer. Karl Foerster, which is a Calamagrostis or feather reed grass is a well known cool season, zone 5 grass that grows 5′- 6′ tall. It likes sun, will take it wet or dry and tolerates poor soil. Overdam and Avalanche are two other feather reed grasses that will be showing green now.

Cool season grass

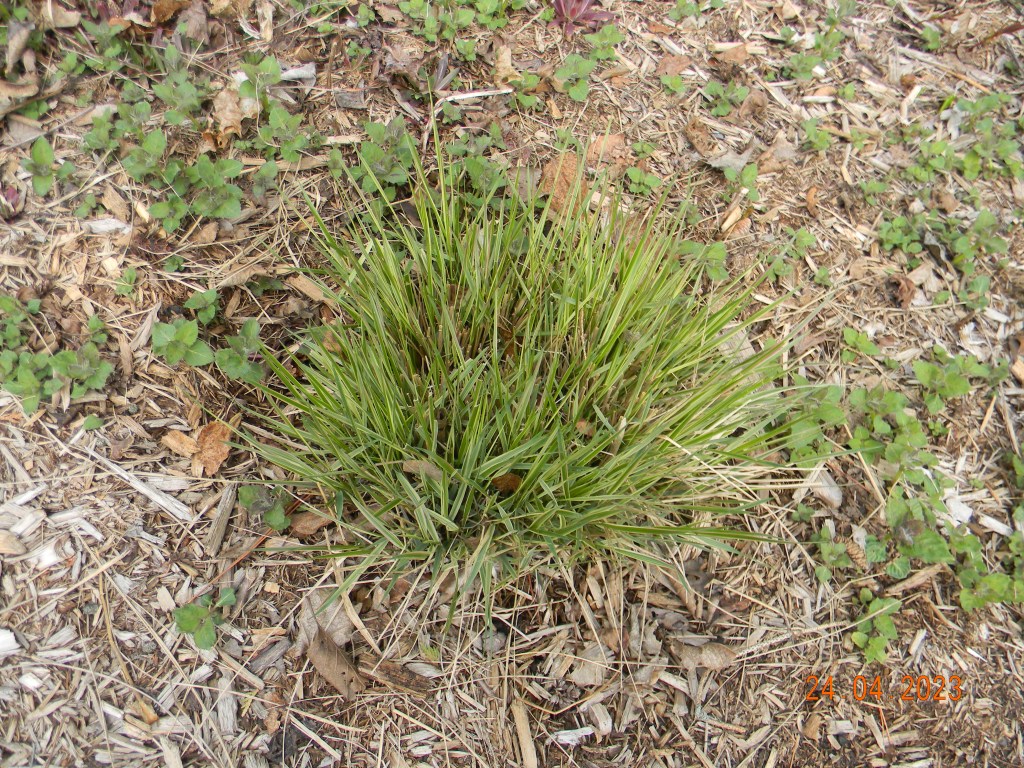
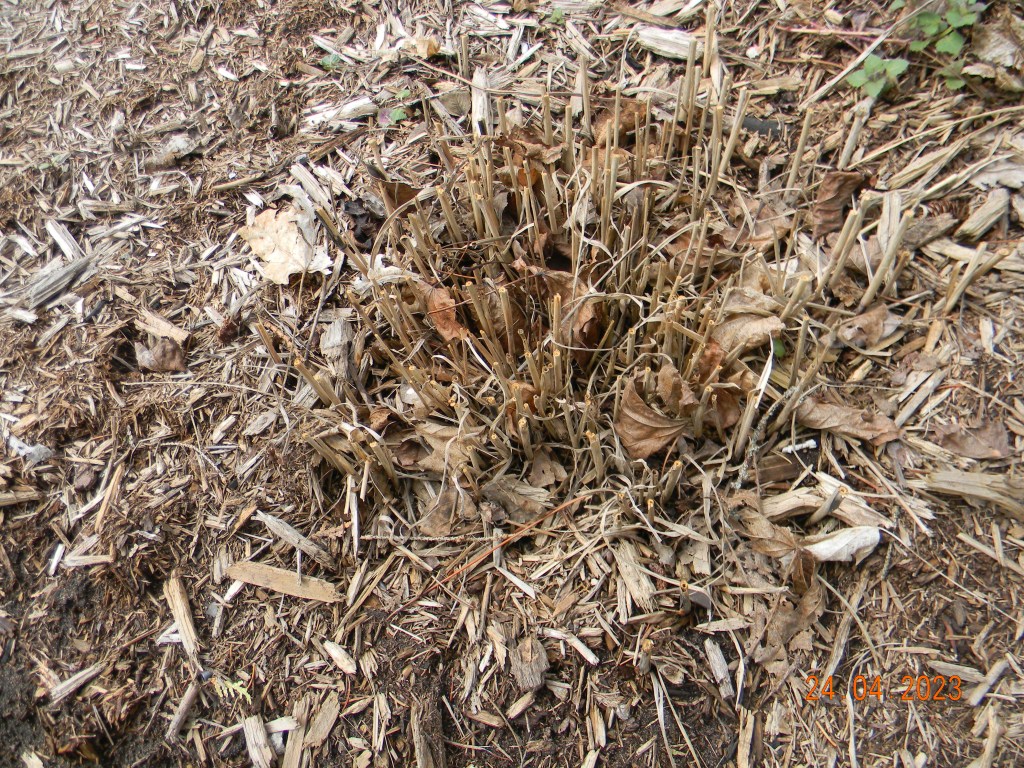
Warm season grasses do not come up until June and are at their best in fall. They will look dead until the weather warms up. Patience! Because they will not show green until later in the spring, you can plant warm season grasses behind other earlier growing perennials to hide their brown bottoms.

Warm season grass

Miscanthus grasses are warm season types and are available in different heights from 3′ to 8′ tall. Miscanthus sinensis & M. Sacchariflorus are classed as invasives, spreading by rhizomes and seeds. Other warm season grasses include Japanese Forest Grass or Hakonechloa, Japanese Blood Grass and Sedges. Panicum or switch grass is a warm season grass with many varieties native to North America. ‘Northwind’ is the most commonly know variety and it is drought resistant, will grow in any type soil and likes full sun.

Native grasses like Little Bluestem  (Schizachyrium scoparium), Big Blue Stem (Andropogon gerardii)  and Indian Grass (Sorghastrum nutans) are warm season grasses. These are beautiful additions to your garden, but will not green up until the weather warms.

May is the most active month in the garden. Sometimes we forget to enjoy the moments, slow down, breath deeply and have patience. New wonders will be happening for many days ahead. Enjoy them!

https://landscapeontario.com/perennials-in-bloom-month-by-month

https://www.invadingspecies.com/

The Matrix

By Lois Scott, Master Gardener

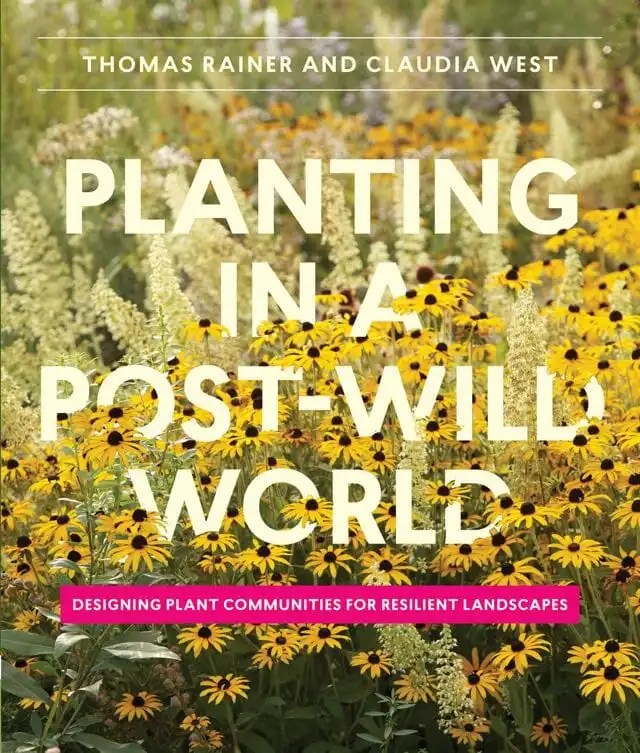
Planting in a Post-Wild World by Thomas Rainer and Claudia West, is a book described by Doug Tallamy as a how-to guide to sustainable landscaping.  The prescribed way to create this sustainable landscape is referred to as matrix planting, wildscaping or new American style.  Check out this link for a very good description of this type of planting.   https://www.hortmag.com/gardens/matrix-planting-garden-design

The book spends a lot of time describing ‘landscape archetypes’, design processes and site preparation etc., with the finished planting being a matrix or array of plants that thrive in related habitats with root systems that don’t compete.  Planting is done in layers using structural/framework plants (10-15%), seasonal theme plants (25-40%), and ground cover plants (50%).  Plant spacing is based on the mature width of plants and their growing behaviour.  This method usually requires a large number of plants so using ‘plugs’ is the most economical way of starting.  This style of garden does rely on some plants self-seeding to create a dense planting, so this may not be to everyone’s liking!

As an example, I have a stretch of garden along the sidewalk that I refer to as my ‘hell-strip’ and I have found few plants that have thrived there.  A boulevard tree that shaded part of this area was damaged last year and was taken down, so I can now use sun-loving plants that I have had success with in an adjacent area.  So, to translate that into what I might plant, I could use 25 Prairie Dropseed (Sporobolus heterolepsis) plugs as a ground cover plant, 15 Lance-leafed Tickseed (Coreopsis lanceolata) plugs as a seasonal theme plant and 9-10 Dense Blazing Star (Liatris spicata) plugs as a structural/framework plant.  Or maybe … ???  Isn’t that the fun part? 

The goal is to have a dense planting that will discourage weeds, be resilient, provide habitat, sequester carbon, reduce storm water run-off and to create a beautiful garden!

Divide to Multiply

by Marilyn Homewood, Master Gardener

Despite the lingering snow, the longer days and stronger sun tell us that spring is indeed here! With that we begin to think about all of the chores we wish to accomplish. Division of perennials is a common task. So why do we divide?

Division is a common means of vegetative propagation. It is an easy way to increase the number of plants you have available. Division is also required maintenance for some perennials in order to achieve maximum bloom year after year. Although a fairly simple process, there are a couple of considerations you must make.

Time of Year

Because successful division depends on the growth of new roots, the best times of the year to divide are spring and fall when the soil is warm, water is available and stressors are at a minimum.

Many perennials can also be divided during the summer months but high temperatures mean an increase in water loss. This leads to a stressed plant so extra care must be provided to ensure the plant remain well hydrated. Also, there are some ornamental grasses that only grow new roots in the spring. These plants should not be divided in the fall as they will not grow new roots that can take up water.

Method of Division

This will depend on the type of root and crown system the plant has. No matter the type of plant, keep in mind that each plant division must contain at least one bud or growing point and a few healthy roots. If you are unsure of the what you are dealing with, there is a link to a list from the University of Minnesota at the end of this blog.

Clumpers – These plants often have fibrous root systems sometimes with rhizomes but grow many smaller crowns at the base of the original each having its own root system. This often makes for easy separation with little tissue damage. Examples include ajuga, daylily and hosta.

Runners – These are plants that spread by covering the ground by shallow horizontal stems. They root along their nodes and send up new shoots making them easily dividable by separating the root ball. Examples include bee balm and goldenrod.

Tight, woody crowns – These plants are a little more challenging to divide as the buds are often tightly packed on a hardened crown. For best results the plant must be older when split to ensure that divisions with have growing points. Examples include baptisia and peony.

Thick rhizomes or tubers – Rhizomes are technically stems that grow underground. Divided sections must contain at least one growing eye. Examples in this group would be bearded iris and dahlia. These varieties should only be divided when dormant.

Tap rooted plants –These cannot rarely be divided unless multiple tap roots have developed and are better propagated by using root cuttings. Plants in this group includes oriental poppies.

Basic Steps for Division

  1. Dig out the plant. If not replanting immediately, protect from desiccation. Removing the plant from the ground can destroy tiny root hairs (responsible for water uptake). Protecting the plant means a faster recovery on the division is replanted. I often place the root ball in a plastic bag and place in a shaded area.
  2. Separate your plant into pieces using the most appropriate method. Make sure to take generous divisions of sufficient size to ensure growing points and healthy roots.
  3. Replant, digging hole wide enough. Roots like to grow out and down so give them enough space to spread out. Be sure that the soil has good contact with the root system by firming the soil then water the division in, slowly allowing the soil to further settle against the roots.

Resources

The Science Behind Plant Division

Divide and Conquer: How to Divide and Multiply Perennials

How and When to Divide Perennials

Table for Dividing Perennials

Winter Weeds

By Laura Gardner, Master Gardener

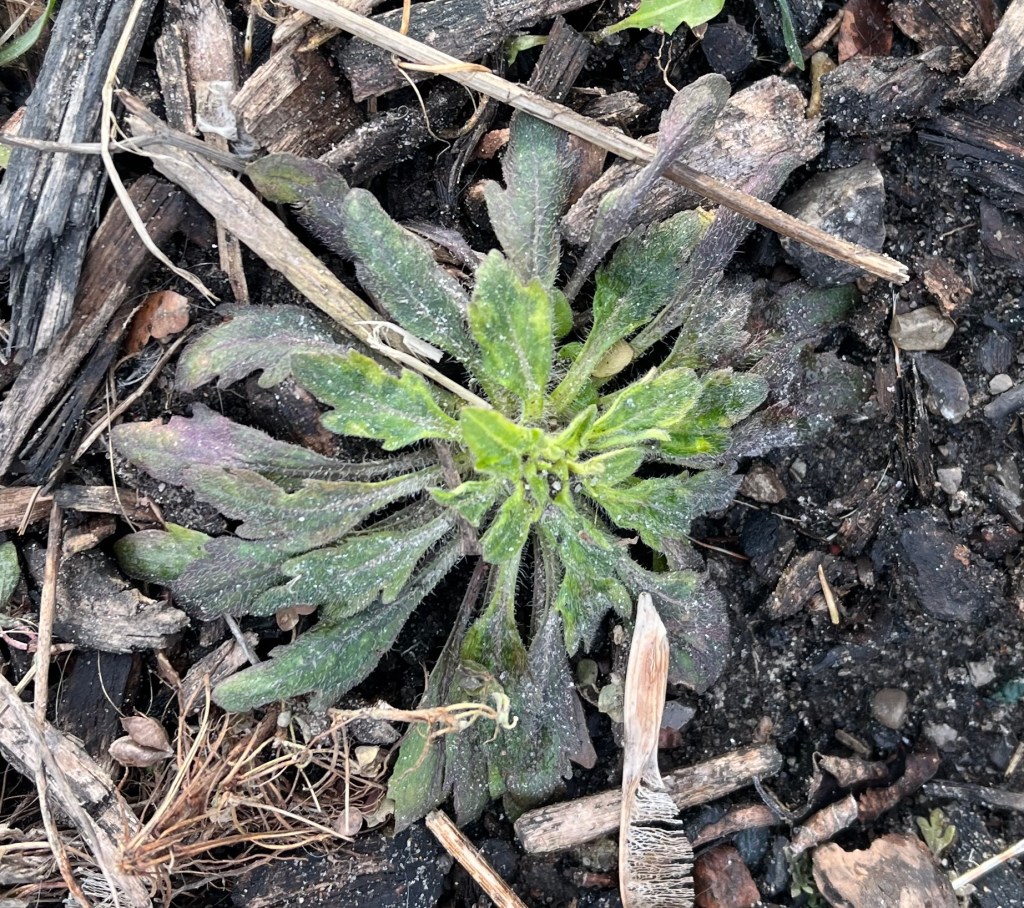
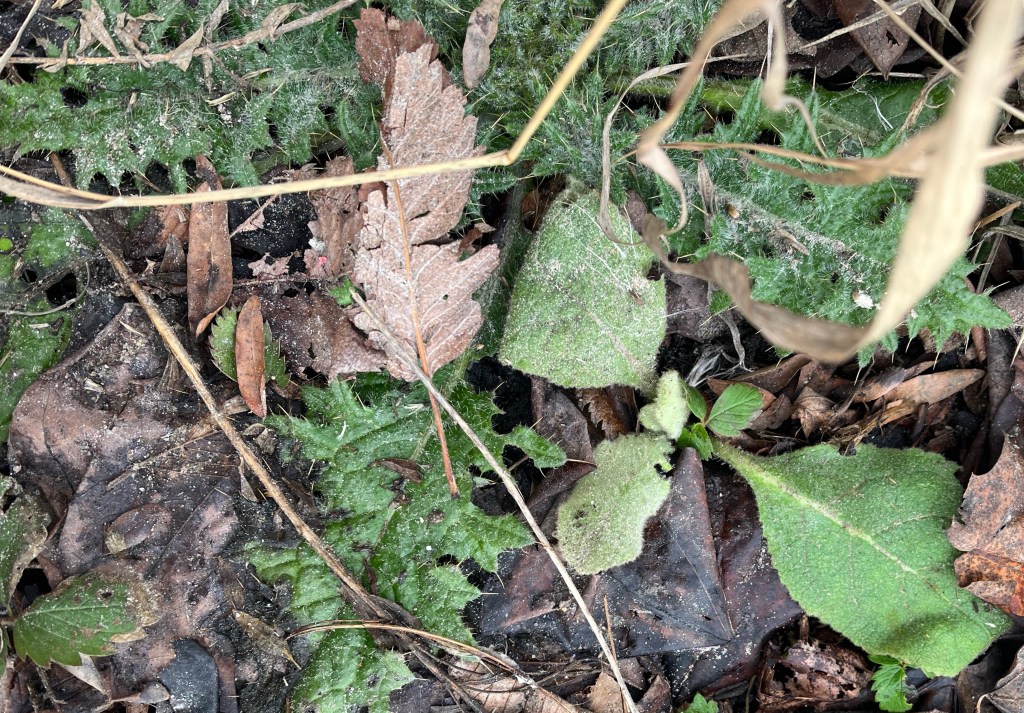
At this time of year there are two kinds of easily identifiable weeds: “winter annuals” and “biennials.” Biennials begin their lifecycle by germinating from seed in the first growing season. Winter annuals germinate from seed in the fall. They both form a vegetative basal rosette that lies in a suspended state over winter. The rosette protects what is known as the shoot apical meristem—stem cells of the plant that are responsible for the generation of shoots and leaves later in the spring. They will then grow more upright, flower, produce seeds, and then die, finishing their lifecycle. Some species may function as either a winter annual or a summer annual. Summer annuals germinate from seed in the spring and complete their life cycle that same year. One of the challenges of managing summer annuals is that they can reproduce more than once a year, potentially contributing to a large seed bank. Biennials generally take two years to complete their lifecycles. However, some so called biennial species may extend into subsequent growing seasons and be more like perennials if they have sufficient root energy stores and have not had the opportunity to flower and go to seed. This can happen if you do not remove at least the root crown of the plant when weeding.

In the Peterborough Public Library’s native plant garden, I took some photographs of some basal rosettes with the idea of identifying them later at home. Coincidentally, a copy of a book that I had on order for more than a year finally arrived: Weeds of the Northeast, 2nd Edition, by Joseph C. Neal et al. (Cornell University Press). In addition to the US Northeastern, Mid-Atlantic, and Upper Midwestern states, the book includes Southern Canada. In the 26 years since the first edition was published in 1997, more than 200 new species have been added. Many of these new species are invasive plants from the horticultural trade [e.g. Common Periwinkle (Vinca minor)]. It is strictly an identification guide and so if you are looking for weed management guidance, this type of information will need to be found elsewhere.

The book has a dichotomous key that is a bit different from others. It relies on identifying the plants through their vegetative parts such as leaf lobes, leaf arrangement, leaf margins, leaf hairs, etc., but not on their floral traits. It also does not lead you to an immediate single species identification, but rather enables you to compare your plant with several possible matches through their photos and descriptions. The photos are particularly valuable for identification purposes—showing plants in various stages of life—from seedling to maturity. The glossary is helpful for those that are unfamiliar with some of the botanical terms. This is a great resource for anyone to use to confirm the findings of a plant identification app.

Here are some of the weeds I found and identified using this guidebook:

Shepherd’s Purse (Capsella bursa-pastoris): A summer or winter annual.

Shepherd’s Purse (Capsella bursa-pastoris)

Field Pennycress (Thlaspi arvense): A Summer or Winter Annual

Field Pennycress (Thlaspi arvense)

Canada Horseweed (Erigeron canadensis): Summer or Winter Annual

Canada Horseweed (Erigeron canadensis)

Bull Thistle (Cirsium vulgare) and Common Mullein (Verbascum thapsus): Biennials

Bull Thistle (Cirsium vulgare) and Common Mullein (Verbascum thapsus)