Category Archives: Perennials

Winter Observations (in my Garden and Others)

By Laura Gardner, Master Gardener

That White Stuff has a Function

When a deciduous tree or shrub doesn’t have its foliage, other parts of the plant such as the stems and branches are more noticeable. For example, some species like this Manitoba Maple (Acer negundo) have a noticeable waxy cuticle or bloom on its young stems. This coating or layer acts as a defense mechanism that protects the plant from moisture loss, ultraviolet radiation, dust, fungi, pathogens, and insects. Concerning the latter, researchers found that a certain beetle species could temporarily lose its grip after its “tarsal setae” was covered with the wax stem crystals from A. negundo.[i] Research has also shown that A. negundo is able to regenerate the wax within only a few hours after its removal.[ii]

Waxy Cuticle of a Young Manitoba Maple (Acer negundo)

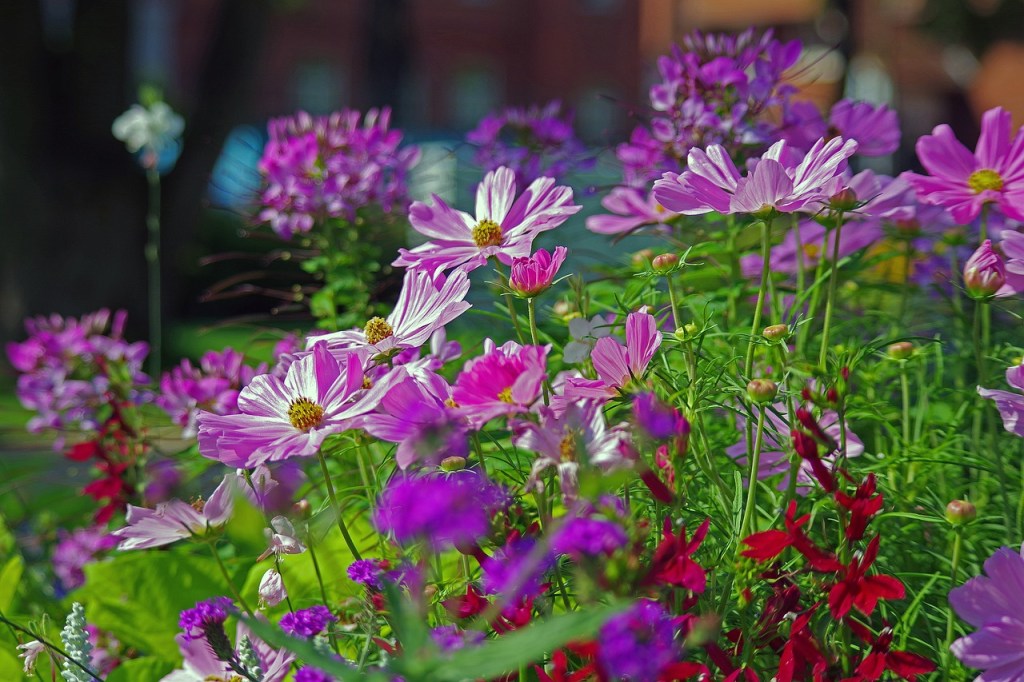
Dandelions in February?

I don’t remember the last time I saw a Dandelion (Taraxacum officinale) in my garden bloom so early in the year. Coltsfoot (Tussilago farfara) are usually the first yellow flowered plants to appear, but this one is clearly a Dandelion. From what I’ve read, it isn’t all that unusual. A researcher at the University of Western observed that “if there is a January or February thaw that lasts for at least a week, then flowering and seed production can occur.”[iii] This week’s mild temperatures caused the snow to recede by my walkway, unveiling a yellow bloom. It may be considered a “day-neutral” plant, but some also view it as a “short-day” species. “Day-neutral” species do not require a specific photoperiod to flower and “short-day” species flower with day lengths less than 12 hours.[iv] Its non-dormant seeds are also able to germinate at temperatures as low as 5 degrees Celsius.[v] In winter, they lie close to the ground as a basal rosette with the crown drawn towards the ground for maximum protection from the elements.[vi] More developed plants will have large energy stores in their tap roots to fuel more vegetative and flower growth in the spring.

Closeup of Dandelion
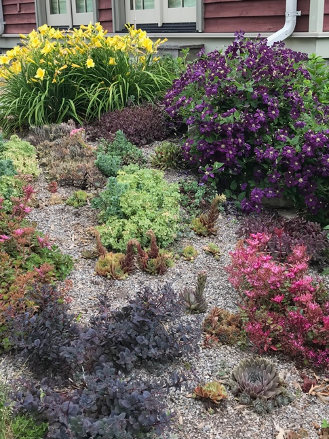
No Fall Cleanup

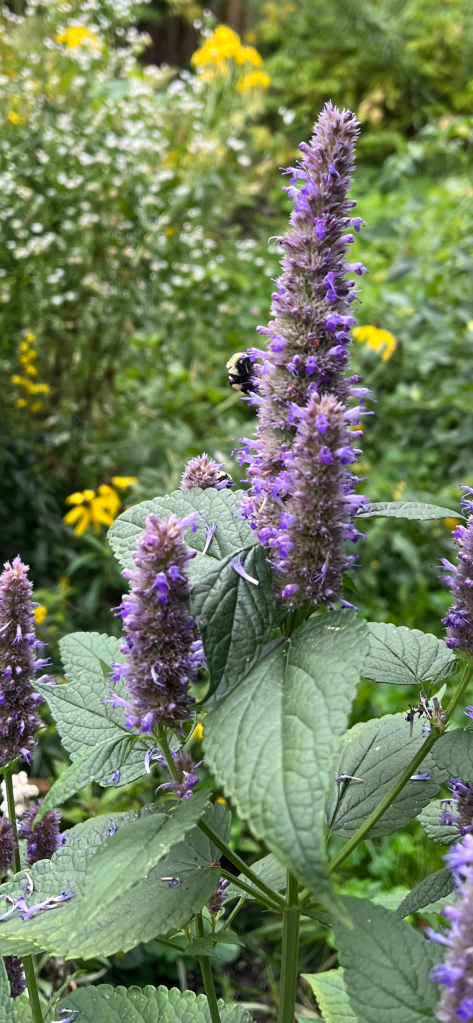
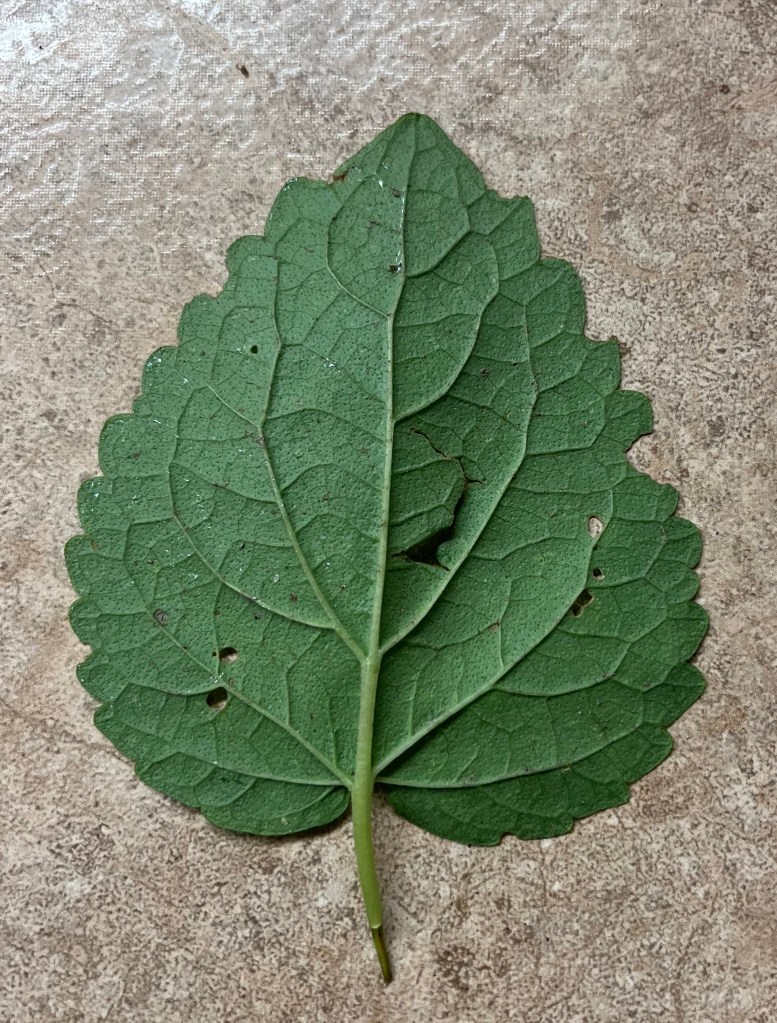
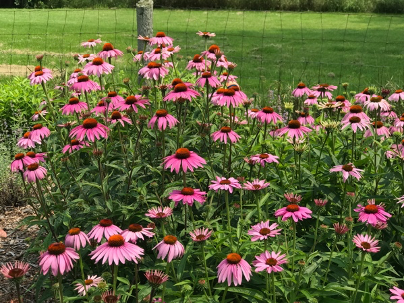
Last summer I planted a mass of Annual Sunflowers (Helianthus annus). Ideally, the dead plants would have been left completely intact in the fall to overwinter, but the flower/seed heads were so heavy that the stems had broken under the weight. I cut the pithy stems and seed heads and left them in a pile nearby for wildlife. The chipmunks were quite appreciative. Come spring, the old stems will remain for stem nesting bees such as Megachillidae species (e.g. Small Mason Bees and Leaf-Cutter Bees). Approximately 30% of our native bees require above-ground nesting sites. Rather than including commercial “bee hotels” in my garden, I am aiming for a constant cycle of old and new plant stems. New sunflowers will be planted around the old stems to eventually become new nest sites. Providing a wide range of different sized hollow and pithy-stemmed plants will also attract a variety of different bees. Some hollow-stemmed species in my garden include Milkweed (Asclepias), Bee Balm (Monarda), Cup Plant (Silphium), Anise Hyssop (Agastache), and Joe Pye Weed (Eutrochium). Some pithy-stemmed species include Ironweed (Vernonia), Aster (Symphyotrichum), Goldenrod (Solidago), and Coneflower (Echinacea).[vii]

An Arrangement of Dead Plant Stems for Nesting Bees
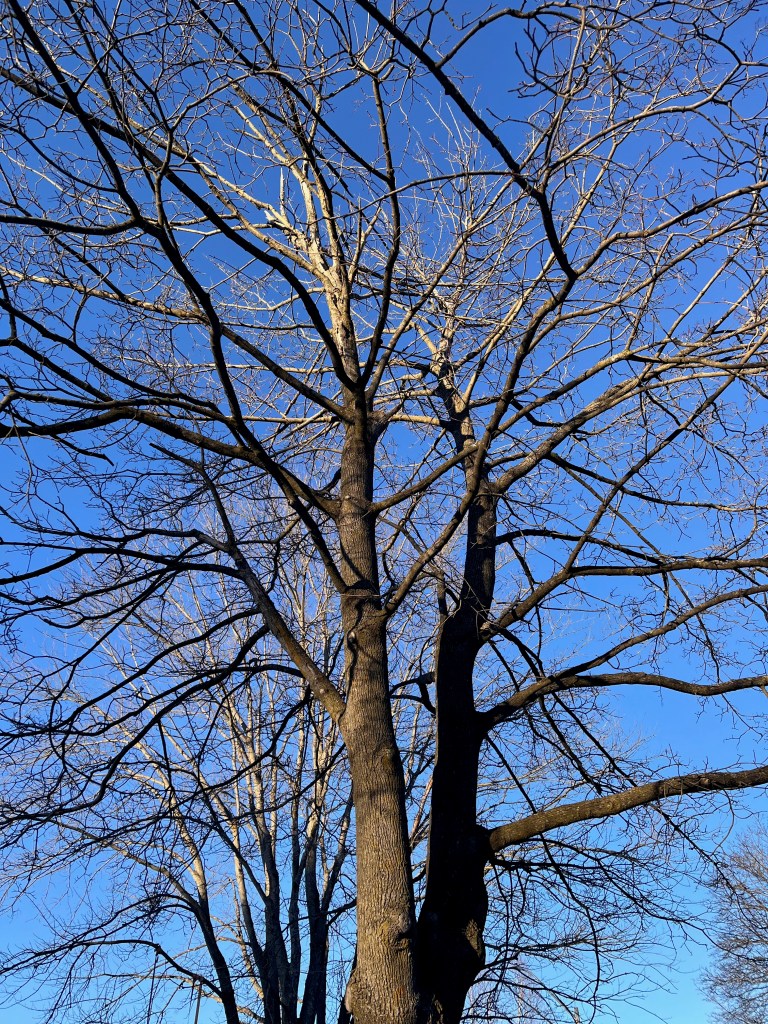
A Dying Maple

Last summer, I noticed that a Norway Maple (Acer platanoides) tree in my front yard was showing dieback of the canopy in the centre. I can only guess, but I suspect that root girdling was the main cause. Environmental stresses such as drought and road salt could only have compounded the situation. Another strike against this tree is that it has weak co-dominant stems. I contacted the city to have them check it out. I came home to see the dreaded pink spot spray-painted on the trunk—it is marked to come down. I feel mixed emotions—on one hand, it is an invasive species that isn’t the best for our ecosystem but on the other hand, it is still sad to see any living tree come down—especially one that wasn’t very old. If it could remain safely standing as a snag, that would be beneficial for wildlife. A snag is a dead tree that is left to breakdown naturally. It serves as a nesting site for birds and other wildlife and the insects that reside in them serve as food for wildlife, fungi, and other microorganisms.

A Dying Maple

A Neighbour’s Snag

What’s going on in your garden?


[i] Gorb, E.V. and Gorb, S.N. (2002), Attachment ability of the beetle Chrysolina fastuosa on various plant surfaces. Entomologia Experimentalis et Applicata, 105: 13-28. https://doi.org/10.1046/j.1570-7458.2002.01028.x

[ii] Tomaszewski, Dominik & Zieliński, Jerzy. (2014). Sequences of epicuticular wax structures along stems in four selected tree species. Biodiversity: Research and Conservation. 35. 9-14. 10.2478/biorc-2014-0014.

[iii] S. M. Stewart-Wade, S. Neumann, L. L. Collins, and G. J. Boland. 2002. The biology of Canadian weeds. 117. Taraxacum officinale G. H. Weber ex Wiggers. Canadian Journal of Plant Science. 82(4). p. 835. https://doi.org/10.4141/P01-010

[iv] Ibid.

[v] Ibid., p.837.

[vi] Ibid., p. 832.

[vii] Roos, Debbie. Provide Nesting Habitat for Native Bees Through Plant Stems in Your Garden. NC State Extension. Online: go.ncsu.edu/readext?857307

Creating a Wildlife Friendly Hedgerow in my Ontario Garden

by Emma Murphy, Master Gardener

Although I’ve lived in Canada for almost 50 years, I grew up in Bristol, England for some of my formative years, and always loved the traditional hedgerows that existed along rural roads and properties. Every time we return to the UK on a trip, I marvel at the diversity and intricacy of these functional garden/farm structures.

On our three quarter of an acre property in a small village north of Peterborough (Zone 4b/5a) I have a neighbour on one side who has a chain link fence and loves their golf green lawn. On the other side there is no fence at all, but I’ve been growing a few elderberries (Sambucus canadensis) and cup plants (Silphium perfoliatum) to hide a poorly maintained house – the first shrub suckers well and the second plant grows fast and tall.

So I’d love to have a traditional English-style hedgerow on both edges that would provide visual screening as well as animal and bird habitat…so I went looking to see how to adapt the traditional English hedgerow to Ontario.

Hedgerows can provide amazing bird habitat

The origins of hedgerows

It’s thought that hedgerows (or hedges) were first used by humans as ‘dead hedges’ to enclose livestock using thorny plants. Once agriculture began, clearing woodlands created fields with tree and shrub boundaries that were managed to create livestock-proof ‘living fences’.

Hedgerows have been planted since the time of the Romans and reached their peak in Britain during the Enclosure Acts of the 1700s when an estimated 200,000 miles of mostly hawthorn (Crataegus spp) hedgerows were planted.

Credit: People’s Trust for Endangered Species, UK

Hedgerows have many purposes, as you can see from this graphic from the People’s Trust for Endangered Species. They have an excellent video on how to manage a hedgerow here, but it’s not quite the same in Ontario, as we don’t have the same hedgerow species or coppicing techniques.

In their best form I think hedgerows can be a mini-ecosystem with key ingredients that animals and birds need to survive — food, shelter, nesting and denning sites. Hedgerows also function as corridors, connecting one habitat to another and offering a safe passage for wildlife. They help muffle sound, create privacy, and act as windbreaks.

Definitely not a short term project

According to the Ottawa Field Naturalists Club (OFNC), the ideal hedgerow is

  • Planted with a variety of berry- and seed-bearing shrubs for food
  • Interspersed with cedar for added cover
  • Thick, bushy, largely unpruned and entangled with vines

The Ontario Rural Skills Network suggests that hedgerows can be single species but are best if they comprise a diversity of plants. Planting should be very dense, with a double line spaced 40cm (16in) apart with plants in a staggered pattern at 30cm (12in), giving 5 plants per metre.

Because they’re comprised of living shrubs, hedgerows grow and require management. It’s all about creating a balance between growth and avoiding them becoming gapped and unmanageable. A hedgerow may take seven to 10 years to establish, depending on the species composition.

This young hedgerow bordering a field features native plants that provide habitat for beneficial insects and pollinators. Photo: Janet Donnelly, © Oregon State University

Making a plan

I’m just at the beginning of my plan for hedgerows on our property, but winter is a great time to do research. Both sites are sunny and have well drained soil, and I want to focus on using Ontario native plants as much as possible. I’m looking at a combination of seed- or nut-bearing shrubs (like speckled alder and hazel) and berry producers (serviceberry, chokecherry, red osier dogwood). Thorny shrubs (native roses, wild raspberry, hawthorns) will give added wildlife protection. The design will probably be different for each one, but that’s the fun of it.

The OFNC has excellent lists of plants you can consider for an Ontario hedgerow. I’m thinking about using

  • Speckled alder (Alnus incana)
  • Beaked hazel (Corylus cornuta)
  • Hawthorns (Crataegus spp.)
  • Common elderberry (Sambucus canadensis)
  • Flowering raspberry (Rubus odoratus)
  • Willow spp. (Salix spp.) – native if I can find them – there is an amazing group in
  • Choke cherry (Prunus virginiana)
  • Red osier dogwood (Cornus stolonifera or C. sericea)
  • Eastern white cedar (Thuja occidentalis)
  • Wild (riverbank) grape (Vitis riparia)

Next steps

I’m just at the beginning of my journey. In my next blog post on March 25th, I’ll give you an update on my research and my plans for my spring hedgerow projects. Until then, here’s some interesting sites to look at if you are thinking about something similar. And, by all means, if you have created a hedgerow in your Ontario garden, I would love to hear about it.

More resources

Creating a hedgerow for wildlife (Canada)

Hedgelink (UK)

National Hedgelaying Society (UK)

The traditional farm hedgerow (Canada)

Surrey Wildlife Trust – how to lay a hedge (UK)

1000 Islands Master Gardeners – Wildscaping with hedgerows (Canada)

How to plant a hedgerow in the home landscape (Ohio, US)

How to Start a Hedgerow (5 Steps) (Washington State, US)

A Guide to Hedgerows: Plantings That Enhance Biodiversity, Sustainability and Functionality (Oregon State U Extension)

Healthy hedgerows on your land (UK)

What have hedgerows ever done for us? how hedges benefit us (UK)

Gardening for Birds Through the Seasons

By Silvia Strobl, Master Gardener in Training

More than 1 in 4 birds have disappeared in North America since 1970, primarily due to habitat loss according to a recent study. As gardeners we can help to mitigate further declines by adding native plants to our gardens that meet seasonal bird habitat needs. If you would like to help, consider whether you can add one or more of the Ontario native plants noted below in your 2024 garden plans. All these are easy to grow, low maintenance, prefer full to part sun, and tolerate a wide range of soil conditions—ideal for almost any garden! Click on the plant names for Ontario specific growing information and photos.

In spring, food for early returning migrants is critical. The catkins of Pussy Willow (Salix discolor) and other willow species are an important early nectar and pollen source for native bees, but they also attract insects which feed returning Eastern Phoebes, Ruby-crowned Kinglets, Chickadees, and other insect eating birds.

Northern Oriole among Willow catkins in early spring (photo credit: Beth McEwen)

For returning Ruby-throated Hummingbirds, growing a patch of Wild Columbine (Aquilegia canadensis) provides a critical source of early nectar. Providing a succession of nectar sources for hummingbird parents will entice them to nest and let you enjoy the flight chases of the juvenile birds in late summer. Include native plants with red, orange, or pink tubular flowers such as Scarlet Beebalm (Monarda didyma), Fly Honeysuckle (Lonicera canadensis), or Northern Bush Honeysuckle (Diervilla lonicera).

If you have room to plant only one tree in your yard, make it a Bur Oak (Quercus macrocarpa), Red Oak (Q. rubra), or Black Cherry (Prunus serotina). These trees support the greatest numbers of caterpillar species and hence provide important food high in protein for Chickadees and other birds raising nestlings in our short, temperate summers. To rear one clutch, Chickadees require up to 9000 caterpillars. Trees also provide structure and cover for nests.

Small, garden-size shrubs such as Serviceberries (Amelanchier spp.), Common Elderberry (Sambucus canadensis) and Chokecherry (Prunus virginiana) produce early season berries that provide food for Cedar Waxwings, Rose-breasted Grosbeaks, Catbirds, and Robins. These shrubs also provide cover for nesting birds.

Cedar Waxwing eating a Smooth Serviceberry (Amelanchier laevis) berry in late June/early July in the author’s former Peterborough Garden (photo credit: Silvia Strobl)

For fall and winter bird habitat, grow a variety of plants that provide food, including:

  • Native Sunflowers, Purple Coneflower (Echinacea purpurea), Black-eyed Susan (Rudebekia hirta), and Asters (Symphyotrichum spp.) and stop deadheading at the end of August to promote production of seeds. Leave these plants standing overwinter to provide food for Goldfinches, Northern Cardinals, and Dark-eyed Juncos.
  • Shrubs such as Grey Dogwood (Cornus racemosa), American Plum (Prunus americana), Chokeberry (Aronia melanocarpa) and the vine, Virginia Creeper (Parthenocissus quinquefolia) produce late-season berries that are rich in fats. Many insect-eating birds switch to eating berries in fall to store fat under their chests and wings to support either long journeys south or survival in our chilly winters. Berries of native shrubs have higher percentages of fat (6.5% to 48.7%) than most non-native shrubs (less than 1%) according to this study.
  • Conifer trees and shrubs such as Eastern White Cedar (Thuja occidentalis) provide sheltering cover for year-round resident birds such as Chickadees, Nuthatches and Mourning Doves.
  • Decaying stumps and logs attract numerous beetles and ants. If you must remove a tree that has died or outgrown your garden, consider leaving the standing dead tree or stump to decay and provide insect food for Pileated and other Woodpeckers.
Goldfinches enjoying seeds of Purple Coneflower against a backdrop of winter snow in the author’s current garden (photo credit: Silvia Strobl)

You can have a spectacular garden by adding native plants. And, when you see birds using your garden, you will not only feel good about your contribution to bird conservation, but you will enjoy your garden even more!

The author’s (mostly native plant) garden in early August (photo credit: Silvia Strobl)

Native Plant Sources

A key issue for those trying to grow native plants is finding them. To help you, the Halton Master Gardeners maintains a map of Ontario native plant nurseries that also provides websites and contact information. Always phone the nursery first to confirm they will be open.

Other Resources

In Our Nature. Nd. Native Plants for Hummingbirds. https://www.inournature.ca/plants-for-hummingbirds

In our Nature. N. 30 Native Shrubs for Ontario Gardens: Your go-to reference for the best shrubs for gardeners and wildlife. https://www.inournature.ca/best-native-shrubs

Tallamy, D.W. 2019, Nature’s Best Hope: a new approach to conservation that starts in your yard. Timber Press. 256 pp.

Related Over the Fence Blogs

EXPANDING YOUR NATIVE PLANT PALETTE

ATTRACTING BIRDS 1

ATTRACTING BIRDS, PART 2

ATTRACTING BIRDS PART 3

5 Simple New Year’s Resolutions for Gardeners

by Emma Murphy, Master Gardener

As this year ends, I’m offering a few New Year’s resolutions for gardeners for 2024. If you want more of a challenge, the Chicago Botanic Garden offers 50.

Add Native Plants To Your Garden

  • We’re all seeing the effects of climate change on our gardens.
  • Native plants adapt more readily to stressful and changing weather patterns, such as prolonged droughts or winter cold snaps, than hybrids and non-natives often seen in our nurseries.
  • Native plants help sustain beneficial insects and bird populations because they attract native pollinators and birds that might not be drawn to non-natives.
  • Create less work for you, as native plants tend to be lower maintenance than non-native ones.
  • The Native Conservancy of Canada offers some suggestions to get you started, or consult with your local Master Gardener group or Horticultural Society.
Bloodroot, Sanguinaria canadensis

Start A Compost Bin

  • Composting helps keep waste out of landfill by collecting and processing organics into material that can be used to create nutrient-rich compost used to feed and nourish soil.
  • Canadian Living offers a simple outline, as shared by Ed Begley  Jr.
  • Or more here from the Thames Region Ecological Association, including troubleshooting issues.
Compost bin

Grow More Of Your Own Food

  • The pandemic has highlighted how our agricultural systems are vulnerable to global shocks. Issues with supply chains, migrant workers, transport, trade and border closures have resulted in some foods being in short supply or prices going up (while quality goes down).
  • Insects do all the hard work, and all pollinators benefit.
  • Gardening provides benefits for your wallet, your nutrition, and reduces your environmental footprint. By growing your own food (either from seeds or small plants), your food is automatically more sustainable simply because you are doing it onsite or in a community garden. If you control the ‘inputs’ and do it well, you can save a lot of money.
  • Ultimately there is nothing more rewarding than planting and maintaining your own vegetable garden and harvesting (and sharing) your results. And we all know how much better homegrown produce tastes versus conventional produce at the grocery store. If you have too much produce, then you can just share the love with others!
  • Royal City Nursery in Guelph offers 8 Reasons to Start Growing Your Own Food from Seed
Creating a vegetable garden

Continuous Learning

  • Do what you love but keep on top of what’s trending in garden design to see if anything sparks your interest.
  • Keep track of what’s working and what’s not by documenting your garden happenings in a journal.
  • Expand your garden library and treat yourself to a new gardening book.
  • There are so many amazing (and free) garden webinars available now – learn from the experts.
  • Some of my favourite bloggers – The Impatient Gardener (in Wisconsin, similar climate to us), The Empress of Dirt (Ontario), Niki Jabbour (Halifax), The Laidback Gardener (Montreal), and Garden Myths (Robert Pavlis in Guelph, Ontario).
Online learning is a great opportunity

Reduce Your Use Of Plastic

  • Plastic is a major component in the garden, from plastic plant pots and seed trays to watering cans, and compost bins. Most plastic gardening equipment will end up in landfills, where plastic pots alone can take up to 500 years to decompose.
  • There are a few easy swaps you can make in going plastic-free: Many of us want to use less plastic in the garden, from plant labels to watering cans, tools, plant pots and the sheeting used to suppress weeds. Buying (and therefore using) less plastic will not only reduce your plastic footprint but also sends a message to manufacturers that gardeners want alternatives to plastic (especially single-use plastic).
  • Try to find biodegradable pots that made from natural materials such as coir, bamboo, wood chips, or seaweed (or commit to using your plastic pots year after year).
  • If you use plastic string, make the swap for a natural jute or hemp, and protect your fruits and vegetables with metal mesh instead of plastic netting – it lasts for years.
Find alternatives to plastic pots, or commit to using (and reusing them) for many years

Happy gardening dreams until we can get out into our gardens again….

Love Me Tender

by Lois Scott, Master Gardener

At this time of year that nasty five letter word “frost” starts making an appearance in the weather forecast.  Our hardy perennials will manage just fine with freezing temperatures but some of your plants may be tender perennials that won’t survive winter.  As a reminder, a perennial is a plant that will live for more than two years.  This can include bulbs like begonias and dahlias, rosemary, and geraniums just to name a few.  Annuals complete their life cycle in one year and biennials in two.  Tender perennials can give us years of beauty if we treat them well. 

Pelargoniums, commonly called geraniums (which are different from hardy Geraniums/Cranesbill) are a tender perennial in our climate but they are easily wintered over using one or all of three different methods.  You can take a stem cutting, overwinter as a potted plant, or overwinter as a bare-root plant. This link gives clear instructions for all three methods. 

Personally, I will be taking a stem cutting from a geranium and a Dorotheanthus bellidiformis ‘Mesbicla’, commonly known as Mezoo Trailing Red, another tender perennial.  Cuttings produce a plant identical to the parent, avoids any difficulty with starting from seed and will frequently produce a plant that matures faster and flowers sooner than a plant grown from seed. 

I will be using an 8-10 cm stem that includes a few leaves.  Make sure your cutting contains as much water as possible by watering your plant the day before and taking your cutting before the heat of the day reduces water content.  Plants lose most of their moisture through leaves so I will remove half to a third of the leaves. Ideally, process the cutting right away or place it in water. 

Using clean pots and tools, and soilless potting mix or vermiculite is important to reduce the chance of disease killing your cuttings.  Once your pot is ready, secure the cutting by placing it into the medium far enough that the cutting can support itself.  Put your pot in a closed plastic bag and place it in a warm, bright spot but not in direct sun.  The plastic bag should keep the plant’s environment humid enough to prevent water loss in the cutting and reduce the need for any further watering.  Too much moisture and the cutting will rot.  More info here.

In a few weeks you should be rewarded with good root growth on your cutting which you can then repot and grow on for use in the garden next year. 

Around My Garden

by Laura Gardner, Master Gardener

To Squish or Not to Squish?

For over 13 years, I have had a Hydrangea arborescens ‘Annabelle’ (Smooth Hydrangea) in my garden. A few years ago, contractors put in a fence, and I thought it was a goner — trampled into the ground. It was their version of rejuvenation pruning.

Well, I learned they are hard to kill. Every summer there is a profusion of blooms. Every spring, some of the leaves are curled and fused together—a temporary home for Olethreutes ferriferana (Hydrangea Leaftier Moth) caterpillar—a native insect. Anecdotally, it seems to favour Hydrangea arborescens over others, although the food plant database for Tortricid (Leafroller) moths indicates simply Hydrangea spp.

Most sites I have seen online advise you to squish the caterpillars because they can cause a reduction in blooms. They feed on the leaves and the flower buds. While my Hydrangea has likely seen a reduction, I have not noticed.  It does not affect the overall health of the plant. Another consideration is that often within these rolled-up leaves, spiders make their home. It is thought that they take up residence before the moth leaves but do not predate the caterpillar.[i] Year after year, I just let this moth complete its lifecycle.

In Integrated Pest Management (IPM) there is something called a threshold of action. Is the damage enough to warrant taking any action to control the pest? Is it possible that other beneficial organisms may be harmed in the process? If there are only a few blooms that could be affected, consider not doing anything.

Hydrangea arborescens ‘Annabelle’ in July
Curled and fused leaves of Hydrangea arborescens ‘Annabelle’ in June. Note the pupal skin hanging out of the leaf pouch—this indicates that there is no caterpillar within and the adult moth had exited.

Is it Real or an Imposter?

Last year I planted what I thought was Agastache foeniculum (Anise Hyssop). It was a huge Bombus (Bumblebee) magnet and flowered virtually up until frost. It did not come back this spring — apparently it is considered a short-lived perennial, but in the end, I concluded that its demise was mainly due to a sustained dog pee assault. I am the crazy gardener that runs after my dogs with a watering can. I digress.

Agastache rugosa (Korean Mint) and a Bumblebee visitor

Like many in the mint family, there were many seedlings that popped up in its place. Fast forward to this week, and I noticed a discussion online about how some nurseries are inadvertently selling Agastache rugosa (Korean Mint) instead of A. foeniculum.

After careful inspection, I am now certain that I am one of many who got the non-native species. “Both these species are aromatic and have flowers of similar colors, but Korean mint has rugose, dark green leaves with cordate bases, whereas Anise Hyssop has shiny, bright green leaves with feltlike undersides and cunate bases.”[ii] The undersides of the leaves of A. rugosa also have little indentations (areoles) that A. foeniculum lacks.[iii]

Underside of Agastache rugosa leaf

The question is, should I keep it in my garden? A field study of Agastache spp. in Iowa over a three-year period found that more Apis mellifera (European Honey Bee) visited the Korean Mint and hybrids than Anise Hyssop.[iv]

Judging from the number of Bumblebees on the few plants that sprung up this year, it would seem like a keeper. If I were to find and plant Anise Hyssop, there would be a high probability that it would cross-pollinate with the Korean Mint, creating hybrid plants. According to the literature, these hybrids are sterile[v] and so there would not be a problem of the hybrids re-seeding. Korean Mint is also morphologically like Anise Hyssop.[vi] This means that there is a greater chance that pollinators can benefit from the non-native species. I am waffling.


[i] Boggs, Joe. Hydrangea Leaftier. Buckeye Yard and Garden Online. May 22, 2022. Ohio State University. Online: https://bygl.osu.edu/node/1979 Accessed August 24, 2023

[ii] Widrlechner, Mark P. A Field Evaluation of Native Mint Family Plants as Honey Bee Forage in Iowa. Proceedings of the Twelfth North American Prairie Conference 1990. p. 40. Online: https://dr.lib.iastate.edu/handle/20.500.12876/55985 Accessed: August 24, 2023.

[iii] Serres, Terry. Buyer Beware. Agastache foeniculum vs. Agastache rugosa. September 2018.

https://bigriverbigwoods.org/wp-content/uploads/2019/03/ThreeProblemSpecies_v3.pdf Accessed: August 24, 2023.

[iv] Ibid., p.40.

[v] Vogelmann, James E. “Crossing Relationships among North American and Eastern Asian Populations of Agastache Sect. Agastache (Labiatae).” Systematic Botany 10, no. 4 (1985): p. 451. Online: https://doi.org/10.2307/2419137 Accessed: August 24, 2023.

[vi] Ibid., p. 451.

Low Maintenance Gardening

By Marilyn Homewood, Master Gardener

Sound too good to be true??  Years of trial and error on a property with a (shallow) dug well has taught me the value of adequate bed preparation for long term success of the landscape garden that consists primarily of perennials, shrubs and bulbs (with the odd annual and biennial tossed in).  I have large landscape beds and could not keep up without some kind of strategy. 

It may seem somewhat discordant to be discussing bed preparation in July but a little planning and preparation can go a long way towards achieving a garden that requires less maintenance, is easier to work in, requires little to no supplemental water or feeding all while looking attractive. The solution lies under our feet. 

My beds have all been dug to a depth of 18 inches.  This one time initial dig allows for loosening of compacted earth, removal of rocks (or boulders) and generous amendment of the soil with organic matter such as rotted manure or leaf or mushroom compost. This preparation will allow plant roots to reach deeper into the earth (especially those with large fibrous roots or tap roots) where residual moisture is still available during drought. Plants will become more resilient and able to survive on the rainfall alone.  In my garden, I have not watered the landscape beds since they were begun with the exception for first year plants that are getting established.  In dry spells, the blooms may be somewhat smaller but are still found in abundance.   

Coneflowers blooming well despite drought

The loosening of the soil also creates a better-draining soil makes it less likely that plants become water-logged or oxygen-deprived in those times when water is abundant.  This also minimizes loss of plants/bulbs to rot.   

The use of organic matter amendments helps the soil to retain the water that is provided by the rainfall by increasing the porosity of the soil.  And finally, an application of a thick layer of mulch (I use shredded bark) on the surface of the soil helps prevent evaporation of moisture from the ground and well as inhibiting the greedy weeds that will compete for moisture.

Second year delphiniums are 6-7 feet despite no water

Organic matter (OM) amendments provide a number of other benefits which ultimately gives healthy plants while saving us labour.  It enhances soil structure which increases the porosity of the soil leading to improved water infiltration, better drainage/aeration and help soils to resist compaction.  This makes soil more friable and easier for the gardener to work in as well as easing root penetration in the soil profile.  

OM helps to store and supply macronutrients (ex. nitrogen) and makes micronutrients (calcium, magnesium and potassium) available to the plant by increasing the soils’ ability to hold onto these elements (prevents leeching).  Also binds metal micronutrients (iron, aluminum, zinc, copper, manganese) and increases their availability to the plant.  All this means that your need for chemical fertilizers will be reduced or not required. 

Despite my best efforts, I had to make a succulent only garden in a difficult spot

OM also enhances soil microbial diversity that assists in the suppression of disease so plants are healthier. 

Deep beds mean deep roots; improved soil structure means better drainage and water holding capacity; increased biological activity mean more nutrients released for plant use and microbial diversity means less disease.  The result is healthy, vigorous plants that need less watering, less additional feeding/supplementation and less treatment for disease. 

Resources: 

Cornell University Cooperative Extension, Agronomy Factsheet 41, “Soil Organic Matter”, http://franklin.cce.cornell.edu/resources/soil-organic-matter-fact-sheet 

Leslie Cooperband (2002), “Building Soil Organic Matter with Organic Amendments” University of Wisconsin-Madison, 

Lois Berg Stack (2016), “Soil and Plant Nutrition: A Gardener’s Perspective” University of Maine Cooperative Extension: Garden & Yard, https://extension.umaine.edu/gardening/manual/soils/soil-and-plant-nutrition/ 

Gardening in July

by Cheryl Harrison, Master Gardener

July is the month that I tend to really enjoy the garden….most of the work is done! The planting of seeds, and plants into pots and garden beds, dividing and thinning and garden creating is behind me for now. However, there are still a few garden tasks.

I try to keep up with weeding because weeds can quickly overrun your garden as they begin to set seed. Weeds take nutrients from the soil which your plants need and can smother out young plants. And I am one of those gardeners who enjoys weeding. I feel a great sense of accomplishment when I finish weeding a garden bed and when I pull out a weed and get the root….well that is simply thrilling.

Early July is a good time to trim back your annuals in order to encourage bushier growth and to trim off the spent blooms of your perennials to prevent seed production and allow the plant to put its energy into its roots. You may want to start fertilizing your potted plants because any fertilizer that was contained in the potting soil has probably been used up by now. There are lots of choices when it comes to fertilizers so talk to the staff of your favorite local nursery. They will be able to advise you and will likely carry the best products.

July is also the month when that garlic that you planted last fall is ready to harvest. We grow hard neck garlic that a kind neighbor started us on a few years ago. I removed the curled scapes last week and froze them for future use. I will keep an eye on the leaves on the garlic because when a few leaves have started to turn brown then the garlic is ready to harvest.

The rest of your vegetable garden may be starting to produce now as well. We have harvested some tomatoes already which is a bit earlier than usual for us. It is a good idea to check your vegetable garden daily so that you harvest and enjoy the results at their peak and to respond quickly to any issues that may arise.

I evaluate the appearance of my ornamental gardens in July. It is interesting to see if the garden looks the way that I had planned. I do not mean, “is it perfect” but how close is it this year to the feeling that I would like to achieve when someone walks through the gardens for the first time. I look at how the colours and textures work together. I ask myself if there are any bare spots or areas that I will need to renovate soon (eg. crowded and/or overgrown plants).

I am starting to plan my fall and next spring projects now. This year, two smaller gardens were joined and planted with mainly annuals for quick impact. I know that I plan to fill this garden with perennials and native woodland plants. This means keeping this garden in mind when I am shopping at the local nurseries.

Spring, and early summer, gardening can be a very busy time. July is the month to really enjoy your gardens and dream about what you might like to do next!

Peonies: The Stars of the Show at Present

By Mary-Jane Pilgrim, Master Gardener

Peonies are like the royalty of the flower world, with their lush petals and captivating fragrances. If you’re itching to grow more of these stunning beauties in your garden, you’re in luck!

Peony plants fall into one of three categories: herbaceous peonies, tree peonies, and intersectional/Itoh peonies (modern crosses between herbaceous and tree types). This article addresses the propagation of herbaceous peonies by seed and by division.

  1. Growing Peonies from Seeds: Starting peonies from seeds is like embarking on a rather long gardening adventure. First, collect ripe seeds from mature peony plants once the flower heads have dried. Give them a good soak in water for a day to help with germination. Then, plant the seeds in well-draining soil in a pot or tray. Cover the container with plastic wrap to create a cozy greenhouse effect.

Now, it’s time for a little winter simulation. Pop the container in a cool spot like your fridge for about three months. After the chill period, move the container to a warmer spot with indirect sunlight. Keep the soil moist, and be patient. It might take a while, but soon you’ll see those precious seedlings sprouting. Once they grow bigger, you can transplant them into individual pots or your garden. Remember, it may take a couple of years for them to bloom.

  1. Dividing Peonies: Dividing peonies is like giving them a fresh start and making more peony magic happen. Autumn or early spring is the perfect time to divide these beauties. Carefully dig up a mature peony plant, making sure to keep as many roots intact as possible. Gently shake off excess soil and look for natural divisions or “eyes” on the plant – these are the points where new shoots will emerge.

Grab a clean and sharp knife, and cut the plant into sections, making sure each division has a few healthy roots and eyes. Then, replant these divisions in well-prepared soil in a sunny spot. Give them a good drink of water and watch as they settle in and grow. Don’t be surprised if it takes a year or two for the divided peonies to bloom, but when they do, it’ll be worth the wait!

With these two propagation methods, you can expand your peony collection and enjoy a blooming paradise in your garden. Whether you choose seeds or division, the joy of growing peonies will reward you with breathtaking blossoms and a sense of accomplishment. Happy gardening!

Why are my Columbines Changing Colour?

by Emma Murphy, Master Gardener

Columbines (Aquilegia spp) are lovely perennials. I have had them in my garden for many years, and they always offer a pop of colour in the late spring/early summer garden here in Lakefield, Ontario.

These easy care perennials come in a variety of colours, shapes and sizes – most are bi-coloured, ranging from pastel shades to vibrant hues. Columbines have distinctive five-petaled flowers with long backward-extending spurs as pouchlike extensions of the petals, containing nectar. Sepals and petals are brightly coloured. The leaflets of the compound leaves are usually rounded and notched.

In my garden I have both cultivars and straight species (native) columbines, but it was a query on our Master Gardener of Ontario’s Facebook page about someone’s columbines changing colour from year to year that caused me to go down the research rabbit hole to try and find an answer for them.

What Did I Find Out?

Well, apparently columbines really like to hybridize with other columbines. They really do. They are also sensitive to their soil conditions and a number of other factors.

There has been some fascinating research done at universities like UC Santa Barbara (here and here). In one study they used two columbine varieties – red columbines pollinated by hummingbirds, and white or yellow columbines pollinated by hawk moths. Apparently hummingbirds prefer medium length nectar spurs (the ‘tails’ on the columbines), while hawk moths prefer the relatively longer-spurred species.

The study also noted that columbines can change from blue to red, then white to yellow. According to the researchers, the colour shift from red to white or yellow in columbines has already happened at least five times in North America.

So Why Do They Change?

There are several reasons why columbines change colours:

  • DNA mutation
  • Natural selection
  • Adaptive radiation
  • Hybridization
  • Changes in soil conditions

DNA Mutation

Based on the UC Santa Barbara findings, at least 34 genes produce different columbine flower colours. Because of the presence of various genes, there’s an increased likelihood that the colours will change simply due to gene mutation. It doesn’t happen because of creation of new genes, but just because of current gene mutation.

Natural Selection

In the studies and mentioned above, if most pollinators are hummingbirds, most of the columbine colours are red. However, when the population shifts and most of the pollinators become hawkmoths, there’s a potential for the colour to modify. The resulting blooms can be white or yellow.

Adaptive Mutation

Another concept explored in the study of the columbine colour changes is adaptive radiation, based on Charles Darwin’s Theory of Evolution, which assumes that living organisms change their structures to better adapt to the changes in their surroundings. For columbines, flowers develop new traits as a response to changes in their environment. In this case, the changes include the pollinators

Research shows that columbine flowers are tailored to the tongues of their pollinators, which shows an example of how they evolve based on their environment.

Hybridization

Columbine colour change can also be due to cross-breeding, when male and female parts are pollinated. The goal? Combining the positive attributes of two species, changing the physical characteristics, resulting in a better yield and disease resistance, among others. 

Hybridization can also occur non-deliberately – for example when we plant two columbine varieties near each other, this will often create colour changes from the original plants.

To prevent problem hybridization, especially with our native Eastern Red columbine (Aquilegia canadensis), the best thing you can do is plant the native species as far away from the cultivars as you can – not foolproof but an important thing to consider. Or don’t have any cultivars on your property, but that doesn’t guarantee they will stay the same as pollinators move from garden to garden.

Changes in Soil Conditions

It’s common for columbine colours to shift because of slight changes in the soil’s pH, as well as the presence or absence of metal ions in the soil. A pH lower or higher than 6.0 to 6.5 can result in nutrients being unavailable, which in turn can affect colour.

Our beautiful native Eastern Red Columbine (Aquilegia canadensis)

Colour change in columbines is a fascinating phenomenon, as you can see from my “rabbit hole research”.

But here’s the bottom line – if you want to keep your native columbines from hybridizing with cultivars you have to keep them as far away from each other as possible. If you like the idea of them changing colours (for a variety of reasons) just sit back and enjoy!

MORE READING

Sudden evolutionary change in flowers (2022)

Biologists discover a gene critical to the development of columbines’ iconic spurs (2020)

‘A Hopeful Monster’ (2022)

Dramatic diversity of columbine flowers explained by a simple change in cell shape (2011)