This article was published in err a couple of weeks ago, and is being republished today as a corrective measure. Apologies. -Ed.
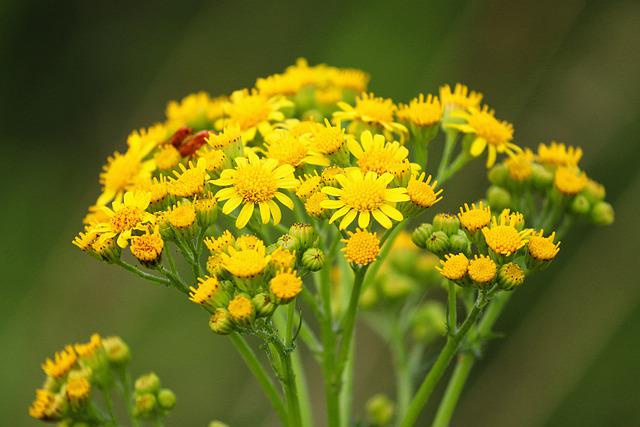
Back in a June post[i], I referenced the Ontario Native Plant Council’s best management practices for Alliaria petiolata (Garlic Mustard).[ii] In it they referred to certain native plants that can be used to outcompete it. I would like to mention one other that I am fond of having in my garden. Packera aurea (Golden Groundsel) has a diminutive orange inflorescence and is native to the Peterborough area. It can be aggressive as it reproduces through rhizomes and adventitious shoots on the stems. It is better situated in moist soils and so it may be more subdued in a drier location. In her blog, The Humane Gardener[iii], Nancy Lawson discovered that when she inserted clumps of Golden Groundsel into patches of Garlic Mustard, the latter quickly became surrounded. Garlic Mustard is known to be allelopathic and inhibits the growth of some plants. However, Golden Groundsel does not appear to be inhibited by it.
Golden groundsel, Packera aurea
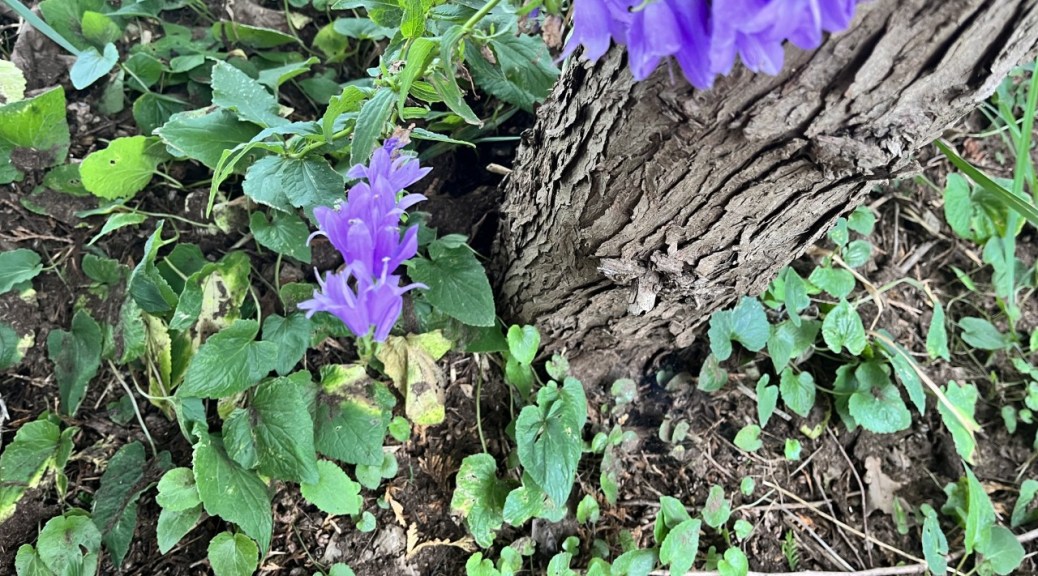
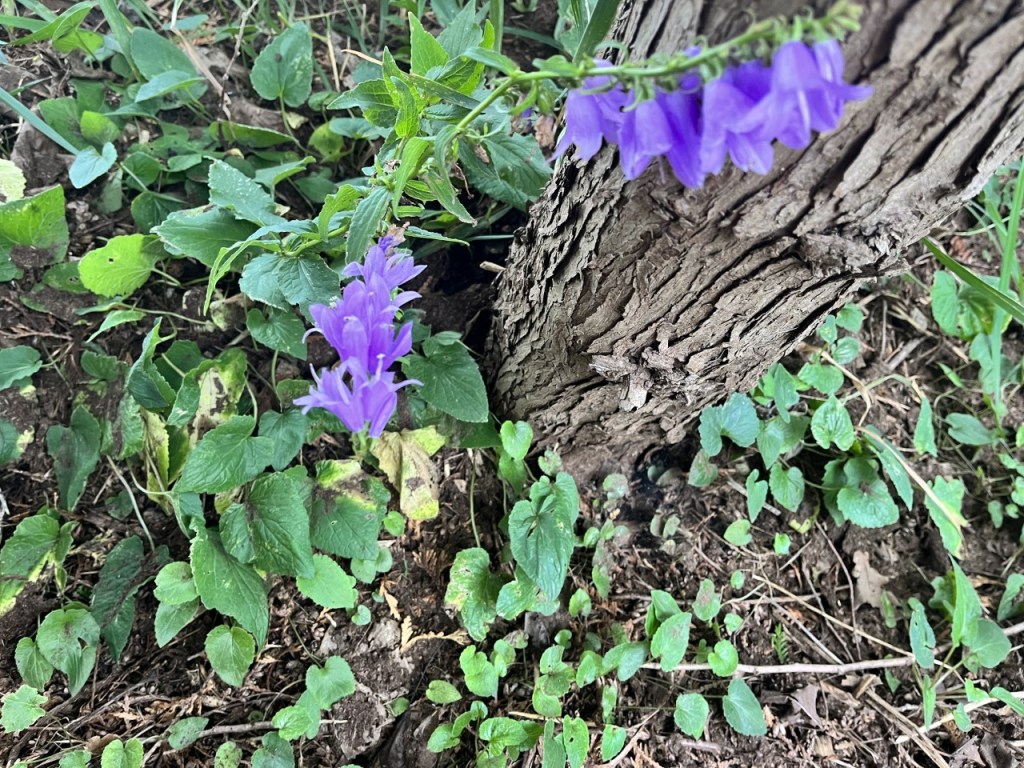
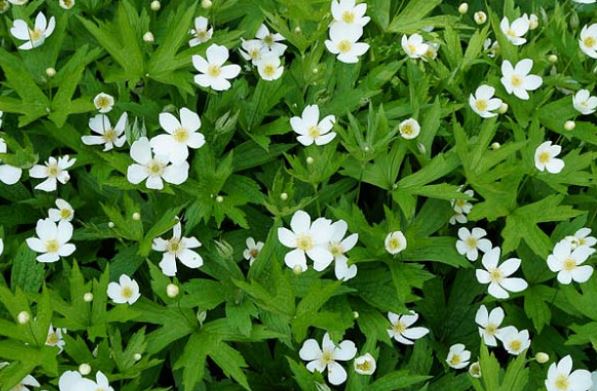
Anemonastrum canadense (Canada Anemone) is a beautiful vigorous native ground cover that performs well in sun to shaded environments; although it can develop brown leaves in more arid conditions. I am using it to limit the advance of Campanula rapunculoides (Creeping Bellflower). The intent is to envelope it so that it is unable to photosynthesize, grow more foliage, and store energy in its roots. One might argue that this is simply a matter of replacing one problem with another. While it is true that Canada Anemone can be overwhelming, it may be limited by deadheading the flowers, removing rhizomes, adding mulches, and by installing edging below the soil surface. As a native plant, it supports pollinators such as miner bees, sweat bees, and hover flies. The Xerces Society notes that it supports “conservation biological control.”[iv] This is a plant that attracts beneficial insects to your garden which in turn will help control other insects that damage your other plants.
So far, the Creeping Bellflower’s development has been slowed but there are still some basal leaves within the patch and at the perimeter. Right now, it is still a team effort: Canada Anemone and me.
We are into the middle of summer, a time to relax and enjoy all the hard work we have put into our gardens. I struggle with my plants receiving enough moisture during the summer months and each year I think more about drought tolerance and what I could grow that would require less water and care.
There are several drought tolerant perennials and we are lucky that many of them are native. Once established they will withstand periods of prolonged drought. Choosing native is a good choice as native plants are tolerant with our soils and climate and have evolved with the birds and pollinators who often use them for shelter and food.
Here are a few drought-tolerant plants that grow well in my garden:
Butterfly Weed (Asclepias tuberosa)
It has been growing at the bottom of my garden near the road and in full sun. It has a beautiful orange flower and is one of the top butterfly-attracting plants around. The stems grow 2-3 feet with narrow leaves that are dark green. If given the room, the plants will get bushy. The large seed pods are also attractive. It is a wonderful native plant that tolerates a broad range of conditions. Beware as this plant emerges very late in the spring and does not like to be disturbed, so mark it well in order not to dig around it.
Prairie Smoke (Geum triflorum)
This is a tough plant that grows to about 6-12 inches. It has a lovely reddish pink to purple bloom with interesting seed heads. It has flourished in my native garden at the bottom of my property in full sun and exposed to winter salt. As the flowers fades and the seeds begin to form, the styles elongate (to 2” long) to form upright, feathery gray tails which collectively resemble a plume or feather duster. They are very unique. It spreads by rhizomes and can be naturalized to form an interesting groundcover.
Blanket Flower (Gaillardia)
This perennial is not native but has beautiful brightly-coloured daisy flowers, often with a contrasting central eye. They are all long blooming and if you have the time to remove the faded flowers, they will continue to bloom for several weeks. Mine is a compact form that looks lovely at the front of the border. It prefers hot, dry areas and are therefore, very drought tolerant! They have a life-span of 2 to 4 years, so cut the plants back hard in early September. This forces new leaf growth from the base and helps to prevent plants from blooming themselves to death.
Russian Sage (Perovskia atriplicifolia)
It forms an upright bush of fine-textured grey-green leaves that are actually fragrant when rubbed. The plant becomes a haze of lavender-blue flowers by the end of July. It continues to bloom for weeks. Russian Sage is an excellent filler plant for a border. Leave the woody stems over the winter months to encourage new shoots to appear. In spring, prune the plant back to 6”. It is very attractive to butterflies.
Little Bluestem (Schirachyrium scoparium)
This is a lovely native grass and is often found growing in open woodlands and prairies. It is a warm season grass so doesn’t start its growth until later in the spring. Its’ early growth has a blue/green colour. The flowers on this grass are very attractive and the seed heads are fine with a fluffy appearance. The mature seeds are greatly favoured by small birds. This plant is clump forming and grows typically between 2 to 4 feet. The plant looks lovely year-round and the deep roots penetrate deep into the soil. In the fall, it turns a golden to reddish brown. There is a large version called Big Bluestem, but I much prefer the Little Bluestem. These two plants are actually from a different genus so although they have some similarities, they are also quite different.
Here is an excellent article by the Toronto Master Gardeners with an extensive list of drought tolerant perennials for many different types of conditions.
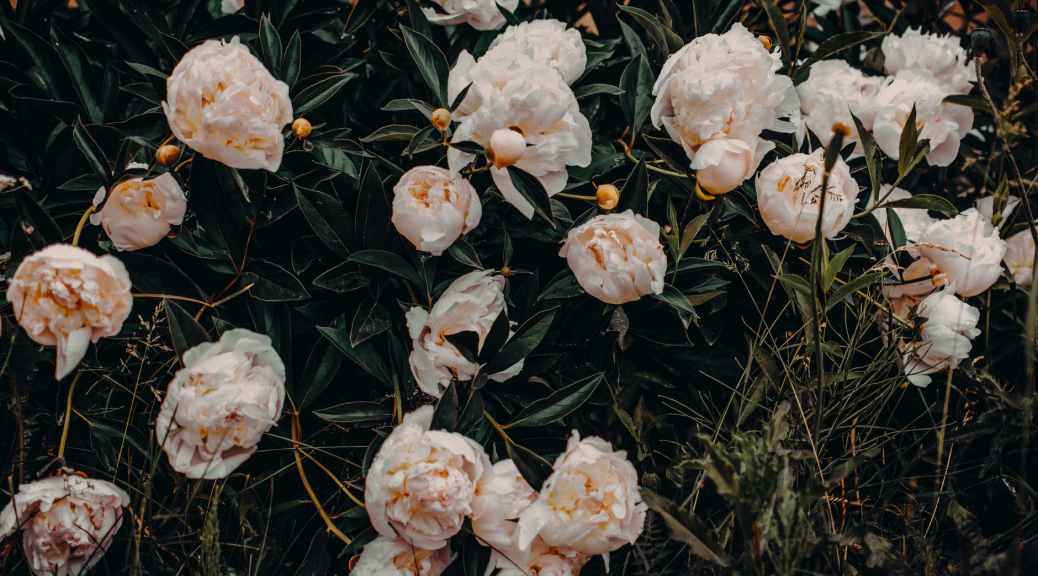
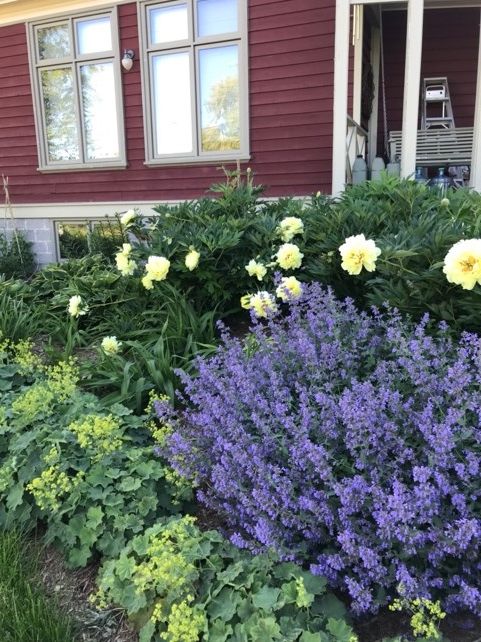
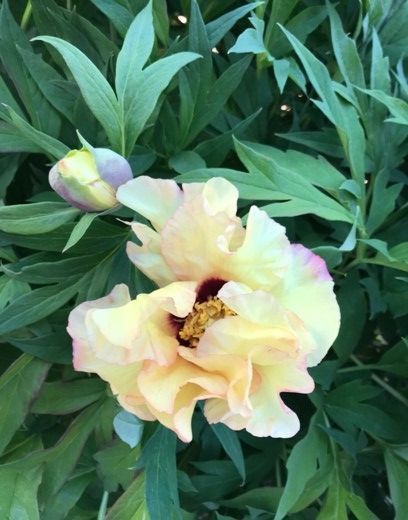
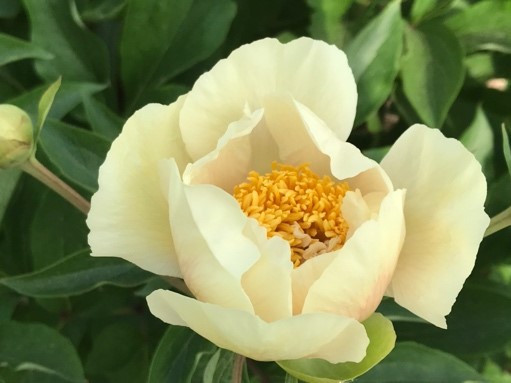
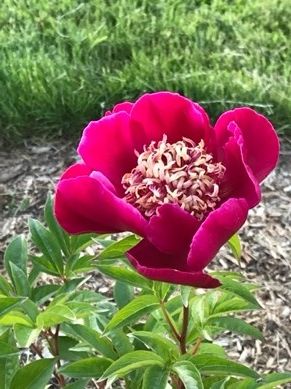
Summer solstice has just passed and with it the waning of some iconic garden varieties. Late spring/early summer brings us not only the iris and rose but the peony as well. Peonies are large, long-lived perennials that may stay in one place without division for up to 100 years. Peonies bloom in a wide range of forms, from simple, elegant singles to massive doubles with more than 300 petals in colours of white, pink, yellow and red tones. They form a rounded shrub that may be up to 3 feet in height and width with glossy deep green foliage that remains attractive after the bloom is over.
Itoh peony ‘Bartzella’ in landscape
There are three types of peonies: Herbaceous, Tree and Itoh. Herbaceous peonies bloom in late spring/early summer and have stems that die back to the ground in the fall. Tree peonies have a permanent woody stem, more like a shrub. Woody stalks remain standing through winter and go on to flower again the next season. The blooms on trees peonies are larger and more fleeting than those on their herbaceous counterparts. In our area, tree peonies appreciate a sheltered spot to grow as a hard winter may result in a lot of die back. The third type of peonies are the Itoh peonies. These plants are a result of crossing herbaceous peonies with tree peonies. The stems of Itoh peonies die back to the ground each fall and yet the bloom is large like that of a tree peony. These plants do not require any additional support unlike some of the herbaceous peonies.
Tree peony
Peonies perform best when planted in a location with a minimum of 6 hours of sun per day and must have fertile, well drained soil. Once planted in a suitable location, they are relatively care free, requiring only a good clean up in the fall to cut the stems down and remove all leaves (reducing the potential for fungal growth). In the case of tree peonies, the stems are not cut but all leaves should be removed and discarded in the landfill.
Peonies are sold as bare roots from growers as well as from some of the larger companies. These can be planted in either spring or fall however from experience fall is the preferred time to get them into the ground. As well, many nurseries sell peonies in containers that can be added to the garden at any time provided they are kept watered.
Early single peony “Claire de Lune”
Recognizing the value of a peony variety that performs well in the landscape, the American Peony Society developed an Award of Landscape Merit for cultivars that do not require support and are vigorous garden varieties. When choosing a peony for your garden, consider one of these.
Japanese peony “Sword Dance”
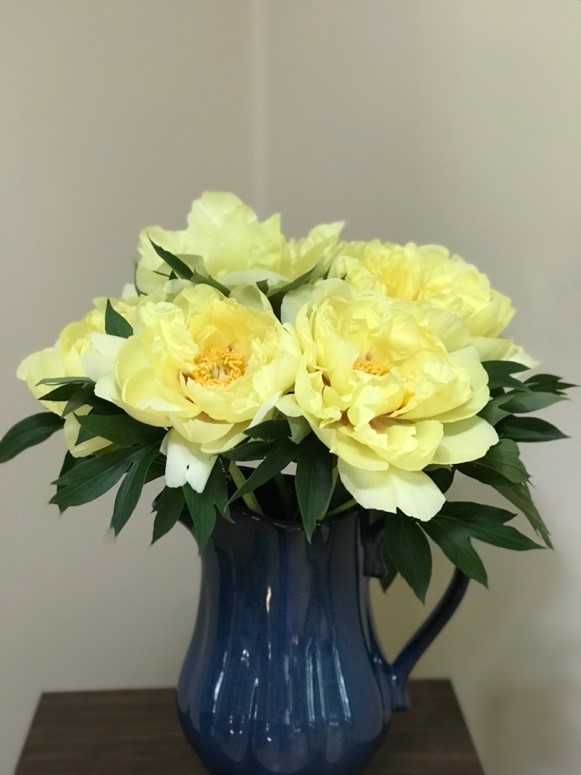
Peonies are not just for the garden. They make wonderful cut flowers as well. For maximum vase life, harvest them when the bud is coloured, rounded and soft to the touch, keep the vase out of direct sunlight and change the water frequently (peonies like cold water and I have started to add some ice cubes to the water in the morning). This should give you 6-7 days of vase life. The blooms are so large that it only takes a few to fill up your vase.
Treat yourself and purchase a peony for your garden. One can never have enough peonies!
Peonies as cut flowers
“Flowers are the music of the ground. From earth’s lips spoken without sound.” – Edwin Curran
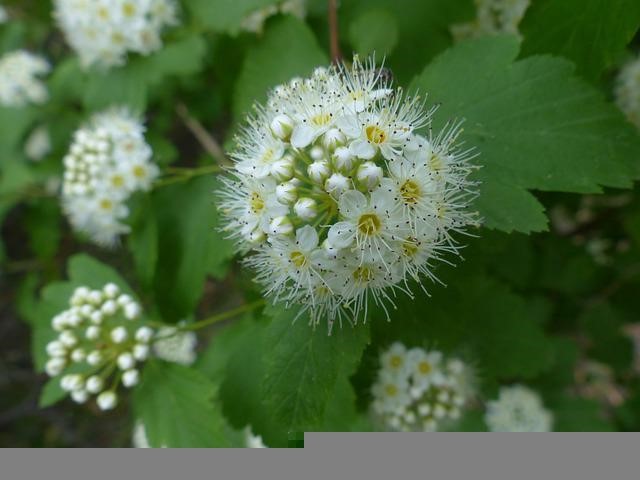
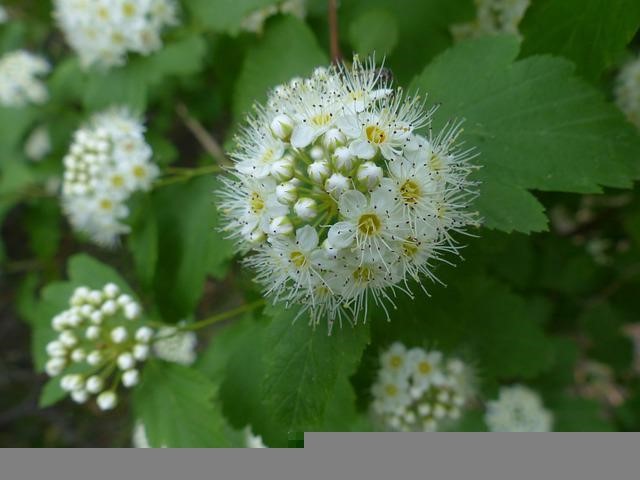
In the spirit of adding more native plants to my garden in order to help support diversity, native pollinators and birds, I recently purchased a New Jersey Tea shrub. Of course, it is also a new-to-me plant so I could not resist! This made me start thinking about other native shrubs that I could use in my garden….I already have some of the usual non-natives like hydrangea, lilac, forsythia and a few of the dwarf conifers. But, much to my surprise, I realized that I also have, in addition to the new-to-me New Jersey Tea (Ceanothus americanus), downy arrowwood (Viburnum rafinesquianum) , dogwood (Cornus species) and ninebark (Physocarpus opulifolius)!
New Jersey Tea – My newly purchased shrub is just a baby….it is barely 13 cm (5 inches) tall but will grow to be about 1 meter (3 feet) tall. I will need to protect it from the rabbits, who also inhabit my garden, by caging it with chicken wire. New Jersey Tea prefers full sun and well drained soil. It produces small white flowers in oval clusters at the branch tips in spring. It is hardy to zone 4. Additional information is available here.
Downy Arrowwood – My arrowwood is blooming right now. It is covered with clusters of tiny white flowers and many native pollinators. The flowers will be followed by blue-black berries that the birds love. Arrowwood prefers poor, well drained soil…..ours is planted at the edge of a gravel walkway. It can take part-sun to shade and is hardy to zone 3. At maturity, this multi-stemmed shrub will be 1.8-2.4 meters (6-8 feet) tall. Additional information is available here.
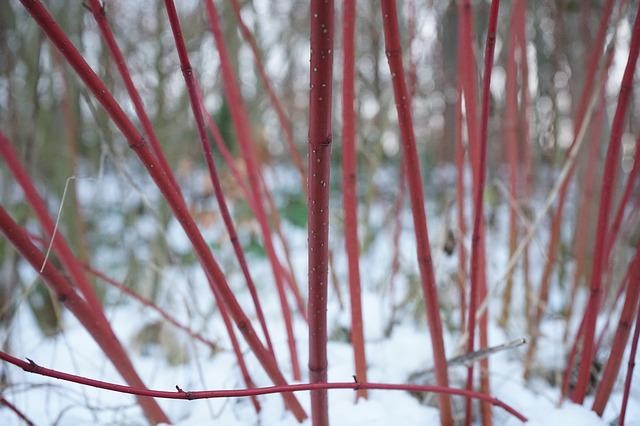
Dogwood – There are a few different species of dogwood native to Ontario including Pagoda dogwood (C. alternifolia), bunchberry (C. canadensis) and Red Osier dogwood (C. sericea). There are more but this group are hardy to at least zone 5 (Peterborough area). They vary in height and growing condition requirements. For more information on dogwood look here . The Peterborough and Area Master Gardeners also have a fact sheet available on dogwood here .
Ninebark – Ninebark is a great native shrub for your garden. It adapts to lots of different soil conditions and moisture levels including drought once established. It is hardy to zone 3, has pretty white blooms in summer and attractive fall foliage. I must admit that ours is planted in good garden soil and is mulched to minimize weeds and for moisture retention so my ninebark has it pretty good. This shrub does prefer full sun for best bloom production. The Peterborough and Area Master Gardeners also have a fact sheet available on ninebark here.
Remember that all new plants need to be coddled for their first year in your garden so keep them watered and watch for insects or critters that may cause damage. For me, that is fairly easy because I am often out in the garden admiring my new plants!
For more native plant choices and other pollinator information, check out Pollinator Partnership Canada under Resources. June 20-26/2022 is Pollinator Week in Canada. Why not celebrate by adding one or more native plants to your garden?
June brings a great show of Bearded Iris into the garden. Iris germanica flower in spring and although the bloom time seems short, the big colourful blooms are breath taking. Iris come in different heights, have big showy flowers in lots of fabulous colours and their elongated fan-like leaves give a different shape in the mixed border. There are 3 parts of the flower – “standards” which are the 3 upright petals, “falls” which are the lower petals usually hanging down and the “beard” which is the fuzzy hairs and is often yellow in colour. There are many varieties available, with colours ranging from shades of blue, purple, pink, peach, orange and combinations of colours where standards are one colour and falls another. Stunning!
Orange Harvest
Iris want a sunny location facing south or west, in well drained soil. They do not want to sit in water and will rot if they are too wet. Iris have rhizomes which produce roots to hold the plant in place and draw up water and nutrients. Rhizomes want their tops to be near the surface of the soil or slightly exposed, especially in heavy soil. A heavily mulched bed will not work for iris unless you leave a large area bare. Fertilize in early spring.
Raspberry Parfait
Dead-head flowers by cutting spent blossom stems right down, which encourages more bloom on rebloomers. Leaf fans should be cut back to 3” to 6” in the fall with sharp scissors.
Plants need to be divided every 3 to 4 years to reduce crowding and encourage blooming. Dividing should be done when plants are dormant in August or September. When dividing, check rhizomes for signs of disease and cut out any soft, wrinkled or marred parts. Let rhizomes dry overnight before replanting to allow cut areas to seal over to protect
Watch for Iris borer which will eat through the rhizomes. If you do get borers, dig up and cut off the damaged rhizomes.
Siberian Iris
Iris are often sold bare root from seed companies and there are several online iris companies in southern Ontario. They tend to ship for fall planting when plants are dormant. You can purchase plants in containers in garden centres in spring or summer.
Royal Botanical Gardens in Burlington have a wonderful display garden if you are up for a trip. Check out their website https://www.rbg.ca/gardens
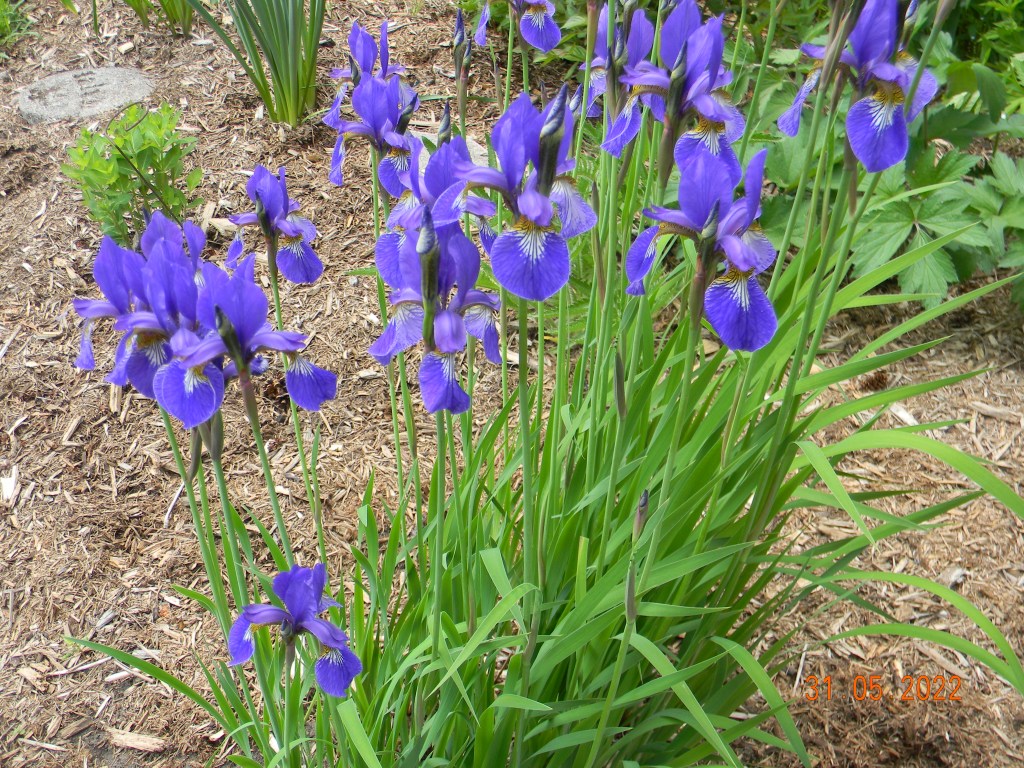
Iris siberica is another showy plant in the early summer garden. Siberian Iris grow 15” to 36” tall with lots of smaller flowers having standards and falls. Their leaves are narrower and almost grass-like. Siberian Iris can be planted into the soil rather than on top although they still have rhizomes. They can take full sun or part sun and do like a moist area. Dividing needs only to be done every 10 years or if the centre dies out.
Siberian Iris: Such amazing detail!
One of the earliest iris is Iris reticulata which is actually a bulb that you would plant in the fall. They are short and usually purple.
In Ontario we have native iris that are classed as wildflowers and known as Flags. They include Iris versicolor which you will find in shades of blue and Iris lacustris which is a smaller wildflower and very rare. These are often used in pond settings as they prefer to be wet. Iris pseudacorus is the non native yellow flag iris which is listed on the Ontario Invasive list.
Iris are poisonous for cats, dogs and humans if eaten.
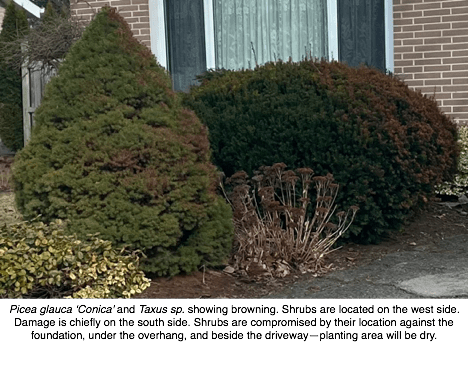
This spring as I walk around my neighbourhood, I have noticed quite a few evergreen conifers with brown needles. The species that are commonly affected are mainly the dwarf and ornamental varieties such as Picea glauca ‘Conica’ (Dwarf Alberta Spruce), Thuja occidentalis ‘Smargd’ (Emerald Cedar), and Taxus spp. (Yew). Some of the more robust and resistant conifers are the parent species such as Thuja occidentalis (Eastern White Cedar).
Cultural Practices for Recovery and Future Maintenance
Depending on the extent of the damage, these shrubs may recover and produce new growth. This process can be encouraged by additional watering and the addition of mulch. Shrubs should be well-hydrated up until freezing in the fall to prepare them for moisture loss in the following winter. Mulching helps protect shallow roots from drying out, can help limit frost-heaving, and moderates the temperature of the soil.
Prior to winter, consider adding some protection such as a burlap screen with stakes for plantings on the south and/or west side where it is sunny or windy or near driveways and walkways that are salted. Burlap can be wrapped around shrubs but should be kept loose so that moisture is not trapped. The advantage to a screen is that the area remains open to air and light. Salt, sun, and wind can draw out moisture from the needles and because the ground is frozen, the roots are unable to draw in replacement moisture. Planting these types of shrubs on the north and east sides, in less open areas, and away from driveways can minimize damage.
Shrubs that have been dug from the nursery field and then have been repotted for sale may be subject to some root damage/loss. This can be more problematic when transplanting late in the fall as there is limited time for root re-development. In addition, the ability of the roots to draw in moisture before freeze-up can be compromised. Refrain from pruning and fertilizing late in the summer as this can encourage a flush of late new growth—tender growth that is more susceptible to winter damage.
Conifers that are exhibiting winter browning:
Is Supportive Care Enough?
Perhaps—it is required in the first few years after transplant and probably they will continue to require extra support. However, some dwarf and ornamental conifer cultivars are simply not genetically adapted to thrive in this region. This is because they have originated from areas of more moderate climate and hardiness zones. When considering trees and shrubs, while some species are more adaptable than others, it is preferable that stock be grown locally and be from local cuttings and seed. Forest Gene Conservation Association notes that “bringing material in from dissimilar areas often results in low survival from heat stress or winterkill, frost damage, reduced growth rates, and increased insect and disease problems.”[ii] While climate change is indeed allowing us to push the envelope a little and plant some species from the next hardiness zone, and there are assisted migration[iii] programs for species, there can be a risk in transplanting certain plants from further afield. Plants are genetically adapted to follow a particular timed growth cycle. For example, a study of Quercus rubra (Red Oak) found that a specimen grown in Algonquin Park that was transplanted in the Niagara region stopped growing before the end of the growing season. It was genetically adapted to a growing season of 185 days but the growing season in Niagara is around 230 days. Another specimen grown in Niagara that was transplanted in Algonquin Park was genetically adapted to continue growing past the end of the growing season there and as a result suffered frost damage and browning. It would be weakened and be more prone to damage from disease and insects.[iv]
Another study of Picea glauca (White Spruce) in Alberta found that cold hardiness was determined to be the trait with the strongest genetic variation. Seed from plants originating from Ontario had high growth but a poor survival rate. Because they were accustomed to longer growth periods, there were more vulnerable to early damaging frosts. The plants with the highest survival and growth rates were grown from local stock.[v]
Before purchasing, determine your garden’s site conditions: soil, moisture, drainage, sunlight, wind, climate, and whether the trees or shrubs you are considering can adapt readily to the conditions. Climate change also needs to be considered as we experience increased drought and higher temperatures. Determine their origin. Ask the vendor where they were grown. If they originated from an area with very different conditions, consider giving them a pass. Realize that “if a tree is not genetically adapted to your site conditions, no amount of care will help it grow as vigorously as one from the appropriate source.”[vi]
Keep in mind the gardening adage, “the right plant for the right space.”
[v] Sebastian-Azcona, Jaime, et al. Adaptations of White Spruce to Climate: Strong Intraspecific Differences in Cold Hardiness Linked to Survival. Ecology and Evolution, vol. 8, no. 3, 2018. Online: http://dx.doi.org/10.1002/ece3.3796.
Dry soil with little nutrient value; amended soil with many nutrients
As we approach the reawakening of our spring gardens, I thought it would be a good idea to review the importance of soil maintenance.
How you prepare your soil will have huge implications on the health and survival of all your plants. Two years ago, my husband dug a deep hole in preparation for building a small pond. All the clay, rocky soil was removed. In the end, we decided on a smaller water feature, so I filled the hole with what was left in my two compost bins and backfilled with some of the clay that had been dug up. I hadn’t tested the soil, but through the use of good quality compost, I ended up creating a garden bed that was rich in nutrients and a soil that had good water-holding capabilities. The following spring, I decided to plant annuals in my ‘new’ garden bed. They were fantastic! All plants in this particular area of the garden flourish! The old saying, “Tend the soil, not the plants” is right on the mark!
My late summer garden with zinnias & cosmos
A well-fed soil will produce healthy and beautiful plants. It provides a physical anchorage, water, and nutrients and allows the exchange of gasses between plant roots and the atmosphere. The ideal soil is made up of 50% solids (mineral and organic materials) and 50% pore spaces (air and water). Water is best at 20-30%, air at 20-30%, mineral at 45%, and organic at 5%. These proportions can and do change dramatically in response to climate and rainfall.
There are 3 types of soil that most of us are familiar with; clay, silt and sand.
Clay is tiny particles about the same size as bacteria. Silt’s particles are 10 times larger than clay. Sand particles are 10 times larger than silt. The larger the particles, the easier it is for water to penetrate. I have lived with both sand and clay soils, and each have their own challenges.
Soil is full of living things like decaying organic matter, microbes, bacteria, fungi and microorganisms. It is very much alive! The world is depleting its soil at a much faster rate than the soil is able to replenish itself. One inch of topsoil that is lost due to erosion, wind or farming takes many, many years to replace.
There are more organisms living in one teaspoon of soil than there are people on this earth. Think about that! Soil is so very important and many of us are not aware of the benefits of keeping our soils healthy!
Here are a few ideas.
MULCHING
Mulching can greatly benefit the health of your plants. Some of those benefits include:
Improving the nutrient content over time of the soil (depending on the type of mulch used)
Reduces weeding as it often smothers them
Reduces water evaporation, therefore less watering is required
Protects the soil from temperature fluctuations, therefore avoiding the freeze/thaw cycle
Prevents soil compaction and reduces soil erosion
There are many materials available to be used as mulches in the spring. Refrain from using black or red coloured mulch. I prefer a natural cedar mulch.
DIVERSIFY AND PLANT MORE NATIVES
We are stewards of our land, no matter how small of an area we own. Native plants have evolved over thousands of years and because they have adapted to their environment, they are easy to grow, provide habitat and food to a variety of insects and wildlife, are remarkably resistant to disease and are generally tolerant of many soil conditions. The majority of native plants have very long root systems which work to improve the structure of the soil.
Doug Tallamy, author of Nature’s Best Hope, speaks about the decline in wildlife populations because of the disappearance of the many native plants they depend upon. He would like us to turn all our yards into what he calls our own Home Grown National Park. This would create corridors of conservation for all the wildlife, insects and birds. Take some of the grassy area you have and create a new pollinator garden with some local native plants. You will be amazed at the wildlife you will see!
BUILD UP YOUR SOIL WITH LOTS OF ORGANIC MATTER
Soil improvement can be a long process. It is recommended that you add a yearly application of organic matter, preferably in early spring. Do not be tempted to dig it in. Weed seeds can lay dormant for many years and as soon as they are disturbed and see the light, they will begin to grow. Lay the organic matter on top of your beds and the worms will do the work.
Use shredded leaves in the fall. I shred my leaves, rake them on my garden beds and leave them over the winter. Come the spring, the worms will do the job of taking them down into the soil.
Manure, Triple Mix or Compost from a reputable Landscape Supply Store
CONSIDER LASAGNA GARDENING
Consider creating new garden beds without removing turf by first covering it with newspaper or cardboard and then layers of soil and compost. If you do this in the fall, you will have a brand ‘new’ garden bed that you can plant in come the following spring!
My new garden bed; compost/leaves on top of cardboard and left to decompose over the winter!
PLANT COVER CROPS
Bare soils encourage erosion, loss of nitrogen, growth of weeds, water accumulation and spring runoff. Cover crops create a universe of microbes, mycorrhizae, fungi, and bacteria. By planting a cover crop in your vegetable garden in the fall, you will receive many benefits such as reducing water run-off, restoring carbon to the soil, erosion prevention and pest and disease resistance. Some of the more common cover crops that are used are legumes such as clover, beans and peas and grasses such as ryegrass or oats. Plants in the legume family take nitrogen gas from the air and convert it to a form that plants can use. In the spring, turn the dead material into the soil.
Sometimes we get questions that sound more complicated than they really are. After observing an odd occurence in my own home, I’ve been contemplating this one: “Why is my Thanksgiving Cactus blooming in March?” Sometimes, it’s a very simple answer: Because it’s not a Thanksgiving Cactus – it’s an Easter Cactus.
However, that’s not the case for MY cactus. Using the image below, I’ve correctly identified my plant as a Thanksgiving Cactus (Schlumbergera truncata) based on its leaf structure. It also bloomed profusely last fall. So what gives?
A couple of weeks ago, while watering, I noticed that some buds were forming on the window side of the plant, but not on the other side facing me. I turned the plant around. A few weeks later, it’s “bloom city” on that side, but the other side has exactly zero blooms.
I did some investigation, and it turns out that blooms require two things: cooler temperatures and long nights. These cacti are short-day plants, which means that blooms are triggered by long dark cool nights. They need for between 14-16 hours of uninterrupted darkness and 8 hours of daylight for between 3 – 6 weeks to set flower buds. Our winter seems to fit that bill — flowering that shows at Thanksgiving will often be followed by a second rush just before, at, or maybe after Easter because of the light and temperature.
Once you notice that your cactus is budding or re-budding, it’s a really good idea to leave it in exactly the same place, and to not move it. Moving the plant may result in bud drop. Also, while in flower, allow the soil to dry down somewhat between waterings.
Don’t worry if math isn’t your thing. Multiplying, or more correctly, propagating Streptocarpus (Cape Primrose), a beautiful flowering house plant, is not complicated at all.
Many plants will root well in water but some, like Streptocarpus, will form stringy, fibrous roots that may have difficulty becoming established when planted in soil. That is why a leaf cutting is advised. It is quite an amazing process as both leaves and roots are formed and the leaf cutting does not become part of the new plant.
You should have all your equipment clean and ready. Take a healthy leaf from a well hydrated plant and either cut out the midrib of the leaf, creating two leaf pieces or cut the leaf into 5cm sections from top to bottom. Have a clean pot already prepared with moistened soilless potting mix or half and half potting mix and perlite (medium). Your moistened medium should still be crumbly, not forming clumps, as that may mean it is too wet and may cause your leaf cutting to rot. Take your leaf cuttings and place them in the soil. Placing them about 2.5cm deep is advised but my leaf cutting wasn’t that big. As you can see parts of the leaf curled up but I still managed to get results. Five plantlets so far!
After your cuttings are in the soil, place your pot in a plastic bag to keep the humidity high. Leaf cuttings have no roots to support them so they need the high humidity. Place your bagged pot in a warm, bright spot but not in direct sun. It is advised to open the bag every week to release excess humidity and to water as needed. You may find you never need to water while the pot is bagged.
In about 6-12 weeks you will hopefully have little plantlets forming. Wait until they have developed enough leaf and root tissue and then pot on to 3-4” pots and enjoy your new plants.
Well, yes … I am, but I have a plan. February 28-March 4/22 is National Invasive Species Awareness Week. This is an international event whose purpose is to raise the awareness of invasive species. “Invasive terrestrial plants in a forest ecosystem can be trees, shrubs, or herbaceous plants that have been moved from their native habitat to an introduced area where they are able to reproduce quickly and crowd out native species. These plants are introduced and spread by infested packaging material, seed dispersal by both environmental and human sources, or by escaping from gardens.” Also look at Ontario’s Invading Species Awareness Program for more information.
Biodiversity is essential to the continued healthy life of an ecosystem. Invasive plants can quickly destroy it and humans require the natural resources found in a healthy ecosystem. We need food and we need water to survive. We are a part of the ecosystem too. Doug Tallamy says it best in his book, “Bringing Nature Home” where he writes “…ecosystems with more species function with more efficiency, are better able to withstand disturbances, are more productive, and can repel alien invasions better than ecosystems with fewer species.”
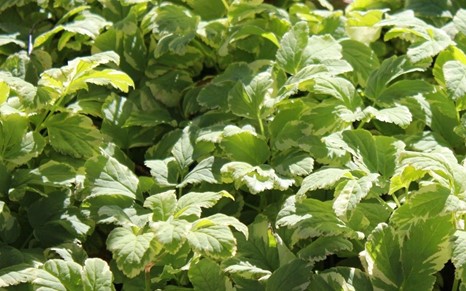
I became aware of invasive species about 15 years ago when on my walk to work, I noticed some English ivy (Hedera helix) growing in a small wooded area. Then, I realized that English ivy had totally carpeted that area. There were no other plants! A couple of years later, I saw the same thing but this time, it was a larger forested area and the culprit was goutweed (Aegopodium podagraria). Since then I have read more about invasive plants and, sadly, now often see problem areas.
So, back to my plan. I was aware of some of the invasive herbaceous perennials so had steered away from them. See terrestrial plants and aquatic plants for more information. However, my husband and I are tree lovers and have a rural property so we frequently indulge in purchasing new trees to add to our collection. Unfortunately, we ended up with two Norway maple (Acer platanoides) trees, two burning bush (Euonymus alatus) and a barberry (Berberis thunbergii) shrub. This year, I plan to convince my husband that they must go. I would like to replace the trees with two red maple (Acer rubrum) or perhaps a couple of sugar maple ((Acer saccharum). The burning bush will be replaced by a couple of native viburnum maybe nannyberry (Viburnum lentago) and the barberry, well, it will be replaced by a native bush honeysuckle (Diervilla lonicera). See Southern Ontario Grow me Instead Beautiful Non-invasive Plants for Your Garden. This is a great resource. It includes some native and some non-native plants to include in your garden plans.
I am inspired to be a better gardener every time I write a blog for the Peterborough & Area Master Gardeners. I hope that you will have a look at some of the links above and below and be inspired too. Please only use non-invasives in your gardening plans this year.
A new group on Facebook is the Canadian Coalition for Invasive Plant Regulations. The group is very concerned about the spread of invasive plants in Canada and would like to do something about it.