You can learn about or review a few terms and definitions and then “dazzle” your friends and family with your seed starting knowledge and vocabulary!
The process by which a plant grows from a seed into a seedling. What is germination?
Optimal water, oxygen and proper temperature. What are the conditions a seed needs forgermination?
The absorption of water by a seed. What is imbibition?
The part of a seed which acts as a food source for the developing plant embryo. What is theendosperm?
The first leaf or one of the first pair of leaves developed by the embryo of a seed. What is acotyledon?
The part of a plant embryo that develops into the primary root. What is a radicle?
The process by which plants use sunlight, water and carbon dioxide to create oxygen and energy in the form of sugar. What is photosynthesis?
A sterile, lightweight, free from weed seed product that is usually composed of vermiculite and peat or coir with no true soil in it. What is a soil-less seed starting mixture?
The process in which seedlings/plants grow leggy (long), pale and yellowed due to insufficient light. What is etiolation?
A disease of young seedlings caused by certain fungi and water mold that thrive in cool, wet conditions. Providing constant warmth under seedlings can help prevent this. What is dampingoff? Learn how to prevent damping off!
The process of allowing a plant to transition from a protected indoor area to the harsh outdoor conditions of fluctuating temperatures, wind and full sun. What is hardening off? Learn how to harden off!
Moving a plant into the garden so it can continue to grow. What is transplanting or plantingout?
True confession: In 30 years of growing a vegetable garden I’ve never made a planting plan. I only make a sketch noting what was grown in each planting bed so that I rotate crops over a 3-year cycle to minimize pest build-up.
Recently, I was introduced to the idea of making a planting plan to both optimize garden space for vegetables to be grown and ensure timely harvests and succession sowing/planting–of particular importance in our short growing season! Now is a great time to plan. To illustrate how, here are the steps to grow 6 crops in a hypothetical garden plot 12 feet x 12 feet in size.
Step 1: Identify the Average Date of Last Spring Frost and Average Date of First Fall Frost for your garden location. By consulting this Ontario map, we see that Peterborough is in Zone E with a May 17 last frost and a September 26 first frost, giving a 19-week or 133-day growing season.
Step 2: Identify the vegetables you want to grow, and note the weeks to maturity (i.e., estimated time before you can harvest edible vegetables) on the seed packet. Decide whether you will direct sow or plant seedling transplants that have either been purchased or sown indoors. In short growing seasons, transplants can give you a head start and are recommended for crops that take more than 100 days to mature.
Step 3: Make a schedule either on paper or in digital format, by creating a table with the months of the growing season as columns and the 4 weeks in each month as rows (see Table 1 or this more detailed worksheet). Identify in which weeks the following events for each crop will occur:
Direct sowing of cool season crops like lettuce, spinach, kale and snow peas (second week of April in Peterborough)
Either direct sowing or planting of seedling transplants of warm season crops like carrots, beans, squashes, melons, tomatoes (third week of May, or later)
Count the weeks to maturity and identify when harvest will occur for each crop
Identify if there will be enough weeks in the growing season to sow or plant the space with a second crop of after the first crop is harvested
If you can sow or plant a second crop, add these actions to the schedule, ensure the second crop in any planting bed is from another vegetable family
Finally, add in other key dates, like when seedling transplants need to be sown indoors in spring and hardened off, or in mid-summer (for a second crop), if growing these yourself
Table 1 shows a schedule for 6 crops and identifies that the growing season in this hypothetical garden can accommodate harvests of two kale, lettuce, and bush bean crops, and one carrot crop.
Step 4: Identify where each crop will be planted by sketching a map to approximate scale of your planting beds. Refer to the recommended spacing on the seed packet, to identify how many plants will be sown or planted. Refer to notes about the past 2 years of planting to ensure you don’t grow the same crop in the same location as the years before.
Figure 1 shows the 12-foot square hypothetical garden divided into 6 beds, each 3 feet by 5 feet. We immediately notice that nothing is planted in beds 4 and 5 until the last week of May and the first week of June, respectively. Could radishes (3 to 5 weeks to maturity) and spinach (5 to 6 weeks) have been planted in mid-April in beds 4 and 5, respectively, and mostly harvested just before planting the small tomato and zucchini seedlings?
Ft.= feet; in.=inches; W/in = within; Wk=week
You will likely grow more than 6 vegetable crops. For example, you could plant seedlings of a short-season broccoli instead of kale crop #1 and snow peas instead of bush bean crop #1. But, if you follow these steps to make a planting plan almost every inch of your garden space will be used from as soon as cool-season crops can be sown to when crops such as kale, cabbages, carrots, and parsnips are touched by the first frosts that concentrate sugar content and improve their taste. You might also include annual flowers like marigolds, calendula and alyssum that not only add beauty to the vegetable garden but attract pollinators.
By recording yields in your garden over the years, the planting plan can be fine-tuned so that the number of plants of each crop grown is as much as your family can eat. Nobody wants to be overwhelmed by too many zucchinis!
It is a bit of work upfront to make a planting plan, but it will save time over the growing season because you will know exactly when and where each crop will be planted, at what spacing, and which crop will succeed the one just harvested. You will also save money by only buying seeds for crops that will be grown!
I am going to try this for my vegetable garden this year, how about you?
For more info on growing veggies in Ontario check here. Also check the Peterborough & Area Master Gardeners resources page here for fact sheets on growing lots of different kinds of vegetables.
This is an important question! People garden for various reasons and the answer to that question is a wonderful guide for helping to create your garden. If you do not know why you garden, then you may put a lot of effort, and money, into something that does not make you happy or meet your needs. So, figure out why you garden, what inspires you and keeps you coming back for more!
I recently asked this question of the Peterborough Master Gardeners. Some find gardening a creative, and passionate, process that gives them joy and peace and a feeling of gratitude. They spoke of being in nature and being part of the relationship between the soil, bees, birds, butterflies and plants. For some, it is the nurturing of the land and being able to feed their families, and share with neighbours, through the vegetables that they grow. Others spoke about the enjoyment they get from the physical process of gardening. Gardening is good exercise, especially if your job includes sitting at a desk all day. One of our fairly new Master Gardeners talked about starting to garden because it was a lower-cost opportunity to take care of living things and the desire for her property to be pretty and attractive to pollinators. Gardening has evolved for her to provide her with a sense of peace and accomplishment. A final comment about the “why garden” question…..gardening can be a solitary activity or a very social activity where you talk to fellow gardeners or give advice to curious non-gardeners.
Thinking about why one gardens leads to asking yourself what type of garden you are most drawn to. One Master Gardener shared that she prefers a more formal garden although she can appreciate a cottage style or meadow garden too. The rest of us are a bit more on the wild side. We prefer colourful cottage gardens that are informal but not out of control. This type of garden might include bee balm (Monarda species), coneflowers (Echinacea species) and brown/black eyed susans (Rudbeckia species). The importance of growing for diversity with native plants and not growing invasives was mentioned as was a garden that appealed to pollinators. Formal gardens can be more difficult to maintain because it may require more time and effort to keep a very specific style eg. pruning shrubs to a unique shape. Cottage gardens tend to have a looser structure and may require less maintenance. They may also include vegetables!
However, gardening is not all just pretty flowers and shiny vegetables. Some Master Gardeners mentioned the frustration when garden pests or disease attack. The best defense is to inspect your garden often to catch problems early. Plants are also less susceptible when they are healthy. For good health, plants need the appropriate moisture, light, temperature and soil for that plant. Other Master Gardeners were challenged by out-of-control invasive plants (eg. goutweed, Aegopodium podagraria), weeds or limitations that occur as we age….for some, gardening from dawn until dusk is just a memory!
So, grab your pen and paper and answer the question, “why do I garden?” You may feel that you are on the right track, or you may decide to make some changes. Now is the time to dream and plan what you would like to do this year, to have a garden that feeds your soul and maybe your family and neighbours too!
Thank you to the Master Gardeners who responded to my questions. I loved reading your answers and thinking about how we are drawn to gardening in slightly different, but similar, ways.
Bolting? Run to seed? Wait, my plants are going to pull up roots and escape?! No! These terms are used when vegetable crops prematurely flower and go to seed, very likely making the plant unpalatable and possibly unusable. https://www.rhs.org.uk/vegetables/bolting
According to https://www.canr.msu.edu/news/bolting-in-spring-vegetables, ‘flowering in most annual vegetables (ex. lettuce, arugula, spinach) or biennial vegetables (ex. kale, onions, carrots) is influenced by complex interactions between temperature, daylength and stresses of various kinds. Among these, periods of cool temperature during early growth followed by long daylight hours are often the most important determinant of unwanted bolting in vegetables’. Sounds complicated!
Can a gardener prevent bolting? From my research there does not seem to be a general rule of thumb for all vegetable crops. Suggestions include timing your sowing of seed or planting out of seedlings until temperatures are relatively stable. One could employ succession planting such as planting cool weather crops like arugula in the spring and then again in August to have a more consistently available crop. Providing good growing conditions so that your crop will mature enough to provide a usable portion before flowering, is another suggestion. Dry soil is also reported as a cause of bolting so careful watering may help. Careful watering is never a bad thing. Lastly, using bolt-resistant cultivars is on most lists as a way to ‘control’ bolting.
So why am I talking about vegetable crops going to seed in January? At this time of year, we have the wonderful opportunity to peruse seed catalogues and there you will see specially bred plant cultivars being described as ‘slow to bolt’ or ‘bolt resistant’. They may not always be what I choose when ordering seed but they are an option to potentially extend and improve the vegetable harvest.
As this year ends, I’m offering a few New Year’s resolutions for gardeners for 2024. If you want more of a challenge, the Chicago Botanic Garden offers 50.
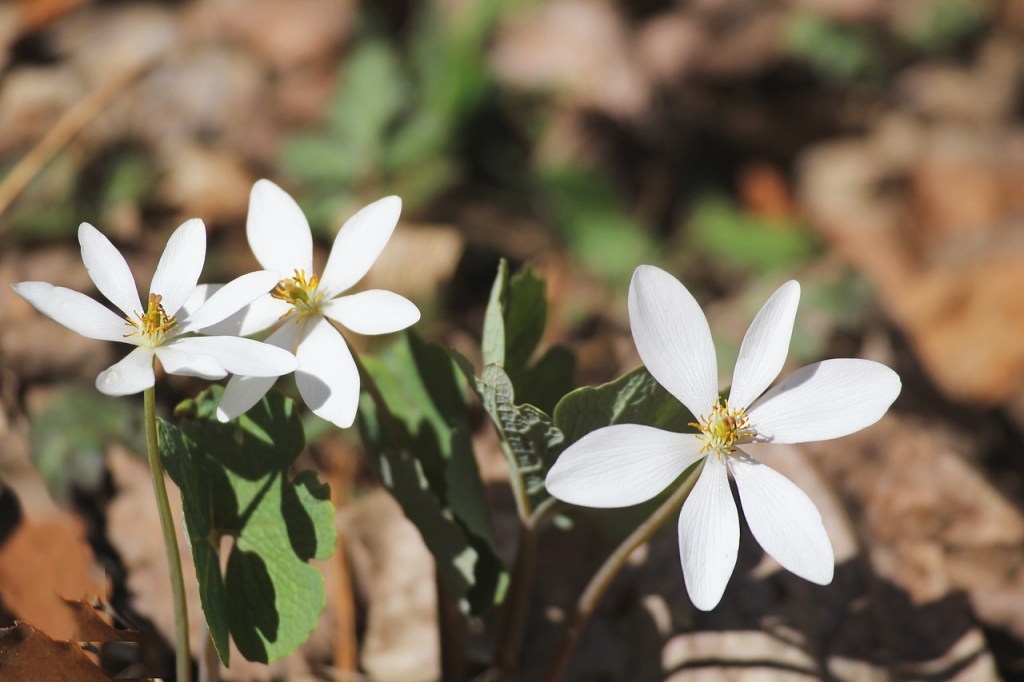
Add Native Plants To Your Garden
We’re all seeing the effects of climate change on our gardens.
Native plants adapt more readily to stressful and changing weather patterns, such as prolonged droughts or winter cold snaps, than hybrids and non-natives often seen in our nurseries.
Native plants help sustain beneficial insects and bird populations because they attract native pollinators and birds that might not be drawn to non-natives.
Create less work for you, as native plants tend to be lower maintenance than non-native ones.
The Native Conservancy of Canada offers some suggestions to get you started, or consult with your local Master Gardener group or Horticultural Society.
Bloodroot, Sanguinaria canadensis
Start A Compost Bin
Composting helps keep waste out of landfill by collecting and processing organics into material that can be used to create nutrient-rich compost used to feed and nourish soil.
Canadian Living offers a simple outline, as shared by Ed Begley Jr.
Or more here from the Thames Region Ecological Association, including troubleshooting issues.
Compost bin
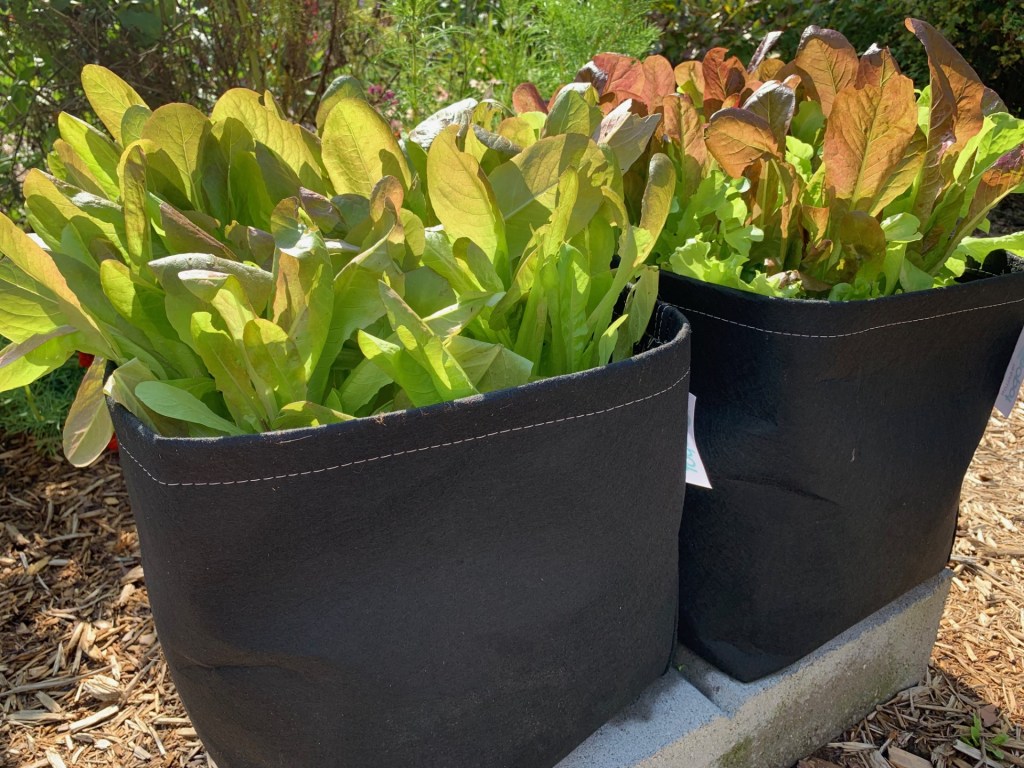
Grow More Of Your Own Food
The pandemic has highlighted how our agricultural systems are vulnerable to global shocks. Issues with supply chains, migrant workers, transport, trade and border closures have resulted in some foods being in short supply or prices going up (while quality goes down).
Insects do all the hard work, and all pollinators benefit.
Gardening provides benefits for your wallet, your nutrition, and reduces your environmental footprint. By growing your own food (either from seeds or small plants), your food is automatically more sustainable simply because you are doing it onsite or in a community garden. If you control the ‘inputs’ and do it well, you can save a lot of money.
Ultimately there is nothing more rewarding than planting and maintaining your own vegetable garden and harvesting (and sharing) your results. And we all know how much better homegrown produce tastes versus conventional produce at the grocery store. If you have too much produce, then you can just share the love with others!
Plastic is a major component in the garden, from plastic plant pots and seed trays to watering cans, and compost bins. Most plastic gardening equipment will end up in landfills, where plastic pots alone can take up to 500 years to decompose.
There are a few easy swaps you can make in going plastic-free: Many of us want to use less plastic in the garden, from plant labels to watering cans, tools, plant pots and the sheeting used to suppress weeds. Buying (and therefore using) less plastic will not only reduce your plastic footprint but also sends a message to manufacturers that gardeners want alternatives to plastic (especially single-use plastic).
Try to find biodegradable pots that made from natural materials such as coir, bamboo, wood chips, or seaweed (or commit to using your plastic pots year after year).
If you use plastic string, make the swap for a natural jute or hemp, and protect your fruits and vegetables with metal mesh instead of plastic netting – it lasts for years.
Find alternatives to plastic pots, or commit to using (and reusing them) for many years
Happy gardening dreams until we can get out into our gardens again….
As the snow blankets our gardens in Ontario, many might assume it’s time to hang up the gardening gloves until spring. However, seasoned gardeners know that December can be a time of indoor/outdoor preparation for the upcoming growing season.
One key activity for this month is winter mulching. While it may seem counterintuitive to spread mulch in the cold, it’s a crucial step to protect your plants from the harsh Canadian winter. A thick layer of mulch acts as a cozy blanket, shielding the soil and plant roots from extreme temperature fluctuations. Thankfully in our region, Mother Nature does this job for us in the form of snow!
For those dreaming of vibrant spring blooms, December is the ideal time to start forcing bulbs indoors. Tulips, daffodils, and hyacinths can be coaxed into early flowering by providing them with a period of cold storage, mimicking the winter chill they would experience outdoors.
Don’t forget about your compost! While your outdoor compost pile may slow down in the winter, it’s still a valuable resource. If you don’t do this already, consider continuing your indoor composting with kitchen scraps to keep the nutrient-rich compost coming, even in the colder months. People living in the city will probably be already doing this thanks to the new green bin program, but for others living outside of the city limits, sometimes the outdoor compost pile seems like it’s just too far to venture to in the cold. However, a little bit of effort now will divert a lot of food waste from the landfill.
Lastly, embrace the festive spirit by incorporating evergreen plants into your outdoor decor. Hollies, spruces, and winterberry bushes add a touch of green to the winter landscape and can be adorned with festive lights or ornaments.
December in Ontario might be chilly, but for gardeners, it’s a time of planning, protecting, and finding joy in the small wonders that the winter garden has to offer. So, bundle up, grab your gardening tools, and let the December gardening adventures begin!
Full disclosure: Just a few short years ago, before Master Gardener training, I considered my house the place where houseplants came to die. Changing my plant care routines has saved plant lives but winter has its challenges.
Watering
As a Master Gardener in training, I learned that 80% of house plant “failures” were due to over-watering. That was empowering for me and changing watering practices has led to success. In winter, plant growth is decreased and house plants need less water. Before watering check to see if the top 1-2” of soil is dry. With smaller plants you can also get to know the weight of a saturated pot relative to a dry pot by lifting them a few times between waterings. Water thoroughly only when your plant feels dry. Underwatering is much better than overwatering. Signs of overwatering include the wilting or yellowing of lower leaves and inner leaves advancing to scorch, leaf drop and plant death.
Fertilizing
During the winter when houseplants may not be actively growing, they do not need fertilizing.
Humidity levels are lower in our homes during the winter. For house plants that prefer higher humidity the only sure way to provide this is by increasing the humidity in your home which may be problematic. Some people advocate misting plants, placing them on a pebble tray filled with water or clustering plants so that they can benefit from the water that each plant transpires. The effectiveness of these methods is questionable. Choosing plants that tolerate less humid conditions, like succulents is another option. Plants suffering from low humidity may develop drying and browning around leaf edges.
Light
As light levels drop in winter some plants may need to be moved to increase the amount of light they receive or have supplemental light provided such as fluorescent grow lights. Symptoms of not enough light include pale green, yellow to white leaves, leggy stems, dropping leaves, variegated leaves becoming solid green or flowering plants not flowering. Lighting for plants is an involved discussion but this article https://extension.umn.edu/planting-and-growing-guides/lighting-indoor-plants has good information.
Houseplants are a beautiful indoor feature providing pleasure for many. Mastering winter care for your house plants will keep them healthy and beautiful, a wonderful touch of green in our winter world.
At a recent horticulture meeting, the subject of using wood ash in the garden came up. As the days grow shorter and the temperatures drop, I was reminded of this. As someone who used to heat the house with wood, I am no stranger to finding uses for my ashes. Although most of the time, the ash went onto icy paths and the lane, there was always some left in the spring. Those were spread in a thin layer over some of the soil in the garden. As with most things, ashes in moderation can be a good thing, sometimes!
Why use wood ash in the garden? From my perspective there are two reasons for wanting to use ash in the garden.
1. Recycling. Better to see the ash returned to the earth than ending up in the landfill.
2. Benefits to the soil. Constituents of ash can vary depending on what type of wood is burned but generally the largest component is calcium carbonate (20%). Next is potassium (10%), phosphorous (1%) and possibly some trace amounts of micro-nutrients such as iron, manganese, boron, copper and zinc. Used in moderation, ash does act as a fertilizer but note it is not a complete fertilizer as it doesn’t contain nitrogen.
Keep your eye on Soil pH
Ash is alkaline due to its calcium carbonate component and has the ability to affect soil pH. For those growing acid loving plants such as azalea or blueberry, the addition of wood ash will not be appreciated. Folks with neutral to slightly sweet soil probably will not notice any deleterious effects however if you are struggling with an elevated pH, ashes could end up tying up more micronutrients such as iron and result in even more chlorosis in plants.
How do I use wood ash and how much?
As a general rule of thumb, an application rate of 20 pounds (approximately a 5 gallon pail) per 1000 square feet per year (it takes about one cord of wood to produce this much ash). I have seen recommendations on applications for both spring and fall. Just recall that wood ash is very fine and blows away quite easily. It seems best to apply a thin layer to moist soil or to dig it in. Wood ash can also be added to compost piles at a low rate (sprinkle one or two cups on top of pile when adding green or brown material to the pile but do not exceed more than 5% of the total volume of the compost).
Cautions when using wood ash
Ash is caustic. Wear a mask to avoid breathing it in and wear appropriate PPE. Never mix ash with nitrogen fertilizers such as urea or ammonium sulphate as such a mixture will produce ammonia gas. There are certain things you should not burn if you plan on using your ashes in the garden as they could contain heavy metals such cadmium, chromium or lead. These things include: Treated lumber, painted or stained wood, cardboard, fake fireplace logs, coal, BBQ briquets and any wood that was ignited with a fuel such as gasoline. Some references caution against using the ash from wood that was grown near industrial locations for fear of heavy metal contamination.
Since wood ash does have some benefit as a soil amendment, it seems like this is one more way to reduce the amount of waste going to our landfill. Why not give it a try?
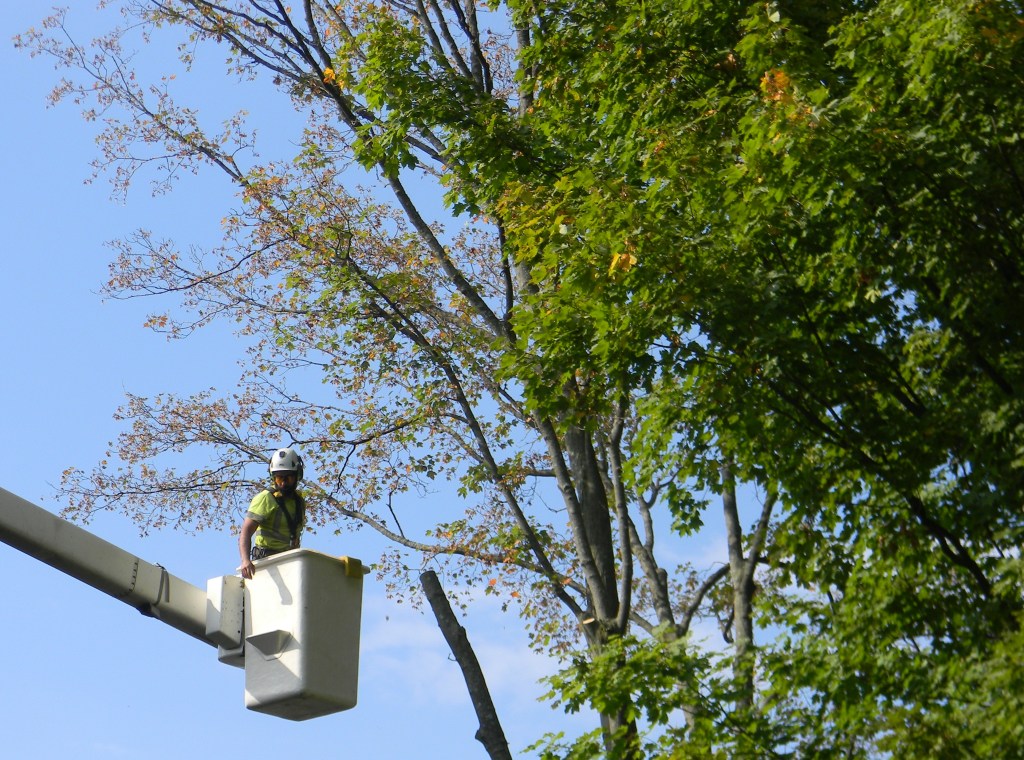
As gardeners, we are aware of the importance of trees. In our yards they give us shade from the hot sun, dropping the temperature beneath them and cooling the air. They give habitat to birds and insects. They purify the air and help reduce greenhouse gases. They anchor the soil and help with soil erosion. They give us privacy. Studies have shown that trees also help our mental health. In the past few years, ice storms, spongy moths, wind storms, and the recent derecho have damaged many trees in our area. Around every neighbourhood, you hear the buzz of chainsaws throughout the year. Last week, we had one of our lovely big sugar maples cut down because it became diseased. Heartbreaking but necessary to have it taken down.
Fungal diseases are often the culprit of the decline and death of many species of trees. Trees that are planted where their roots have no good earth to grow in become stressed. A stressed plant is easier for pests and diseases to invade. Our sugar maple was close to our driveway and although it is not paved, the ground is compacted.
Years of drought also affect a tree’s health. Wind storms can damage branches and leave open wounds where disease can find its way in. We are all familiar with Dutch Elm disease which has been in Ontario since 1946. It is a highly contagious fungal disease that has almost wiped out elm trees. Many of the dead trees you see along roadsides are elms.
Anthracnose is a common disease in maple and oak trees. It often appears after a damp cool spring. Brown blotches appear on leaves, they dry up and fall off. When combating this disease, you need to rake up and dispose of infected leaves. Tar Spot is common on norway maples. Although it may not kill your tree, it is a fungal disease and will continue to spread. It is recommended to rake up leaves and dispose of them rather than mulching them.
Spruce trees were stressed by the spongy moths and drought and we are seeing them suffering with Cytospora Canker. Signs of this disease are needles turning purple, then brown, then dropping off leaving branches bare but covered with a white resin. Cankers appear on the branches near the trunk.
Last week’s post was on Oak Wilt, a recent fungal disease which has no chemical control yet. Pests are also a huge problem with our trees. Emerald Ash Borer has been in Ontario since 2002. The metallic green beetle emerges in late June, laying eggs in crevices of bark. Larvae overwinter under bark and tunnel under the bark leaving “S” shaped marks which cuts off the trees ability to draw food and water. There is an insecticide that a professional can inject into the tree.
Spruce budworm is native to North America. It attacks balsam fir (Abies balsamea), white and black spruce (Picea), hemlock (Tsuga), jack and eastern white pine (Pinus) and Larch (Larix). BTK has been used to control, however if you have a mature tree this option is overwhelming. We all need to be aware of the health of the mature trees on our property. Ensure they are getting enough water, watch for small leaves or broken branches and pest infestations. Call an expert arborist to give advice on an ailing trees. They can also help with any pruning issues that might need to be addressed.
If you are investing in a tree for your property, be sure to do some research and find the right tree for the right spot. Take into consideration how big the tree will get, where the sun will shine on it, how much ground it will have to absorb moisture and what competition it might have. Young trees need lots of water to get established and grow. What’s that old saying? Hug a tree? Well, after you hug your tree, check out the references below for more information on diseases and pests and ways to help your trees.
Oak trees are an essential part of Ontario’s natural beauty, providing shade, wildlife habitat, and a sense of nostalgia. However, these majestic trees face a silent threat known as oak wilt, a deadly fungal disease that can devastate entire oak populations if left unchecked. In this article, we’ll discuss what oak wilt is and how you can help prevent its spread.
What is Oak Wilt? Oak wilt is a disease caused by the fungus Bretziella fagacearum. It primarily affects oak trees, especially red oaks and pin oaks. The fungus clogs the tree’s water-conducting vessels, causing wilting, leaf loss, and eventually death. Oak wilt is highly contagious, spreading through root grafts between neighboring trees or by sap-feeding beetles that transport the fungus spores.
Avoid Pruning Oaks in Spring and Early Summer: Oak wilt spores are most active during these seasons. Pruning creates wounds that can attract sap-feeding beetles carrying the fungus. Instead, prune oak trees during the dormant season in late fall or winter.
Use Pruning Paint: After pruning, seal the wounds with pruning paint or a latex-based paint to prevent beetles from entering and spreading the disease.
Dispose of Infected Wood Properly: If you suspect oak wilt, remove and destroy infected wood by burning or burying it. Do not use it for firewood or mulch.
Report Suspected Cases: If you notice oak trees showing signs of oak wilt, contact your local forestry department or arborist immediately. Early detection and intervention can help contain the disease. This link may help: Signs and Symptoms of Oak Wilt.
Promote Tree Health: Healthy trees are less susceptible to oak wilt. Ensure your oaks receive proper care, including regular watering, fertilization, and protection from other stressors like construction damage.
Oak Wilt has been found in the following locations in Ontario: City of Niagara Falls, township of Springwater (north of Barrie), and Niagara-on-the-Lake, ON.
There is currently no available treatment for oak wilt.
We must take collective action to protect our oak trees from oak wilt. By following these prevention measures and staying vigilant, we can help preserve the beauty and ecological importance of these remarkable trees for generations to come.