Peonies are like the royalty of the flower world, with their lush petals and captivating fragrances. If you’re itching to grow more of these stunning beauties in your garden, you’re in luck!
Peony plants fall into one of three categories: herbaceous peonies, tree peonies, and intersectional/Itoh peonies (modern crosses between herbaceous and tree types). This article addresses the propagation of herbaceous peonies by seed and by division.
Growing Peonies from Seeds: Starting peonies from seeds is like embarking on a rather long gardening adventure. First, collect ripe seeds from mature peony plants once the flower heads have dried. Give them a good soak in water for a day to help with germination. Then, plant the seeds in well-draining soil in a pot or tray. Cover the container with plastic wrap to create a cozy greenhouse effect.
Now, it’s time for a little winter simulation. Pop the container in a cool spot like your fridge for about three months. After the chill period, move the container to a warmer spot with indirect sunlight. Keep the soil moist, and be patient. It might take a while, but soon you’ll see those precious seedlings sprouting. Once they grow bigger, you can transplant them into individual pots or your garden. Remember, it may take a couple of years for them to bloom.
Dividing Peonies: Dividing peonies is like giving them a fresh start and making more peony magic happen. Autumn or early spring is the perfect time to divide these beauties. Carefully dig up a mature peony plant, making sure to keep as many roots intact as possible. Gently shake off excess soil and look for natural divisions or “eyes” on the plant – these are the points where new shoots will emerge.
Grab a clean and sharp knife, and cut the plant into sections, making sure each division has a few healthy roots and eyes. Then, replant these divisions in well-prepared soil in a sunny spot. Give them a good drink of water and watch as they settle in and grow. Don’t be surprised if it takes a year or two for the divided peonies to bloom, but when they do, it’ll be worth the wait!
With these two propagation methods, you can expand your peony collection and enjoy a blooming paradise in your garden. Whether you choose seeds or division, the joy of growing peonies will reward you with breathtaking blossoms and a sense of accomplishment. Happy gardening!
Columbines (Aquilegia spp) are lovely perennials. I have had them in my garden for many years, and they always offer a pop of colour in the late spring/early summer garden here in Lakefield, Ontario.
These easy care perennials come in a variety of colours, shapes and sizes – most are bi-coloured, ranging from pastel shades to vibrant hues. Columbines have distinctive five-petaled flowers with long backward-extending spurs as pouchlike extensions of the petals, containing nectar. Sepals and petals are brightly coloured. The leaflets of the compound leaves are usually rounded and notched.
In my garden I have both cultivars and straight species (native) columbines, but it was a query on our Master Gardener of Ontario’s Facebook page about someone’s columbines changing colour from year to year that caused me to go down the research rabbit hole to try and find an answer for them.
What Did I Find Out?
Well, apparently columbines really like to hybridize with other columbines. They really do. They are also sensitive to their soil conditions and a number of other factors.
There has been some fascinating research done at universities like UC Santa Barbara (here and here). In one study they used two columbine varieties – red columbines pollinated by hummingbirds, and white or yellow columbines pollinated by hawk moths. Apparently hummingbirds prefer medium length nectar spurs (the ‘tails’ on the columbines), while hawk moths prefer the relatively longer-spurred species.
The study also noted that columbines can change from blue to red, then white to yellow. According to the researchers, the colour shift from red to white or yellow in columbines has already happened at least five times in North America.
So Why Do They Change?
There are several reasons why columbines change colours:
DNA mutation
Natural selection
Adaptive radiation
Hybridization
Changes in soil conditions
DNA Mutation
Based on the UC Santa Barbara findings, at least 34 genes produce different columbine flower colours. Because of the presence of various genes, there’s an increased likelihood that the colours will change simply due to gene mutation. It doesn’t happen because of creation of new genes, but just because of current gene mutation.
Natural Selection
In the studies and mentioned above, if most pollinators are hummingbirds, most of the columbine colours are red. However, when the population shifts and most of the pollinators become hawkmoths, there’s a potential for the colour to modify. The resulting blooms can be white or yellow.
Adaptive Mutation
Another concept explored in the study of the columbine colour changes is adaptive radiation, based on Charles Darwin’s Theory of Evolution, which assumes that living organisms change their structures to better adapt to the changes in their surroundings. For columbines, flowers develop new traits as a response to changes in their environment. In this case, the changes include the pollinators.
Research shows that columbine flowers are tailored to the tongues of their pollinators, which shows an example of how they evolve based on their environment.
Hybridization
Columbine colour change can also be due to cross-breeding, when male and female parts are pollinated. The goal? Combining the positive attributes of two species, changing the physical characteristics, resulting in a better yield and disease resistance, among others.
Hybridization can also occur non-deliberately – for example when we plant two columbine varieties near each other, this will often create colour changes from the original plants.
To prevent problem hybridization, especially with our native Eastern Red columbine (Aquilegia canadensis), the best thing you can do is plant the native species as far away from the cultivars as you can – not foolproof but an important thing to consider. Or don’t have any cultivars on your property, but that doesn’t guarantee they will stay the same as pollinators move from garden to garden.
Changes in Soil Conditions
It’scommon for columbine colours to shift because of slight changes in the soil’s pH, as well as the presence or absence of metal ions in the soil. A pH lower or higher than 6.0 to 6.5 can result in nutrients being unavailable, which in turn can affect colour.
Our beautiful native Eastern Red Columbine (Aquilegia canadensis)
Colour change in columbines is a fascinating phenomenon, as you can see from my “rabbit hole research”.
But here’s the bottom line – if you want to keep your native columbines from hybridizing with cultivars you have to keep them as far away from each other as possible. If you like the idea of them changing colours (for a variety of reasons) just sit back and enjoy!
I was honoured to be part of the Lakefield Horticultural Society’s Garden Tour last summer, along with fellow MG Emma Murphy. It was a glorious day, and I loved the wide range of people who came to tour — each with different backgrounds and gardening styles.
The one question I fielded more than once is “where are the weeds”?
First of all, what’s a weed? To me, a weed is a plant that is growing where it is not wanted. My weeds could be your prized “Lubauchnia” (my hubby’s fabricated word for plants he doesn’t know the name of, which includes most plants).
Disclaimer: I didn’t inherit a bunch of the nasty weeds as there were no gardens at my house when we bought it 32 years ago. I do deal with the nasties at my gardening clients’ homes weekly, though!
For plants that are growing where they’re not wanted in my gardens, here’s what works for me:
Don’t wait — smaller weeds are easier to get rid of than larger ones. This applies to spring and fall when we’re often not as diligent in getting outside. Sometimes it seems like a full grown weed can appear overnight during those seasons!
Use mulch — I love my leaf mulch, and it seems to be very effective in suppressing weeds. A chipper makes short work of a pile of leaves. Mulch also conditions your soil and encourages earthworms and microorganisms, a win-win situation.
It’s especially important to weed BEFORE the seed heads develop — you’ll save yourself a LOT of trouble getting them early in their life cycle.
Cut back perennials after they’ve finished blooming, and check for the inevitable “weeds” underneath.
Weed when the soil is moist, so that the maximum amount of root comes with the weed. Weeding in dry/hard soil results in small pieces of the root being left behind, which can usually regrow. I rarely weed without my trusty Lee Valley Root Knife — loosening the soil around the root before pulling.
Watch newly planted perennials closely, especially natives. If they send out runners or if they are very proficient at casting seedlings, they get “shovel pruned” at my place. You can do you at your place.
Lastly, “know your garden“. The more time you spend out there, the fewer undesirable plants there will be.
Simple knife-in then pulling works well for most regular weeds. However, some types such as japanese knotweed, lily of the valley, bindweed, cow vetch, DSV or creeping bellflower will require more diligence as their mother-roots are buried deep underground. Eradicating those weeds involves a lot of deep digging, soil sifting, and extreme diligence. There are actually support groups on Facebook for those truly invasive plants. May actually be easier to move!
Weeds that contain viable seeds should be “solarized” — left in a black plastic bag on the driveway for a couple weeks. The heat will fry the seeds. Dispose of the bag in the garbage. Don’t put seed heads attached into your composter.
There’s a new thought process that suggests that repetitively cutting difficult weeds at soil level is more effective than pulling them. It’s true that if it’s done often enough, those roots will eventually die for lack of nutrient supply from any top growth — however the weeds are usually much more persistent than the weeders! I read that cutting bindweed every 2 weeks will still take multiple years to make an impact. Sigh.
Gardeners are typically highly invested in having a beautiful and productive garden and want to do what is best for their plants. Although fertilizers are very often considered a necessary tool in providing optimal growing conditions they should be used with care and only when a soil test says they are needed. https://www.ontario.ca/page/soil-leaf-and-petiole-tissue-and-forages-and-feed-testing-labs
Commercial fertilizers or ‘plant food’ usually list three major nutrients on their products; nitrogen, phosphorus and potassium or N-P-K. These are very important plant nutrients but according to Linda Chalker-Scott PhD, author of the book “How Plants Work” https://horticulture.wsu.edu/people/chalker-scott/ “Our home landscape soils usually have enough phosphorus and potassium to meet our plant’s needs. So, wouldn’t more be better? She goes on to explain that excess levels of phosphate fertilizer can be bad for soil organisms by inhibiting the “development of the mycorrhizal relationship between fungi and plant roots causing plants to expend more energy for root growth. Another negative aspect of excess phosphorus is that it reduces the ability of plants to take up iron, a plant micronutrient. Excess phosphorus may also dissolve in runoff water causing blooms of harmful algae, depleting waterways of oxygen. Organic fertilizers such as bone meal, guano and chicken manure can also create an excess of phosphate in the soil”. https://gardenprofessors.com/fertilizers-a-cautionary-tale/
When your vegetable garden and/or annuals are growing abundantly but you start seeing older leaves turning yellow, your soil may need a boost of nitrogen-rich fertilizer. Nitrogen can become deficient in an actively growing garden and using something like alfalfa meal can replenish it.
Slow and steady may be the best approach to providing your plants with the ideal growing conditions. According to Dr. Chalker-Scott, “using organic mulches like composts, wood chips and pine needles provide a slow feed of nutrients to the soil, the way that nature provides nutrients”.
As the spring bulbs fade and we move past our “last frost” date (or so we hope!), the perennials are starting to grow by leaps and bounds. This can lead us to consider ways to manage their size or bloom time. The Chelsea Chop is a method of pruning that limits the size of a plant, controls the flower season (which can assist in creating peak season bloom combinations) and often decreases the floppiness of a number of herbaceous perennials.
In England, the time for this type of pruning is carried out now which is around the same time as the Chelsea Flower Show is held, hence the name. In our neck of the woods, timing would be most appropriate in late spring or very early summer when the plant has a fairly substantial amount of vegetative growth. When I am going to do this, I like to have it done before the onset of our hotter, drier weather so that it does not stress the plant overly (on average by mid June).
Phlox chopped in front to extend blooming season
Plants that have received the Chelsea Chop are not as tall or leggy, so that they may not need supporting. Flowers are smaller but are more numerous (removal of top shoots encourages branching of laterals).
It should be noted that you can not chop all summer blooming plants. Woody sub-shrubs do not respond well. If the spring has been dry, drastic pruning could shock your plants so a light hand is recommended in those years.
Many summer and autumn flowering perennials are good candidates for the chop. These plants include:
Garden phox (Phloxpaniculata)
Yarrow (Achillea spp.)
Bellflower (Campanula spp)
Aster (Symphyotichum spp)
Coneflower (Echinacea spp)
Black-eyed Susan (Rudbeckia spp)
Upright Sedum Hylotelephium spp)
Penstemon (Penstemon spp)
Goldenrod (Solidago spp.)
Shasta daisy (Leucanthemum superbum)
This list is not complete. Try experimenting with some of the vigorous plants in your garden. I have a cultivar of catmint (Nepeta “Six Hills Giant”) that is large and spreading. In one area of my garden, I prefer it to stand a little more to show the blooms to effect so I chop it back by about one third in the last week of May.
Nepeta more upright and floriferous due to chopping
The chop is done in two ways depending on the effect one desires. In the first method, clumps of perennials are cut back by one third to one half. This will delay flowering and keep plants shorter and more compact. The second method involves cutting back only half of the stems on a plant, this has the effect of extending the flowering season over a longer period. I commonly used the second method on my Garden Phlox keeping the plants in bloom for a longer time. Pruning can be done with sharp shears or with secateurs. Garden shears are often faster when there is a large volume of pruning to be done. Try out the chop and see if you can alter the form or flower of some of your favourites!
I was recently browsing through a hard copy April, 2009 issue of the “Fine Gardening” magazine. I came across an article, “Who Says Your Kitchen Garden Can’t Be Beautiful”… to see the full article check the link here. The author, Jennifer Bartley, planted her raised vegetable garden for the edibles that it produced but in such a way that the garden was also beautiful!
This appeals to me because vegetable gardens are definitely not my passion. However, I do love to eat my own fresh veggies and so I have a vegetable garden.
I have raised vegetable beds where I have intermittently practiced square foot gardening (see square foot gardening for more information). I have also planted marigolds and nasturtiums amongst my vegetables which are pretty but also serve a purpose….the marigolds for insect control and the nasturtiums because they are edible. For more information on flowers for your vegetable garden check the link here. I have been inching towards trying to make my vegetable garden more visually appealing without realizing it.
Ms. Bartley talks about using “four simple design tips” including:
Arrange bunches of bold colour.
Plant snug beds.
Smooth out the edges.
Define your space.
Arrange bunches of bold colour – I do a planting plan ahead of time every year. Try grouping your vegetables, flowers, fruits and herbs together so that you have lots of colour and texture (different leaf shapes). For example, you may edge the bed with the leafy fronds of carrot followed by beets and parsnip, maybe you plant some asparagus in the centre for the height or an obelisk in the centre and plant runner beans to climb it. You could use yellow, green or purple bush beans to fill in the blanks. I grew some purple Brussel sprouts last year and the leaves were spectacular!
Plant snug beds – This tip works well with raised beds. There is no need to plant your vegies in rows. Instead, group the vegetables together close enough to cover the soil when they are grown but not so close that they will crowd each other to prevent proper maturity. Covering the soil helps with moisture retention and weed suppression. Thinning your carrots allows them to mature properly and provides the delicious “thinnings” for your salad.
Smooth out the edges – Just like your flower beds, vegetable gardens are at their best when they are clean and pathways are clear. I use straw in my pathways because it is available and my garden is wet in the spring so the straw covers the mud between the raised beds. You could use bark mulch, gravel, brick or whatever you have.
Define your space – We humans like a certain amount of order and proportion in our world. If a space is too big, or too small, it can make us feel uncomfortable. The edges of a raised bed help to define the space. In our garden, we have several raised beds so have a defined entry to the garden and a wooden cedar fence to further define the space. You might choose to use a pot filled with herbs at your entry, a rock or cedar stump on either side or a berry producing shrub.
It is also a great idea to have a bench in the garden where you may rest and admire your work. Also, don’t stop with just a scarecrow … you may choose to add other garden ornaments in order to make your own beautiful vegetable garden!
At the beginning of February, the snow had melted on the grounds of the native plant garden at the Peterborough Public Library. This garden is an ongoing project between the library and the Peterborough and Area Master Gardeners. I noticed a few weeds in areas that did not have a thick enough layer of wood mulch. Ideally, they would have been removed in the fall, but I didn’t get that opportunity. Being situated downtown, the library garden is open to many types of plants that arrive via wind-blown seeds. As the intentional plantings continue to grow and fill in the empty spaces, weeds will become less of a concern.
However, it may be a good idea to consider incorporating living green mulch such as low sedges and reducing or eliminating the wood mulch in the garden to minimize weeds and to develop a more natural aesthetic that mimics nature. Benjamin Vogt of Monarch Gardens defines a green mulch as a lower plant layer that covers more than 90% of the ground. Vogt talks about how sedges, short grasses, and other low-lying forbs can be used as an initial base layer in a garden with taller plants interspersed throughout. They can also be used to plug in holes in between existing plantings. Vogt also mentions that wood mulch can inhibit the growth and spread of the plantings—which reduces the overall natural aesthetic.
Tussock sedge
Incorporating green mulch does have an initial cost but over time will cost less than wood mulch as the latter needs to be constantly replenished as it breaks down. Native plant nurseries may have smaller plugs that can be purchased in bulk at a lower cost than larger potted plants. In addition, sedges and grasses can be divided and replanted. Wood mulch is also not as environmentally friendly as it needs to be transported to the site.
Green mulch offers the same benefits as wood mulch—the ability to provide organic matter to the soil when it dies back in the fall; it helps to regulate soil temperature and moisture levels; it shields weed seeds from the light exposure they require to germinate, and it prevents soil erosion. One thing I have noticed about a particular area in the garden is that despite the heavy application of wood mulch, invasive perennial weeds like Canada Thistle (Cirsium arvense) and Field Bindweed (Convolvulis arvensis) still have the strength to poke through. The long-term and more practical solution to managing these perennial weeds here is to encourage dense plantings of green mulch and the spread of existing plantings. These weed species thrive in the sun but will weaken if shaded out by other plants.
Green mulch provides support to various wildlife species. For example, unlike traditional turf grass, sedges grow with a space around them, thus providing access for ground-nesting bees. If wood mulch is too heavily applied in the garden, it inhibits pollinator lifecycles. Sedges and grasses also serve as host plants for some Lepidoptera species and produce seeds that are valued by birds.
When considering sedges, note that many prefer at least partial shade and moist soil conditions and so the right ones need to be selected. For the library garden, the area that is sunny and dry could accommodate Short-Beaked Sedge (Carex brevior), Ivory Sedge or Bristle-Leaved Sedge (Carex eburnea); while the partially shaded but dry areas could be home to Pennsylvania Sedge (Carex pensylvanica). A low-lying grass that could be used is Blue Grama (Bouteloua gracilis). When sourcing these, it is best to check area native plant nursery catalogues this spring for available stock. The ones to check locally are Natural Themes in Frankford, Grow Wild in Omemee, GreenUp Ecology Park Nursery in Peterborough, and Native Plants in Claremont. Ontario Native Plants is an online mail order provider. For hard-to-find sedges, Prairie Moon in Minnesota has a wide variety available to ship to Canada as seed.
Further Reading
For more on sedges, the 1000 Islands Master Gardeners wrote a wonderful article about them.
Planting in a Post-Wild World: Designing Plant Communities for Resilient Landscapes, by Thomas Ranier and Claudia West (Timber Press, 2015).
Groundcover Revolution by Kathy Jentz (Cool Springs Press, 2023).
Prairie Up! An Introduction to Natural Garden Design by Benjamin Vogt (3 Fields Books, 2023).
When spring finally arrives, gardeners are outside daily looking for signs of life in our flower beds. Snowdrops, crocus, tulips and daffodils along with many other spring bulbs give us that pop of colour we have missed. Hellebores, primula, magnolia, Iris reticulata, lungwort are all beginning to bloom. Spring perennials like ground phlox, poppies, pasque flowers, daylilies are showing their green shoots and will soon be flowering. Bleeding Hearts, trilliums, lupins and salvia are all growing in leaps and bounds.
Bleeding heart is well on its way
This past April, we experienced a week of abnormally hot weather that encouraged plants like peonies to jump up. Note to self – get peony rings up. The return to “normal” temperatures is better for all the plants. And it reminds us that spring is an unpredictable season and we can’t rush it.
As gardeners, we need to practice a bit of patience. We need to leave our gardens to thaw, give the soil time to warm up and give the overwintering insects time to awaken from the garden litter we are so excited to “clear up”. We also need to be aware that not all perennials show life at the same time.
Hostas show their poking dark shoots just as we are getting into the flower beds, so we need to watch when stepping around or moving mulch in those gardens. Perennial Hibiscus are probably one of the the later showing perennials that will look dead until mid June. Be patient! When Hibiscus decide to begin growing, they grow quickly, inches in a day. Lilacs are making buds and maples are leafing out, but hydrangeas are still looking asleep. Although early flowering clematis like Blue Bird and other group 1 types will be popping up, later bloomers with still be sleeping. Don’t despair. Be patient!
Hibiscus is very late to show growth
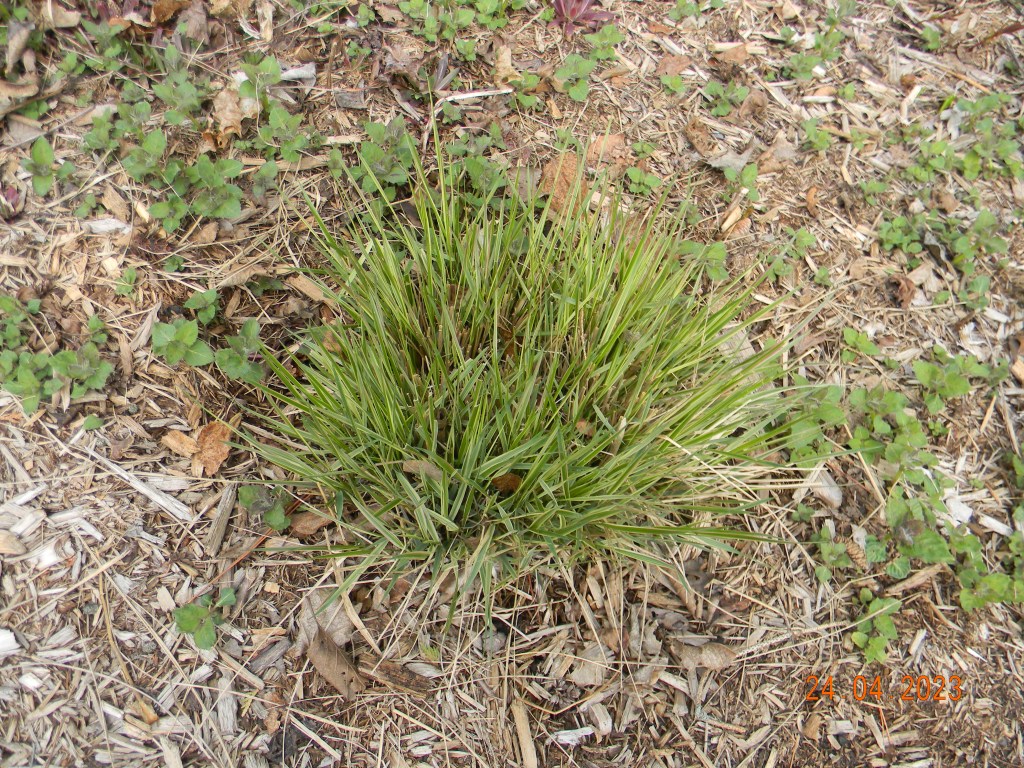
Grasses can also be deceptive. Cool season grasses begin to grow in early spring and have reached their best by mid summer. Karl Foerster, which is a Calamagrostis or feather reed grass is a well known cool season, zone 5 grass that grows 5′- 6′ tall. It likes sun, will take it wet or dry and tolerates poor soil. Overdam and Avalanche are two other feather reed grasses that will be showing green now.
Cool season grass
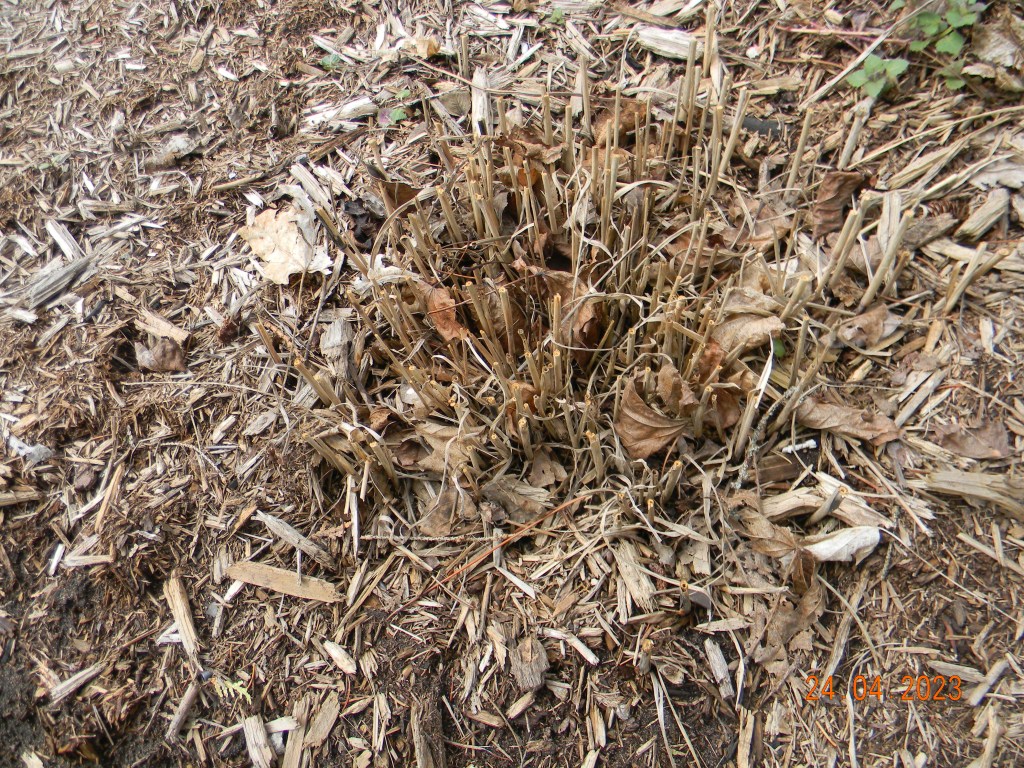
Warm season grasses do not come up until June and are at their best in fall. They will look dead until the weather warms up. Patience! Because they will not show green until later in the spring, you can plant warm season grasses behind other earlier growing perennials to hide their brown bottoms.
Warm season grass
Miscanthus grasses are warm season types and are available in different heights from 3′ to 8′ tall. Miscanthus sinensis & M. Sacchariflorus are classed as invasives, spreading by rhizomes and seeds. Other warm season grasses include Japanese Forest Grass or Hakonechloa, Japanese Blood Grass and Sedges. Panicum or switch grass is a warm season grass with many varieties native to North America. ‘Northwind’ is the most commonly know variety and it is drought resistant, will grow in any type soil and likes full sun.
Native grasses like Little Bluestem (Schizachyrium scoparium), Big Blue Stem (Andropogon gerardii) and Indian Grass (Sorghastrum nutans) are warm season grasses. These are beautiful additions to your garden, but will not green up until the weather warms.
May is the most active month in the garden. Sometimes we forget to enjoy the moments, slow down, breath deeply and have patience. New wonders will be happening for many days ahead. Enjoy them!
A few weeks ago, the incomparable Lorraine Johnson spoke at my local horticultural society. She summarized four key actions gardeners could do to help our pollinators, and the last one stuck out for me — reduce/reconsider outdoor lighting (see her full list of actions at the bottom of the blog).
I thought, what does outdoor lighting around my house or garden have to do with pollinators? I know that the presence of lighting (or even more importantly, light frequency) is disruptive for migrating birds and nesting sea turtles, but for pollinators in my garden?
However, what I’ve learned in my research is that artificial lighting at night (aka ALAN) poses a hazard to nocturnal pollinators and prevents proper navigation, reproduction, and their ability to find food.
This really cool graphic (from Kenilworth Park and Aquatic Gardens in Washington DC) shows some examples of day and night pollinators.
Why is it a problem?
Use of ALAN has rapidly spread around the globe over the past few decades. This 2021 Nature Communications journal article states increasing evidence that ALAN adversely affects the behaviour, physiology, and survival of animals and plants, ultimately leading to a significant decline in their abundance and diversity.
This 2020 Biological Conservation journal article says that although habitat loss, pesticide use, invasive species, climate change all play a role in insect decline, ALAN is another important—but often overlooked—bringer of the “insect apocalypse”.
A Nature journal article back in 2017 also sounded the alarm, showing that in ALAN plant–pollinator communities, nocturnal visits to plants were reduced by 62% compared to dark areas.
Nocturnal insects (including many moths) who navigate using natural light sources (like the moon) are disoriented by ALAN (although research is now indicating that ALAN disrupts circadian rhythms in both nocturnal and diurnal animals).
Security lights appear to temporarily blind some animals and may even attract them (for example, frogs – I have seen this in my backyard near my pond).
Birds are disturbed from sleep by sudden lighting and can begin singing before dawn (robins especially seem sensitive to light). Birds that start migration flights at night can become disoriented.
In ALAN areas, shorter periods of nighttime darkness means less time for foraging/hunting for crepuscular (dawn/dusk) or nocturnal species.
ALAN is thought to be partly to blame for the decline of fireflies/glow worms; the females emit low, greenish light to attract mates and even low level ‘skyglow’ from distant light sources such as floodlit playing fields or towns will lessen their breeding success.
The type (frequency) of light seems to affect species differently. For example, research indicates that LEDs seem to attract more moths and flies, but fewer beetles than sodium lamps. And LEDs with cool white light (blue end of the spectrum) attract more insects than warm white ones. As a general rule insects are more sensitive or attracted to short-wavelength (UV, blue and green) than long-wavelength (orange, red and infra-red) light.
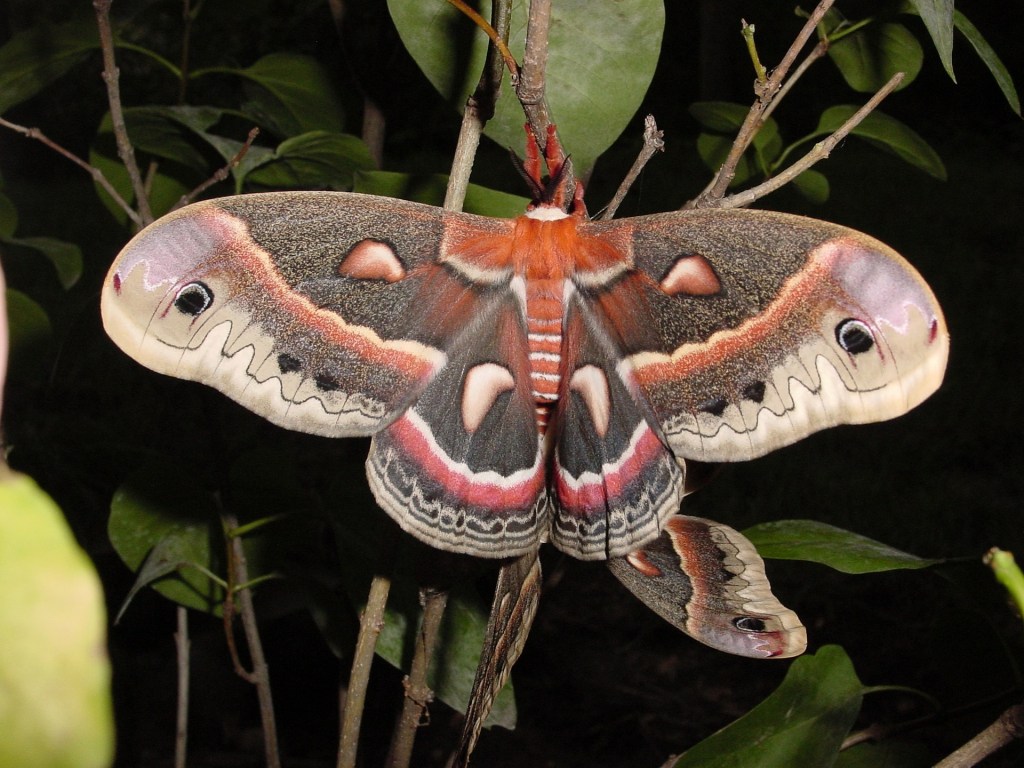
Cecropia moth (Hyalophora cecropia)
So what can gardeners do?
While ALAN has become a trendy part of our outdoor living spaces, consider whether you really need it, or modify it to minimize its impact. In my back garden I definitely need some path lighting for visiting guests, but I make sure it’s shielded lighting that is on a motion sensor so it’s only on for a short time. The International Dark-Sky Association has some great information on keeping our skies dark, including using shielded light fixtures that minimize glare, light trespass, and skyglow.
Besides, a garden can be just as magical a place enjoyed in moonlight or simply with the aid of a flashlight! And if you minimize ALAN you might just see more fireflies/glow worms in your garden, like I do (hint: having a pond or water feature also attracts them).
Spring bulbs are hardy plants that are adapted to survive even in cold and unpredictable weather conditions. While a late frost or spring snow may cause damage to the leaves and flowers of spring bulbs, it is unlikely to kill them altogether.
One of the main reasons why spring bulbs can survive a late frost or spring snow is their ability to go dormant during periods of extreme cold or drought. During dormancy, the bulbs store energy and nutrients in their underground structures, allowing them to survive until conditions improve.
Spring bulbs have a unique growth habit that enables them to emerge from the soil before the last frost date. They grow and develop quickly, taking advantage of the early spring sun and warmth to build up their energy reserves. By the time a late frost or spring snow arrives, most of the growth and development has already taken place, minimizing the impact of the cold on the plant. You may lose any blooms at the time of the adverse weather, but new blooms will likely wait until the weather changes again, and it will!
Snowdrops, hyacinths and some daffodils seem to be particularly resistant to cold, wet spring precipitation. Tulips and lilies are a little more prone to damage once they’ve formed buds or blooms. If a hard freeze or extended cold period is in the forecast, it may be wise to cover budding or flowering tulips and lilies to ensure that you get to enjoy their blooms this year. Make sure that you uncover them if daytime temps rise above freezing. If they’re not budding or blooming, no covering is necessary as the foliage is quite robust.
When planting spring bulbs in the fall, make sure that they are planted deep enough in the soil to avoid the worst effects of a late frost or spring snow. This means that even if the surface of the soil is frozen or covered in snow, the bulbs remain insulated and protected underground.
If frost damage does occur, don’t cut off the leaves as bulbs need even damaged foliage to feed the bulb for next year’s blooms!
In conclusion, while a late frost or spring snow may cause some damage to spring bulbs, they are unlikely to be killed off completely. These hardy plants have developed a range of adaptations to cope with the unpredictable and often harsh conditions of spring, allowing them to survive and thrive year after year.