Category Archives: Grass

Mulling about Mulches

By Laura Gardner, Master Gardener

At the beginning of February, the snow had melted on the grounds of the native plant garden at the Peterborough Public Library. This garden is an ongoing project between the library and the Peterborough and Area Master Gardeners. I noticed a few weeds in areas that did not have a thick enough layer of wood mulch. Ideally, they would have been removed in the fall, but I didn’t get that opportunity. Being situated downtown, the library garden is open to many types of plants that arrive via wind-blown seeds. As the intentional plantings continue to grow and fill in the empty spaces, weeds will become less of a concern.

However, it may be a good idea to consider incorporating living green mulch such as low sedges and reducing or eliminating the wood mulch in the garden to minimize weeds and to develop a more natural aesthetic that mimics nature. Benjamin Vogt of Monarch Gardens defines a green mulch as a lower plant layer that covers more than 90% of the ground. Vogt talks about how sedges, short grasses, and other low-lying forbs can be used as an initial base layer in a garden with taller plants interspersed throughout. They can also be used to plug in holes in between existing plantings. Vogt also mentions that wood mulch can inhibit the growth and spread of the plantings—which reduces the overall natural aesthetic.

Tussock sedge

Incorporating green mulch does have an initial cost but over time will cost less than wood mulch as the latter needs to be constantly replenished as it breaks down. Native plant nurseries may have smaller plugs that can be purchased in bulk at a lower cost than larger potted plants. In addition, sedges and grasses can be divided and replanted. Wood mulch is also not as environmentally friendly as it needs to be transported to the site.

Green mulch offers the same benefits as wood mulch—the ability to provide organic matter to the soil when it dies back in the fall; it helps to regulate soil temperature and moisture levels; it shields weed seeds from the light exposure they require to germinate, and it prevents soil erosion. One thing I have noticed about a particular area in the garden is that despite the heavy application of wood mulch, invasive perennial weeds like Canada Thistle (Cirsium arvense) and Field Bindweed (Convolvulis arvensis) still have the strength to poke through. The long-term and more practical solution to managing these perennial weeds here is to encourage dense plantings of green mulch and the spread of existing plantings. These weed species thrive in the sun but will weaken if shaded out by other plants.

Green mulch provides support to various wildlife species. For example, unlike traditional turf grass, sedges grow with a space around them, thus providing access for ground-nesting bees. If wood mulch is too heavily applied in the garden, it inhibits pollinator lifecycles. Sedges and grasses also serve as host plants for some Lepidoptera species and produce seeds that are valued by birds.

When considering sedges, note that many prefer at least partial shade and moist soil conditions and so the right ones need to be selected. For the library garden, the area that is sunny and dry could accommodate Short-Beaked Sedge (Carex brevior), Ivory Sedge or Bristle-Leaved Sedge (Carex eburnea); while the partially shaded but dry areas could be home to Pennsylvania Sedge (Carex pensylvanica). A low-lying grass that could be used is Blue Grama (Bouteloua gracilis).  When sourcing these, it is best to check area native plant nursery catalogues this spring for available stock. The ones to check locally are Natural Themes in Frankford, Grow Wild in Omemee, GreenUp Ecology Park Nursery in Peterborough, and Native Plants in Claremont. Ontario Native Plants is an online mail order provider. For hard-to-find sedges, Prairie Moon in Minnesota has a wide variety available to ship to Canada as seed.

Further Reading

For more on sedges, the 1000 Islands Master Gardeners wrote a wonderful article about them.

Planting in a Post-Wild World: Designing Plant Communities for Resilient Landscapes, by Thomas Ranier and Claudia West (Timber Press, 2015).

Groundcover Revolution by Kathy Jentz (Cool Springs Press, 2023).

Prairie Up! An Introduction to Natural Garden Design by Benjamin Vogt (3 Fields Books, 2023).

Winter Favourites

By Lois Scott, Master Gardener

As I begin to hunker down for winter, the garden outside my windows still gives me pleasure.  Some plants are blackened and not particularly attractive but grasses continue to look beautiful throughout the winter months. 

Two of my favourite grasses for winter are Little Bluestem (Schizachyrium scoparium) and Switchgrass (Panicum virgatum).  These are both native grasses that are not only beautiful but well behaved in my garden.  Little Bluestem is a great choice for a dry, sunny spot or even a rain garden that may flood and then dry out.  It can grow up to 4 feet high and 2 feet wide. Switchgrass is a taller grass that grows to 6 feet with a 3-foot spread.  It prefers soil that is medium to wet and is also a great choice for rain gardens. 

Bluestem in author’s garden

Both these grasses are host plants for many species of butterflies.  They also provide seeds and nesting materials for birds and shelter for small mammals.

Switchgrass in author’s garden

Little Bluestem and Switchgrass are “warm season” grasses which means that unlike “cool season” grasses they don’t go dormant in the heat of summer.  Warm season grasses thrive in the heat.  They start growing later in springtime and flower later in the summer. 

This brings me to why I love them in winter.  They hold up their beautiful seed heads that look stunning when frosty, they create movement in the garden, provide colour all winter long and they help make my garden a winter refuge.

Resource:

https://www.inournature.ca/native-grasses-for-ontario-gardens

A new kind of lawn?

By Mary-Jane Pilgrim, Master Gardener

If you scroll through some of the gardening groups on Facebook these days, you’ll often see people asking “How do I get rid of the clover in my lawn?” Shortly thereafter, you’ll see a lot of people respond with “Love my clover”, “Leave it”, “Food for pollinators”, etc., all of which is true. This post follows fellow MG Emma Murphy’s post from last week quite well, I think!

As a contract gardener/landscaper, if I had a loonie for every person who asked me what to do about their weed-ridden lawns post-herbicides, I’d be a rich person.

Clover may be just the ticket, as it requires less water, fertilizer and weeding than lawns without clover. It stays green all summer. It requires little or no mowing as it only grows 10-20cm (4 -8″) high. It out-competes other weeds, as it has a dense root structure. It grows well in poor soil. It feels great on bare feet. The seed is inexpensive (see below for a tip on where to buy it!)

White clover (Trifolium repens) or Dutch white clover can be established in an existing lawn by overseeding whatever is currently there or by planting a mixture of clover and basic grass seed in a new lawn. From my reading, I’ve found that people have had disappointing results when trying to establish a pure clover lawn. You really need both clover AND grass as they are complementary to each other and one supports the other. Clover does best in full sun, but can do OK in partial shade. It doesn’t grow well in full shade. When mixed with grass, it does well in high traffic areas as well.

Author’s back lawn showing already successfully combined grass and white clover

For us, it started with the white grubs. Whole sections of grass in the front yard are gone. Just gone. Turns out that grubs also do not like clover. Bonus.

Be sure to use Dutch white clover and not the larger red clover. The best time to plant clover is in the early spring before the grass starts growing quickly because the other broadleaf plants are not in competition with it. Early seed sown will germinate when the soil starts to warm up in late April. Clover seed can be purchased at your neighbourhood garden centre or hardware store, but I’ve found it to be much cheaper (less than half price) at my local co-op as it is also a farm product. Clover seed to cover my large front lawn (150ft x 150ft) cost about $10 at the Co-op. About 2 ounces of clover is needed for every 1,000 sq ft of lawn, so my front yard required about 3 pounds or 1.4kg of clover, mixed with about $30 worth of grass seed.

Late summer/early fall is an alternative time to plant. The grass should be cut short and raked first to remove any existing thatch. Clover seed can be spread onto the soil along with grass seed on a 10:1 or 15:1 grass/clover ratio. I’d suggest top-dressing with some triple mix for best results so that the seeds are covered well. Most seed will germinate in less than a week if the temperature is above 15C and if it’s well watered.

It may be necessary to overseed with clover every 2-3 years for the first few years until the mixture gets established.

One caution: If you or any of your loved ones are allergic to bee stings, clover may not be right for you. The clover will flower, and bees will be attracted to the flowers! You can, however, minimize this risk by mowing regularly from June through August during flowering time.

Author’s front lawn showing recent overseeded and top-dressed grass/clover mix.

Resources:

How to Overseed Clover Into a Lawn
Establishing White Clover in Lawns:
Advantages and Disadvantages of Clover Lawns

Is it time to rethink our lawns?

by Emma Murphy, Master Gardener

Full disclosure – I have never been a fan of lawns. I’ve had a 20 year plan to convert my large property to perennial gardens and paths, and I’m getting there, slowly but surely. 

However, I am fascinated with how (and why) people are so attached to their square green spaces of grass. 

A little history first..

Lawns became popular with the aristocracy in northern Europe from the Middle Ages onward, evolving as a sign of wealth.  Originally they were mostly used as pasture – lawns like we have today first appeared in France and England in the 1700s when André Le Nôtre designed the gardens of Versailles that included a small area of grass called the tapis vert, or “green carpet”.

versailles-4074418_1920

Immigrants to North America brought these traditions with them as they settled the land. Particularly after the Second World War, the creation of the middle class and suburbia and the advent of chemical fertilizers led to a North American culture of ‘the lawn is king’, with the requirement that it was every homeowner’s responsibility to keep it watered, mowed, repaired, and cultivated, just like their neighbours. One article I read even went so far as to blame the rise of lawns on the Scots, who brought their love of lawn bowling and golf to this continent (and therefore the need for flat green areas).

lawn-mower-2127637_1920

Lawn is a cognate of llan which is derived from the Common Brittonic word landa (Old French: launde) that originally means heath, barren land, or clearing.

Lawns are expensive to create and maintain, so why do we still have them? Simply put, the belief is that lawns are indicative of success – if you have a well maintained lawn you have the time and money to create and maintain it, and you care about belonging to your neighbourhood.

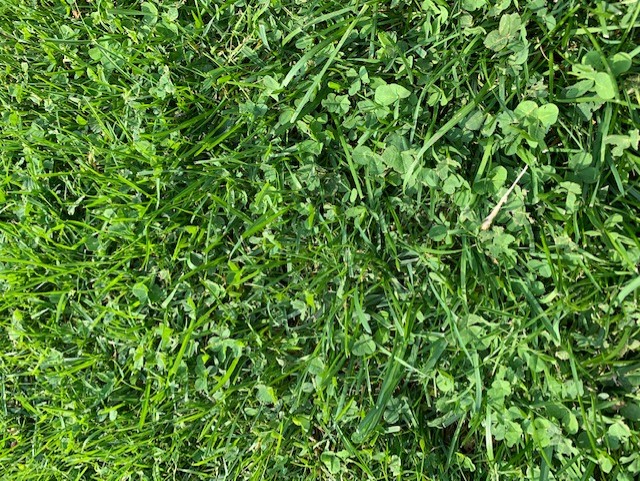
Fast forward to current times, where we now see articles in the Globe and Mail asking whether “it’s time to decolonize your lawn” and efforts are underway in many areas to convert lawn areas into more ecologically responsible landscapes to support our pollinators, birds, and wildlife. Whether you simply overseed with some white clover, and reduce or eliminate fertilizers, or convert your entire lawn into a wildflower meadow, there is a full range of options to consider.

Such changes have not been without their challenges. A recent newspaper article shows the conflict between those who want a new attitude towards our properties. Nina-Marie Lister, a Ryerson University urban planner and ecologist removed all her lawn, replacing it with “a lush and layered landscape” filled with “milkweed, boneset and black-eyed Susans, among other plants largely native to the region.” Her neighbours complained and she was visited by a Toronto city bylaw officer – under Toronto’s municipal code, residents need to “cut the grass and weeds on their land” whenever they grow past 20 centimetres.

The comments community lit up, and well known gardener Lorraine Johnson even penned an editorial in the Toronto Star about it.

houseonriver 044 (2)

Naturalized gardens are becoming a widespread phenomenon, and municipal bylaws will continue to be challenged by those that advocate for increasing biodiversity by creating landscapes that support an abundance of species of flora and fauna. Wouldn’t it be interesting to see someone complain to bylaw about a green lawn destroying biodiversity, filling the landscape with chemicals, wasting water by watering, and creating air and noise pollution through mowing? You see, it’s all a matter of perspective.

The debate is far from over, but gardeners should enter the discussion and think about whether there is a way for their green spaces to be just a bit more ecologically friendly.

Whatever your opinion, I encourage you to read these articles and think about the issues surrounding our garden spaces. I know I will never convert the staunch, lawnmower riding king to create a wildflower meadow, but if I just get a few people to think about how they can make a small difference in their own backyards I will be happy. I don’t have all the answers – I just want to stimulate the discussion.

FUN FACT – clover was an accepted part of lawns until the early 1950s, only becoming a ‘weed’ because the earliest 2,4-D herbicides killed it off along with the dandelions.

For those interested the Canadian Society for Organic Urban Land Care is hosting an online discussion and learning series on the role of land care, horticulture and landscaping in cultivating social and land equity. One of the topics is “Cultural values and how they frame horticultural norms” where the colonization and control of our natural landscapes will be the topic.

For more information:

The American Obsession with Lawns

The History of Lawns

Decolonizing Horticulture by Sundaura Alford-Purvis

Starting from scratch — 2 months later

By Judy Bernard, Master Gardener

As mentioned in the my previous blog, creating healthy soil is to be the topic of this article.

Healthy soil is made up of the following components:

Sand, silt and clay – in any soil they are the bones, the structure that is the foundation on which the rest is built. About 48% of the soil.

Air spaces – are the lungs of the soil. They allow for movement of oxygen, water, and nutrients. About 25% of the soil

Organic material – is the food which nourishes the soil to make it a living microcosm for plants to grow in. The microorganisms in the soil process the organic material into a form that plants can use when they need it. The larger organisms in the soil help to maintain its structure. The organic material in the soil is also like a sponge which will hold many times its weight in water. This represents ideally about 4% of the soil.

Water – is like blood. It carries the nutrients from the soil to the roots of plants in a form the plants can use.

In the housing development where I live, we have been provided with good bones. Some of the soils may have more or less of one component than another, but for the most part the bones are good.

From my perspective, the biggest issues are:

  1. compaction from all of the heavy construction equipment that has been driven over and over the sites. Even when the topsoil was put down, dump trucks and bulldozers were used. The soil and sub soil are deeply compacted.
  2. lack of organic material in the soil.
  3. the inability of the soil to retain water.

To overcome these problems the soil needs to be aerated, whether by mechanical means with a core aerator or by hand with a shovel. The plugs of soil, although unsightly, can be left on top of the soil to dry out and then run over with a lawn mower to break them up and spread them over the ground or lawn. Then organic material needs to be added to the soil. For the grass, I would add compost which you can purchase in bulk from garden centres. Spread 1-2 cm (1/2”) over the lawn and rake it in. You may want to add a little grass seed where there are bare spots. With the compost, you won’t have to add any other fertilizer and you won’t have to water very much. For my flower and vegetable beds I add a more generous amount of compost or manure, working the manure into the soil so it doesn’t smell.

It takes 2.5cm (1”) of water to penetrate 15cm (6”) into the soil. With air spaces and multiple surfaces for the water to adhere to and with organic material to act as a sponge and hold the water, the water will stay In the soil better and not run off. For growing vegetables 2.5cm per week is a good rule of thumb. Add more if it’s very hot or windy. With healthy soil, watering the lawn and garden is less of an issue.

The most common grass used for sodding is Kentucky Blue Grass. It is natural for this grass to go dormant in the hot summer months. With good healthy soil to support it, the grass will be able to overcome the drought and revive as the weather gets cooler.

You know you have healthy soil when it has a nice crumbly texture, the surface of the soil doesn’t crack from the heat and when the soil absorbs water instead if having the water sit in pools or run off into ditches. I’ve added a couple of web sites with further information about healthy soils and adding compost to lawns.

Resources

Healthy Soils, UMass Extension
Compost for Summer Lawns, Planet Natural Research Center

Starting from Scratch

By Judy Bernard, Master Gardener

My dream is coming closer to being realized. The construction company cleaned up the construction area, removed a lot of the larger stones and graded the property. When it rains this grading directs water to the road in front and to the catch basin in the back. (I’m going to have to plan how to plant my water loving plants to take advantage of this drainage.) We have told the excavating people that we will be putting in a walkway and water barrels. They kindly set up the fill to accommodate that.

As soon as the topsoil was delivered in mid June, I did the mason jar soil composition test, using the Clemson fact sheet I posted in the previous blog and again below. The soil test results show loam. However there is no organic material in this soil. Heavy equipment was used to spread and grade the soil. It is extremely compacted. We ordered enough compost to cover the topsoil to a depth  1-2cm. We really need 5-10 cm of compost.

Clemson Soil Texture Analysis

Once we got the sod installed we were told to water it well twice a day for 5-7 days, then daily  for a week. I watered as required, making sure the water had penetrated the sod. In spite of my best efforts the sod turned yellow within a couple of days in places. After 2 weeks it was coming back, but needed continued watering of those difficult areas.

Before we had received our sod, I’d gone crazy planting trees and shrubs. I’ve dug holes and loosened up the soil as much as possible, added organic material, and I’m hoping for the best. I’ve planted my vegetables, loosened the soil and added more organic material. Some beds I’ve made for future plants by turning the sod upside down and covering with cardboard and mulch. Next spring they will be ready for planting.

It is going to be an ongoing process of trying to create a healthy soil environment for lawns and gardens. That will be the topic of my next blog.

judy 1

Repair or Replace? That is the Question

By Judy Bernard, Master Gardener

A question about sod that didn’t root came to our contact email account recently. The person asked what to do about an area the size of about a dozen rolls of sod that didn’t take or thrive. Replace it or seed over? Below is a photo of the area in question. Because this is the time of year that we see these problems, I thought the answer to this question would make a good blog.

grass blog

Since new sod won’t be available for a few weeks, I suggested to try seeding a small area. If the seed germinates and grows, then go for it! If not, remove the dead sod and replace. If you’re replacing, make sure the new sod is freshly harvested that day. Also, I would add some compost to the soil before laying the new sod. The compost will help the soil retain moisture and provide nutrients.

This time of year is perfect for seeding lawns as usually there is more rain and the weather is cooler, which grass prefers for germinating and growing. Top seeding is usually done on top of existing lawns, so I don’t see why it shouldn’t work on your recent sod.

Rather than topsoil, my suggestion is to use compost. Depending on where you get topsoil, it could be full of weed seeds. You can get compost from most garden/landscape supply places. The City of Peterborough also makes and sells compost which you can buy at Ecology Park or at the Bensfort Road transfer station. Take your own containers. The compost will also help the old sod decompose into the soil.

Before seeding on top of the sod that didn’t take, rake off as much of the loose grass as possible. Put a good layer of compost over that area, 1/2 inch at least. Before seeding, make sure the old sod and the ground are moist underneath. Two and a half centimetres (1”) of rain/water will soak approximately 15 cm (6”) deep.

Then, seed the area with the same variety of grass that is in the sod so that eventually you will have a uniform lawn. Gently cover the lawn seed with a thin layer of mulch by using the back of a garden rake to rake over the area. Water well.

To keep the existing sod healthy, put a thin layer of compost over that as well and rake it in. The compost will help the soil retain moisture and provide all the nutrients your lawn needs without expensive chemicals.

Resources

Green Up Ecology Park Garden Market
Choose Compost Carefully when Topdressing the Lawn
How to spread Compost on the Lawn