by Emma Murphy, Master Gardener
It’s wintertime – the snow is high, the temperatures are low, and I’ve already completed my winter sowing. So what’s a gardener to do?
Other than catching up on my garden reading, I like to experiment with new things, and one thing I’ve been seeing for a couple of years now are “seed snails” or snail rolls – a clever, coiled method of starting seeds in tight spaces. I’m going to try it this week, so I did a little research.
So, what is a garden/seed “snail”?
A garden snail is a roll of material lined with seed starter mix, then coiled so it looks like a snail shell. Seeds are sown into the exposed spiral of soil, where they sprout and grow until you unroll and transplant them.
Instead of dozens of trays, you stand the snails upright in a container, which makes this method very space efficient. It’s become popular with gardeners who want to start lots of plants indoors before the last frost and who have limited space.
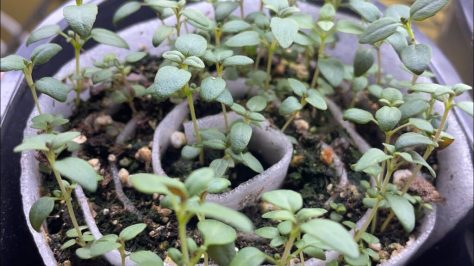
Seed snails concentrate many seedlings in one compact, easy-to-move bundle. So, you can tuck them under grow lights, on a bright windowsill, or use them in winter-sowing containers outdoors.
The continuous column of soil encourages deep, downward root growth instead of circling in a small cell. When transplant time comes, you simply unroll the snail, tease the seedlings apart, and set them into pots or the garden once the risk of frost has passed.
How to make your own garden snails
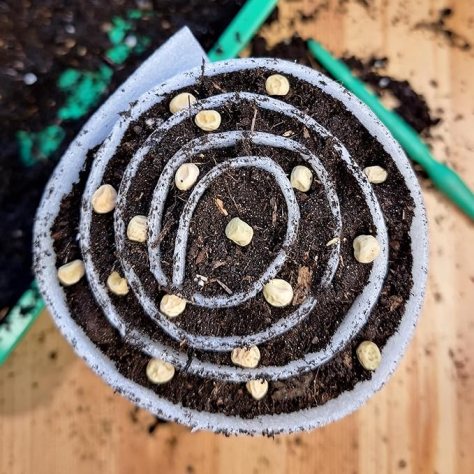
The basics – take a strip of plastic or bubble wrap, wax paper (or other suitable material) about 15–60 cm long and 10–15 cm high, quality seed-starting mix, elastic or tape, a tray, and labels. Spread moist seed starting mix along the strip, about 1–2 cm thick, leaving a bare section at one end so it will roll easily.
Roll it up gently into a spiral, secure it, then stand it on end in a tray. Firm the soil from the top and plant your seeds into the visible spirals at the recommended depth, misting lightly and covering with plastic to hold humidity until they germinate.

There are many sites on the internet to learn more about the process (some good, some not so good), so I’ve put two good Canadian ones below that really helped me. There are definitely some pros and cons to this method.
If you have used this technique yourself, please comment and let us know what you think?
Start Your Seeds in a Snail Roll! North Shore Gardening Life (Nova Scotia) Super helpful in visualizing the process.
Snail Roll THE New Way To Start Seeds Gardening in Canada – Gardening in Canada (Ashley) Science-based video (10 min) on the method, pros/cons, what soil etc.
I’m going to try some veggies, herbs, annuals (sweet peas), and native plants, all using different options, and I’ll report back on my experiments in a later blog.
Common Mistakes with the Seed Snail Method
I thought I’d list a few of the most common seed snail pitfalls I discovered so that hopefully you (and I) can avoid them.
1. Rolling or sowing the wrong way
Sowing seeds before rolling often leads to seeds shifting, spilling, or ending up too shallow or too deep in the spiral. A more reliable approach is to roll the snail first, then plant seeds from the top where you can control depth.
2. Planting too many kinds of seeds in one snail
Mixing different varieties or species in a single snail makes it hard to tell which seedling is which, especially when some don’t germinate. Use only one crop (and ideally one variety) per snail, making shorter rolls if you need fewer plants.
3. Overwatering and poor moisture balance
It’s easy to overwater snails, especially early on, causing poor germination and weak seedlings. Snails also dry out quickly because they contain little soil, so you need careful, even watering over the entire spiral rather than just one side or one edge.
4. Too little soil and wrong mix
Very thin snails or mixes with lots of perlite hold little water, so roots dry quickly and capillary action from the tray is limited. A slightly thicker layer of seed-starting mix with good water-holding but not heavy or compacted works better for this method.
5. Skipping labels and timing info
Label your snail with variety and sowing date. Knowing when you sowed helps you decide whether to wait longer or resow.
6. Letting seedlings stay in the snail too long
Because each snail holds so little soil, seedlings can become root-bound and stressed if not transplanted or potted up promptly. Unroll/pot on once seedlings have a couple of true leaves, rather than waiting until they are tall and leggy.
7. Covering or enclosing without checking
Covering snails with plastic for humidity is helpful but use clear coverings you can monitor and keep them on just long enough to maintain moisture until germination is underway.