By Lois Scott, Master Gardener
I have been fortunate this winter to have the ability and opportunity to carry on with regular, ‘socially distanced’ walks in my neighbourhood and to be able to enjoy the winter interest provided by nature.
On several walks I was quite excited to see small flocks of Pine Grosbeaks and Cedar Waxwings feeding on ornamental crabapple trees (Malus species) in two neighbouring gardens that I pass by. For me it was a special treat to see Pine Grosbeaks, as they are a somewhat irregular winter visitor to the Kawarthas. Their breeding range is in the boreal forest and, according to Drew Monkman, if there is food they stay put. If not they travel south where you may see them on feeders or fruit trees, such as crabapples.
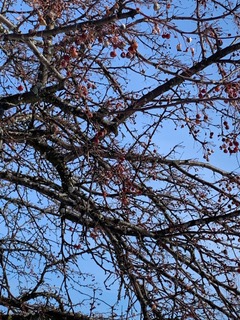
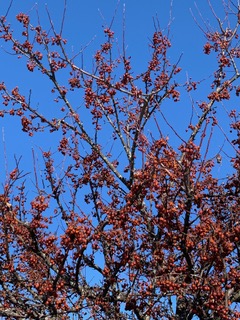
Crabapples, typically planted for their flowers, produce colourful fruit that is not only attractive in winter but a potential source of food for birds. In choosing a variety to plant, Landscape Ontario recommends considering resistance to disease and insects, and fruit persistence, which is important for feeding the birds as the crabapples need to stay on the tree. Another noteworthy fact is that birds can be picky eaters and in their estimation apparently not all crabapples are created equal. For example they like ‘Prairiefire’ whereas they do not like ‘Adams’, ‘Donald Wyman’ or ‘Red Jewel’. Who knew! I don’t know what the varieties are of the two different trees I saw birds in but the tree in the first photograph shows the tree fairly well stripped of fruit. In the second photo there is still plenty of fruit that they have not come back to finish.
There are other excellent choices of native trees and shrubs that can provide winter food sources for birds. The hackberry (Celtis occidentalis), a shade tree that works well in ‘difficult’ urban areas, hawthorns (Crataegus species), highbush cranberry (Viburnum trilobum), and red chokeberry (Aronia arbutifolia) are a few good choices.
For a more comprehensive list of crabapple varieties and other native species to feed the birds in winter please check out the following links.
- It’s for the Birds! Iowa State University Extension and Outreach
- Plant a Prairie Fire Crabapple Tree to Feed Birds in Autumn and Winter
For more general information on attracting birds to your garden please check out Master Gardener Judy Bernard’s excellent posts on our Peterborough Master Gardeners website.