Planting in a Post-Wild World by Thomas Rainer and Claudia West, is a book described by Doug Tallamy as a how-to guide to sustainable landscaping. The prescribed way to create this sustainable landscape is referred to as matrix planting, wildscaping or new American style. Check out this link for a very good description of this type of planting. https://www.hortmag.com/gardens/matrix-planting-garden-design
The book spends a lot of time describing ‘landscape archetypes’, design processes and site preparation etc., with the finished planting being a matrix or array of plants that thrive in related habitats with root systems that don’t compete. Planting is done in layers using structural/framework plants (10-15%), seasonal theme plants (25-40%), and ground cover plants (50%). Plant spacing is based on the mature width of plants and their growing behaviour. This method usually requires a large number of plants so using ‘plugs’ is the most economical way of starting. This style of garden does rely on some plants self-seeding to create a dense planting, so this may not be to everyone’s liking!
As an example, I have a stretch of garden along the sidewalk that I refer to as my ‘hell-strip’ and I have found few plants that have thrived there. A boulevard tree that shaded part of this area was damaged last year and was taken down, so I can now use sun-loving plants that I have had success with in an adjacent area. So, to translate that into what I might plant, I could use 25 Prairie Dropseed (Sporobolus heterolepsis) plugs as a ground cover plant, 15 Lance-leafed Tickseed (Coreopsis lanceolata) plugs as a seasonal theme plant and 9-10 Dense Blazing Star (Liatris spicata) plugs as a structural/framework plant. Or maybe … ??? Isn’t that the fun part?
The goal is to have a dense planting that will discourage weeds, be resilient, provide habitat, sequester carbon, reduce storm water run-off and to create a beautiful garden!
Despite the lingering snow, the longer days and stronger sun tell us that spring is indeed here! With that we begin to think about all of the chores we wish to accomplish. Division of perennials is a common task. So why do we divide?
Division is a common means of vegetative propagation. It is an easy way to increase the number of plants you have available. Division is also required maintenance for some perennials in order to achieve maximum bloom year after year. Although a fairly simple process, there are a couple of considerations you must make.
Time of Year
Because successful division depends on the growth of new roots, the best times of the year to divide are spring and fall when the soil is warm, water is available and stressors are at a minimum.
Many perennials can also be divided during the summer months but high temperatures mean an increase in water loss. This leads to a stressed plant so extra care must be provided to ensure the plant remain well hydrated. Also, there are some ornamental grasses that only grow new roots in the spring. These plants should not be divided in the fall as they will not grow new roots that can take up water.
Method of Division
This will depend on the type of root and crown system the plant has. No matter the type of plant, keep in mind that each plant division must contain at least one bud or growing point and a few healthy roots. If you are unsure of the what you are dealing with, there is a link to a list from the University of Minnesota at the end of this blog.
Clumpers – These plants often have fibrous root systems sometimes with rhizomes but grow many smaller crowns at the base of the original each having its own root system. This often makes for easy separation with little tissue damage. Examples include ajuga, daylily and hosta.
Runners – These are plants that spread by covering the ground by shallow horizontal stems. They root along their nodes and send up new shoots making them easily dividable by separating the root ball. Examples include bee balm and goldenrod.
Tight, woody crowns – These plants are a little more challenging to divide as the buds are often tightly packed on a hardened crown. For best results the plant must be older when split to ensure that divisions with have growing points. Examples include baptisia and peony.
Thick rhizomes or tubers – Rhizomes are technically stems that grow underground. Divided sections must contain at least one growing eye. Examples in this group would be bearded iris and dahlia. These varieties should only be divided when dormant.
Tap rooted plants –These cannot rarely be divided unless multiple tap roots have developed and are better propagated by using root cuttings. Plants in this group includes oriental poppies.
Basic Steps for Division
Dig out the plant. If not replanting immediately, protect from desiccation. Removing the plant from the ground can destroy tiny root hairs (responsible for water uptake). Protecting the plant means a faster recovery on the division is replanted. I often place the root ball in a plastic bag and place in a shaded area.
Separate your plant into pieces using the most appropriate method. Make sure to take generous divisions of sufficient size to ensure growing points and healthy roots.
Replant, digging hole wide enough. Roots like to grow out and down so give them enough space to spread out. Be sure that the soil has good contact with the root system by firming the soil then water the division in, slowly allowing the soil to further settle against the roots.
Yes, it is finally spring! We can feel the sun getting warmer and see the light lasting longer and so can your orchids.
Before the outdoor gardening season starts, have a look at your Phalaenopsis orchids … actually check all of your houseplants but I am going to stick with just Phalaenopsis orchids for now. Your orchids may have already started to bloom. I have 5 Phalaenopsis orchids and one of them has been in bloom for a couple of weeks. The others are not in bloom but, after inspection, I realized that they all needed to be repotted. How do I know that??
Orchids are epiphytes which means that they grow on other plants but are not parasitic so do not hurt the other plants. Epiphytes have aerial roots to anchor themselves to a tree, for example, or in a pot. The aerial roots pull minerals, moisture and nutrients from the air. They are not growing in soil. When I checked the medium in the pots of my Phalaenopsis, by gently lifting the plant from its pot, the medium had broken down and looked more like soil than the appropriate mixture of bark, perlite and sphagnum moss (or renewable coconut chips).
Phalaenopsis orchids often need to be repotted after purchase because they may have been in the pot for quite some time and the potting medium has decomposed or they may be in an incorrect potting medium. Incorrect potting mediums include anything that holds too much moisture and/or is compacted around the plant’s roots e.g. regular potting soil or a ball of sphagnum moss. They also need to be repotted every 2 to 3 years because again, the medium in their pots will have decomposed, begun to become compacted around the roots and hold too much water. Too much water will lead to root rot followed by a decline in plant health and subsequent plant death.
The other indicator that repotting may be needed with Phalaenopsis orchids occurs because the plant is monopodial which means that it grows taller with new leaf growth at the tip of the stem. The plant can end up top heavy and if not well anchored in its pot, it can fall over as flowers, stem and leaves are pushed up out of the pot by the roots. With repotting, you can settle the plants roots back down into the pot. If the potting medium is still in good shape, then it does not need to be replaced but if you are repotting the plant anyway then it may be a good time to replace the medium.
I have collected my supplies to repot my plants. Note that I am not going to disturb the one that is blooming. I will leave it until it is done blooming then repot because I do not want it to drop its flowers with the shock of being repotted. The flowers are way too pretty!
Now you know why my Phalaenopsis orchids need to be repotted, so check your plants before you get too busy with the start of outdoor gardening season … it’s spring!
At this time of year there are two kinds of easily identifiable weeds: “winter annuals” and “biennials.” Biennials begin their lifecycle by germinating from seed in the first growing season. Winter annuals germinate from seed in the fall. They both form a vegetative basal rosette that lies in a suspended state over winter. The rosette protects what is known as the shoot apical meristem—stem cells of the plant that are responsible for the generation of shoots and leaves later in the spring. They will then grow more upright, flower, produce seeds, and then die, finishing their lifecycle. Some species may function as either a winter annual or a summer annual. Summer annuals germinate from seed in the spring and complete their life cycle that same year. One of the challenges of managing summer annuals is that they can reproduce more than once a year, potentially contributing to a large seed bank. Biennials generally take two years to complete their lifecycles. However, some so called biennial species may extend into subsequent growing seasons and be more like perennials if they have sufficient root energy stores and have not had the opportunity to flower and go to seed. This can happen if you do not remove at least the root crown of the plant when weeding.
In the Peterborough Public Library’s native plant garden, I took some photographs of some basal rosettes with the idea of identifying them later at home. Coincidentally, a copy of a book that I had on order for more than a year finally arrived: Weeds of the Northeast, 2nd Edition, by Joseph C. Neal et al. (Cornell University Press). In addition to the US Northeastern, Mid-Atlantic, and Upper Midwestern states, the book includes Southern Canada. In the 26 years since the first edition was published in 1997, more than 200 new species have been added. Many of these new species are invasive plants from the horticultural trade [e.g. Common Periwinkle (Vinca minor)]. It is strictly an identification guide and so if you are looking for weed management guidance, this type of information will need to be found elsewhere.
The book has a dichotomous key that is a bit different from others. It relies on identifying the plants through their vegetative parts such as leaf lobes, leaf arrangement, leaf margins, leaf hairs, etc., but not on their floral traits. It also does not lead you to an immediate single species identification, but rather enables you to compare your plant with several possible matches through their photos and descriptions. The photos are particularly valuable for identification purposes—showing plants in various stages of life—from seedling to maturity. The glossary is helpful for those that are unfamiliar with some of the botanical terms. This is a great resource for anyone to use to confirm the findings of a plant identification app.
Here are some of the weeds I found and identified using this guidebook:
Shepherd’s Purse (Capsella bursa-pastoris): A summer or winter annual.
Shepherd’s Purse (Capsella bursa-pastoris)
Field Pennycress (Thlaspi arvense): A Summer or Winter Annual
Field Pennycress (Thlaspi arvense)
Canada Horseweed (Erigeron canadensis): Summer or Winter Annual
Canada Horseweed (Erigeron canadensis)
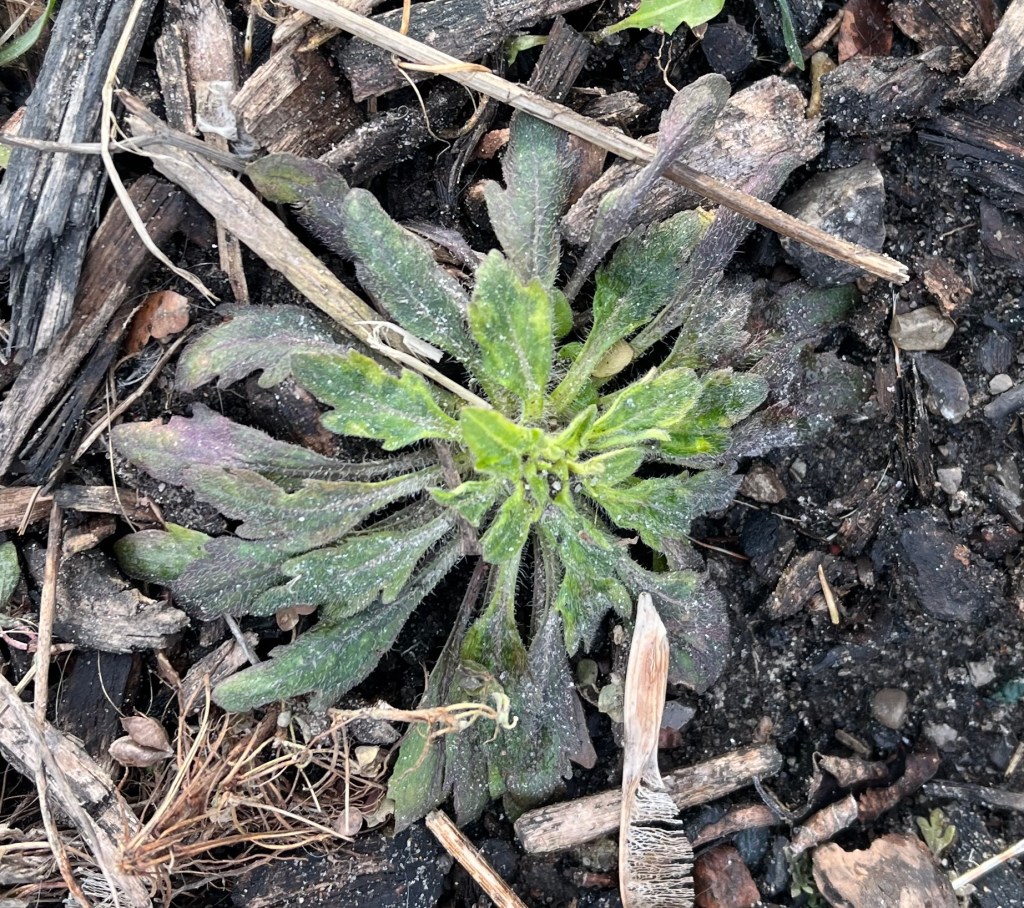
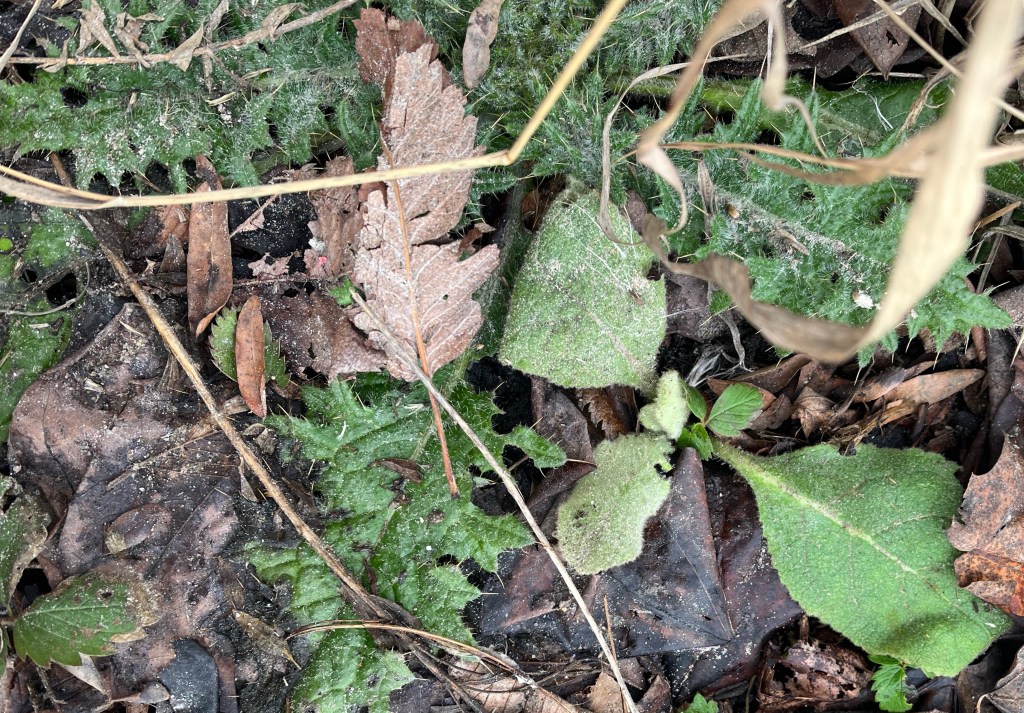
Bull Thistle (Cirsium vulgare) and Common Mullein (Verbascum thapsus): Biennials
Bull Thistle (Cirsium vulgare) and Common Mullein (Verbascum thapsus)
For many years, we have been told of the depleted bogs where peat has been harvested and why we should not be buying it. Many gardeners wonder what they would use to replace this product that is a great soil amendment and seed starting medium.
Peat is an organic naturally forming product which can take hundreds of years to replace. We all know the history of peat bogs in the British Isles when peat was used to heat homes and then mined irresponsibly, destroying wetlands and ecosystems. The International Union for Conservation of Nature (IUCN) is a group which is responsible for setting up a Peatland Programme in the UK.
Peat harvesting
Did you know that Canada is the largest producer and exporter of horticultural peat, with about 1.3 million tonnes of peat being mined in 2010? Peat companies must, however, follow federal and provincial guidelines. Just recently, in Manitoba, this ruling occurred: On January 20th, 2023, Moswa Meadows and Fish Lake Fen were designated as provincially significant peatlands in the newly created Provincially Significant Peatlands Regulation in order to ensure the biodiversity of the two areas is preserved. Specified development activities, including mining, forestry, agriculture, and peat harvesting, are now prohibited across the nearly 28,000 hectares that make up Moswa Meadows and Fish Lake Fen and will ensure the areas can continue to provide long-term beneficial goods and services including carbon sequestration and storage, water filtration, and flood mitigation. For more about peat management in Canada, check out
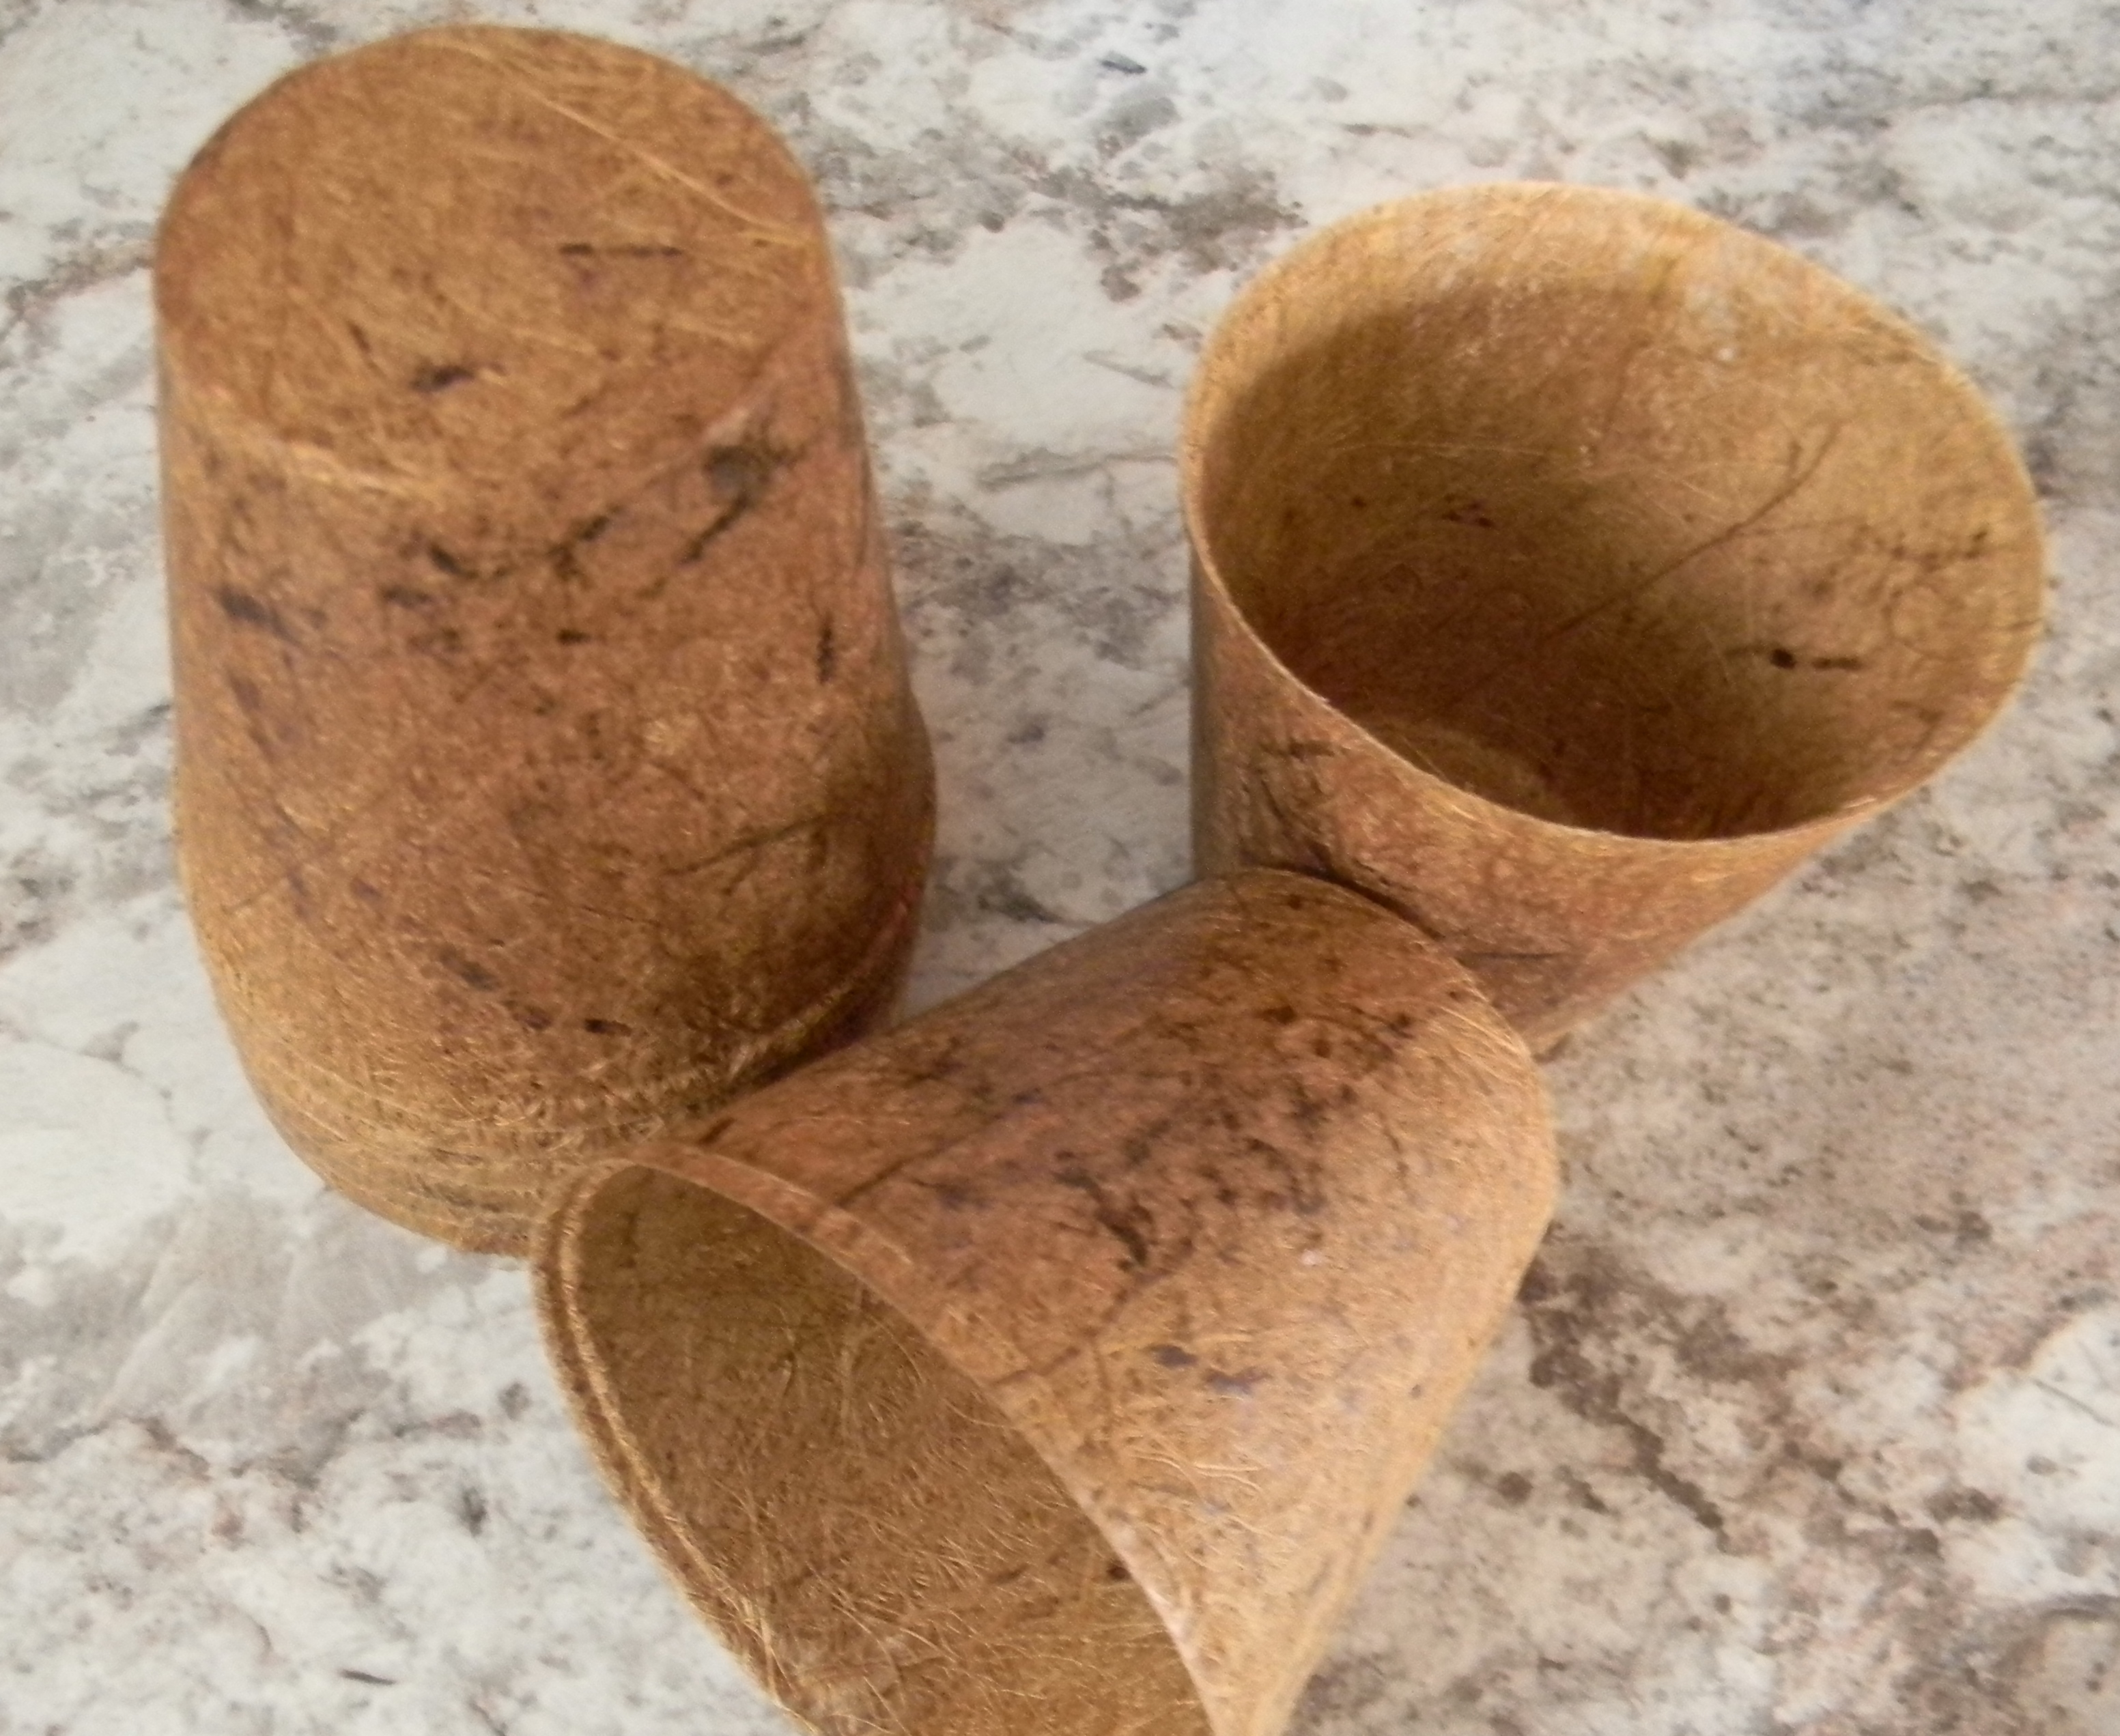
Coir (pronounced COY-er) comes from the coconut plant. It is the part between the meaty white flesh and the hard outer shell. Because coconuts are grown and harvested for food, coir is readily available. India is the largest exporter of coir. It can be used on its own as a growing medium for seed starting and root cuttings or as a soil amendment for holding moisture and is a great replacement for peat.
Sample package of coir
Coir has a pH of 5.7 to 6.5 which is perfect for plants to obtain nutrients. It can be used in containers to help hold moisture and lighten soil. The square foot garden formula is one third peat moss, vermiculite and compost, so coir would be an excellent peat replacement. Coir last longer than peat, being slower to breakdown. It has no odour. It gives sandy soil more structure. Excess salt may be a problem, however, rinsing with fresh water a few times should remove enough of the salt.
Coir is available in many different ways including bales, bricks, pots and discs. Compressed blocks need to have warm water added for it to absorb and expand, just like peat. Place the brick in a bucket, add water and watch it expand. The coir will absorb the water, and can expand by up to 15%. It will soften and have a fluffy texture which can then be placed in pots for planting slips or rooting plants. The small disks also need to have water for them to expand and act like the peat pods we are familiar with. And like the peat pods, these coir disks can be planted directly into the garden. Check out this article: What is Coconut Coir?
Coir products are available online at many sites like Veseys Seeds. I have also found them in Peavey’s and Home Hardware in Peterborough. Let’s all be responsible by purchasing coir rather than peat.
Ironically enough, some speculate that the term probably came from the appearance of flowers after they’ve shed their seeds, when they start to lose colour and eventually die.
However, that all changed in 1990, when the first Seedy Saturday was held at the VanDusen Botanical Garden in Vancouver, BC. At the time, the idea of conserving heritage seeds from garden plants or agricultural crops wasn’t really a thing, and it was hard to find heritage varieties of vegetables, fruits, flowers, and grains.
In 1988 Sharon Rempel wanted to find period-appropriate heritage vegetables, flowers and wheat for the 1880s heritage gardens she was creating at the Keremeos Grist Mill museum. As a pioneer in Canada’s organic and heritage seed movements, she organized the first Seedy Saturday event, and has kept the titles “Seedy Saturday” and “Seedy Sunday” dedicated to the public domain.
In Canada, these events have continued to be locally or regionally organized events, although the amazing organization Seeds of Diversity maintains a national presence. Almost all of these events occur in the late winter, with a few in the autumn.
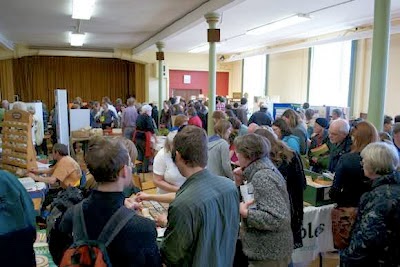
We totally get it. Canadian winters are long and cold and by February, gardeners are already looking forward to the springtime and planting. Seedy Saturdays/Sundays are non-profit, public events organized by individuals and community groups to bring together gardeners, seed companies, nurseries, gardening organizations, historic sites, and community groups so they can learn from one another, exchange ideas and seeds, and purchase seeds and plants in a social setting. Seeds of Diversity promotes these events on their website.
Many Master Gardener and Ontario Horticultural Association organizations are critical partners in these events – I love this poster from the London Middlesex Master Gardeners for this year’s event.
Every year more communities join the movement – according to Seeds of Diversity more than 170 events were held in 2019 across Canada. These events can be small or large, depending on the community. I love that they all have the same themes of encouraging use of open-pollinated and heritage seeds, enabling local seed exchanges, and educating the public about seed saving and environmentally-responsible gardening practices.
They’re a great opportunity to swap and exchange your seeds with others, get new varieties from other seed savers, meet seed companies in person, attend workshops/talks, and of course buy seeds!
In the Peterborough area, we are finally getting back to an in-person event. 2023’s Seedy Sunday will be held on Sunday March 12th from 11am to 3pm in a new location at the Peterborough Square Mall in downtown Peterborough (where the winter Farmers’ Market is being held). It’s a great venue, with lots of space (the pre-pandemic Seedy Sunday was held at the Emmanuel United Church and George St United Church).
Long time organizer Jillian Bishop (who runs her own UrbanTomato business and hosts seed saving workshops) says the event is “the perfect place to get inspired for spring. Come out to get all the knowledge, tools and resources needed to get growing this season.”
Jillian Bishop with her Urban Tomato sales stand.
This year’s Peterborough Seedy Sunday event includes:
An incredible diversity of vegetables, flowers, herb seeds available for sale
Community groups showcasing the great work they do locally
Informative hands-on workshops
A popular Seed Exchange Area where you can trade seeds with other gardeners
Jillian says the last few years have been challenging because of the pandemic.
“As many of you know, in 2020, two days before we were set to host our 15th annual event, we had to cancel as the world began to shut down. As disappointed as we were, we knew it was the right thing to do! Of course, no one could have predicted what happened in the weeks, months and years to come, particularly in the world of seeds and gardening.
All of a sudden seeds became a hot commodity, and seed vendors across the world saw unprecedented demand as people became more concerned about securing their food sources, and had more time at home to plan, plant and enjoy their gardens.”
Peterborough Seedy Sunday, like similar events, went virtual for a few years, but Jillian is very happy to be planning a return to in-person seed fun and spring mania for the 15th annual event, with 13 vendors selling seeds, compost supplies and more! Workshops will be focusing on hands-on skills sharing.
If you’d like to take part in the Seed Exchange, please bring your seeds divided into smaller envelopes (approx. 25 seeds) labeled with the name of the plant, year harvested, and any other information you would like to share! Once you have them all ready, you can bring them down to the Seed Exchange and swap them for other fun varieties you have yet to try in your garden!
Hope to see you in Peterborough, or join your local ‘seedy’ event!
Words of Wisdom from Jillian Bishop
Why I Save Seeds
“Saving seeds means a lot to me. It means a lot to the world. Each heirloom seed contains history and future. Past and present, the ability to adapt to unforeseen climate change and unique environments, to spread stories and knowledge through generations it contains the capacity for communities to grow their own food in sprawling fields, community gardens, abandoned lots and fire escape pots.
Those seeds are living beings. They want to grow. They needs stewards. Citizens willing to give them water, sun, soil and yes, cheesily enough, love.”
More links and information
Seed Companies in Canada-list of seed companies in Canada, as well as the vegetable and fruit seed they’ve sold in recent years.
Peterborough Seed Savers Collective – Great short film (2015) about seed saving work happening locally – follow local seeds being grown out by the emerging Seed Savers Collective, and being shared at an annual Seedy Sunday event.
Canadian Seed Security – The Bauta Family Initiative on Canadian Seed Security works with farmers, researchers, universities, and other organizations to develop resources that can help farmers and seed growers advance their knowledge on seed in Canada.
Seed Savers Exchange – Stewards America’s culturally diverse and endangered garden and food crop legacy for present and future generations. We educate and connect people through collecting, regenerating, and sharing heirloom seeds, plants, and stories.
The Eastern White Cedar (Thuja Occidentalis) is also known as the swamp-cedar. Although it’s most often found in the wild in wet areas, it is also widely cultivated as an ornamental plant. It’s a slow to moderate growing evergreen that has a pyramidal shape; some of them live over 800 years. Despite having “cedar” in its name, this particular tree is not a true cedar but a cypress tree (Cupressaceae).
Cedar trees lining Chemong Lake at the Selwyn Conservation Area. Photo credit: MJ Pilgrim
While on a hike today at the Selwyn Conservation Area, this tree could be seen skirting the hardwood forest with its roots on the lake edge. It was widely prolific in some areas but noticeably absent in others. It’s rare to find one growing separate and distinct from others — they grow in ever widening clumps.
Although cedars are not flowering plants, they produce reproductive organs called “cones.” Because of this, they fit in the conifer family. Winds facilitate the pollination of the cones which results in production of seeds. Both male and female cones occur, but only the female cones yield seeds which are then spread by the wind.
Cedar branch showing cones bearing seeds. Photo credit: MJ Pilgrim
This tree is a member of the redwood family and is important for people and animals alike. Snowshoe hares, porcupines, red squirrels, birds and insects take shelter in its branches, especially during harsh winters. White-tailed deer and moose utilize it for food and shelter.
This tree has a long history of medicinal and practical uses. In the 1500s, on his 2nd trip to Canada, Jacques Cartier called the tree “arborvitae,” which is Latin for “tree of life.” The indigenous peoples gathered branches and boiled them into a tea. The vitamin C from the branches helped to ward off the threat of scurvy for Cartier and his men.
Practically, the Eastern White Cedar is valuable as a decay-resistant timber for canoes, posts, shingles and more. In our area specifically, cedar split rail fences are often still seen — remnants of the challenging farming situation in our rocky landscape. Most of these fences have the rails stacked in an interlocking zig-zag fashion that is self-supporting, easy to create, easy to repair, and easy to disassemble. These fences are ecologically positive, in that while they do the job of keeping larger animals in or out, smaller wildlife can pass through them easily. Being made of wood, they are less intrusive on the landscape, and will naturally break down over time.
Photo credit: MJ Pilgrim
The native cedar’s mature size is 40-50′ tall and 10-15′ wide which is much too large for the average city lot. However, they can be pruned heavily to form dense hedges for windbreaks and privacy fences. Hybridizers have created several popular cultivars for smaller lots including ‘Emerald’, a compact and dense tree with a height of 12-15ft that does not require pruning.
The author would like to gratefully acknowledge the assistance of Darcy, Tom and Jim in the writing of this article.
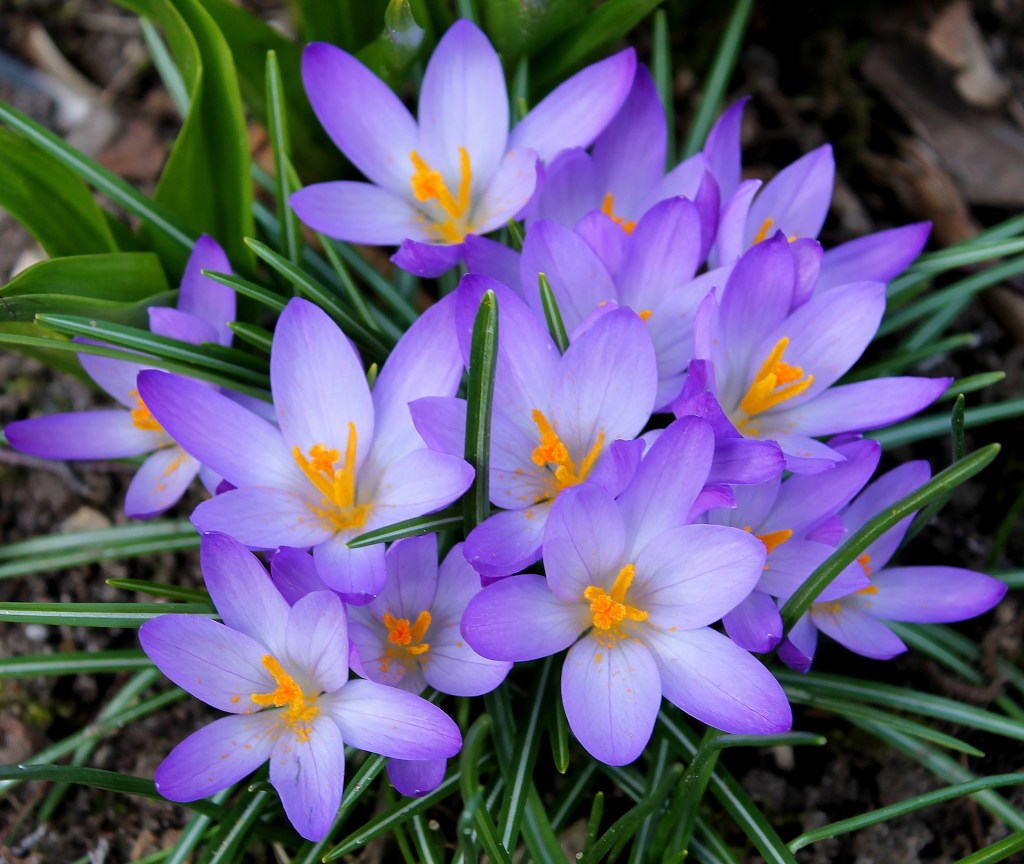
Can spring bulbs be planted in late winter/early spring and still bloom? The answer is yes!
Perhaps you forgot to plant your spring bulbs in the fall (as is customary and recommended), it is better to take your chances now (late winter) and plant the bulbs rather than waiting for next fall as bulbs may not survive out of the ground this long.
Regardless of your circumstance, if you have “stray” bulbs still in your possession and they have been stored properly…you can “force” (or “trick”) your spring bulbs into blooming.
Bulbs can be divided into two groups, those that require a chill period, and those that don’t. For those that do require chilling, this chill period is less than what the bulbs would experience in the ground in a typical Ontario winter.
To force cold hardy bulbs into bloom you must first encourage them to produce new roots. This is accomplished by keeping them cool and moist for a period of time. Dropping the temperature during the cooling period to mimic the shift in soil temperatures that occurs naturally during the winter is a very effective method to encourage rooting, but can only be accomplished if you have the right set up (separate refrigerator, etc…).
Regardless, a proper cooling period that is around 40 degrees F (4.5 degrees C) throughout should be satisfactory to stimulate rooting and subsequent flowering.
Here is what you need to do:
Step
Notes
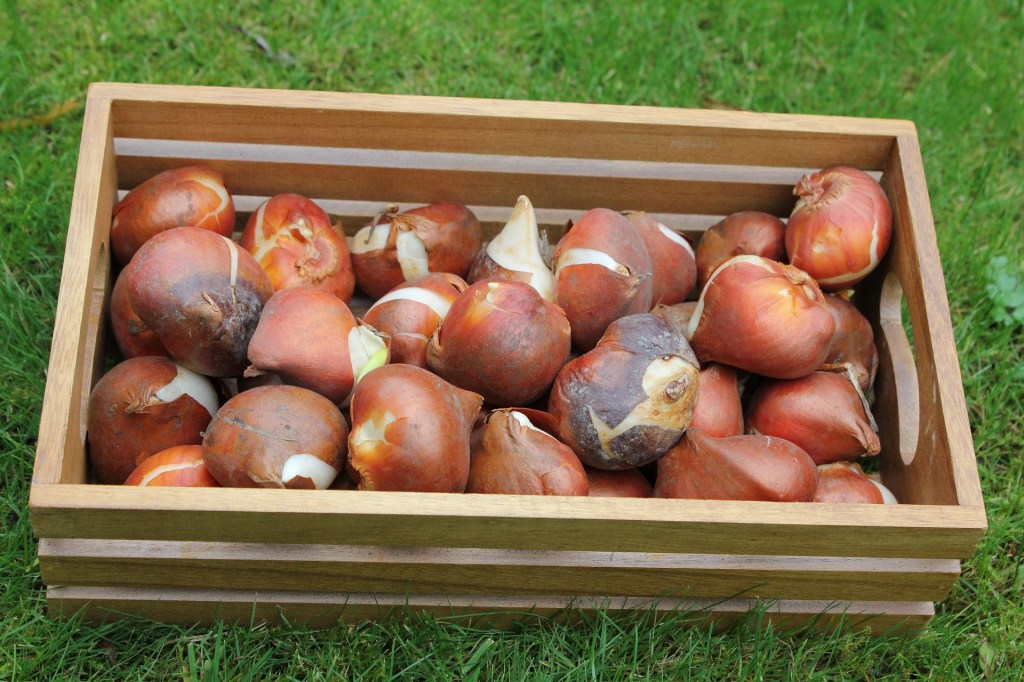
Ensure that those forgotten bulbs are still good.
If they have been stored in a cool, dry and dark location (and even better in a paper bag) they should be okay. Bulbs should be plump, firm and dry. Any sign of softness or evidence of mould signals that they are likely better in the trash can.
Pot the bulbs in a well-drained potting mix according to depth requirements for that bulb. Space the bulbs much more closely than you otherwise would have (almost touching).
Any pot can be used as long as there is 3-4” of soil under the bulb for rooting. It is recommended that “soil-less” potting mix is used as this allows excess moisture to drain away preventing potential growth of pathogens.
Water well and place in a cool dark spot (not freezing) for the required cooling period (see Table 1 below). Check moisture levels during this period and water if top is dry to the touch.
Although the ideal rooting temperature varies, most bulbs do best if stored at 40-60 degrees F for 3-4 weeks after potting, and then 32-40 degrees for the balance of the cooling period, mimicking the actual change in seasons. However, most bulbs will do well if the temperature is maintained close to 40 degrees F for the duration of the chilling period.
Check for rooting after the recommended chilling time.
Look for fleshy white roots in the bottom of the pots. Pots can stay in the cool zone until you are ready to bring them in of pot outside.
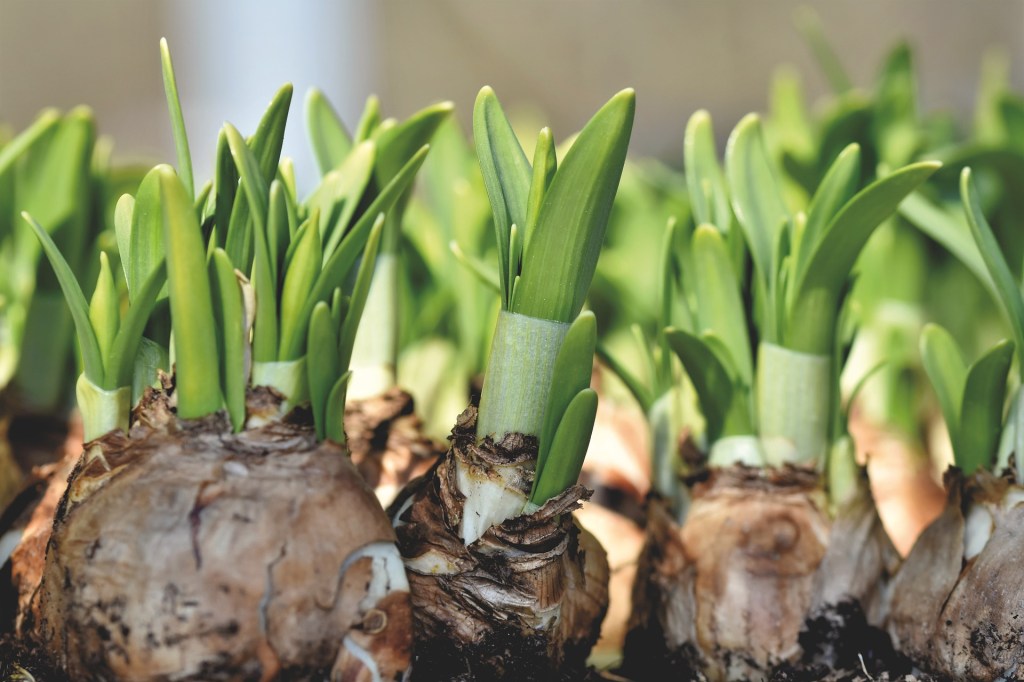
Bring the pots into the warmth/light in the house.
Ideally a sunny window in a cooler room (~65 degrees F). The bulbs think that spring has arrived and will sprout and ultimately flower in ~ 2-5 weeks.
Once the bulbs sprout and flower, they can be transplanted into larger outdoor containers outside.
They can also be transplanted into the garden directly at this point, maintaining the same depth
If grown in containers outside, remember that just like bulbs in the garden, allow them to completely die back (including the foliage).
Bulbs need all of the energy from the stems in order to replenish and store energy in the bulb for next years growth/bloom.
Note: Bulbs can also be chilled in a refrigerator where the temperature can be turned down after 3-4 weeks to truly mimic the changing seasons. However, ensure there is no fresh fruit in the same refrigerator as the ethylene gas produced can affect flowering.
Table 1. Recommended Rooting Times by Bulb Type
Bulb Type
Planting Depth
Cooling Period
Anemone
4 inches
8-10 weeks
Crocus
4 inches
8-10 weeks
Hyacinth
6 to 8 inches
12-14 weeks
Narcissus (Daffodil)
6 to 8 inches
14-17 weeks
Snowdrops
3 inches
10-12 weeks
Tulip
6 to 8 inches
14-16 weeks
Keep in mind that forced bulbs planted into the garden may not bloom the subsequent year. However, in the end, it may be better to try and “trick” your spare or forgotten bulbs into blooming this spring and enjoy them rather than take the chance that they are spoiled by next Fall.
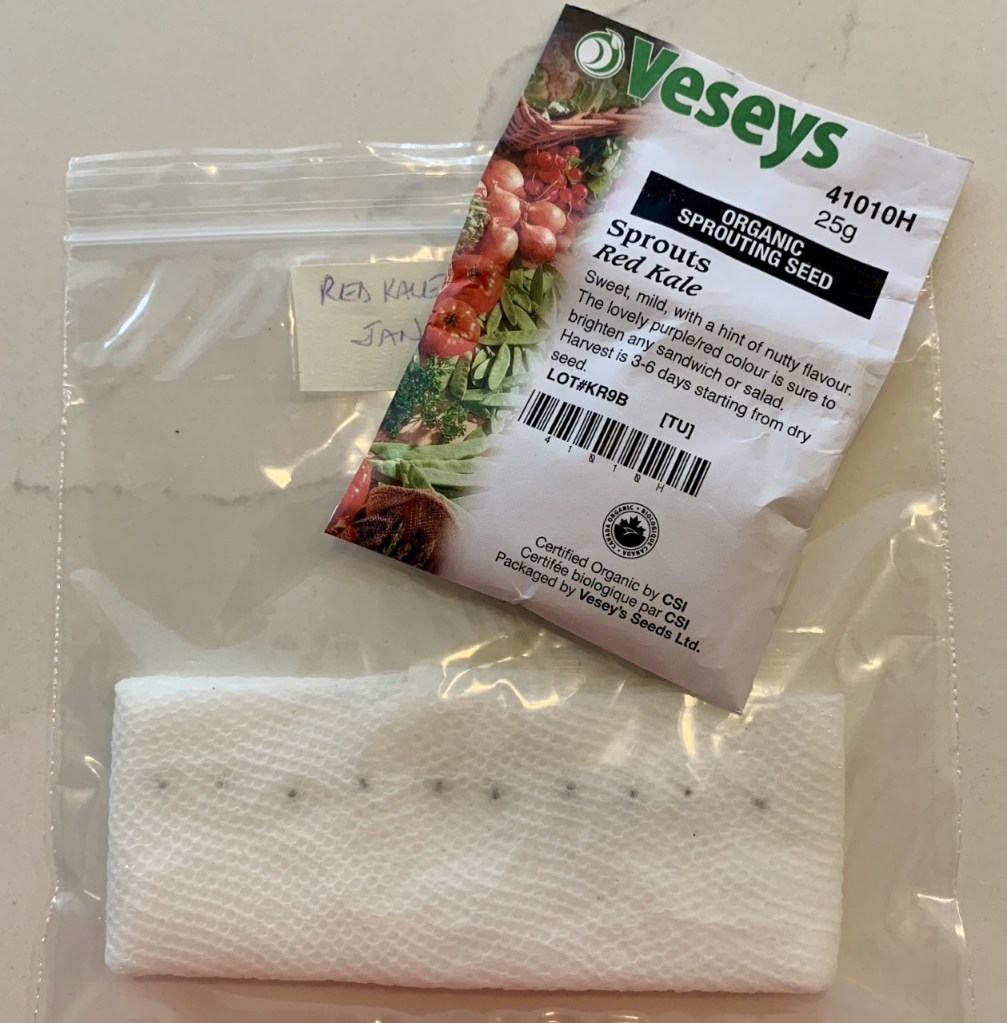
You have probably heard this adage applied to various activities/hobbies, but here I go. Buying seeds and starting seeds are two different activities. I engage in both, but sometimes the buying outruns the starting and I find myself looking at an unused package of vegetable seed purchased in the past and wondering if those seeds are viable. Checking vegetable seed viability is easy and may save you from the disappointment of a poor harvest.
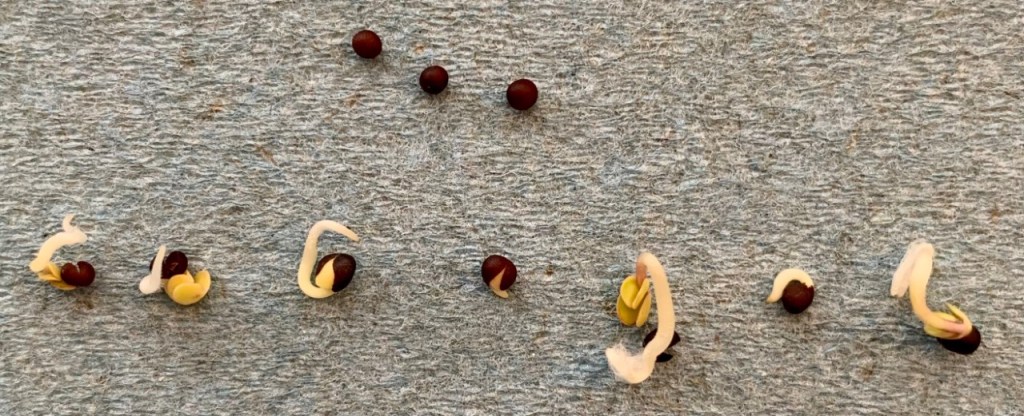
To say a seed is viable is to say it is alive. Checking for this can be easily done by wrapping a number of seeds (10-20) in a moistened paper towel, placing them in a sealed plastic bag in a warm place (21-26*C) and then checking for germination in a week or so. Your germination rate is a percentage, calculated by multiplying the seeds germinated by 100 and dividing that by the total number of seeds in your trial. It is recommended that if your germination rate is below 70% you should buy new seed. In my demonstration featured in the two photos shown, I used 10 seeds and 7 sprouted. My germination rate is 70%.
Checking for seed viability by putting seeds in water and discarding the floating ones is not a reliable test.
Some seed companies also list on the back of their seed packages the optimum germination rate and the year the seeds were packed and tested. So, I know that the rapini seeds I haven’t used were packed in 2022 and maybe I should plant them this year!
It’s coming to that seed starting time of year so don’t hesitate to give some of your older seeds a chance to prove themselves and save yourself from vegetable garden let-down.
Over the past few years, it has become increasing clearer that loss of biodiversity due to loss of habitat is at a crisis level. It is also well documented that the planting of native species provides us with an opportunity to help reverse this process by creating or enhancing ecological networks.
Renowned entomologist Douglas Tallamy has been beating this drum for some time. It is his belief that all of us can provide part of the solution no matter our area of interest and no matter the scale of effort (no need to be a native plant purist!). He believes that small efforts by many people can make a significant contribution. Tallamy provides practical, positive advice for adapting his principles into your situation. His philosophy is about encouraging folks to participate in regenerating biodiversity in the way they are most comfortable versus prescribing “must do’s” or formulas. He doesn’t let the perfect be the enemy of good. To this end, he is spearheading a grass roots, science-based solution called Homegrown National Park. Participants in both the US and Canada involved in this effort are encouraged to register their properties on the parks map in order to be counted towards the park’s goal of planting 20 million acres. The website provides extensive resources to gardeners such as blogs and videos as well as a newsletter. You can also follow the park on Instagram @homegrownnationalpark.
Tallamy suggests 10 steps that anyone can all do to get started and make a contribution (see the link for more detail). They are as follows:
Shrink your lawn – All of us could probably do with a little less lawn to cut but no need to go without. Replace some turf with trees, shrubs or gardens.
Remove invasive species – Invasive species interfere with the ecosystems ability to function and will affect any type of garden. Removing some if not all out will reduce the impact on your plants and reduce the amount of seed that is shed into the environment.
Encourage Keystone Genera – Research has shown that a few genera of plants are the backbone of local ecosystems especially as a food source for insects. Without local keystone plants, food webs will fail. Common keystone plants in the east are oak, willow, birch, elm, goldenrod, aster and sunflower. In my own case, goldenrod and aster is abundant on the farm. I now let it grow along the perimeter of my fields instead of cutting it down.
Be generous with your plantings. Increasing the abundance and diversity of our plantings will assist in realizing the ecological potential of our landscape.
Reduce Nighttime Light Pollution. White porch lights and security lights are a major cause of insect decline. Consider switching lighting with motion sensors or replace white bulbs with yellow (less attractive to bugs).
Network with neighbours and encourage them to get involved. Be a role model by transforming your property in attractive ways. Display a sign to show your commitment.
Build a conservation hardscape by using window well covers to prevent toads and frogs from falling into the wells where they starve to death. Mowing your lawn no lower than 3 inches helps to ensure that you mow over the turtles, toads and other small critters.
Create caterpillar pupations sites under trees. Most caterpillars drop from trees to pupate in duff on ground. Replace the lawn under trees with well planted beds full of ground cover to encourage pupation.
Avoid use of chemical fertilizer. Create soils rich in organic matter instead.
Educate, educate and educate. Spread the word.
“Education is the most powerful weapon which you can use to change the world.” -Nelson Mandela