Category Archives: Perennials

Spring Bulbs – Beyond Daffodils and Tulips

by Suzanne Seryck, Master Gardener

October and November is a great time to plant spring bulbs – these are the bulbs that will extend the colour in your garden,  often blooming when there is still snow on the ground. These bulbs – the most well-known being daffodils and tulips – bloom from March or April until late spring. They are incredibly low maintenance, you plant them once and then forget about them, with the exception of daffodils which often need dividing every 5 years or so. However the reward outweighs the hardship of dividing them, a clump of 5 can easily multiply to 40 or 50.

Daffodils and tulips are, by far, the most recognized spring bulbs, coming in many different colours, sizes and bloom times. However if you look beyond, you start to notice the many other different spring bulbs available.
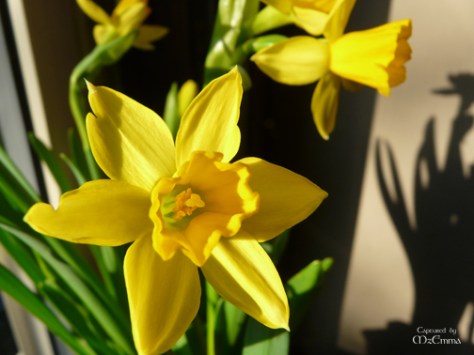
daffodils_EM

I live in Lindsay and like many cities, if you drive around in the spring, you will notice the many blue lawns. These are actually either glory of the snow (Chionodoxa spp.), or siberian squill (Scilla), tiny blue bulbs that naturalize in both your lawn and your flower beds. The difference between the two depends on the direction that the flower head faces, but either are perfect in the lawn. As well as blue they also come in lavender, pink or white.

Squill_EM

Snowdrops (Galanthus), which are among the earliest blooming spring bulbs will also naturalize in your lawn or flower beds, however in my garden, they are slower to multiply. They can be either single or double with a small white or snow colored flower.
I plant a lot of grape hyacinth or muscari in my garden, however I find them too large for my lawn and instead plant them in the perennial beds. They are also great under shrubs, trees or hedges. They come in blue, violet, pink and white and multiply easily, quickly spreading to form large clumps. Blue muscari works very well when paired with daffodils and can be planted in the same hole. Bulbs are typically planted at a depth determined by the size of the bulbs, allowing you to layer the muscari on top of the daffodils.

Crocuses whilst beautiful in their many different colours seem to be especially appetizing to squirrels. I planted orange crocuses two years ago and out of the twenty crocuses I planted, I may have seen one actually bloom, I was left with either holes where the bulbs used to be, or they would be nipped off when they were about 1 inch tall. I still plant them, but I make sure to plant a daffodil in the same hole, squirrels do not like the smell of daffodils and tend to stay away.

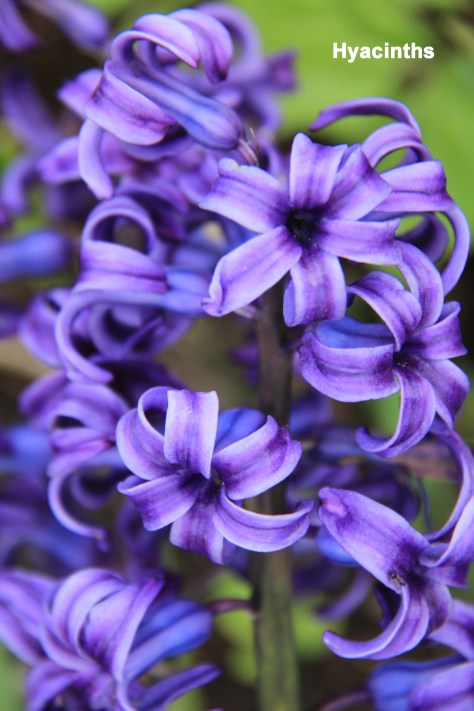
Other spring bulbs I have planted in my gardens include anemone, oxalis adenophylla, which is a very pretty pink colour, hyacinths, winter aconites, a very cheery shade of buttercup yellow, iris hollandica and of course English bluebells. I have to admit I do have a lot of daffodils and tulips in my garden from my early gardening days, but I am now starting to look beyond and plant the many different spring bulbs now available.hyacinths_EMHint: If you’re looking for ideas for something different check out this GardenMaking magazine article with ideas for 25 unique bulbs for your garden.
 

Planting to Encourage Proper Root Growth and Branching

By Sue Flinders-Adams, Master Gardener

Here are a few tips to ensure that the new shrub or tree you just brought home will thrive and grow to its full potential.

1. Before planting, soak the plant in the pot, in a pail of water for a few hours or even overnight to hydrate the roots.

2. Carefully remove plant from the pot. If it doesn’t come out easily gently press on the sides so that the roots will come away from the pot, and tap on the bottom.

3. There are usually roots circling the pot – gently coax these roots away from the root ball to encourage outward growth. If roots are left in the ‘circling’ position, they will continue to grow in this direction, circling the plant and even girdling the trunk of the tree in 10 or 15 years.flinders pic 1

4. The picture shows the roots that have been spread out in the very large hole. Partially cover the roots to hold them in place and water thoroughly with transplant fertilizer, according to the directions. Fill in the hole with the surrounding soil. Top dress with an inch or two of composted manure, and then 3 inches of mulch. Prune off any dead branches.flinders pic 2

5. Branches are often cramped and a little twisted from shipping. Gently pull them away to a better positon and secure with plant supports (pictured). In a couple of weeks you can take the supports away and the branches will continue to grow in that direction.

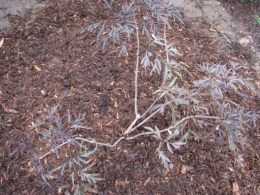
6. flinders pic 3Three weeks later, the Black Lace Elder is looking very happy. It is October which explains the lack of new growth.
The Plant Lover’s Guide to Salvias (Book Review)

By:  Mary Jane Parker, Master Gardener

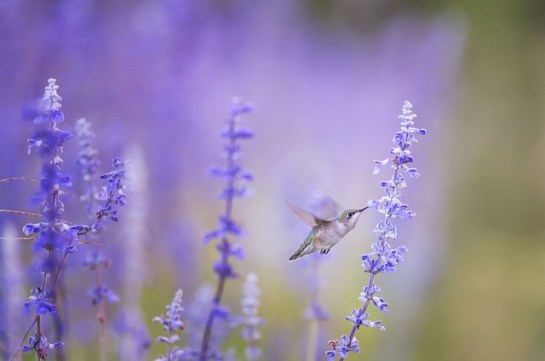
If you care deeply about natural gardening and attracting bees, insects and hummingbirds to your garden, then salvias should be one of your go-to plants. They have wonderful flowers and fragrant leaves and for me, they bloom almost all summer.

In this very readable book, The Plant Lover’s Guide to Salvias, John Whittlesey outlines designing with salvia plants in different climate zones. We learn that salvias are generally hot climate plants and many have low water requirements but some of the perennial ones can be treated as annuals in our climate. Some are rated for zones close to ours and will survive here as perennials. I have had Salvia glutinosa growing here for many years and the book rates that one only a US zone 6a. Culinary sage (Salvia officinalis) has overwintered for me also for a number of years.

hummingbird 1851489_640

The author next goes through and discusses 150 species and exceptional hybrids, their country of origin and specific cultural practices for each and any notable characteristics such as a strong hummingbird attractor.

Finally, he discusses general cultural techniques and then provides a listing of sources for plants and seed. After having read the book and descriptions of different salvia species, I have ended up with a two-page list of interesting species I wish to try.

The Peterborough Horticultural Society has this book available in their lending library or you can purchase from Timber Press.

New Garden Planning; a Look Ahead

By Cheryl Harrison, Master Gardener

Fall is a great time to get a head start on the new garden that you have been dreaming about for next year.

Deciding the new garden’s location depends on the purpose of the garden.  Will it be a quiet area for relaxing?  Look at the view from outside and also through the windows from inside your home when assessing potential locations.

Consider the growing conditions.  Is the potential location windy, sunny, shady or combination sun/shade?  It may be important to know the location of utility lines and pipes depending on how radical the planned change to the landscape.  Do you have access to water?  New plants usually need supplementary water for their first year.  Also check the area for flooding and provide drainage when necessary.IMG_1164

Think about garden structures……perhaps an arbor, fence or pergola or maybe a bird bath or bench?  For larger structures, you may need a construction permit.  A landscape professional can be a great person to consult at any stage of planning.

Soil condition is vey important to the growth of plants.  Newly built homes often have very little topsoil layered over nutrient poor subsoil.  It may be necessary to dig out some of the subsoil and replace it with good topsoil.  This “digging” step is when to be aware of the location of your utilities.

Create a new garden by edging the chosen area with a sharp shovel or edging tool then placing the material (usually a combination of grass and soil) into the centre of the new garden location.  Smother unwanted growth by covering the area with 4-5 layers of newspaper, or cardboard, and water it down.  Then layer topsoil about 15 cm (6 inches) on top and add additional organic material like composted manure.  Finish the new garden bed with a 7-10 cm (3-4 inch) layer of mulch.  The newspaper/cardboard layer, and the mulch will eventually decompose to become part of the garden’s soil.

Your new garden bed is ready for planting.  Choose plant material by looking at plant catalogues and on web sites.  What a great way to spend a fall or winter afternoon!

Preparing Your Perennial Garden for (gasp!) Winter…

By Mary-Jane Pilgrim, Master Gardener

Winter is fast approaching, and it’s time to prepare your gardens for the long, cold months ahead. By spending a little time this fall preparing, you can insure a healthier start to next year’s  season. Here’s a checklist of fall activities to get them ready for winter before it gets too cold to comfortably work outside.

  1. In all areas, spring-flowering bulbs, such as tulips and daffodils, should be planted six weeks before you expect the ground to freeze.
  2. Dig and store tender summer bulbs, such as dahlias and canna lilies, after the first hard killing frost. Store them in wood shavings or crumpled/shredded newspaper in a cool, dry place.
  3. Stake and tie up any young trees or shrubs that may break under the weight of wet snow or ice. Use soft (but strong) ties around the bark of trees, as wire or twine can cut into the bark and cause serious damage. Place wooden tepees over shrubs growing under eaves where snow tends to fall off the roof.
  4. After the first couple of frosts, hosta and daylily leaves will pull up very easily. Doing the removal in the fall means that you don’t have to deal with a slippery mess next spring.
  5. To prune or not to prune perennials to ground level? It’s a good idea to leave some plant material for visual interest through the winter months; ornamental grasses and hydrangeas have attractive seed heads and always look gorgeous in the winter, especially sprinkled with snow. With the exception of hosta and daylily leaves, I choose to leave everything else for spring cleanup.
  6. Protect hybrid roses with rose cones or bark mulch piled over the crown of the plant after a hard freeze.
  7. Remove all weeds from your perennial beds, and add compost to create a good base for next year’s growth. Compost applied in the fall is better than the spring as it has had time to break down and release its nutrients into the soil.
  8. Move containers to a protected location when frost threatens. After a frost, remove soil and plants from containers and store ceramic and clay pots in a garage or basement. Place used potting soil in the compost pile. If the containers have perennials planted in them, consider digging a hole to bury the plant including the pot, or bury in leaves in a protected area. Potted perennials will not usually survive the winter if not buried/covered.
  9. Instead of raking and bagging the leaves to cart off to the landfill, shred leaves with a mower to create amazing leaf mulch which can be spread on the garden as a winter protectant.  The earthworms will love the food, and the leaves will eventually break down, adding nutrients to the soil. If you decide to cover gardens with unmulched leaves, do not apply a thickness of more than about 10 centimetres (four inches). Any deeper will smother bulbs and perennials trying to grow in the spring.
  10. Take pictures of your gardens to assist with your dreaming and planning for the next season after the snow flies!
  11. As you wind down the garden season, make notes on what worked and what didn’t work, to help you plan for a successful garden next year. You are more likely to remember key points now rather than next April or May.
  12. Join a local garden or horticultural society. Many organizations meet over the winter on a monthly basis and provide interesting speakers who can help chase away the winter blues and provide you with great ideas for your upcoming garden season.

The Importance of Plant Labelling

By MJ (Mary-Jane) Pilgrim, Master Gardener

Why should we label the plants in our gardens? The answer is simple–so that we know their names & can then give them the correct care. For herbaceous plants, the labels act as placeholders over the winter, so that we don’t accidentally disturb them, or try to plant bulbs too close to them while they are dormant.

Figuring out how to handle labeling is one of the trickier parts of perennial and vegetable gardening. Do you keep the tags your plants come with, filling your garden with dozens or hundreds of bits of plastic? Do you tape them into a special garden notebook, so you can keep track of where all of the information for your plants? Or do you simply toss the labels in the recyling bin as soon as you get the plants in the ground?

For me, the answer to all of these questions was ‘no’ simply because most of my first plants came from local plant sales and were probably pretty common (and invasive?) plants. The white paper address label from the sales were usually blank the following spring so I was no further off than when I started. Then, I started buying more unique perennials at garden centres — the real money kind of plants. It seemed a shame to toss those beautiful tags full of information, so I buried them close to the plant which worked well — but the tags did crack and disintegrate after a couple of seasons. Tags created with my simple Dymo labeller were often blackened by the sun after a similar amount of time. Then, I listened to a speaker at my local horticultural society discuss his approach to labels — one of those portable labelling systems that could take a special kind of tape: “high temperature/low temperature”. He reported that his labels were lasting 10 years and counting. Being a “techy” kind of person, I bought one from Brother/Staples about 5 years ago and I’ve been pretty happy with it. I also record plant information and cultivar names into my mobile phone’s “notes” feature in categories such as ‘hostas’, ‘coneflowers’, ‘sedum’, ‘trees’ so that if I forget to create a label, or the label goes through the chipper in the spring (yikes!), I still have something to go back to. Keeping a list of plants I’ve purchased on my mobile device also helps but doesn’t prevent me from purchasing duplicates. Sigh. (Been there, done that, too many times to count).

My last reason for labelling is that any visitor to your garden will ALWAYS want to know the names of your plants! They may already THINK they know what it is, and they are happy to have their knowledge confirmed with the presence of a tag.

Downside of Plant Labeling

  • The amount of time it takes to check the plant, produce the label, and attach it, not to mention regular checking and replacing of broken, moved and missing labels
  • The cost to purchase the labeller ($100 ish) and the label tape ($30 per roll)
  • Labels can be easily be mistakenly moved from one area to another at cleanup time — and a wrong label is worse than no label.
  • Labels can sometimes detract from the beauty of the garden.

Reasons to Label:

  • You’ll remember your plants’ names, and can give them the correct care.
  • You’ll remember which heirloom veggies are which for reordering next year.
  • You’ll know which very expensive perennial you purchased LAST year did not show up at all this year.
  • The labels act as placeholders so that you don’t accidentally plant something new in the space being held by another, but dormant, plant or bulb.
  • “Oh, I’ll remember what this is.” Oh no, you won’t; trust me.
  • Plants are worth WAAAAYYY more at plant sales if you know the cultivar name — we normally know the genus and species, but the cultivar name is much more tricky and often impossible to determine after the fact.

labelling optionsPlant Label Materials:

  • Simple white plastic labels for seed-starting are available at many landscape supply stores, but what to use for the actual marking?
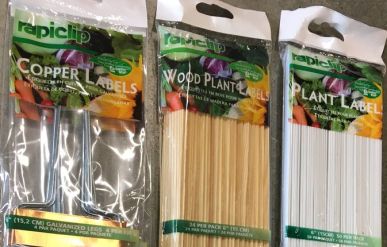
  • Copper labels – use a ballpoint pen to make a true inscription on the thin copper — although these are sometimes difficult to read years from now.
  • Paint the plant names on both sides of hand-sized smooth river-style rocks.
  • Cheapest option: plastic mini-blinds or wooden popsicle sticks but these often fade or disappear.
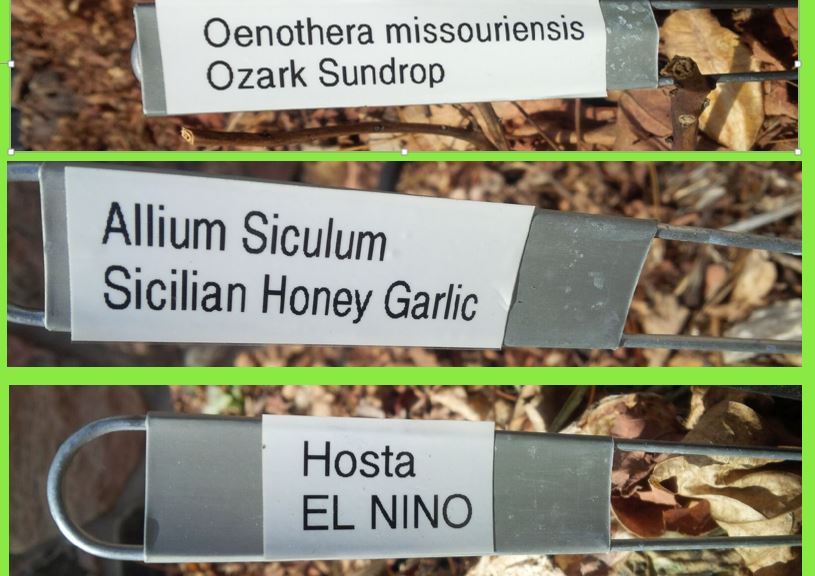
  • Strips of galvanized “duct hanger” metal strips, cut to length with a plastic label.
  • Metal hairpin-type labels with a plastic label: sturdy, but easy to step on or pull out with a rake.

According to my research, the following will work on plastic, wooden and/or metals tags: pencils, ballpoint pens, paint pens, Sharpies, and supposedly fade-resistant nursery marking pens. According to some articles I’ve read, the unexpected hero is the ordinary pencil on plastic or wood: it’s perfect for all but the shiniest materials. A great suggestion is to include the plant information on the back of the marker, too. If the front fades or is damaged, the info on the more protected back side will hopefully still be readable.

brother-labeller low-resMY Preferred Labeling System: hairpin-type label stakes (Lee Valley), pushed more than halfway down with white “live forever” plastic label tape (Amazon) printed on a small Brother labeller (see picture).

One last suggestion for plant record-keeping is the digital camera. It’s so easy to take a picture of the label right against the plant in the garden — you’ll then have a visual record of the name and where the plant is growing.

Hope this helps to save some time, energy and frustration for someone!


Where’s the Rain? How to Deal with Drought Conditions in Your Gardens

By Emma Murphy, Master Gardener

(top photo courtesy of the Missouri Botanical Gardens website; Dogwood (Cornus) wilting from water stress)

Just two years ago, the Peterborough area experienced Level 2 drought conditions. Local residents and businesses were encouraged to reduce their water use by 20 per cent daily and there were 11 days in August when daytime temperatures were higher than 30 degrees Celsius.ONDrought_zpsal2mmbjn

Drought conditions usually relate to sunny, dry conditions, combined with an extended period of very hot weather, and it looks like the summer of 2018 is shaping up to be very similar to 2016. “The watershed region received below normal precipitation amounts in June, and during the first two weeks of July precipitation has been 25% of normal.” said Dan Marinigh, Chief Administrative Officer for Otonabee Conservation.

So what can a gardener do to help their gardens survive (and even thrive) during dry or drought conditions?

In the Short Term

Just before or during drought conditions

Recognize the Signs of Stress

Plant dehydration symptoms include:
• Curling or rolling of leaves
• Slowed/no growth, undersized leaves
• Leaves, blossoms, or fruits drop prematurely
• Wilting, limp and droopy leaves
• Leaf scorch, yellowing and/or browning, death of leaf edges
• Dead or brown/dying extremities starting from the outer leaves inward

Water Wisely

Avoid watering during the heat of the day when evaporation rates are highest. Water either very early in the morning or late in the evening, and adhere to any watering restrictions that may be in place. Try and keep water off flowers, as sunlight is magnified through water droplets and can damage delicate flowers. Depending on your garden, consider hand watering rather than using a hose or sprinkler. Hand watering using a watering can targets the water to the areas that really need it, keeping waste to a minimum.20180716_133136

Harvest Water

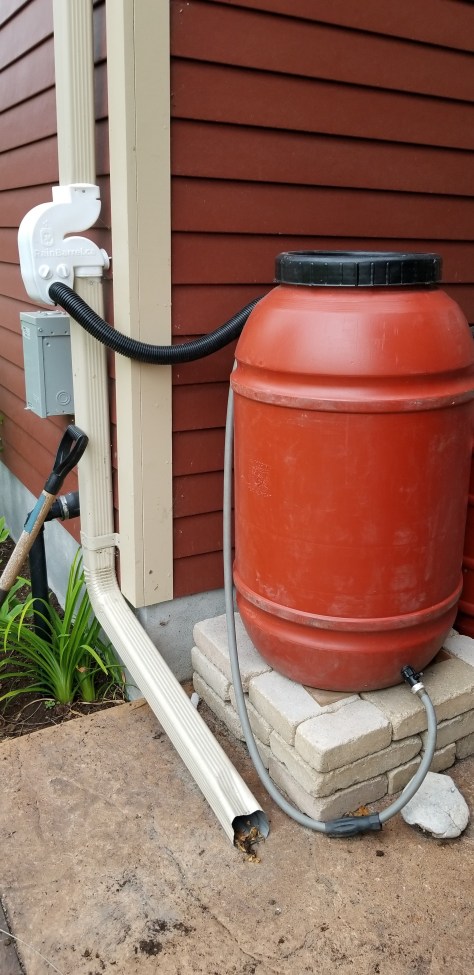
Water harvesting is a great way to use water from your home’s roof and direct it onto the landscape, where the soil becomes your “holding tank.” The best example is using a water barrel – we have four of them in our garden and they are a great investment. You can also practice ‘passive’ water harvesting by creating depressions that fill with water from the roof runoff or formal rain gardens, both of which help with stormwater runoff issues. You can find out more about rain gardens here. Peterborough Greenup Rain Program 20180716_132548

Reduce Stressors

Skip the fertilizer or pruning live branches during drought conditions. No need to add to the plant stress! When soil moisture is low or temperatures are high, plants don’t benefit from fertilizer and without adequate water, fertilizer can burn your plants. Excessive pruning will stimulate new growth that will not be drought tolerant. However, it is good practice to deadhead flowers, as removing spent blooms before they have a chance to set seed saves energy for your plants.

Make Priority

Give priority to watering newly planted trees and shrubs during periods of drought. Young plants have not had sufficient time to establish deep root systems, and depend on surface water for survival. Do not let the root balls of newly planted trees and shrubs dry out completely or become too saturated.

P1040111.JPG

Over the Long Term

Planning for Future Drought Conditions

Think About Plant Selection

Use appropriate plants, which are often marked as drought tolerant or resistant. Consider native plants, which generally adapt better, have lower water demands, and fewer pest problems. Group plants according to how much water they need. Ask your local garden centre or nursery staff which plants they recommend. Check out members of the local Peterborough Area Garden Route. Peterborough and Area Garden Route

Maintain Healthy Soils

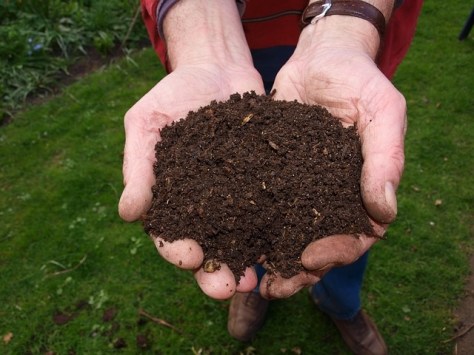
Good soil is the foundation for good plant growth. Anything you can add to your native soil like compost or other organic matter will make it easier for roots to penetrate deeper, creating more expansive root systems that can seek out water and nutrients. The result? Healthier, more drought-resistant plants. Good soils are better able to absorb surface water runoff, minimize erosion, and access nutrients and sediments.fresh-2386786_640

Use Mulch

Mulch reduces evaporation, moderates soil temperature, and inhibits weed growth. It is estimated that three quarters of the rain falling on bare soil is lost to plants through evaporation and runoff. Both of these are reduced up to 90 percent by adequate mulch. Use compost, wood chips, bark nuggets, shredded bark mulch, shredded leaves, or any other organic material to cover the surface of the soil at least 5 cm deep.

Water Well

Deep watering encourages roots to go deep down in the soil to where it is moist and a lot cooler. Water less frequently but for longer periods, so water reaches deep into soil. Good thorough watering promotes healthier plants. Also, water only when necessary, based on condition of the plant. Most plants will normally wilt in hot sun, and then recover when watered. Also, a dry surface is not always a sign of water need. The surface generally dries out first and is not a true indicator of what is going on down deep near the plant root. Make use of a hand trowel to check for moisture.

Weed Management

Weeds will compete with your plants for moisture and nutrients. Keep your gardens and areas beneath trees and shrubs weed free. Once the weeds are eradicated, apply mulch.

Consider Alternate Watering Methods

Investigate use of soaker hoses or other irrigation techniques using a timer, which keeps water on the soil and reduce losses by evaporation. Adjust watering frequency and amounts based on season, temperature, and amount of rainfall. Overhead watering uses more water and encourages fungal diseases.

Practice Water Conservation

Not just in your gardens. Water is our most valuable resource. Learn how to reduce water use throughout your house and gardens at this link.
Water Conservation Fact Sheet – Otonabee Conservation 20150822_185728

Summer Deadheading

by Christine Freeburn, Master Gardener

After spring cleaning in your garden, when you have been weeding and digging and transplanting and prepping flower beds, July gives you time to really enjoy your gardens. But don’t spend all your time sitting in your muskoka chair admiring all your work. Deadheading perennials and annuals keeps them neat and tidy and in many instances, brings back more blooms.

The definition of deadheading from Barron’s Complete Gardener’s Dictionary states “Removing spent blooms before they form seeds. This tends to lengthen bloom season because it encourages many plants to produce more flower buds.”

Deadheading Annualsdeadheading

When taking spent blooms off most annuals, don’t just snap off the blossom. Follow the stem right down to where it meets another branch and break it there. Otherwise you will leave on a stem that will just turn brown and be ugly. Annuals like geraniums, large petunias, marigolds, daisies, and cosmos to name a few, will continue to produce more flowers if they are regularly deadheaded. When plants like alyssum, diascia, bacopa and other trailers have lots of dead blooms, use scissors to trim back, removing the dead parts like giving a hair trim. Coleus grow seed heads which should be broken off to encourage more leaf growth. Most annuals will love it when you cut them back and will bloom again looking bushier and healthier.

In the Perennial Gardensharleenpratt

Perennials also benefit from deadheading. Again, do not just cut off the spent flower head, but go down the stem. If the flowers are en masse, like creeping thyme, take a pair of grass shears and give the plant a hair cut to make it neater. Deadheading also stops unwanted seeds from dropping to the earth and reseeding where you don’t want them.

In the Vegetable Garden

In your vegetable garden, you may want to leave on those peas and beans that got away on you and have become over ripe. You can let these seed pods dry out and ‘harvest’ those seeds to plant next season. Peas plants are a great source of nitrogen, so you can leave them in your garden to die back naturally before you compost, allowing the nutrient to go back into the soil.

When you keep up with the removal of spent blooms, you keep your garden looking tidier, don’t invite disease from rotting blossoms and spread out the fall clean up.

So, grab your wine glass in one hand and get close and personal in your garden to deadhead.

Dealing with Drought in the Garden

By Mary-Jane Pilgrim, Master Gardener

Plants are composed of anywhere from 50-90 percent water. When they suffer from the heat, it’s because of an insufficient amount of water being available to them. Drooping, seemingly lifeless leaves are a sign that a plant does not have enough water and is unable to take in carbon dioxide from the air through tiny, open pores on the underside of the leaves and make food.

When plants wilt from lack of sufficient water, they stop growing, stop producing and will die if their cells are not replenished with water.

Plant Selection

The best way to deal with drought is through plant selection. Grow plants that don’t ask for much!

pink-2678918_640

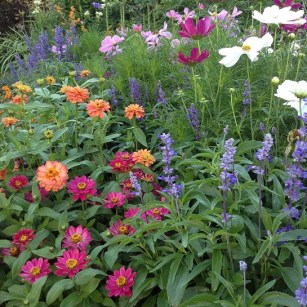
Choose plants that are drought resistant and can handle the heat in the first place, rather than struggling with the more sensitive types. Some suggestions are: ornamental grasses, salvia, sedums, cacti. Also native plants such as black-eyed susan, liatris, purple coneflower, coreopsis, lavender. Some non-native plants such as daylilies, hellebore, barrenwort/epimedium also all tolerate the heat well.

Watering

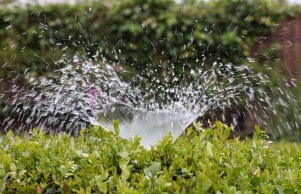
The best way to get moisture to the plants is to apply water at ground level with drip irrigation or via soaker hose, and the best time to do this is in the morning. The idea is to give the plants an infrequent but deep soaking. Water that seeps deep into the soil will help plants develop a deep root structure, which helps them survive prolonged periods without rain. The morning is the coolest time of the day, and there is less evaporation while temperatures are relatively cool than later in the day when the temperature is at or near its peak. The second best time is right at dark or just before dark.irrigation-2402568_640 (1)

Using sprinklers is not as optimal because a significant amount of water is lost due to evaporation from the leaves into the air before the leaves can absorb the water.  However, for extensive garden beds, it may be the only available choice!

For patio container plants, consider adding water gels to the potting mix. The gels absorb water and release it slowly to the plant roots, reducing the number of times the plants will need to be watered. Another option for patio containers is a self-watering pot. These types of containers have a water reservoir from which water is absorbed up into the pot and to the root zone. Like the gels, these specialized containers will reduce the need for frequency of watering.

Mulching

Another way gardeners can help their plants survive excessive heat and drought is to mulch their garden beds. The mulch will help reduce evaporation, insulate plant roots from the high temperatures and reduce or eliminate weeds, which compete with desirable plants for water and nutrients. When choosing mulch, use only biodegradable materials that decay over time. Two to three inches of mulch should be plenty for the growing season. Don’t put mulch up against trees because it can cause the trunk to rot. Also, mice and other vermin may create nests in the mulch and chew on the tree’s bark.

IMG_2320Shredded leaves are also an excellent choice, but they break down faster than wood mulch and may harbor seeds like maple keys. However, earthworms love shredded leaves and will make the soil more friable and fertile with their castings. If leaves are hard and fibrous, leave them in place to decay. Oak and other tough leaves should be shredded and allowed to decay a bit before placing on the garden. Soils topped with shredded leaves will soon be crumbly and easy to plant.
Weed-free straw is good mulch and is often used in vegetable gardens. It packs down and hold weeds at bay. Make sure to use straw (grain stalks) instead of hay (dried grass) to prevent seeds from germinating.

There are many other tips / tricks about gardening during drought but the key message is that “you don’t have to stop gardening due to drought. Simply change the way that you garden to adapt to the conditions.”

Roses are Easy!

By Cauleen Viscoff, Master Gardener

EASIEST ROSES:

  • The new Landscape roses: “Drift”, “OSOEasy” etc.
  • Disease resistant, hardy and ever-blooming.
  • However, there are others just as lovely that require a bit more care.
  • Do your research: know your space and sunlight.

ROSES NEED 6 – 8 hours each day … otherwise they’ll struggle for nutrients and have weaker blooms and roots.

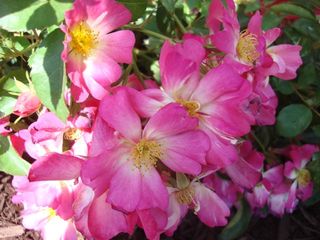
ZONE: Push your zone with roses and they don’t do their best.roses2
READ THE TAGS: Printed in US? Our zone 6 is their zone 5.

ROSES COME:
Bare Root (own root or grafted) – no leaves, no soil
Bagged: bare root in sawdust
Potted: blooming in pot

PLANTING:

  • Soak each rose for an hour or two before planting.
  • Dig hole deeper and wider than needed.
  • Don’t amend the soil – (recent construction?  remove stones, etc; add compost to existing soil otherwise roots will stay encircled in the composted hole without spreading out.)
  • Fill hole with water; let drain away.

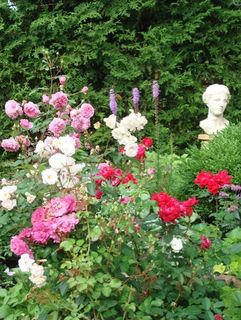
POTTED:  Tangled, encircling roots? Slash down each side, teasing roots out. If rose comes out of pot easily, shake off the soil, and rinse well to rid of nursery chemical fertilizer.roses1

GRAFTED: plant bud union 4 inches below surface – protects against frost and the (graft point) should form its own roots over time.

BARE ROOT: mound soil; place roots over mound. Fill in and tamp down gently.

PRUNE and GROOM:


When Forsythia blooms in Spring — 4D’s: dead, diseased, dying, design.
Groom all summer: deadhead; broken canes or out of shape.
Never prune climber to ground or else it has to start all over. Prune side branches horizontally for blooms.

BOTTOM LINE: Know your space, light and rose.
Then, buy the one you love.