Category Archives: Information

Tree Identification with a Winter Key

By Laura Gardner, Master Gardener

Plant apps can be useful identification tools but their accuracy often depends on the quality of the photos and the features that are being examined. They tend to work best with more unique features such as fruit or flowers. I find that as a learning tool they can be limited because they do not give the user details about how or why the particular species was suggested. There are some other tools that can lead to an identification as well as help hone identification skills.

There is a little book called Winter Tree Finder by May Theilgaard Watts and Tom Watts. Originally published in 1970 and at only 58 pages, it is the perfect size to take into the garden or on nature walks. Known as a dichotomous key, it covers deciduous trees of the Eastern US and Canada and provides maps that show the various species ranges. Dichotomous keys lead you along a path towards the correct species by asking a series of questions about the tree’s various parts. This particular key relies mainly on the appearance and arrangement of terminal and lateral buds on twigs, twig width, bud scales, and vein or vascular bundle scars for identification. Other features may also be considered such as lenticels (pores), bark colour, pith (tissue inside twig), fruit, thorns, etc. It also includes a ruler on the back cover that is used to measure the width of the twigs.

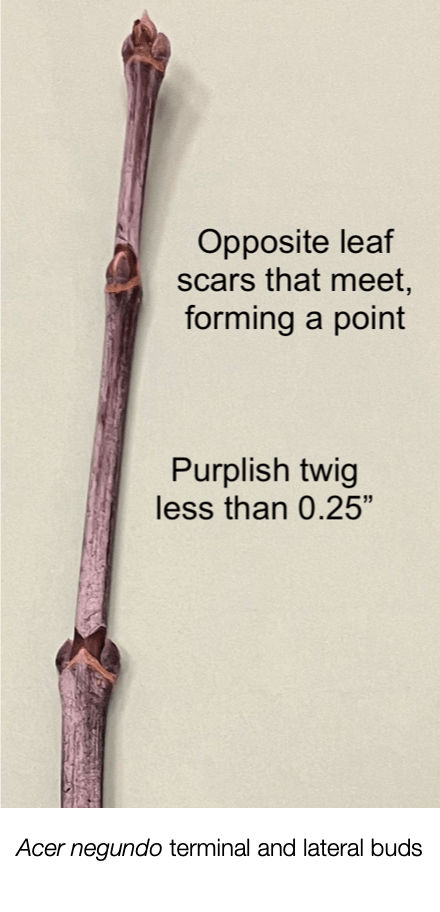
There is a tree that is growing on my neighbour’s property that I know is Acer negundo (Manitoba Maple) and I decided to see if this book could identify it. I pruned a twig that was hanging over on my side of the fence. If you wish to identify other trees that are not on your property, it is appropriate to take photos, take a guidebook or key with you, or get permission to take a cutting.

Step 1: I noted whether the leaf scars are in an opposite or alternate arrangement (phyllotaxy) on the twig and if they were in pairs or were more numerous (whorled). Leaf scars are the markings on the twig where the leaf stalk was attached before it dropped off in the fall. In the case of my tree, there was an opposite arrangement and paired leaf scars.

Step 2: I looked at the width of the twig—less than 0.25” or greater than .25” In this case, the twig was no greater than 0.25.”

Step 3: I examined the texture of the terminal bud and the shape and the number of old vascular bundles or vein scars. Old vascular bundles represent the xylem and phloem (ports or channels) where water had flowed to the leaves. Since the terminal bud was not rough and dry, is conical, and the leaf scars had three bundles and were somewhat V-shaped, the twig belongs to the genus Acer (Maple).

Step 4: I considered the colour of the buds. The key asked if the buds were red, reddish brown or not. These buds might be seen as reddish brown and so could lead one down the path towards a different species but they also were “whitish and woolly” and the twigs were “purplish.” The leaf scars also met at a point on the twig. These combined features pointed towards A. negundo (Manitoba Maple). Colour variability within a species might question an identification. Also bear in mind that these types of guides may not identify exact cultivars or hybrids. But since this exercise, I now see this tree everywhere on my winter walks.

Other Similar Books

Fruit Key and Twig Key to Trees and Shrubs by William M. Harlow

The Shrub Identification Book and The Tree Identification Book by George W. Symonds

Woody Plants in Winter by Core and Ammons (also online through Archive.org as an eBook.)

Online Sources

University of Wisconsin K-12 Forestry Education Program: https://www3.uwsp.edu/cnr-ap/leaf/Pages/LEAF-Tree-Identification-Cards.aspx

An excellent web site of winter tree photos can be found at http://www.portraitoftheearth.com/trees/specieslist.html

Gardening in January

By Christine Freeburn, Master Gardener

Here we are in the dark days of winter; the holidays are over, the new year has been rung in, and the days are getting longer as we see the snow falling and the temperatures plunging.

Although we can’t go out and play in the garden, there are still lots of things we can do to satisfy our green thumbs.

Clean and sharpen garden tools
Buying good quality tools and keeping them clean and sharpened just makes good sense. Diseases can be passed through your tools, so always wipe with soap & water or even better with disinfectant wipes. Check out this site for tips on keeping tools in great condition.

Check out seed catalogues online
Growing plants from seed gives you a wider variety to choose from and also the satisfaction of growing your own. If you are a vegetable grower, try something new this coming season. If you are like me, you will want to order a paper copy catalogue from your favourite seed companies.

Start a garden journal
Set something up on your computer with charts and photos, or start a written record in a blank book or special garden journal. Record new plant purchases and who you bought them from and where they were planted in your garden. Include successes, ways to improve and dreams for next season.

Review last year’s garden successes
If you have kept a journal, you can check your notes. How can you improve for this coming season? Did you plant the right plant in the best location? Were soil, light and water conditions the best they could be? Remember that weather can determine success or failure as well. Some plants thrive with wet cooler springs while others enjoy hot and humid weather.

Check your houseplants for signs of pests or diseases
Gnats and aphids seem to come alive during the next couple of months. Have Safers soap ready to combat those nasty pests. Remove diseased leaves and isolate plants that are sick. Many houseplants are in resting stages and are not actively growing, so do not fertilize. Houseplants may not be drinking as much either so water sparingly. Have a bright indirect spot in your home? Maybe it’s time for a new specimen. Remember to isolate your new plant to ensure it is not infested or diseased before introducing to the rest of your collection.

Brighten your home with some fresh cut flowers
There is nothing like fresh cut flowers to brighten up a gloomy winter day. Check out this post on our website for caring for cut flowers.

Read a gardening book
When the weather outside is frightful, be sure to have a list of books to read, whether physically or electronically. Lorraine Johnson’s A Garden for the Rusty-Patched Bumble Bee is on my list.

Outside garden maintenance
When you are outside shovelling snow, throw some clean snow on and around any of your more tender perennials. Things like rhododendrons and hibiscus overwinter better if they have a nice layer of snow to cover and insulate them. If the weather has gotten mild and the snow has melted, cut and use your old Christmas tree branches to cover and protect from the coming frigid temperatures and bright burning sunlight.

Sign up for some online learning
There are many local garden organizations that have newsletters, blogs, YouTube videos and live zoom events available. Be sure you are learning from a reputable and local site if you want to add to your knowledge for your own garden. You can, of course, enjoy the foliage of some exotic locations, but know we can’t grow most of it in our zone 5 environment.

Try these sites for local learning. Some sites offer free webinars while others will charge.

https://arboretum.uoguelph.ca/educationandevents/workshops
https://splibrary.ca/events/gardening-changing-climate
https://www.eventbrite.ca/e/attracting-pollinators-to-the-garden-tickets

Already signed up for some online learning?  You can share with us or post on our facebook page “Over the Fence with the Peterborough Master Gardeners

As of today, there are only TEN more weeks till spring.

Use this time to rest, plan and dream for the next season.

In Praise of the Lowly Common Juniper

By Mary-Jane Pilgrim, Master Gardener

I am always amazed that wildlife makes it through winter in our zone, as food doesn’t appear to be all that plentiful when everything is covered in snow and ice. However difficult it seems, native wildlife have a variety of adaptations to surviving winter; knowing where to find food is one of them.

Juniperus communis or common juniper is one of the most widely distributed trees in the world. They are members of the Cupressaceae family. They can tolerate a wide range of conditions; they are tough, they can survive with a lot of wind, and thereby can provide protection for animals in harsh weather. Junipers have a strong scent, bitter taste, and sharp needles. Deer tend to ignore plants with these attributes.

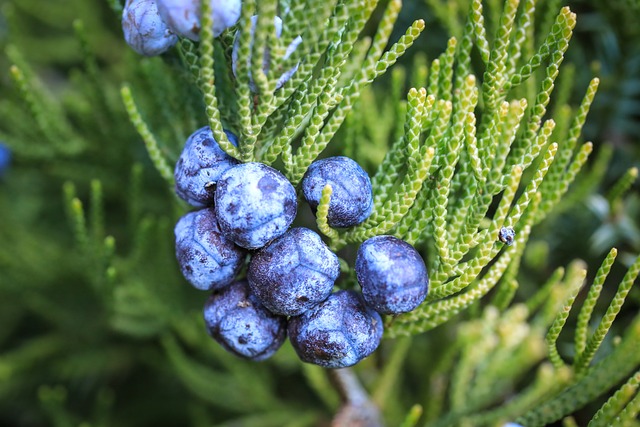
The berries, however, are a different story. They begin life a grey-green color, and ripen in 18 months to a deep purple-black hue with a blue waxy coating. While they are called juniper berries, the “berry” is actually a cone, the female seed cone. Junipers are almost always dioecious which means that in order for the female plants to set fruit, a male plant must be in the vicinity.

Juniper berries are one of the top late winter foods for many birds and mammals which covet the deep blue orbs. They aren’t particularly high energy or calorie-dense; they are soft and fleshy, and have a strong, woody, spicy, pepper-like flavor with a gritty texture. Perhaps this is why they are ignored early on, but in the depths of winter when all the other really desirable food is gone, they become more popular with wildlife. Juniper berries could be the difference between survival and starvation for the species who rely upon them.

Junipers have a long history with humans as well as wildlife. These trees are responsible for one of the only spices derived from a conifer. The ripe, blue berries were and are currently used throughout the world to flavor meats (particularly wild game) – and sauerkraut. The first record of juniper berries was in Ancient Egypt at around 1500 BC.

During the Black Death in the 14th century, plague doctors wore masks with long beaks full of juniper berries and other botanicals to mask the unpleasant smells they’d encounter tending the sick. They believed that juniper stopped the spread of the disease. This was somewhat true – the disease was spread by fleas and juniper is an effective and natural flea repellent.

Most famously, the unripe, green berries are used to flavor gin. Gin is originally from the Netherlands — in the 16th century, a schnaps was distilled with juniper berries to become so called “Genever” (in dutch: juniper berry) which was consumed for medical purposes. “Genever” developed to become the today’s “Gin”.

Juniper berries have since been used to flush out toxins, heal infections and even aid in digestion. Caution: If you intend to forage your local woodlot for berries, be wary because while most of them are harmless, there are some species that have mildly toxic berries. Do not randomly harvest juniper berries unless you are sure of the species.

Foraging aside, if you are looking for native plants for your garden, a few juniper bushes are a great choice. They’re hardy, provide cover and food for a variety of wildlife, and will definitely help our wild neighbors survive particularly difficult winters.

Some Fascinating Off-Season Reading

By Laura Gardner, Master Gardener

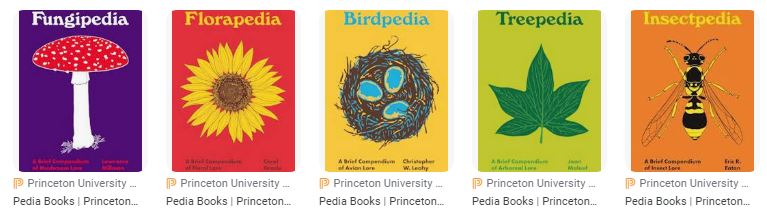
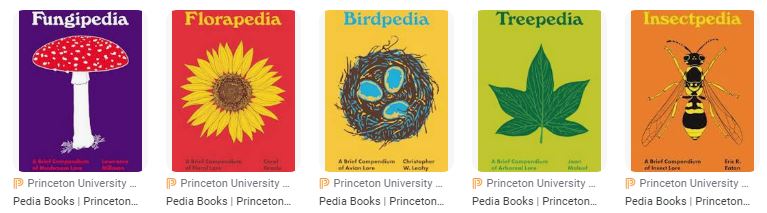
Now that the gardening season has winded down, I’ve turned my attention to some interesting reading. On my nightstand there are some little books that I’ll pick up and read a few snippets just before bed. They are part of a series called “Pedia” published by Princeton University Press.[i] The word “pedia” comes from the Greek word “paideia” for “learning” or “education.” There may be a perception that University presses publish only heavy academic titles. However, many do publish titles that are suited for the general reader. In this particular series, so far it covers the subjects flora, insects, trees, fungi, geology, dinosaurs, birds, and neurology. The petite clothbound books are like miniature encyclopedias, each with around 100 entries on a wide range of topics. Some of the entries are so fascinating that I needed to find out more.

Here are three entries that show gardeners the symbiotic relationship between insect species such as bumblebees, beetles, ants and selected plants:

In “Florapedia,” there is an entry for the plant Cornus canadensis (Bunchberry), a native of the Dogwood family that can be found in some of our Peterborough County forests. Its flowers are said to be capable of the fastest movement in the plant world. As a self-incompatible plant (i.e., unable to self-pollinate), it relies on a unique process of pollen transfer. Amazingly, it has the ability to project its pollen at a rate of 4 metres per second—more than 2,000 times the acceleration of gravity (p. 20). When an insect touches on an unopened flower, it triggers the firing of the pollen through the release of stored energy. The pollen then transfers to the insect which in turn moves on to another flower to cross-pollinate. Larger pollinators such as Bombus (Bumblebees) are required to initiate the opening of the flowers; although flowers that open by themselves are able to fire the pollen at a distance of about 1 metre to adjacent plants.[ii]

In “Treepedia,” we learn that Magnolia trees were among the first flowering species on the evolutionary scale (about 100 million years ago) and that they were and still are pollinated by beetles (p. 82). Magnolias developed hardened carpels (female reproductive parts) so they are able to tolerate the beetles’ chewing mandibles.[iii] The beetles are attracted to the large, strongly scented flowers as well as the pollen and other secretions. Pollen grains are readily captured by the insects’ hairy bodies—which are transferred to other flowers.[iv] Some gardeners may only think of bees as being pollinators and don’t think of the importance of beetles. Some other species that are pollinated by beetles here in Ontario include Asimina triloba (Pawpaw), Nymphaeaceae spp. (Water Lillies), and Lindera benzoin (Northern Spicebush).

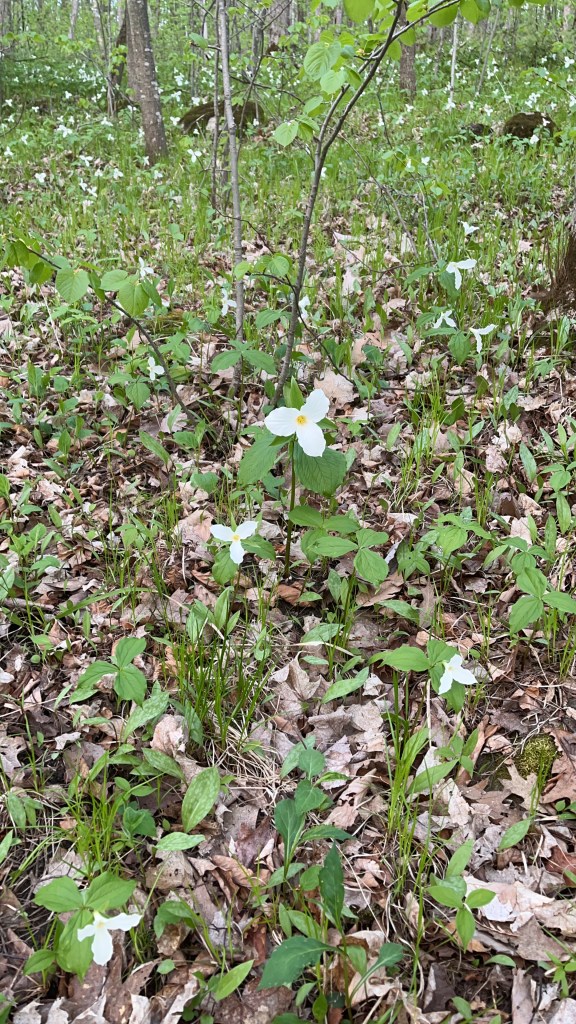
In “Insectopedia,” the topic of seed dispersal, the term myrmecochory is explored. More than 4,000 plant species rely on ants for seed dispersal. Ants are attracted to the nutritious fatty seed coats called elaiosomes and take them back to their nests. The remaining unwanted parts of the seeds are discarded near the nests and subsequently germinate into new plants (pp. 155-156). Have you ever wondered how some new plants pop-up some distance from the parent plant? Species such as Sanguinaria canadensis (Bloodroot), Trillium spp., (Trillium), Scilla spp., (Squill), Hepatica acutiloba (Sharp Lobed Hepatica), Viola spp. (Violets), are just a few examples of plants that can spread with the help of ants.

These little books would make a nice gift for any curious gardener, amateur botanist, or nature enthusiast.


[i] Pedia series. Princeton University Press: https://press.princeton.edu/series/pedia-books

[ii] Edwards, J., Whitaker, D., Klionsky, S. et al. A record-breaking pollen catapult. Nature 435, 164 (2005). https://doi.org/10.1038/435164a

[iii] Evich, Philip. The Botany of Magnolias. Smithsonian Gardens. Online: https://gardens.si.edu/learn/blog/the-botany-of-magnolias/

[iv] Hooks, Cerruti R., and Anahí Espíndola. Beetles and Pollination. Maryland Agronomy News. Online: https://blog.umd.edu/agronomynews/2020/06/29/beetles-and-pollination/

Winter: When Bunnies Can Wreak Mortal Havoc on Gardens

By Mary-Jane Pilgrim, Master Gardener

Two weeks ago, MG Lois Scott wrote an article about Burning Bush (Euonymous alatus) and other invasives now on the Invasive Species lists that she is eradicating from her gardens in favour of natives. I actually used to have a beautiful Burning Bush, right at the front of my garden. And then winter came, and a furry rodent.

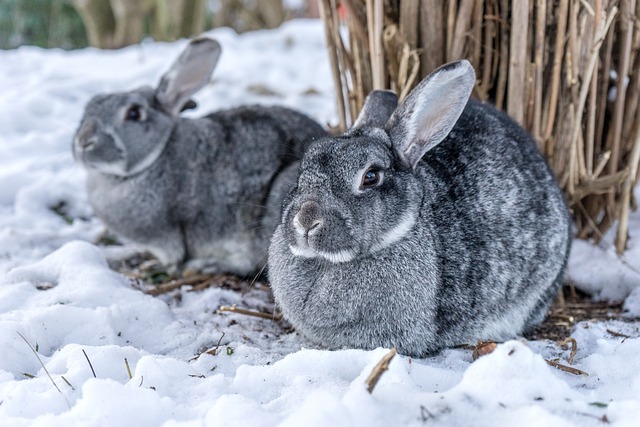
Rabbits might look cute and fluffy, but they’re not a welcome sight for gardeners; especially between December and March. As cute as they might be, they can cause serious damage to plants in the winter when greens aren’t available for them to easily munch on.

Pretty sure that Bugs Bunny, who we could see in the snow through the living room window, caused the demise of the burning bush. In the spring, it didn’t bud. Most of the outer bark was missing and tooth marks were very evident. It was as dead as a doornail. (Aside: “Dead as a doornail” is one of the oldest idioms found in print, going back to the 14th century. It referred to nails having been pounded through a door, and having the pointed end pounded flat against the door. That nail could not be reused!)

Back to my story. Apparently, our neighbourhood cottontail had made a lunch or dinner (or several of each) out of the soft bark on our small burning bush shrub and also my prized “Perry’s Gold” pine (Picea abies ‘Perry’s Gold’), purchased from Anna’s Perennials; my favourite local garden centre. Sigh. Happily, Anna had another one for me.

Obviously, rabbits don’t hibernate. When winter arrives and greens disappear, they turn to nibbling on the bark of young trees such as birch, crabapple, mountain ash, honey locust, willow and oak. Older trees with their thick rough bark aren’t as tempting as a young tree where the bark is smooth and thin. Green food material is just under the surface of young trees.

The rabbit’s menu also includes bushes/shrubs, such as roses, sumac, Japanese Barberry, viburnum, Burning Bush, Rose of Sharon, arborvitae/cedars and other broadleaf evergreens. It’s all about survival and they won’t be picky when their populations are high. Once a rabbit has chewed the outer bark of a small tree or shrub, little can be done to save it.

While I feel for the starving rabbits out there, there are a few preemptive steps you can take to stop rabbits from wreaking mortality havoc in your gardens. The most effective is to place chicken wire fencing around vulnerable plants like a cylinder. The fencing material needs to be high enough that rabbits won’t be able to climb or reach over the fence after a heavy snow. In most cases, a fence that stands 2-3 ft should be sufficient. To prevent them from crawling underneath the fencing, pin the fencing to the soil with U-shaped anchor pins.

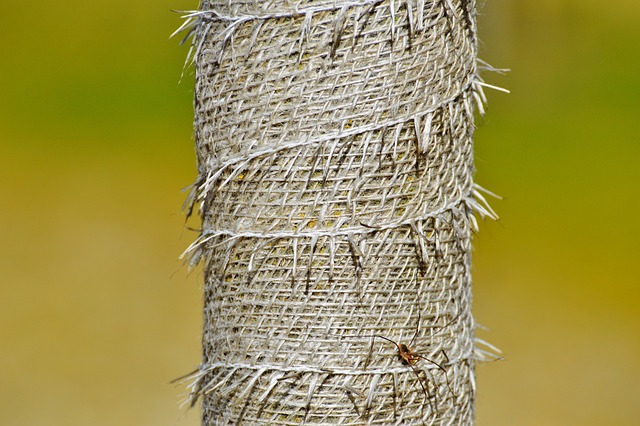
Small trees can also be protected by placing white spiral tree guards around their trunks or by wrapping them/their trunks in burlap. Damage may be further reduced by removing brush, junk piles and other places where rabbits live and hide from around your home.

Lastly, there are a few plants that rabbits seem to find less appealing, particularly plants with thick or prickly leaves, and plants with very strong scents. It may be worth it to experiment around your prized shrubs with hellebores, foxgloves, allium, acanthus (bear’s breeches), and salvia (sage).

A final parting note: One or two rabbits that overwinter in your garden this year could mean dozens returning to munch on your prized shrubs next winter, given the fertility of these furry rodents!

Jumping Worms & Invasive Species Awareness

By Christine Freeburn, Master Gardener

Master Gardeners have been talking about the importance of controlling invasive species for years. Purple Loosestrife, Giant Hogweed, Buckthorn, Garlic Mustard and Dog-strangling Vine are on a long list of Invasive Plant Species.

You can check the list out at www.invasivespeciescentre.ca  or www.invadingspecies.com

But there are more than just invasive plants. There are also invasive insects like Spongy Moths and Emerald Ash Borer. There are invasive fish and invertebrates like Zebra Mussels and Asian Carp. We have invasive pathogens like Dutch Elm disease (Dutch Ed: “Identified by the Dutch, not CAUSED by the Dutch”). And just recently, we have begun to hear about Wild Pigs and Jumping Worms.

I took part in a webinar presented by the Royal Botanical Gardens on Jumping Worms (JWs) earlier this month. Two speakers, Brook Schryer from the OFAH who works with the Invading Species Awareness Program and Dr. Michael McTavish with the Smith Forest Health, University of Toronto, spoke about the need to be aware of jumping worm sightings in Ontario. They gave information about Eddmaps.org where interested citizens can share their own findings. You can find a recording of this event at https://www.youtube.com/user/royalbotanicalgarden

Now is a good time to find JWs as they are adults at this time of year and can be better identified.

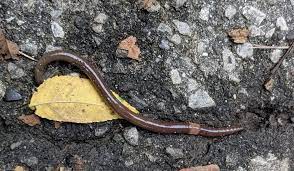
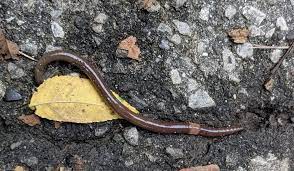
Jumping Worms are an invasive species of Asian worm that are slowly moving their way from the United States. They are voracious eaters and can consume much of the compost, topsoil and debris that lays on forest floors. They leave behind worms castings that are loose and crumbly similar in appearance to coffee grounds. They are often found in wet and shady spots and castings are spread evenly rather than in clumping piles. The castings can be a thin layer or can be 10 cm deep. It will appear as though the ground has been previously dug as the soil will be loose. Jumping worms are distinguished by their thrashing behaviour when moved or picked up. They have also been known to amputate their tails as a method of evasion from predators. There are usually many worms found together close to the soil surface. The worm body is smoother than our earthworm and tends to be more gray than red. The milking band or clitellum goes all the way around their body. Although the worm dies in the cold winter months, their cocoons survive, becoming juvenile worms in May and June and adults in July.

Left on their own, these worms can spread up to 10 meters per year. However, without human help, the spread could happen much quicker.

Research in Canada is happening, but we should all be aware of the dangers of this invasive species, and take precautions.  We just need to think of the days before Phragmites showed up in every wetland and ditch in our area. Awareness and education are important.

Check out the EDDmaps.org site where you can see where actually sightings of invasives have been recorded. The two presenters encouraged us to go out and search for signs of the Jumping Worm and report it to the EDDmaps, whether a positive sighting or a negative one. You can also call the Invading Species Hotline at 1-800-563-7711 if you have a concern.

Google Lens (free!) for all of your identification needs

By Mary-Jane Pilgrim, Master Gardener

If you’re outside enjoying the fresh air, and happen across a flower or bird or insect and you’re not sure what you’re looking at, a new feature from Google can help you out.

Google Lens lets you search what you see. Using a photo, your camera or almost any image, Lens helps you discover visually similar images and related content, gathering results from all over the internet.

All you need to do is: On your phone, open the Google app and in the search bar, tap Google Lens. Point your camera at the flower to identify the plant. Swipe up to learn about the discovery.

On Android, Google Lens is likely already built right in — open the Google App or Google Photos app. Tap Discover or tap the Google Lens icon.

On Apple, Google Lens is part of the Google app — a separate app from using Google on Chrome, Firefox or Safari. Go to the App Store and download/install Google as a unique app if you haven’t already done so.

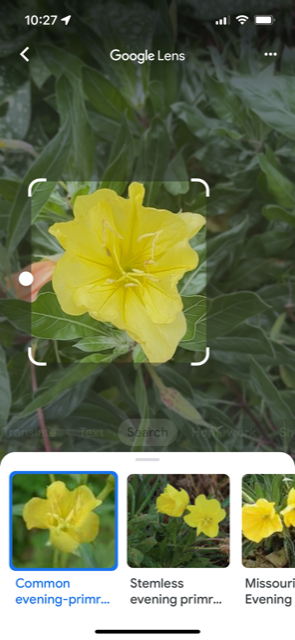
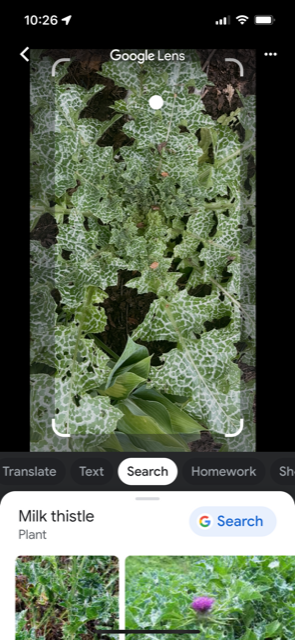
When you open the Google App, you’ll see a screen like this with the Lens icon. It’s your window to discovery!

Last week, I went for a long walk and checked out a lot of the volunteer trees and plants along the rural roadway. Sometimes I wanted to verify an item I thought I already knew, but more often I wanted to determine the name of a common but name-unknown item. Google Lens scored on both fronts. Now if only I could remember all of those names!

If you have a bug infestation, use Google Lens to identify the bug if you can get it to sit still long enough!

There’s plenty more you can do with Google Lens, too, including pulling the contact information from business cards, identifying unusual foods and almost anything else. It can also translate words on the screen into other languages, and read them back to you.

The ability of the app to actually CORRECTLY identify plants and bugs is pretty decent, and will get better over time. It helps to allow Google to use location services, so that it’s not searching through the entire rain forest to determine the name of the plant in your neighbourhood. You can also allow Lens access to your photos, so that you can identify items you’ve already taken pictures of.

Best of all, it’s free and will always be free. Try it!

What’s the Deal with Green Leaves on Variegated Plants and Trees?

By Mary-Jane Pilgrim, Master Gardener

Photosynthesis is the process by which plants use sunlight, water, and carbon dioxide to create oxygen and energy in the form of sugar. Plant leaves are most often green because that colour is the part of sunlight reflected by a pigment in the leaves called chlorophyll. However, not all plants are completely green!

Variegated plants can be a beautiful and unique-looking addition to your plant collection. Variegation simply means that the plant’s leaves have both green and non-green parts. Some have shades of cream, or yellow, light green, pink, purple, or red – to name a few. Some plants have a stark white variegation that makes these plants really stand out. Many times, these plants are used to brighten up shady, dim areas or as used as focal points in landscapes or as striking indoor plants. Variegated plants can be the result of engineered breeding or a grower taking advantage of some type of random genetic flaw (chimera).

Leaves of variegated plants occasionally lose their colorful markings and return to plain green. This twist of nature can be frustrating when extra money is spent for the unique foliage markings. Variegated plants often have smaller leaves and are less vigorous than green specimens because the lack of the green pigment means less chlorophyll for generating energy.

Variegated plants can revert or turn green beginning on a stem, branch, or another area. Reverting back to solid green leaves could be a protective way that the plant returns itself back to a healthier form. When this happens, the best thing to do is prune out the affected leaves because if you don’t, the plain green can actually take over the plant because of the increased chlorophyll and vigour as compared to the variegated foliage. If the reversion continues, try to provide your plant with some extra light by moving it to a sunnier location if possible.

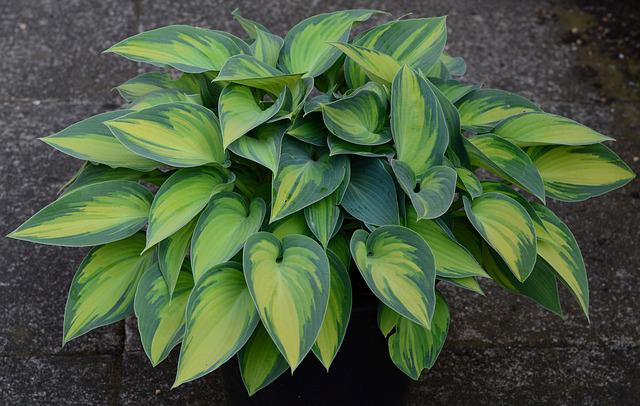
The hosta in this picture shows great variegation in all leaves except one. That leaf should be removed to preserve the variegation.

Resources

Spotting the signs: Variegated plant reversion
Reversion
Variegated leaves reverting

The Joy of Sharing our Gardens

Reflections after a Garden Tour

by Emma Murphy, Master Gardener

It’s been a tough few years for all of us because of COVID-19, but I had time to reflect this weekend on why it’s been hard for me as a gardener. While it’s been wonderful to have our gardens as an oasis and source of comfort during the pandemic, I realized that other than a few close friends, no one had seen all the work (and the results) that my husband Grant and I had achieved over that time.

So it was with great anticipation that we looked forward to our Lakefield garden being featured on a garden tour organized as a fundraiser to celebrate 60 years of the Lakefield Horticultural Society.

While we spent a few very crazy days trying to put the final touches on our garden (my husband decided he would build a beautiful pergola [awesome] a week before the event [not so awesome] so plants had to be moved into pots and then back into the beds just a few days before) — sorry I digress — everything was perfect on the day — the weather was spectacular, we placed the last bits of mulch to cover a few empty patches and we looked forward to welcoming our guests.

The new pergola.

As the first people arrived (I think our first visitor was a man on a bicycle!) I began to realize how much I had missed the joy of sharing our gardens with others. And as the day progressed, it was wonderful to hear other people’s perceptions — for some it was inspiring, for some a bit overwhelming (we have a 3/4 acre property in a small village), for some they loved that we had plants they had never seen before (not your typical garden). Everyone seemed to leave with a smile on their face, which made our day.

Grant created numerous raised beds over the past few years — at my request — and we’ve had great success with them. We also purchased a “COVID present” for ourselves — a long wished-for greenhouse to extend our gardening season, and it’s been put to good use.

We’ve spent time over the past few years planting more native plants as I learn more about the benefits of creating habitat as well as having an aesthetically pleasing garden. Hey, it’s not all about me!! Doug Tallamy’s book is a great start to understanding the benefits we can provide in our humble gardens to the greater ecosystem.

There is definitely a balance — we’re aiming for a 50/50 balance of native/non-native — because I love my daylilies and peonies and don’t want to give them up (they give me pleasure), but I also love the hundreds of pollinators (bees, butterflies, wasps etc.) that flock to my Common Boneset (Eupatorium perfoliatum), Pearly Everlasting (Anaphalis margaritacea), Cup Plant (Silphium perfoliatum), and Cardinal Flower (Lobelia cardinalis) because I am choosing to plant native plants.

Boneset (white) and Cardinal Flower (red)

Last winter I grew some native (and non-native) plants using the Winter Sowing technique (because most native plant seed requires winter/cold stratification) and it was a great success (with some lessons learned – but that’s another blog).

Grant set up a Plant Sale area for the garden tour and people were able to buy plants that they saw in the garden (although alas, I did not take any cuttings on my amazing orange Butterfly Weed – a type of milkweed – which really caught everyone’s attention).

The Plant Sale area

Over the day I saw many gardening friends I hadn’t seen in several years, and made all sorts of new friends. It felt like my community was coming together — like we were reconnecting after a long time apart in a beautiful place. And I realized that gardening is both a solitary and a very social activity. We even got featured in the local newspaper.

We raised funds to support our local horticultural society, we got back to feeling ‘a bit normal’, and most importantly we got to reconnect with people over a common passion — the love of gardening.

I hope that all of you will find opportunities to reconnect with people this summer and share your gardens and plants and trade stories about attracting pollinators etc. with others. It’s a feeling like no other. #happygardening

Our lovely rudbeckia and greenhouse in the background.

The Wilting of ‘Mrs. Robert Brydon’

By Lois Scott, Master Gardener

Garden gazing out the window a couple of weeks ago I noticed, with a sickening jolt, that my Clematis x jouiniana ‘Mrs. Robert Brydon’ was wilting.  (It’s only a plant, Lois, only a plant).  She has been in my garden for 4 years and had been growing very well up to this point but it appeared she must have clematis wilt.  Clematis wilt and clematis slime flux are the two diseases that this particular cultivar may be susceptible to.  Not noticing any slimy, smelly matter oozing from the stems, I ruled out slime flux. 

‘Mrs. Roberty Brydon’ showing leaf wilt

According to Missouri Botanical Garden,  clematis wilt is a serious disease of clematis caused by the fungus Ascochyta clematidina.  This fungus can survive in the soil surrounding infected plants and may overwinter in infected plant debris.  The fungus appears to be activated by ‘high humidity and favourable growing conditions found early in summer’.  Any to all stems may be affected and the whole plant killed down to just below soil level.  The good news is that the plant may recover after a year or two. 

There are ways to manage and avoid having your clematis plants affected by this disease and indeed other diseases of clematis.    Strategies (cultural practices) include a favourable planting site with 6 or more hours of sun.  Soil should be fertile and well-drained with good air circulation around the plant.  The area around your clematis should be free of plant debris and avoid any injury to stem and roots.  Do not cultivate the soil around your clematis plants and mulch it well.  Water carefully, keeping water off the leaves.  If your plant becomes infected, cut the diseased stems just below ground level and destroy them.

‘Mrs. Robert Brydon’ in flower

I removed and destroyed all the diseased growth on my clematis (which was all the growth) and there is now new growth coming up from the root.  I will be paying attention to keeping leaf debris cleaned up, improving air circulation around the vine and watering as needed, with care.

Hopefully ‘Mrs. Robert Brydon’ will survive this setback.  Her profuse, pale blue flowers are unusual and appealing to me.  The gardener, Robert Brydon, who ‘found’ this clematis in a Cleveland, Ohio garden in 1935, clearly thought enough of it to name it after his wife! Sigh.