Category Archives: Compost

Cover Your Bases with These Cover Crops

By Rachel Foebel, Master Gardener in Training

What are cover crops?  

These are plants that are seeded and grown in a specific area for the purpose of covering the soil with plant matter and then allowing that green material (and its roots) to return to the soil by decomposing, thereby feeding the soil and its constituents. Specific crops are used for this purpose as you can choose the cover crop to fit the needs of your soil or the period of time that your garden space is not being used for other crops. 

Benefits of Cover Crops  

  • Covers the soil – preventing soil run off, evaporation of moisture, and suppresses weeds 
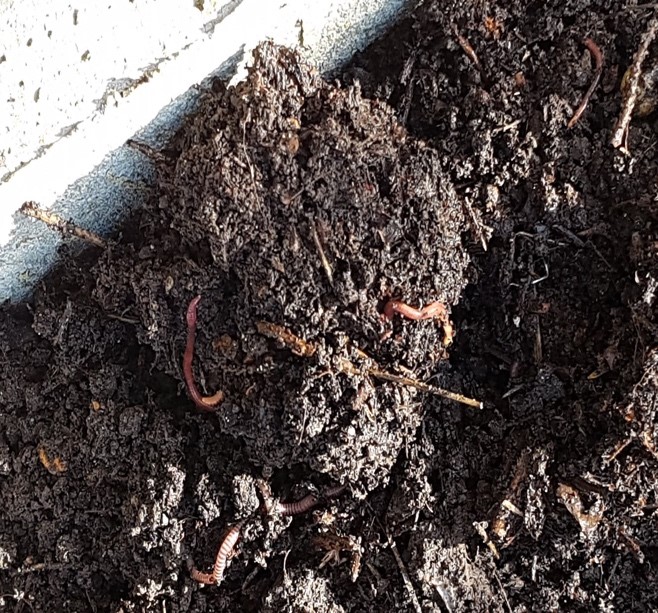
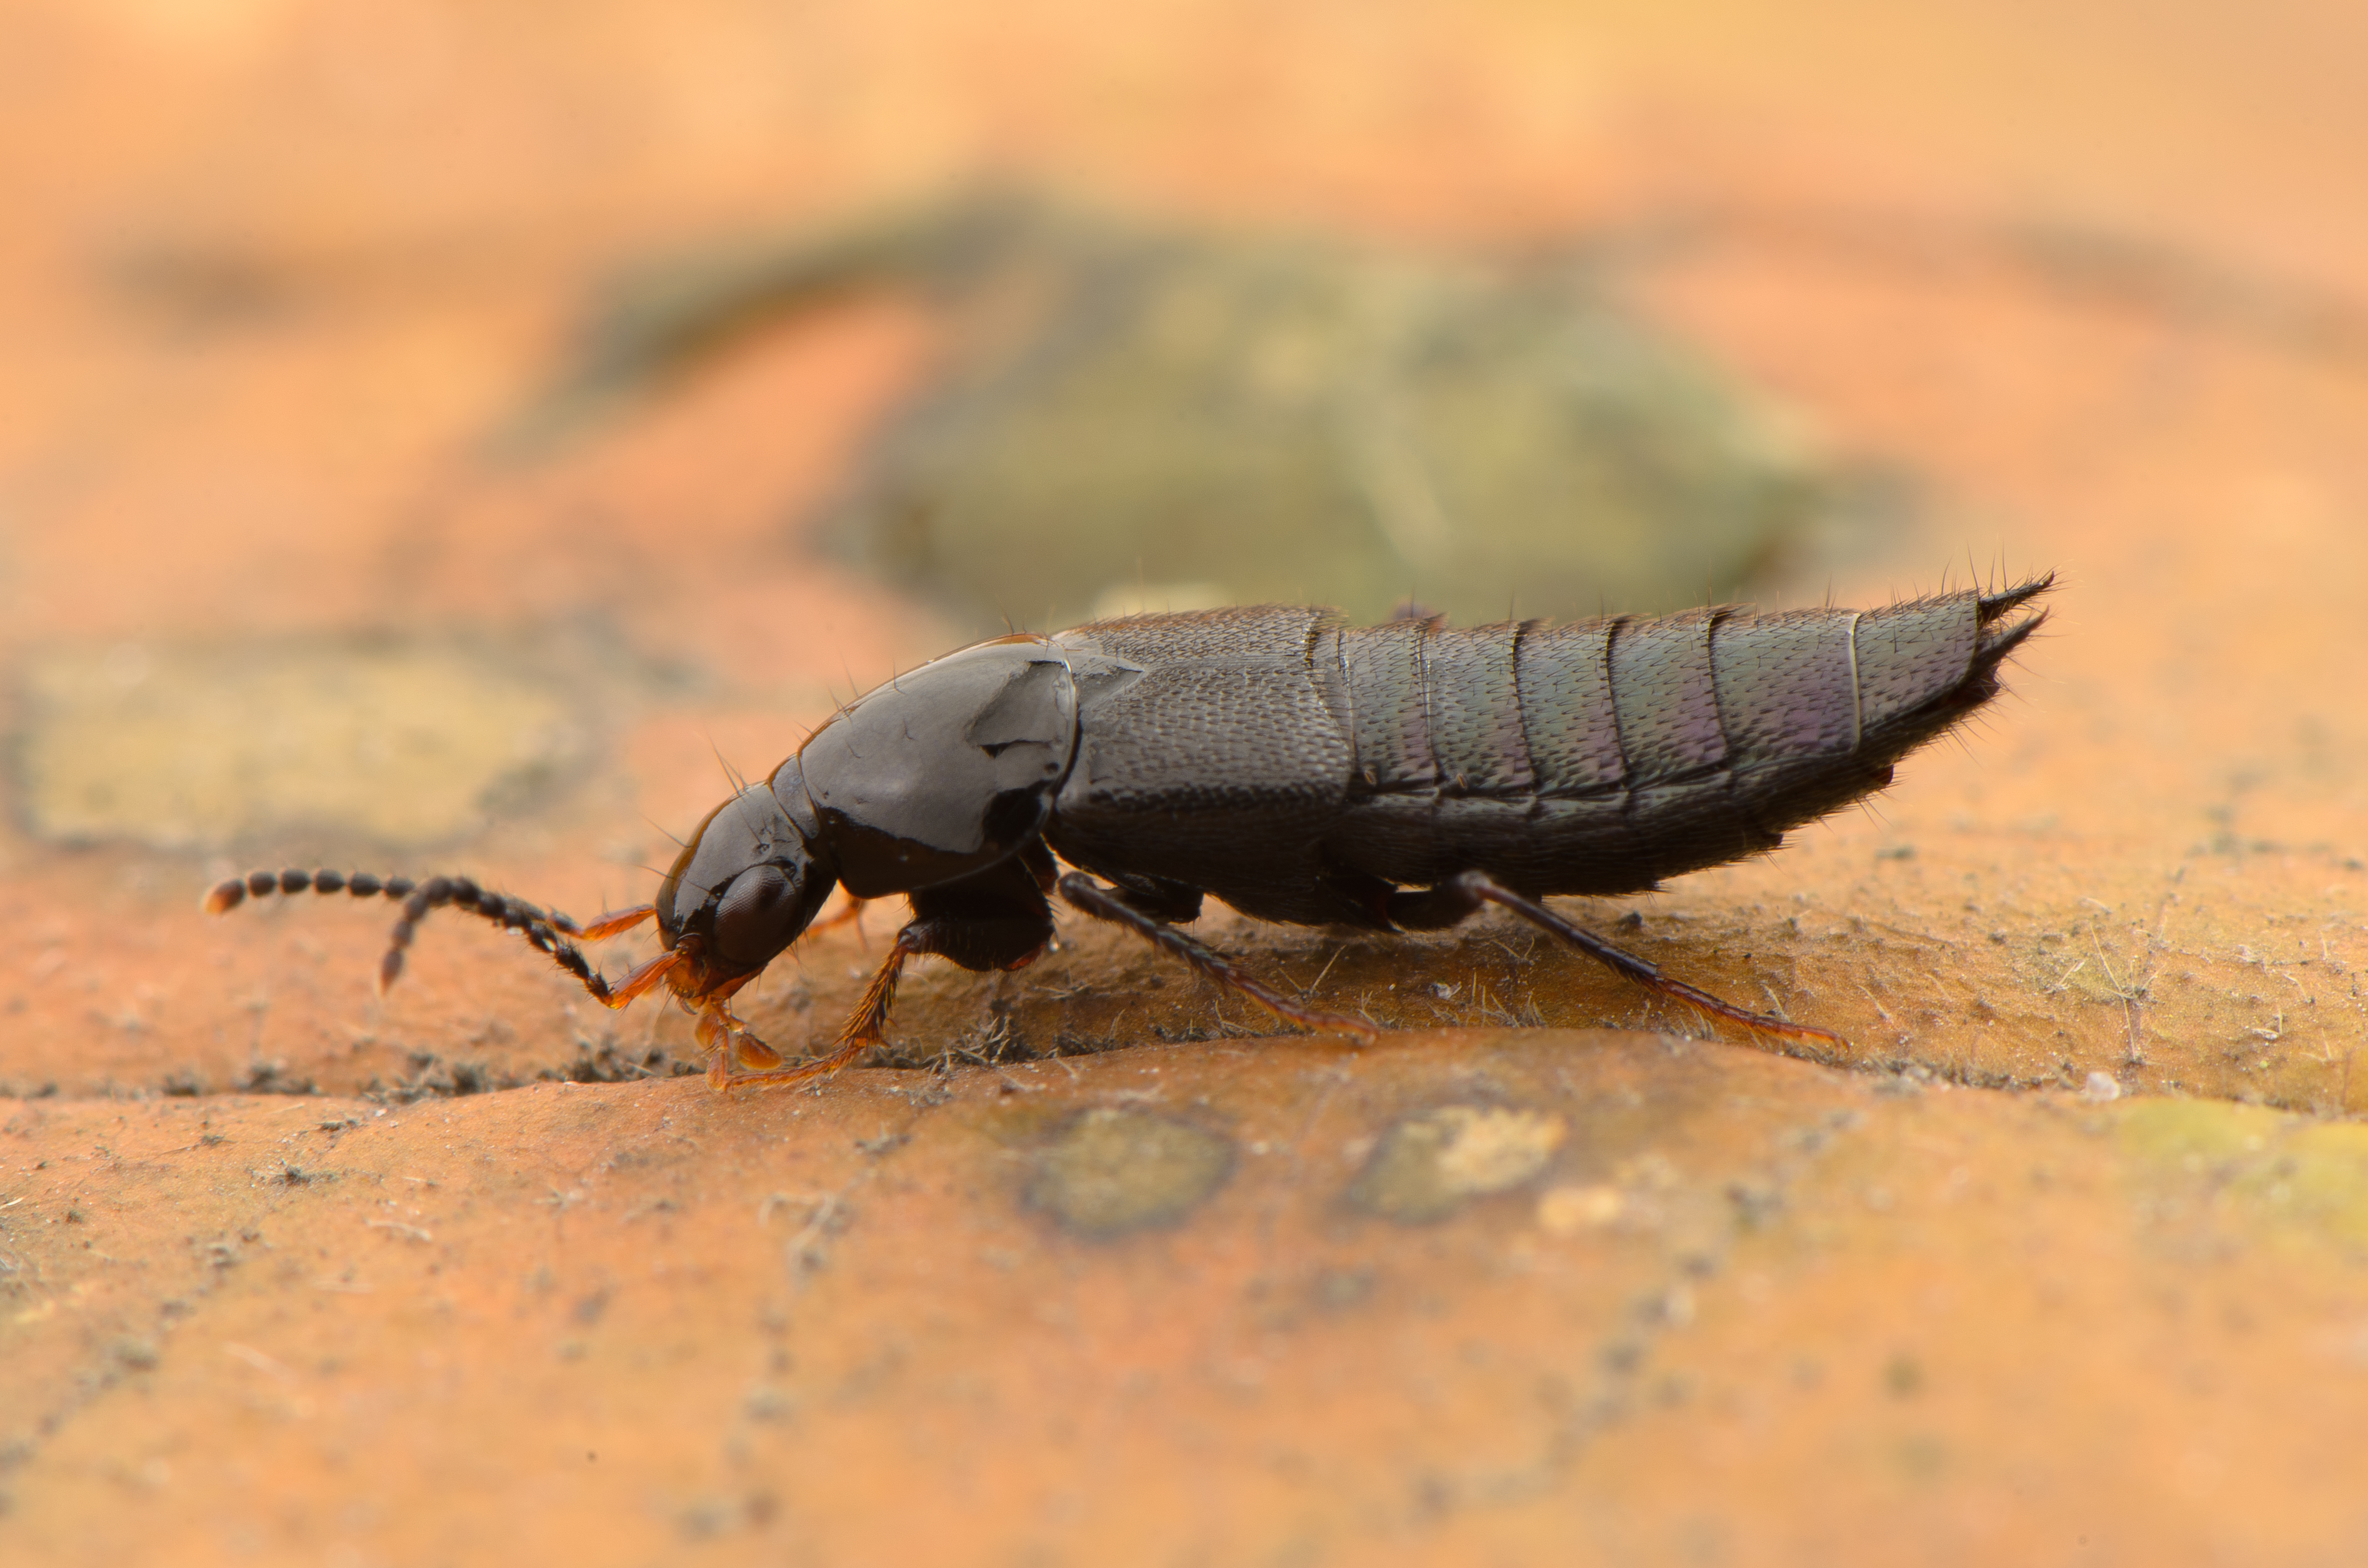
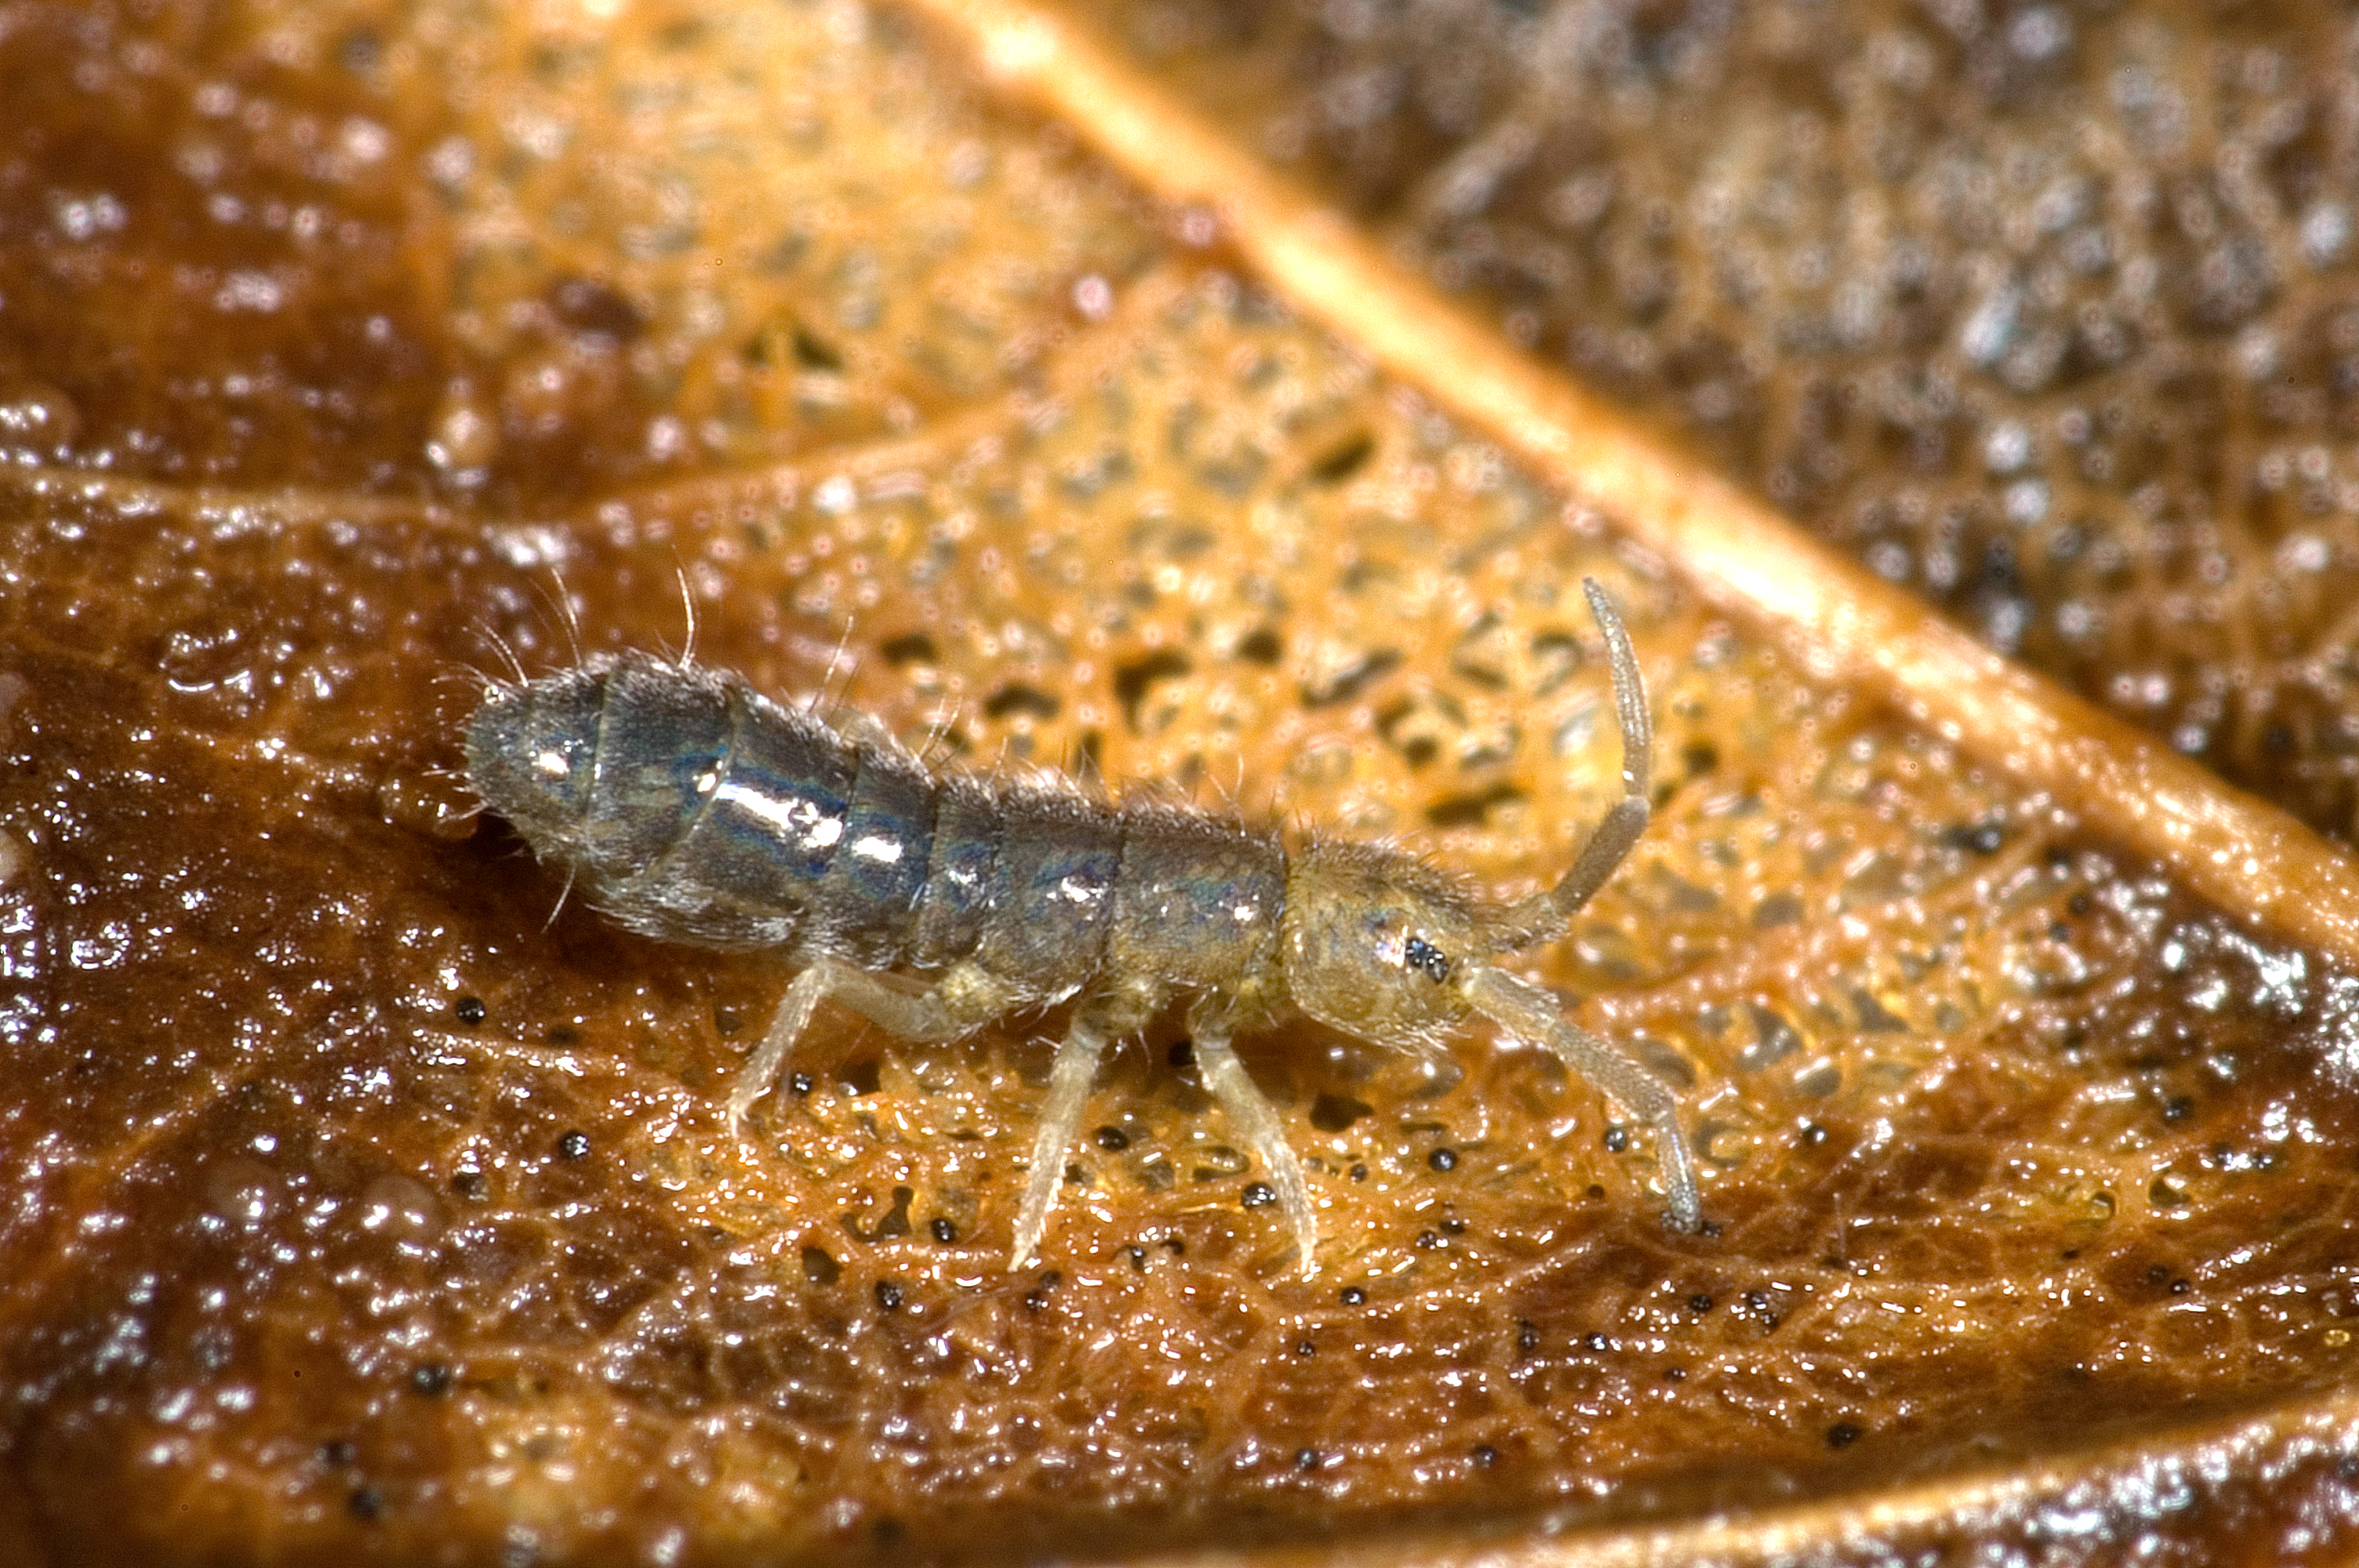
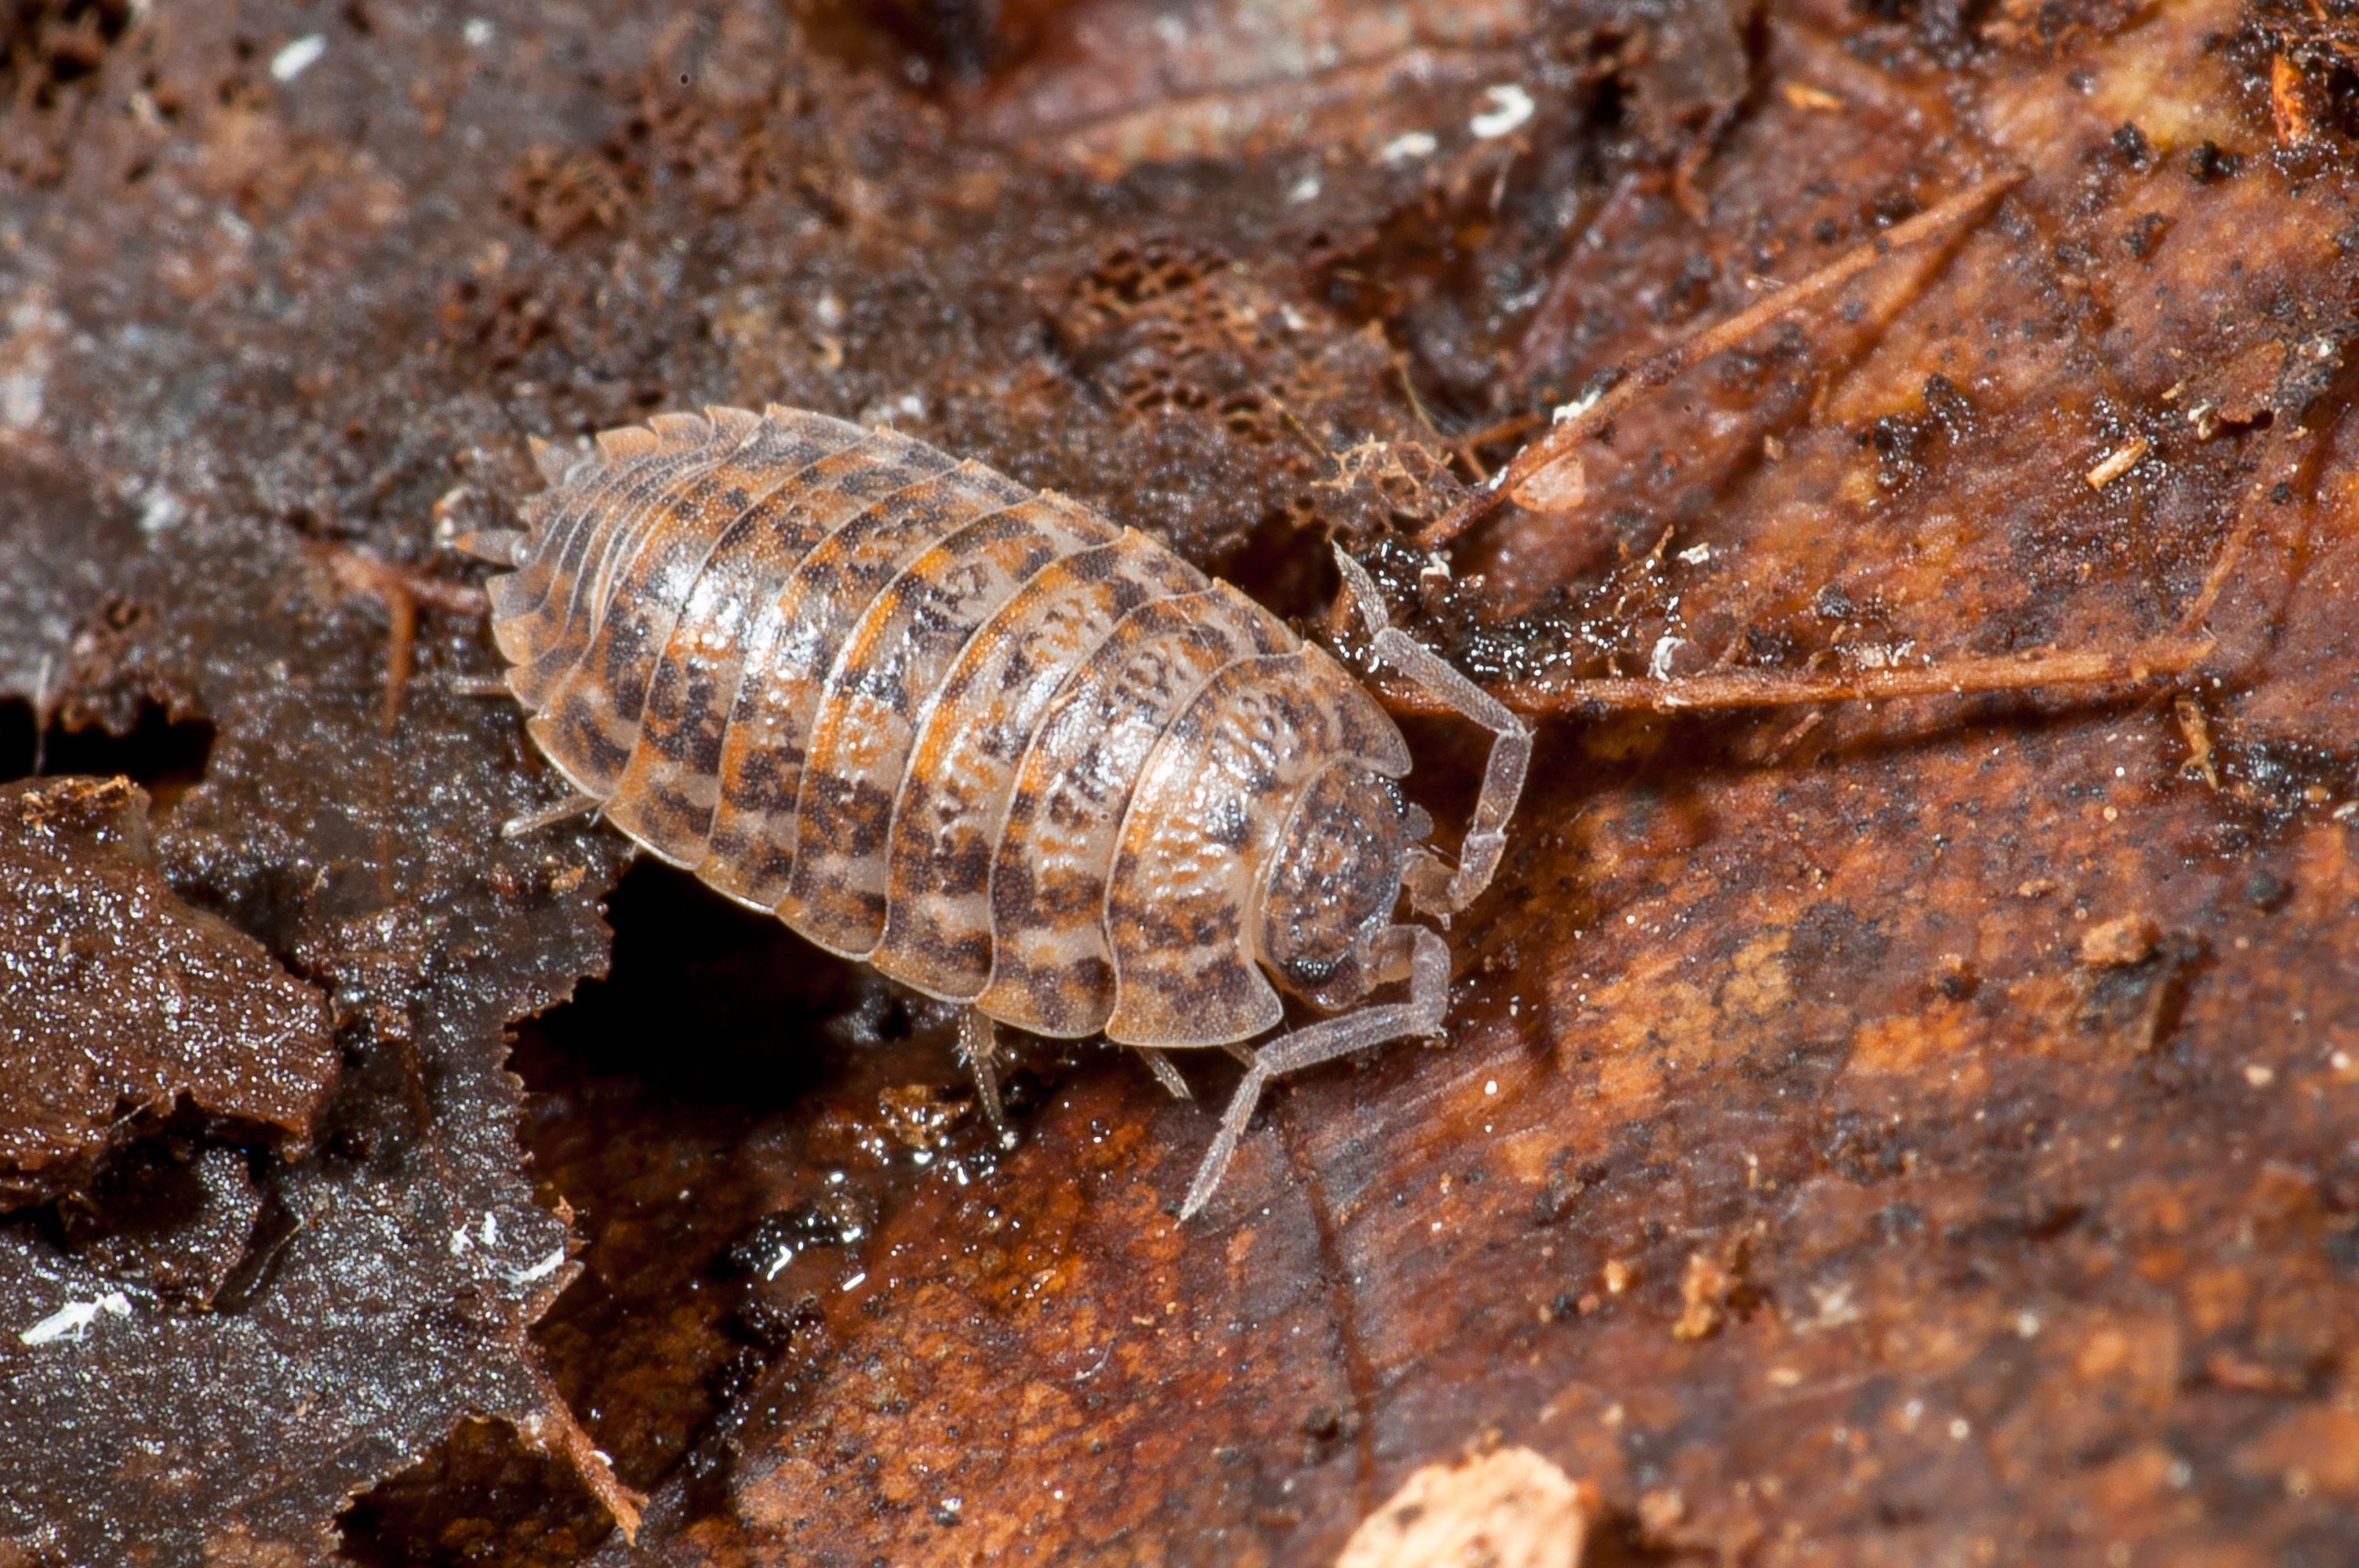
  • Feeds microbial life in the soil  
  • Creates organic matter for the soil to feed itself with 
  • Convert atmospheric nitrogen into a form that is usable for plants 
  • Their roots can loosen compacted soil and allow for aeration as they decompose  

Where to use them?  

You can use them in any garden space that is not otherwise in use, is about to come out of production or to prepare a garden space for future use. Cover crops are often used by farmers and market gardeners, but can be used in your backyard veggie garden, annual beds, or a garden space you hope to use next year.  

image.png

Freshly mowed cover crop

Winter-Kill Cover Crops 

These are the types that you plant in early fall. They grow to a nearly mature size before winter and then are killed by the frost. They then form a nice mulch over the winter to protect the soil. Choose these varieties in spaces that you want to be able to plant early in the spring.  

Oats – Good for suppressing weeds, improving soil health, protecting from erosion. Sow 6-10 weeks before first frost.  

Field Peas – Grow well in cool weather, great for nitrogen fixation. Plant about 6-8 weeks before first frost for maximum benefit.

  Field peas in bloom

Field Peas in Bloom

Daikon Radish (Tillage Radish) – Most known for its bio-tillage capabilities. The long tap root grows deep into the soil and then breaks down over winter and early spring, aerating the soil, providing organic material for the microbes and can be useful in loosening compacted soil.  image.png

Radish Sprouts  –  I planted these around Sept 3. This photo was taken Sept 12. 

Sorghum Sudan Grass – Great for weed suppression and moisture retention in the soil. Be sure to plant when soil is still warm. It will die after frost but if planted too early will go to seed so be sure to mow before it sets seed if it hasn’t been killed by frost yet.  image.png

Mature Sorghum (when used as a cover crop you would terminate before this stage)

Cold-Hardy Cover Crops  

These are types that you plant in mid to late fall. They begin to grow in fall, become dormant in the winter and re-emerge in the early spring. You then wait for them to develop appropriate bio-mass and terminate before they go to seed. These are usually more difficult to terminate and may require tillage, crimping or tarping. Choose these varieties for a space in the garden that won’t be needed until very late spring.   

Rye – Can thrive in low-fertility soil. Very cold hardy. It is recommended to till it into the soil in the spring when it reaches 12-18 in high.  

image.png

Mature Rye (Should be terminated by crimping or tilling before this stage)

Hairy vetch – Not as great for weed control at first as it is slow growing, but an excellent nitrogen fixator as it is a legume. Plant in early fall and then till or mow it down in the spring and it can remain in place as a nitrogen-rich mulch.  

image.png

Vetch Flowers

Crimson Clover & Red Clover – If allowed to grow to mid-May in the spring, will provide lots of nitrogen for the soil and provide a spring flower source for pollinators. Has a strong root system that helps reduce compaction.  

image.png

Crimson Clover

Red Clover

 Resources

Field Peas – SARE https://www.sare.org/publications/managing-cover-crops-profitably/legume-cover-crops/field-peas/ 

Radish as a cover crop – Integrated Pest and Crop Management – UW–Madison https://ipcm.wisc.edu/blog/2011/04/radish-as-a-cover-crop/ 

University of Vermont – Winter Rye: A Reliable Cover Crop  https://www.uvm.edu/vtvegandberry/factsheets/winterrye.html 

Crimson Clove Cover Crop Fact Sheet https://www.nrcs.usda.gov/sites/default/files/2024-04/Crimson%20Clover%20Crop%20Fact%20Sheet.pdf  

Hairy Vetch – https://www2.gov.bc.ca/assets/gov/farming-natural-resources-and-industry/agriculture-and-seafood/agricultural-land-and-environment/soil-nutrients/cover-crops/hairy_vetch_final.pdf  

Searching for Rain – Rethinking the Future of our Gardens

By Emma Murphy, Master Gardener

Heat. Humidity. Thunderstorms but no real rain. Dry soil.

cracked soil and dry leaves

What I wouldn’t give for a week of solid, consistent rain in our gardens. After the March ice storm, followed by a cool, wet spring and high water conditions until May, Mother Nature turned the water faucet off and we haven’t had solid rain for what feels like months.

I rarely have to water our established perennial gardens, which are a mix of native and non-native plants, but this month has been the exception.

So it’s time to think about the future. What can we do so our gardens survive (and thrive) during future dry or drought conditions?

Maintain Healthy Soils

Good soil is the foundation for good plant growth. Anything you can add to your soil like compost or other organic matter will make it easier for roots to penetrate deeper, creating more expansive root systems that can seek out water and nutrients. Check out Master Gardener Sharleen Pratt’s previous blog.

The result? Healthier, more drought-resistant plants. Good soils are better able to absorb surface water runoff, minimize erosion, and access nutrients and sediments.

hands holding soil with small plant seedling

Think About Future Plant Selection

Evaluate your plants for their resistance to dry conditions or drought; look for new plants (hey, who doesn’t want more plants?) that are identified as drought-tolerant or drought-resistant. Group plants according to how much water they need. Ask your local garden centre or nursery staff which plants they recommend.

Consider incorporating more native plants, which generally adapt better, have lower water demands, and fewer pest problems, plus of course the many benefits they provide to our pollinators and wildlife. In Our Nature has some great ideas.

bumble bee on native purple asters
Bumblebee on native asters

Use Mulch

Mulch reduces evaporation, moderates soil temperature, and inhibits weed growth. It is estimated that three quarters of the rain falling on bare soil is lost to plants through evaporation and runoff.

Use compost, wood chips, bark nuggets, shredded bark mulch, shredded leaves, or any other organic material to cover the surface of the soil at least 5 cm in thickness. More info and a deeper dive here.

shredded bark mulch
Shredded wood mulch

Water Well

Long, deep watering encourages roots to go deep down in the soil to where it is moist and a lot cooler. Water less frequently but for longer periods, so water reaches deep into soil. Good thorough watering promotes healthier plants.

Water only when necessary. Most plants will normally wilt in hot sun and then recover when watered. Also, a dry surface is not always a sign of water need. The surface generally dries out first and is not a true indicator of what is going on down deep near the plant root. Make use of a hand trowel or your fingers to check for moisture.

Weed Management

Weeds will compete with your plants for moisture and nutrients. Keep your gardens and areas beneath trees and shrubs weed free. Once the weeds are eradicated, apply mulch.

Consider Alternate Water Collection and Distribution Methods

Water harvesting is a great way to use water from your home’s roof and direct it onto the landscape, where the soil becomes your “holding tank.” The best example is using a rain barrel – we have various rain barrels and tanks in our garden and they are a great investment.

You can also practice ‘passive’ water harvesting by creating depressions that fill with water from the roof runoff or formal rain gardens, both of which help with stormwater runoff issues. Peterborough Greenup Rain Program

Investigate use of soaker hoses or other irrigation techniques using timers, which keep water on the soil and reduce losses by evaporation. Adjust watering frequency and amounts based on season, temperature, and amount of rainfall. Overhead watering uses more water and encourages fungal diseases.

rainwater barrel beside house
Rainwater barrel and water diverters – check out Rainbarrel.ca for location of sales

Practice Water Conservation Everywhere

Not just in your gardens. Water is our most valuable resource. Learn how to reduce water use throughout your house and gardens. The Simple Guide to Water Conservation and Make Every Raindrop Count.

water droplets on leaf

Is there a Fungus Among Us?

By Mary-Jane Pilgrim, Master Gardener

It’s finally spring and that means that soon there will be an explosion in our gardens and yards. I can’t wait! When I survey my lawn (yes, I still have lawn), I can see patches that will need some attention: especially raking and overseeding. I’m hoping that the skunks don’t come to visit this year, which indicates the presence of white grubs.

What I cannot see yet, but know that they’re going to appear in some of the wetter areas: mushrooms. Mushrooms popping up in your lawn in the spring is actually pretty normal and usually nothing to worry about. Here’s what’s going on:

Why they grow:

  • Moisture: Spring brings rain and warming temps—perfect conditions for fungi to grow.
  • Organic matter: Mushrooms feed on decaying stuff underground like old tree roots, buried wood, mulch, or even thatch in your lawn.
  • Healthy soil: Ironically, mushrooms can be a sign your soil is rich in organic material and biologically active.

Are they bad?

  • For your lawn? Nope! Mushrooms don’t harm the grass. They’re just the fruiting bodies of underground fungi doing their natural recycling job.
  • For pets/kids? Some wild mushrooms can be toxic if eaten, so it’s wise to remove them if you have curious little ones or pets around.

Can you stop them?

You can’t totally prevent mushrooms, but you can reduce them:

  • Improve drainage (mushrooms love dampness).
  • Rake up thatch and remove any rotting wood or roots.
  • Don’t overwater.
  • Mow regularly to knock them down.

In summary, mushrooms in a lawn are generally not harmful and can even be beneficial, as they help break down organic matter and release nutrients into the soil.

Resources

https://scotts.com/en-ca/how-to-control/how-to-identify-get-rid-of-prevent-lawn-mushrooms-in-your-home-garden.html

Deadwood in the Garden

By Lois Scott, Master Gardener

It was my sister that put the notion in my head that I would like a snag in my garden and the recent ice storm provided the opportunity.  A standard Serviceberry cultivar was too broken to save but it left a reasonable and safe trunk for my smallish garden.  It also left some small logs to tuck under shrubs.

Dead wood provides positive impacts to biodiversity as many beneficial species are on the search for dead wood.  ‘Some of these species include cavity nesting birds and mammals, beetles, fungi and other plants and beneficial insects.  Decaying wood positively impacts soil keeping your garden sustainable for years to come’.  https://ecologicaldesignlab.ca/site/uploads/2024/12/04_good-garden-practices.pdf 

Ecologically speaking a snag refers to a standing dead or dying tree, often missing a top or most of the smaller branches.  A snag is also known as a den, cavity or wildlife tree.  The following link (Ottawa Field Naturalists’ Club) provides an excellent description of the importance of wildlife trees to wildlife.  They provide food, safe cavity nesting sites and platforms, roosting and denning sites, hunting perches, display stations and foraging sites for a wide variety of species.  https://ofnc.ca/conservation-how-to/the-importance-of-snags-and-downed-logs-to-wildlife

Safety first so have a certified arborist advise you on the appropriateness of a potential tree.

Photo:  Top of the snag in author’s garden

Dead wood that is lying in your garden is an excellent addition.  It will be quickly colonized by natural decay fungi known as saprophytic fungi, my new word of the day!  These fungi help recycle the carbon and nutrients stored in woody tissue back into the garden soil which benefits your plants.  A small pile of logs can support many different insects and provide shelter for small mammals, reptiles and amphibians and shelter for over-wintering and hibernating wildlife.  https://www.rhs.org.uk/wildlife/dead-wood-compost-heap-habitats  This may not make everybody’s heart sing but I like the idea.

Photo:  A favourite chunk of wood in author’s garden

The small snag I now have may be more ecologically beneficial as a log on the ground but I have some ideas for it.  I plan on providing some support on it for a vine, maybe a Apios americana (American Groundnut).  There will probably be a small birdhouse attached.  The new logs have joined other decaying wood that I use as garden edging and garden decoration. 

One man’s garbage is another man’s treasure!

Bokashi Method of Composting

By Marjorie Vendrig, Master Gardener in Training

Five years ago I moved from a large rural garden outside Ottawa to a small urban lot in downtown Peterborough. One of the biggest changes in my gardening practice was making the switch from large, multi-bin composting to a single, small, black plastic bin. Over the years in my Ottawa garden I had developed a good system for adding kitchen and garden waste, turning the compost, adding leaf mulch,  then spreading the compost over the gardens. Here in Peterborough, my small plastic bin was productive on a smaller scale but the raccoons, bunnies, and rats managed to chew through the plastic and serve themselves. It was more of a mess than a benefit. They defeated me. Thankfully, the municipal kitchen waste program kicked in about the time the racoons moved in, giving me a reasonable alternative for kitchen waste. My garden wasn’t getting much benefit except for the fall leaves that I mulched and put over the beds.

I realized that I really miss composting and I would prefer to be putting my own food scraps back into my garden.  I started looking into composting systems for small spaces and came across bokashi composting. It’s not really composting, rather a fermentation process, and described as perfect for small spaces. Sometimes called a ‘pre-compost’ process,  the fermented results are added to worm compost or outdoor compost where decomposition is completed. It’s also anaerobic so there’s no need to turn the compost or layer materials. The process is fairly fast, about two weeks for the initial fermentation step. Any kitchen waste, including meat, cheese, oil, can be added. Bokashi is a Japanese word meaning fermented organic matter; the practice originated in Japan.

The anaerobic fermentation process  requires an accelerator, something like a starter for sourdough baking. It is often referred to as ‘bokashi bran’, the bran inoculated with microorganisms – fungi,  lactobacteria, phytobacteria.  It’s easy enough to put together a homemade system with a few 5-gallon buckets –  one with a tight sealing lid – and other household items. One bucket should have holes drilled in the bottom; this bucket is placed inside the other; the holes allowing any moisture from the fermenting food to drip into the bottom bucket. Fill the top bucket with layers of small 2 – 3” kitchen scraps and bokashi bran until the bucket is almost full, cover and press with a layer of waxed paper, a cloth, or even some foam before sealing the bucket with the lid and leaving for a few weeks to ferment.  After about one week some white mold with develop, after two weeks the bucket will smell like pickles and the fermented material can be buried in the garden about 6-12”deep. It will decompose fairly quickly in the garden and planting can be done around the fermented trough after a few weeks. Alternatively, it can be added to the compost heap or even into a large tub of soil indoors where it will continue to decompose. Any liquid  – the ‘tea’ in the bottom bucket can be added to the compost or garden as well.

Bokashi bran is widely available online and at some garden centres; it’s also possible to buy a kit that includes bran, several buckets, and instructions. The buckets in the kits often have a tap and reservoir so the ‘tea’ can be collected at the bottom of the bucket.  Like sourdough starter, the bran can be made at home, though some starters work more quickly than others. It’s worth experimenting to test a few products and compare results. I’ve learned that a few cities in western Canada have municipal bokashi programs so it is possible in colder climates. On a large scale, it is also being trialled at Sissinghurst, a famous garden in the UK. 

The image on the left shows bokashi bran sprinkled on kitchen scraps.

The image on the right shows soil with fermented kitchen scraps after a few weeks in soil.

Resources

https://www.saskwastereduction.ca/recycle/resources/composting/bokashi-buckets/

https://en.wikipedia.org/wiki/Bokashi_(horticulture)#:~:text=Bokashi%20is%20a%20process%20that,by%20specialist%20bacteria%2C%20not%20decomposed.

https://www.gardensillustrated.com/garden-equipment/lifestyle/best-bokashi-bins

Definitely Crawly but Not Creepy! The Importance of Detritivores in the Garden

By Thom Luloff, Master Gardener in Training

Amidst the blooms and foliage in our garden lies an unsung group of heroes tirelessly working behind the scenes: detritivores.  These animals have a “creepy” reputation—we all know the surprise when we move a pot and then there is an explosive scatter of multitudes of legs!  

But aside from the free ‘thrill’, these critters play an essential role in nutrient cycling, soil health, and our overall garden productivity.

Rove Beetle and Springtail

What Are Detritivores?

Detritivores are organisms that feed on dead plant and animal matter, breaking it down into simpler substances such as nitrogen, phosphorus, and potassium, which plants can readily absorb. This recycling of nutrients ensures that the soil remains fertile and capable of supporting healthy plant growth. Invertebrates such as earthworms, beetles, and millipedes are some of the most common detritivores found in Ontario gardens.

Furthermore, the physical activity of detritivores, such as burrowing and feeding, enhances soil structure. Improved soil structure leads to better water retention and drainage, preventing issues such as soil compaction and erosion. A healthy soil ecosystem, rich in detritivores, is more resilient and productive.

Pill Bug and Millipede

Key Detritivores in Ontario Gardens

  • Earthworms (Lumbricus terrestris) are perhaps the most well-known detritivores. These segmented worms burrow through the soil, ingesting organic matter and excreting nutrient-rich castings. Their burrowing activity aerates the soil, improving its structure and allowing plant roots to access oxygen and water more easily (Edwards & Bohlen, 1996).
  • Rove Beetles (Staphylinidae family) are another group of beneficial detritivores. These beetles feed on decaying plant material and fungi, helping to break down organic matter and control populations of other pests. Their presence in the garden is an indicator of healthy soil (Newton, 2010).
  • Millipedes (Diplopoda class) are often mistaken for pests, but they play a crucial role in decomposition. These multi-legged arthropods consume decaying leaves and wood, breaking them down into smaller particles that microorganisms can further decompose (Hopkin & Read, 1992).
  • Springtails (Collembola order) are tiny, soil-dwelling insects that thrive in moist environments. They feed on fungal hyphae and decaying plant material and promote microbial growth, which is essential for nutrient cycling (Hopkin, 1997).

And my personal favourite…

  • Pill bugs, also known as woodlice or roly-polies (Armadillidiidae family), are common detritivores found in Ontario gardens. These small, segmented crustaceans are often mistaken for insects due to their similar size and terrestrial habits, but they belong to the class Malacostraca, closely related to shrimp and crabs. Yes! A terrestrial crab—how awesome is that?!  Pill bugs are easily recognizable by their ability to roll into a tight ball when threatened, a defensive behavior known as conglobation (also, an incredibly cool word!). They thrive in moist environments, often found under rocks, logs, leaf litter, flower pots, and other debris where they can avoid drying out.

Harnessing Detritivores to Make your Garden more Productive!

To encourage a thriving population of detritivores in your garden (and better soil as a result), consider the following practices:

  • Mulching: Apply organic mulch, such as leaves or compost, to garden beds. Mulch provides a habitat and food source for detritivores, promoting their activity.
  • Composting: Incorporate compost into your garden. Compost is rich in organic matter and attracts detritivores, enhancing soil fertility and structure.
  • Avoiding Pesticides: Minimize the use of chemical pesticides, which can harm detritivores.
  • Maintaining Soil Moisture: Ensure that your soil remains consistently moist, as many detritivores, such as earthworms and springtails, thrive in damp environments. 

Detritivore insects may be small, but their impact on garden health is enormous. Embracing these crawly creatures in your garden can lead to more productive and healthier plants, making your gardening experience even more rewarding.

More to learn!

To learn more about these amazing creatures, please download Bugdex wherever you get your smart device apps.  Bugdex is a revolutionary app introducing the world of insects. It is filled with stunning photographs, interactive animations and a beautiful interface designed to make entomology accessible to all. Learn how to identify major insect groups by recognizing distinctive body features that are beautifully illustrated within the guide. Bugdex is developed by a Danish-Canadian team of entomologists from the Natural History Museum of Denmark and DKB Digital Designs.

 All photos in this blog are provided with permission of Dave Cheung, Bugdex.

References:

Edwards, C. A., & Bohlen, P. J. (1996). Biology and Ecology of Earthworms. Chapman and Hall.

Hopkin, S. P. (1997). Biology of the Springtails (Insecta: Collembola). Oxford University Press.

Hopkin, S. P., & Read, H. J. (1992). The Biology of Millipedes. Oxford University Press.

Newton, A. F. (2010). “Staphylinidae Latreille, 1802.” In: Beutel, R. G., & Leschen, R. A. B. (Eds.), Handbook of Zoology: Coleoptera, Beetles. Walter de Gruyter.

5 Simple New Year’s Resolutions for Gardeners

by Emma Murphy, Master Gardener

As this year ends, I’m offering a few New Year’s resolutions for gardeners for 2024. If you want more of a challenge, the Chicago Botanic Garden offers 50.

Add Native Plants To Your Garden

  • We’re all seeing the effects of climate change on our gardens.
  • Native plants adapt more readily to stressful and changing weather patterns, such as prolonged droughts or winter cold snaps, than hybrids and non-natives often seen in our nurseries.
  • Native plants help sustain beneficial insects and bird populations because they attract native pollinators and birds that might not be drawn to non-natives.
  • Create less work for you, as native plants tend to be lower maintenance than non-native ones.
  • The Native Conservancy of Canada offers some suggestions to get you started, or consult with your local Master Gardener group or Horticultural Society.
Bloodroot, Sanguinaria canadensis

Start A Compost Bin

  • Composting helps keep waste out of landfill by collecting and processing organics into material that can be used to create nutrient-rich compost used to feed and nourish soil.
  • Canadian Living offers a simple outline, as shared by Ed Begley  Jr.
  • Or more here from the Thames Region Ecological Association, including troubleshooting issues.
Compost bin

Grow More Of Your Own Food

  • The pandemic has highlighted how our agricultural systems are vulnerable to global shocks. Issues with supply chains, migrant workers, transport, trade and border closures have resulted in some foods being in short supply or prices going up (while quality goes down).
  • Insects do all the hard work, and all pollinators benefit.
  • Gardening provides benefits for your wallet, your nutrition, and reduces your environmental footprint. By growing your own food (either from seeds or small plants), your food is automatically more sustainable simply because you are doing it onsite or in a community garden. If you control the ‘inputs’ and do it well, you can save a lot of money.
  • Ultimately there is nothing more rewarding than planting and maintaining your own vegetable garden and harvesting (and sharing) your results. And we all know how much better homegrown produce tastes versus conventional produce at the grocery store. If you have too much produce, then you can just share the love with others!
  • Royal City Nursery in Guelph offers 8 Reasons to Start Growing Your Own Food from Seed
Creating a vegetable garden

Continuous Learning

  • Do what you love but keep on top of what’s trending in garden design to see if anything sparks your interest.
  • Keep track of what’s working and what’s not by documenting your garden happenings in a journal.
  • Expand your garden library and treat yourself to a new gardening book.
  • There are so many amazing (and free) garden webinars available now – learn from the experts.
  • Some of my favourite bloggers – The Impatient Gardener (in Wisconsin, similar climate to us), The Empress of Dirt (Ontario), Niki Jabbour (Halifax), The Laidback Gardener (Montreal), and Garden Myths (Robert Pavlis in Guelph, Ontario).
Online learning is a great opportunity

Reduce Your Use Of Plastic

  • Plastic is a major component in the garden, from plastic plant pots and seed trays to watering cans, and compost bins. Most plastic gardening equipment will end up in landfills, where plastic pots alone can take up to 500 years to decompose.
  • There are a few easy swaps you can make in going plastic-free: Many of us want to use less plastic in the garden, from plant labels to watering cans, tools, plant pots and the sheeting used to suppress weeds. Buying (and therefore using) less plastic will not only reduce your plastic footprint but also sends a message to manufacturers that gardeners want alternatives to plastic (especially single-use plastic).
  • Try to find biodegradable pots that made from natural materials such as coir, bamboo, wood chips, or seaweed (or commit to using your plastic pots year after year).
  • If you use plastic string, make the swap for a natural jute or hemp, and protect your fruits and vegetables with metal mesh instead of plastic netting – it lasts for years.
Find alternatives to plastic pots, or commit to using (and reusing them) for many years

Happy gardening dreams until we can get out into our gardens again….

A Guide for Ontario Gardeners in December

By Mary-Jane Pilgrim, Master Gardener

As the snow blankets our gardens in Ontario, many might assume it’s time to hang up the gardening gloves until spring. However, seasoned gardeners know that December can be a time of indoor/outdoor preparation for the upcoming growing season.

One key activity for this month is winter mulching. While it may seem counterintuitive to spread mulch in the cold, it’s a crucial step to protect your plants from the harsh Canadian winter. A thick layer of mulch acts as a cozy blanket, shielding the soil and plant roots from extreme temperature fluctuations. Thankfully in our region, Mother Nature does this job for us in the form of snow!

For those dreaming of vibrant spring blooms, December is the ideal time to start forcing bulbs indoors. Tulips, daffodils, and hyacinths can be coaxed into early flowering by providing them with a period of cold storage, mimicking the winter chill they would experience outdoors.

Don’t forget about your compost! While your outdoor compost pile may slow down in the winter, it’s still a valuable resource. If you don’t do this already, consider continuing your indoor composting with kitchen scraps to keep the nutrient-rich compost coming, even in the colder months. People living in the city will probably be already doing this thanks to the new green bin program, but for others living outside of the city limits, sometimes the outdoor compost pile seems like it’s just too far to venture to in the cold. However, a little bit of effort now will divert a lot of food waste from the landfill.

Lastly, embrace the festive spirit by incorporating evergreen plants into your outdoor decor. Hollies, spruces, and winterberry bushes add a touch of green to the winter landscape and can be adorned with festive lights or ornaments.

December in Ontario might be chilly, but for gardeners, it’s a time of planning, protecting, and finding joy in the small wonders that the winter garden has to offer. So, bundle up, grab your gardening tools, and let the December gardening adventures begin!

Wood Ash in the Garden

By Marilyn Homewood, Master Gardener

At a recent horticulture meeting, the subject of using wood ash in the garden came up.  As the days grow shorter and the temperatures drop, I was reminded of this.  As someone who used to heat the house with wood, I am no stranger to finding uses for my ashes.  Although most of the time, the ash went onto icy paths and the lane, there was always some left in the spring.  Those were spread in a thin layer over some of the soil in the garden.  As with most things, ashes in moderation can be a good thing, sometimes!

Why use wood ash in the garden? From my perspective there are two reasons for wanting to use ash in the garden.

1.  Recycling.  Better to see the ash returned to the earth than ending up in the landfill. 

2. Benefits to the soil.  Constituents of ash can vary depending on what type of wood is burned but generally the largest component is calcium carbonate (20%).  Next is potassium (10%), phosphorous (1%) and possibly some trace amounts of micro-nutrients such as iron, manganese, boron, copper and zinc.  Used in moderation, ash does act as a fertilizer but note it is not a complete fertilizer as it doesn’t contain nitrogen.

Keep your eye on Soil pH

Ash is alkaline due to its calcium carbonate component and has the ability to affect soil pH.  For those growing acid loving plants such as azalea or blueberry, the addition of wood ash will not be appreciated.  Folks with neutral to slightly sweet soil probably will not notice any deleterious effects however if you are struggling with an elevated pH, ashes could end up tying up more micronutrients such as iron and result in even more chlorosis in plants.

How do I use wood ash and how much?

As a general rule of thumb, an application rate of 20 pounds (approximately a 5 gallon pail) per 1000 square feet per year (it takes about one cord of wood to produce this much ash).  I have seen recommendations on applications for both spring and fall.  Just recall that wood ash is very fine and blows away quite easily.  It seems best to apply a thin layer to moist soil or to dig it in.  Wood ash can also be added to compost piles at a low rate (sprinkle one or two cups on top of pile when adding green or brown material to the pile but do not exceed more than 5% of the total volume of the compost).

Cautions when using wood ash

Ash is caustic.  Wear a mask to avoid breathing it in and wear appropriate PPE.  Never mix ash with nitrogen fertilizers such as urea or ammonium sulphate as such a mixture will produce ammonia gas.  There are certain things you should not burn if you plan on using your ashes in the garden as they could contain heavy metals such cadmium, chromium or lead.  These things include:  Treated lumber, painted or stained wood, cardboard, fake fireplace logs, coal, BBQ briquets and any wood that was ignited with a fuel such as gasoline.  Some references caution against using the ash from wood that was grown near industrial locations for fear of heavy metal contamination.

Since wood ash does have some benefit as a soil amendment, it seems like this is one more way to reduce the amount of waste going to our landfill. Why not give it a try?

Resources

https://gardening.usask.ca/articles-and-lists/articles-healthysoils/wood-ash-in-garden.php

hort.extension.wisc.edu/articles/using-wood-ash-in-the-home-garden

https://www.canr.msu.edu/news/wood_ash_in_the_garden

All About Pumpkins…

By Emma Murphy, Master Gardener

What says fall or October more than the iconic pumpkin? But how much do you really know about them?

Here’s 10 things about pumpkins that might surprise you.

  1. They’re technically a fruit, not a vegetable. Pumpkins are a winter squash in the family Cucurbitaceae (which includes cucumbers, melons, and gourds.) Pumpkins, along with cucumbers, tomatoes, and avocados, grow from the flowers of their plants. So yes, all squashes are technically fruits as well. It is the official State Fruit of New Hampshire.
  2. They’re native to the Americas. Scientists believe that pumpkins originated in the Americas about 9000 years ago. The oldest pumpkin seeds were found in Mexico and date to somewhere between 7000-5550 B.C.. Originally small and bitter, they were selectively bred by native peoples to be bigger, sweeter, and have more flesh.
  3. They weren’t originally called pumpkins. The word “pumpkin” originates from “pepon” – which means “large melon” in Greek. Then it evolved to “pompon” (in French) and “pumpion” (in Britain). The evolution in North America was to “pumpkin,” what we use today.
  4. Every single part of a pumpkin is edible. That means the skin, leaves, flowers, pulp, seeds, and stems. And they’re 92 percent water. Pumpkin and other squash blossoms can be eaten raw or I’m told they are tasty when lightly battered and fried. Pumpkin pie is a traditional part of Thanksgiving meals in Canada and the United States.
  5. Bumble bees and squash bees are the primary pollinators of the cucurbit family of plants. They help transfer pollen from the male flower to the female flower by visiting each flower to drink the nectar located in the flower. As the bee drinks nectar it vibrates and moves its body around and in doing so, collects grains of pollen on the fine hairs of its body and in pollen baskets located in some species on their legs.
  6. Pumpkins (along with other squash) were a historically important food staple among Native Americans. Using the “Three Sisters Method,” three crops (squash, maize, beans) were grown together – usually near riverbanks – so they could sustain each other. Corn is the trellis upon which the beans climb; beans keep the corn stalks stable on windy days, while also nourishing their soil; and pumpkins/squash shelter the corn’s shallow roots and prevent weeds from forming.
  7. They’re a great source of beta carotene (which is what gives it the orange colour). It turns into vitamin A after you eat it, so it’s excellent for your eye and skin health.
  8. They can get REALLY big. The heaviest pumpkin ever recorded was a staggering 1,226 kg (2,702 lb 13.9 oz), grown by Stefano Cutrupi (Italy) in Tuscany, Italy in 2021.
  9. How long do they last? After a pumpkin is cut, it will usually last about seven to 10 days. Find out how to pick the perfect pumpkin.
  10. Each pumpkin contains about 500 seeds. Once they sprout, pumpkins take between 90 and 120 days to reach maturity, which is why it’s recommended to plant them between May and July.

A LAST NOTE: Just a reminder that you’ll see lots of social media posts after Halloween about giving your pumpkins a second life by putting them out for wildlife. In your own garden, break the pumpkin into small pieces and monitor and remove the pieces when they rot, mold, or aren’t eaten.

Check and see whether local zoos or wildlife rehabilitation centres are interested in donations for animal enrichment. NOTE: they must still be fresh – carved pumpkins break down quickly and whole pumpkins that have been sitting in the sun for weeks can quickly become contaminated and shouldn’t be given to animals to eat. Some municipalities also offer a drop-off program.

Please don’t put them on the side of the road or in natural areas, as this creates problems because if they are near ditches or roadsides, animals will be drawn in close to traffic where they may get hit.

Last but not least, if a pumpkin is starting to decompose, turn it into compost! Chop it up to speed up the process.