Category Archives: Advice

Using Root Cuttings to Propagate Plants

by Marilyn Homewood, Master Gardener

Most of us are familiar with using stem cuttings to make a replica of a specific plant. Less commonly used in Canada are root cuttings, a form of asexual reproduction which can be used to propagate a range of herbaceous perennials and even a few woody plants in the later part of autumn when plants have gone dormant (full plant listing in references).

Beauty of Livermere Oriental Poppies (parents)

Last fall, I determined that I would need approximately 25 new oriental poppy (Papaver orientale) plants to place at the back border of one of my beds. “Beauty of Livermere” was already planted in another bed and I wished to have more of that variety. However, poppies have tap roots and are notoriously difficult divide. As oriental poppies do not come true from seed when looking to reproduce a particular cultivar, root cuttings seemed to be the answer.

As I had never done this before, I choose to take cuttings at more than one time – late September, late October and in the end of December when we had a surprising warm spell. I lifted a couple of plants brushing away the soil from the roots (washing would have worked better). I selected out roots with a diameter of a pencil and cut them off with secateurs taking less than 1/3 of any one plant. The donor was replanted immediately (and the crown mulched for winter protection).

Next, the roots were cut into 2–4-inch (5-10 cm) lengths making a horizontal cut at the upper end (part that was closest to the plant crown) and an angled cut at the bottom. You must preserve the polarity of the cutting. They will not grow if planted upside down. I filled pots with a 50/50 mixture of potting soil and vermiculite (perlite also works). I inserted the cuttings vertically into compost, ensuring that the angled end of the cutting was put in first to preserve polarity. The compost was watered until it was moist and then put out in my extension for the winter where they would be cool but would not freeze. Root cuttings do not require light until green growth begins to show and they can be kept in the basement if need be.

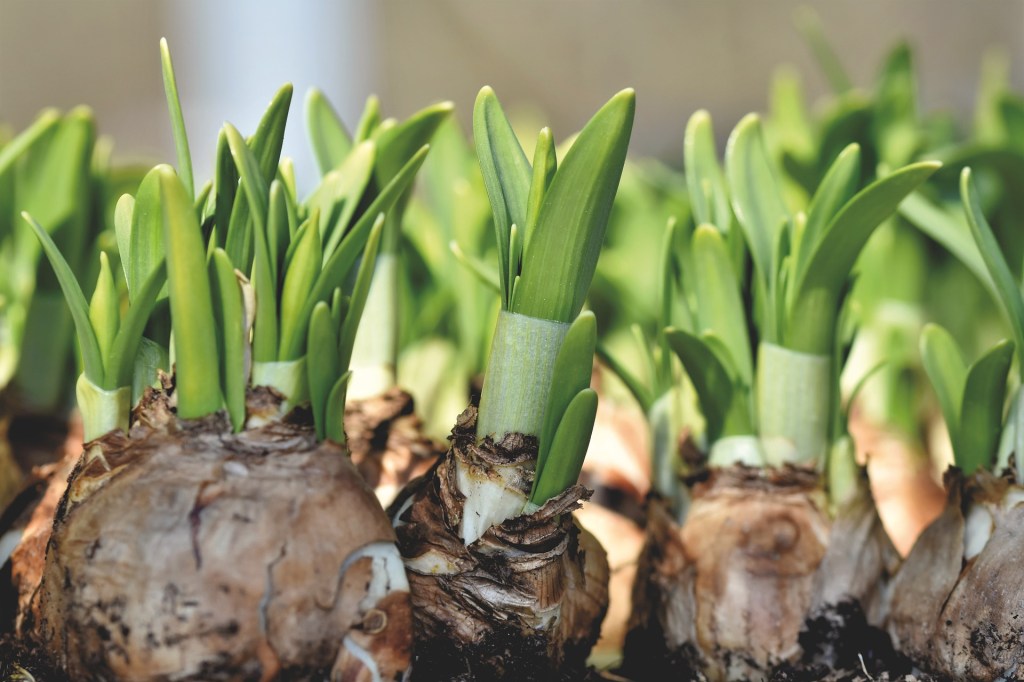
In my case, it took about 2 months before any of the cuttings showed any green. The September cuttings were a flop as only a single cutting out of 10 had growth (too early to take root cuttings). I had almost 100 % strike from both the October and December batch. The cuttings were in a high light area so as they grew on, I did repot them up. In late April, the new plants were hardened off and planted out. They grew well in their new location and I look forward to next year’s bloom.

Potted up separately
Planted out!!

There are other advantages to using root cuttings instead of other means of propagation:

  • Root cuttings require no special aftercare (no humidity bag etc)
  • Large numbers of new plants can be generated from a single parent plant (good for larger gardens)
  • Plants derived from root cuttings are relatively large and vigorous
  • Cuttings are taken in a quieter season when a gardener may have a bit of time (I don’t know about you, but my spring stem cuttings have a high failure rate as I don’t keep as close an eye on them as I should and they either burn up in the plastic humidity bag or dry out from lack of water)
Growing on…

Perennials such as Japanese anemones (Anemone hupehensis) and Phlox (Phlox paniculata) can be propagated in this way. These plants have thinner roots and contain less food reserves so it is recommended for these species to use longer sections (3-5 inches) and lay them horizontally on top of compost in a tray covering with a thin layer of compost.

Whatever plant you wish to propagate, give root cuttings a try. You may be pleasantly surprised.

Resources

Propagation by Root Cuttings (RHS)
Plant Propagation
Grow More Plants with Root Cuttings

Time to take stock of your garden…and collect seeds!

By Silvia Strobl, Master Gardener in Training

Summer is flying by. You can feel the growing season coming to a close with the cooler morning temperatures in late August. Now is a good time to reflect on which vegetables did well in your garden and, if heirloom or open-pollinated varieties, allow some to go to seed for next year’s planting. Or you could collect more seed than you need and package them to exchange for more new varieties at next spring’s Seedy Saturday/Sunday events.

It is important to only collect seeds from open-pollinated varieties as these will retain their genetic diversity and produce plants that adapt to changing growing conditions. They produce seeds that can be legally grown, saved, and shared. Do not collect seeds from hybrid varieties as these will not grow like their parents.

Last spring, I picked up seeds of several new (to me) varieties that diversified both my vegetable garden and my diet this summer, including:

  • An heirloom basil lettuce leaf variety with a milder peppery basil flavour that enhanced mixed lettuce salads throughout the growing season
  • A purple pole bean, Trionfo Violetto, that unlike the purple pole bean, Blauhilde, that I usually grow was more tender and stringless, although not quite as productive
  • A purple podded sugar snap pea, Sugar Magnolia Pea, that is still producing pods today. The peas are very sweet and unlike the purple pole beans do not turn green when cooked, plus they are easy to spot in the tangle of 6 feet tall vines
  • A cantaloupe, Minnesota Midget,that started producing juicy, sweet, ripe fruits by the second week of August
  • A mix of 2 different Armenian cucumbers with light green, ribbed tender skins rather than the dark green skinned Lebanese cucumbers typically grown and available year-round at the grocery store. Surprisingly, Armenian cucumbers are the same species as cantaloupe! Their denser, less watery flesh makes them ideal for tabouli and cucumber salads.
  • Two different peppers that I grew as container plants: (i) Mini Red Bell that produced early sweet peppers that are 1-1/2 inches tall and wide and (ii) Buena Mulata a hot cayenne variety that changes from a pretty purple to red when ripe although we also enjoyed the early milder purple peppers in fresh salsas. Both pepper varieties are very productive, yielding dozens of peppers on one plant!

Why try growing something new?

While it is easy to get into a routine of growing the same varieties of vegetables each year, there are several reasons to experiment with new varieties. A different variety of beans or tomatoes might grow better in your soil conditions and produce a bigger crop, it might taste better, be easier to harvest, mature earlier, or be better suited to the vagaries of our new climate change world with more drought and/or rainy weather. Aside from these good reasons, growing something new can be a lot of fun!

Contributing seeds to your local Seedy Saturday/Sunday event is an economical way to support experimentation with new varieties. You can trade your seeds for seeds of other varieties collected by other gardeners.

How do you get started with seed collection?

As I learned during a seed collection workshop with Jill Bishop of Urban Tomato, here are some general steps to follow:

  • Ensure the variety is open-pollinated or heirloom. The original seed package should provide this information. Or search for the variety name on the internet.
  • Identify the vegetable varieties you enjoyed and mark healthy plants that you will let go to seed. For example, this year I identified 2 plants in my pole bean row where pods could go to seed.
  • Let seeds mature on the plant and observe carefully to ensure you harvest seed heads just before they start to split open.

For beans and peas which are self-pollinated let pods over-ripen and turn brown on the plant. Keep green beans away from purple ones. When seeds rattle inside pods they are ready to harvest. Let the pods dry further indoors.

For lettuce greens, cruciferous vegetables (e.g., kale, cauliflower, broccoli, etc.) and herbs let a plant bolt. Keep different varieties (e.g., of lettuce) apart to avoid cross-pollination or only let one variety bolt. It will take some time for seeds to form and turn completely dry and brown. You might want to cover the seed head with a gauze bag to capture the seeds when seed heads split open. Note that kale is a biennial and won’t form seeds until Year 2 while most spinach varieties are dioecious and both a male and a female plant are required to obtain seed set.

Pepper seeds are simple to collect but make sure to grow varieties separated from one another to avoid cross-pollination. Growing peppers in pots makes this easy to do as you can move the pot during the flowering period. Scrape seeds from a fully ripe pepper and set seeds on newspaper to dry.

Both tomato and cucurbit seeds require a bit more effort to collect.

  • A recent Peterborough & Area Master Gardener blog post, “Tasty Tomatoes”, provided steps for saving tomato seeds from ripe healthy tomatoes. As described in the blog, seeds should be fermented in water for a week to separate viable seeds and improve seed germination and longevity.
  • For cucumbers, squash and melon, let the fruit get big, overripe, and mouldy on the vine, open the fruit, scoop out seeds and let them ferment like tomato seeds, then rinse and let dry.

Ensure that you label and date the seeds you collect through the drying and packaging process. When packaging seeds in smaller envelopes for Seedy Saturday/Sunday events include variety name, year collected, days to maturity, and spacing for sowing. Store seeds in paper envelopes in a dry cool place. If you use jars to store seeds, put an envelope with a fully gummed flap in the jar as well. If the envelope is sealed when you check the jar a week later, humidity levels are too high in the jar. Seeds will start to germinate if kept in humid conditions.

Follow these steps and you’ll be ready to leave a few seed envelopes of your favourite varieties at a Seedy Saturday/Sunday event that will soon be scheduled near you. And you’ll be able to pick up a few free new heirloom varieties to try in 2024!

Seed Collection Resources

Seeds of Diversity a Canadian organization with 1000+ members that grow rare seeds to exchange. They support Seedy Saturday and Sunday events across the country.

How to Save Your Own Seeds–A handbook for Small Scale Seed Production available from Seeds of Diversity for $15.00

The Seed Savers Exchange publishes a Seed Saving Guide in table format that identifies the primary pollination method, how many plants you should grow to collect viable seeds, and how far apart plants should be from other varieties to avoid cross-pollination for more than 80 varieties of vegetables. For example, for vegetables like tomatoes, beans, lettuce and squash, you should grow each variety at least 10 to 20 feet apart from other varieties. If you have a small garden, you can still grow more varieties together but cover a flower with a gauze or blossom bag to only allow that variety to self-pollinate.

There are lots of resources on the internet for making your own seed envelops, including this one: Make Your Own Seed Envelopes For Cheap

What is Happening to my Coneflowers?

By Mary-Jane Pilgrim, Master Gardener

Coneflowers (Echinacea), with their vibrant blooms and potential health benefits, are a favorite among garden enthusiasts. However, these beauties can sometimes face challenges, notably from insects and disease. While both can cause issues, they’re quite different in their effects and how they impact your beautiful echinacea.

Coneflower rosette mites, or eriophyid mites, are microscopic pests that can infest your echinacea plants. They’re like those unwanted houseguests that sneak in unnoticed and cause havoc before you even realize it. These mites suck the sap from the flower cones, leading to stunted growth and a generally unhealthy appearance. To treat for eriophyid mites, remove the flowers and do not compost. The flower heads below both show damage from mites.

On the other hand, aster yellows is a plant disease caused by a bacterium called a phytoplasma. It spreads through leafhoppers, which are tiny insects that feed on plant sap. Unlike erythroid mites, aster yellows is more like a viral cold that your echinacea catches. Plants infected with aster yellows show symptoms like distorted flowers, leaf-like structures in place of flowers, and overall stunted, often yellowed, growth. The plant may have growths out of its cone or tufts of green where the petals should be. Unfortunately, there’s no cure for this disease, so the best approach is to promptly remove and destroy infected plants (including the roots) to prevent the bacteria from spreading to others. The disease primarily affects black-eyed susan (Rudbeckia hirta) and coneflowers (Echinacea spp.)

Lastly, the main difference between mite and disease symptoms are the colors of the rosettes.  Aster Yellows produces yellowish-green rosettes while the mites produce rosettes that usually retain some of the original color of the cones.  Of course, the mites do not affect the rest of the plant; their damage is confined to the flower cones.

For an excellent side-by-side comparison with photos of aster yellows and eriophyid mites on coneflowers, check out this page from Ohio State University.

Resources

Ohio State University: Coneflower Calamities: Round 3

Minnesota State Horticultural Society: Aster Yellows vs. Eriophyid Mites on Coneflower

Illinois Extension: Aster Yellows on Coneflower

Begonias, so many Options!

By Christine Freeburn, Master Gardener

The choices for summer annuals seems to grow greater every year. Filler plants like geraniums, petunias, marigolds, impatiens are lovely, but the begonia has so many variations of shapes, sizes, colour, and sun requirements, they are worth a try in your hanging baskets or containers.

Begonia are generally easy care with no deadheading and different varieties can grow in sun or shade. Flowers are often smaller but there are lots on the plant. They often just fall off or can be pinched off quickly. Leaves come in many shapes and sizes, colours and textures. When you go into a garden centre, you need to know what type of begonia you are looking for.

Fibrous rooted types include the easy Dragon Wing variety which are great in window boxes and containers. They come in red, pink or white, grow about a foot tall and wide, and can take sun or part sun. There is a new variety called Canary Wing which has yellow leaves and prefers less sun.

Wax begonias Begonia semperflorens are usually sold in cell paks, prefer part shade, can have bronze or green thicker fleshy leaves and white, pink or red flowers. Often called bedding begonia, they are great in the garden as an alternative to impatiens.

Tuberous begonias include the Solenia type Begonia x tuberhybrida which can take full sun and come in a variety of colours from shades of pink to yellow and red. Great in hangers or containers.

Solina begonia

‘Nonstop’  and ‘Illumination’ are  hybrid variety of tuberous begonia that will take the heat but want shade. They come in lovely shades of pink, red, yellow, peach or white. These also work well in containers and hangers.

Reiger begonias can produce double blooms, are more upright and also prefer shade.

Gryphon Begonia is a cane type begonia with stunning foliage and upright habit which will do well in part shade in the garden bed. Although the plant rarely flowers, the maple shaped leaves on a 2 foot plant looks great.

Rex Begonias have amazing furry leaves in many different shapes and colours. They do not want any sun and are often used as houseplants. Flowers are rare on these lovely specimens, but the leaves are the showstopper.

Rex begonia

And if you grew houseplants in the 70s, you might also remember the cute little indoor begonia called Strawberry Begonia Saxifraga stolonifera which grows similar to the spider plant having babies growing from trailing stems. These little houseplants are difficult to find but a nice addition to a houseplant collection.

Although begonias don’t need constant deadheading like so many other annuals, removing spent blossoms will keep the plant looking fresh and encourage new blooms.

Soil should be well draining and evenly moist but don’t over water as this can lead to root rot. Begonia stems are fleshy and brittle, and can break easily, so they don’t do well in wind. Fertilizing for bloom and good health can be done weekly over the summer months.

http://www.missouribotanicalgarden.org/

https://www.thespruce.com/

Peonies: The Stars of the Show at Present

By Mary-Jane Pilgrim, Master Gardener

Peonies are like the royalty of the flower world, with their lush petals and captivating fragrances. If you’re itching to grow more of these stunning beauties in your garden, you’re in luck!

Peony plants fall into one of three categories: herbaceous peonies, tree peonies, and intersectional/Itoh peonies (modern crosses between herbaceous and tree types). This article addresses the propagation of herbaceous peonies by seed and by division.

  1. Growing Peonies from Seeds: Starting peonies from seeds is like embarking on a rather long gardening adventure. First, collect ripe seeds from mature peony plants once the flower heads have dried. Give them a good soak in water for a day to help with germination. Then, plant the seeds in well-draining soil in a pot or tray. Cover the container with plastic wrap to create a cozy greenhouse effect.

Now, it’s time for a little winter simulation. Pop the container in a cool spot like your fridge for about three months. After the chill period, move the container to a warmer spot with indirect sunlight. Keep the soil moist, and be patient. It might take a while, but soon you’ll see those precious seedlings sprouting. Once they grow bigger, you can transplant them into individual pots or your garden. Remember, it may take a couple of years for them to bloom.

  1. Dividing Peonies: Dividing peonies is like giving them a fresh start and making more peony magic happen. Autumn or early spring is the perfect time to divide these beauties. Carefully dig up a mature peony plant, making sure to keep as many roots intact as possible. Gently shake off excess soil and look for natural divisions or “eyes” on the plant – these are the points where new shoots will emerge.

Grab a clean and sharp knife, and cut the plant into sections, making sure each division has a few healthy roots and eyes. Then, replant these divisions in well-prepared soil in a sunny spot. Give them a good drink of water and watch as they settle in and grow. Don’t be surprised if it takes a year or two for the divided peonies to bloom, but when they do, it’ll be worth the wait!

With these two propagation methods, you can expand your peony collection and enjoy a blooming paradise in your garden. Whether you choose seeds or division, the joy of growing peonies will reward you with breathtaking blossoms and a sense of accomplishment. Happy gardening!

To Fertilize or Not Fertilize?

By Lois Scott, Master Gardener

Gardeners are typically highly invested in having a beautiful and productive garden and want to do what is best for their plants.  Although fertilizers are very often considered a necessary tool in providing optimal growing conditions they should be used with care and only when a soil test says they are needed.  https://www.ontario.ca/page/soil-leaf-and-petiole-tissue-and-forages-and-feed-testing-labs

Commercial fertilizers or ‘plant food’ usually list three major nutrients on their products; nitrogen, phosphorus and potassium or N-P-K.  These are very important plant nutrients but according to Linda Chalker-Scott PhD, author of the book “How Plants Work” https://horticulture.wsu.edu/people/chalker-scott/ “Our home landscape soils usually have enough phosphorus and potassium to meet our plant’s needs.  So, wouldn’t more be better?  She goes on to explain that excess levels of phosphate fertilizer can be bad for soil organisms by inhibiting the “development of the mycorrhizal relationship between fungi and plant roots causing plants to expend more energy for root growth.  Another negative aspect of excess phosphorus is that it reduces the ability of plants to take up iron, a plant micronutrient.  Excess phosphorus may also dissolve in runoff water causing blooms of harmful algae, depleting waterways of oxygen.  Organic fertilizers such as bone meal, guano and chicken manure can also create an excess of phosphate in the soil”. https://gardenprofessors.com/fertilizers-a-cautionary-tale/

When your vegetable garden and/or annuals are growing abundantly but you start seeing older leaves turning yellow, your soil may need a boost of nitrogen-rich fertilizer.  Nitrogen can become deficient in an actively growing garden and using something like alfalfa meal can replenish it.

Slow and steady may be the best approach to providing your plants with the ideal growing conditions.  According to Dr. Chalker-Scott, “using organic mulches like composts, wood chips and pine needles provide a slow feed of nutrients to the soil, the way that nature provides nutrients”.

Pruning Herbaceous Perennials “The Chelsea Chop”

By Marilyn Homewood, Master Gardener

As the spring bulbs fade and we move past our “last frost” date (or so we hope!), the perennials are starting to grow by leaps and bounds. This can lead us to consider ways to manage their size or bloom time. The Chelsea Chop is a method of pruning that limits the size of a plant, controls the flower season (which can assist in creating peak season bloom combinations) and often decreases the floppiness of a number of herbaceous perennials.

In England, the time for this type of pruning is carried out now which is around the same time as the Chelsea Flower Show is held, hence the name.  In our neck of the woods, timing would be most appropriate in late spring or very early summer when the plant has a fairly substantial amount of vegetative growth.  When I am going to do this, I like to have it done before the onset of our hotter, drier weather so that it does not stress the plant overly (on average by mid June).

Phlox chopped in front to extend blooming season

Plants that have received the Chelsea Chop are not as tall or leggy, so that they may not need supporting.  Flowers are smaller but are more numerous (removal of top shoots encourages branching of laterals).

It should be noted that you can not chop all summer blooming plants.  Woody sub-shrubs do not respond well.  If the spring has been dry, drastic pruning could shock your plants so a light hand is recommended in those years.

Many summer and autumn flowering perennials are good candidates for the chop.  These plants include:

  • Garden phox (Phlox paniculata)      
  • Yarrow (Achillea spp.)
  • Bellflower (Campanula spp)
  • Aster (Symphyotichum spp)
  • Coneflower (Echinacea spp)
  • Black-eyed Susan (Rudbeckia spp)
  • Upright Sedum Hylotelephium spp)
  • Penstemon (Penstemon spp)
  • Goldenrod (Solidago spp.)
  • Shasta daisy (Leucanthemum superbum)

This list is not complete.  Try experimenting with some of the vigorous plants in your garden.  I have a cultivar of catmint (Nepeta “Six Hills Giant”) that is large and spreading.  In one area of my garden, I prefer it to stand a little more to show the blooms to effect so I chop it back by about one third in the last week of May.

Nepeta more upright and floriferous due to chopping

The chop is done in two ways depending on the effect one desires.  In the first method, clumps of perennials are cut back by one third to one half.  This will delay flowering and keep plants shorter and more compact.  The second method involves cutting back only half of the stems on a plant, this has the effect of extending the flowering season over a longer period.  I commonly used the second method on my Garden Phlox keeping the plants in bloom for a longer time. Pruning can be done with sharp shears or with secateurs.  Garden shears are often faster when there is a large volume of pruning to be done.  Try out the chop and see if you can alter the form or flower of some of your favourites!

Resources

https://www.gardenersworld.com/plants/11-plants-to-chelsea-chop/

https://www.bethchatto.co.uk/discover/our-blog/guides/the-chelsea-chop-how-to-do-it.htm

How to Make Your Vegetable Garden Beautiful

By Cheryl Harrison, Master Gardener

I was recently browsing through a hard copy April, 2009 issue of the “Fine Gardening” magazine.  I came across an article, “Who Says Your Kitchen Garden Can’t Be Beautiful”… to see the full article check the link here.   The author, Jennifer Bartley,  planted her raised vegetable garden for the edibles that it produced but in such a way that the garden was also beautiful! 

This appeals to me because vegetable gardens are definitely not my passion.  However, I do love to eat my own fresh veggies and so I have a vegetable garden.

I have raised vegetable beds where I have intermittently practiced square foot gardening (see square foot gardening for more information).  I have also planted marigolds and nasturtiums amongst my vegetables which are pretty but also serve a purpose….the marigolds for insect control and the nasturtiums because they are edible.  For more information on flowers for your vegetable garden check the link here. I have been inching towards trying to make my vegetable garden more visually appealing without realizing it.

Ms. Bartley talks about using “four simple design tips” including:

  • Arrange bunches of bold colour.
  • Plant snug beds.
  • Smooth out the edges.
  • Define your space.

Arrange bunches of bold colour – I do a planting plan ahead of time every year.  Try grouping your vegetables, flowers, fruits and herbs together so that you have lots of colour and texture (different leaf shapes).  For example, you may edge the bed with the leafy fronds of carrot followed by beets and parsnip, maybe you plant some asparagus in the centre for the height or an obelisk in the centre and plant runner beans to climb it.  You could use yellow, green or purple bush beans to fill in the blanks.  I grew some purple Brussel sprouts last year and the leaves were spectacular!

Plant snug beds – This tip works well with raised beds.  There is no need to plant your vegies in rows.  Instead, group the vegetables together close enough to cover the soil when they are grown but not so close that they will crowd each other to prevent proper maturity.  Covering the soil helps with moisture retention and weed suppression.  Thinning your carrots allows them to mature properly and provides the delicious “thinnings” for your salad.

Smooth out the edges – Just like your flower beds, vegetable gardens are at their best when they are clean and pathways are clear.  I use straw in my pathways because it is available and my garden is wet in the spring so the straw covers the mud between the raised beds.  You could use bark mulch, gravel, brick or whatever you have. 

Define your space – We humans like a certain amount of order and proportion in our world.  If a space is too big, or too small, it can make us feel uncomfortable.  The edges of a raised bed help to define the space.  In our garden, we have several raised beds so have a defined entry to the garden and a wooden cedar fence to further define the space.  You might choose to use a pot filled with herbs at your entry, a rock or cedar stump on either side or a berry producing shrub.

It is also a great idea to have a bench in the garden where you may rest and admire your work.  Also, don’t stop with just a scarecrow … you may choose to add other garden ornaments in order to make your own beautiful vegetable garden!

Divide to Multiply

by Marilyn Homewood, Master Gardener

Despite the lingering snow, the longer days and stronger sun tell us that spring is indeed here! With that we begin to think about all of the chores we wish to accomplish. Division of perennials is a common task. So why do we divide?

Division is a common means of vegetative propagation. It is an easy way to increase the number of plants you have available. Division is also required maintenance for some perennials in order to achieve maximum bloom year after year. Although a fairly simple process, there are a couple of considerations you must make.

Time of Year

Because successful division depends on the growth of new roots, the best times of the year to divide are spring and fall when the soil is warm, water is available and stressors are at a minimum.

Many perennials can also be divided during the summer months but high temperatures mean an increase in water loss. This leads to a stressed plant so extra care must be provided to ensure the plant remain well hydrated. Also, there are some ornamental grasses that only grow new roots in the spring. These plants should not be divided in the fall as they will not grow new roots that can take up water.

Method of Division

This will depend on the type of root and crown system the plant has. No matter the type of plant, keep in mind that each plant division must contain at least one bud or growing point and a few healthy roots. If you are unsure of the what you are dealing with, there is a link to a list from the University of Minnesota at the end of this blog.

Clumpers – These plants often have fibrous root systems sometimes with rhizomes but grow many smaller crowns at the base of the original each having its own root system. This often makes for easy separation with little tissue damage. Examples include ajuga, daylily and hosta.

Runners – These are plants that spread by covering the ground by shallow horizontal stems. They root along their nodes and send up new shoots making them easily dividable by separating the root ball. Examples include bee balm and goldenrod.

Tight, woody crowns – These plants are a little more challenging to divide as the buds are often tightly packed on a hardened crown. For best results the plant must be older when split to ensure that divisions with have growing points. Examples include baptisia and peony.

Thick rhizomes or tubers – Rhizomes are technically stems that grow underground. Divided sections must contain at least one growing eye. Examples in this group would be bearded iris and dahlia. These varieties should only be divided when dormant.

Tap rooted plants –These cannot rarely be divided unless multiple tap roots have developed and are better propagated by using root cuttings. Plants in this group includes oriental poppies.

Basic Steps for Division

  1. Dig out the plant. If not replanting immediately, protect from desiccation. Removing the plant from the ground can destroy tiny root hairs (responsible for water uptake). Protecting the plant means a faster recovery on the division is replanted. I often place the root ball in a plastic bag and place in a shaded area.
  2. Separate your plant into pieces using the most appropriate method. Make sure to take generous divisions of sufficient size to ensure growing points and healthy roots.
  3. Replant, digging hole wide enough. Roots like to grow out and down so give them enough space to spread out. Be sure that the soil has good contact with the root system by firming the soil then water the division in, slowly allowing the soil to further settle against the roots.

Resources

The Science Behind Plant Division

Divide and Conquer: How to Divide and Multiply Perennials

How and When to Divide Perennials

Table for Dividing Perennials

Planting Spring Bulbs Now…Yes It Is Possible

by Carol Anderson, Master Gardener in Training

Can spring bulbs be planted in late winter/early spring and still bloom? The answer is yes!

Perhaps you forgot to plant your spring bulbs in the fall (as is customary and recommended), it is better to take your chances now (late winter) and plant the bulbs rather than waiting for next fall as bulbs may not survive out of the ground this long.

Regardless of your circumstance, if you have “stray” bulbs still in your possession and they have been stored properly…you can “force” (or “trick”) your spring bulbs into blooming.

Bulbs can be divided into two groups, those that require a chill period, and those that don’t. For those that do require chilling, this chill period is less than what the bulbs would experience in the ground in a typical Ontario winter.

To force cold hardy bulbs into bloom you must first encourage them to produce new roots. This is accomplished by keeping them cool and moist for a period of time. Dropping the temperature during the cooling period to mimic the shift in soil temperatures that occurs naturally during the winter is a very effective method to encourage rooting, but can only be accomplished if you have the right set up (separate refrigerator, etc…).

Regardless, a proper cooling period that is around 40 degrees F (4.5 degrees C) throughout should be satisfactory to stimulate rooting and subsequent flowering.

Here is what you need to do:

StepNotes
Ensure that those forgotten bulbs are still good.If they have been stored in a cool, dry and dark location (and even better in a paper bag) they should be okay. Bulbs should be plump, firm and dry. Any sign of softness or evidence of mould signals that they are likely better in the trash can.
Pot the bulbs in a well-drained potting mix according to depth requirements for that bulb. Space the bulbs much more closely than you otherwise would have (almost touching).Any pot can be used as long as there is 3-4” of soil under the bulb for rooting. It is recommended that “soil-less” potting mix is used as this allows excess moisture to drain away preventing potential growth of pathogens.
Water well and place in a cool dark spot (not freezing) for the required cooling period (see Table 1 below). Check moisture levels during this period and water if top is dry to the touch.Although the ideal rooting temperature varies, most bulbs do best if stored at 40-60 degrees F for 3-4 weeks after potting, and then 32-40 degrees for the balance of the cooling period, mimicking the actual change in seasons. However, most bulbs will do well if the temperature is maintained close to 40 degrees F for the duration of the chilling period.
Check for rooting after the recommended chilling time.Look for fleshy white roots in the bottom of the pots. Pots can stay in the cool zone until you are ready to bring them in of pot outside.
Bring the pots into the warmth/light in the house.Ideally a sunny window in a cooler room (~65 degrees F). The bulbs think that spring has arrived and will sprout and ultimately flower in ~ 2-5 weeks.
Once the bulbs sprout and flower, they can be transplanted into larger outdoor containers outside.They can also be transplanted into the garden directly at this point, maintaining the same depth
If grown in containers outside, remember that just like bulbs in the garden, allow them to completely die back (including the foliage).Bulbs need all of the energy from the stems in order to replenish and store energy in the bulb for next years growth/bloom.
Note: Bulbs can also be chilled in a refrigerator where the temperature can be turned down after 3-4 weeks to truly mimic the changing seasons. However, ensure there is no fresh fruit in the same refrigerator as the ethylene gas produced can affect flowering.

Table 1. Recommended Rooting Times by Bulb Type

Bulb TypePlanting DepthCooling Period
Anemone4 inches8-10 weeks
Crocus4 inches8-10 weeks
Hyacinth6 to 8 inches12-14 weeks
Narcissus (Daffodil)6 to 8 inches14-17 weeks
Snowdrops3 inches10-12 weeks
Tulip6 to 8 inches14-16 weeks

Keep in mind that forced bulbs planted into the garden may not bloom the subsequent year. However, in the end, it may be better to try and “trick” your spare or forgotten bulbs into blooming this spring and enjoy them rather than take the chance that they are spoiled by next Fall.

Sources: www.whiteflowerfarm.com ; www.frustratedgardener.com ; www.halcyon-landscape.co.uk