With the new year days away, resolutions for 2025 might be on your mind. Here are a few easy garden practices you might want to include in those New Year’s Resolutions.
Keep a record.
Have a file, record on your computer, write in a journal, put plant tags in a zip lock bag by year. Write on your tags the year & where you planted. It is important to know which hydrangea you planted, so if you need to research how to prune or how large it should get or if you want to purchase another, you will have that information. When you keep tags or record what annuals you plant, if it is something you want to repeat, you will have the exact variety when you go shopping the next spring. There are so many varieties of so many plants.
Keep things clean.
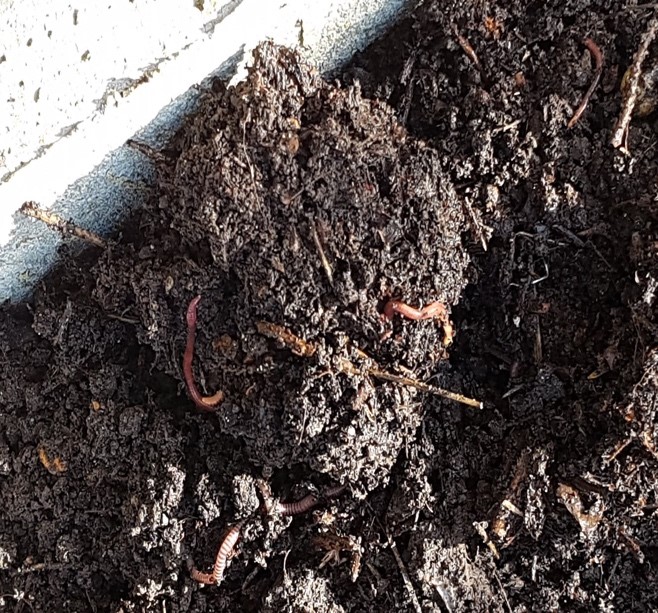
Disease is often spread through the tools we use. Have a pack of wet wipes in your tool box & clean tools after each use. Sharpen tools at the end of gardening season, so they are clean & ready to go in spring. Although you should use leaves as compost, don’t leave diseased plants in your gardens. Place them in your green garbage. Keep houseplant soil free of fallen leaves as well.
Keep yourself healthy.
Stretch before going into the garden to do manual work. Limit yourself to an amount of time that is good for you and your body and stop when your time is up….your garden will be there when you come back. Take your water bottle with you. Wear gloves & hat to protect yourself. Don’t work in the blazing sun…. bad for you & your plants.
Do your research.
Right plant in the right spot will give you more chance of success. If you plant a water loving perennial in a dry sandy spot, the plant will suffer or fail. Planting a tall annual at the front of your bed will obscure the pretty ones behind it. Use the internet, but make sure you are using reputable sites where knowledgeable gardeners are sharing good information. Look for articles written by Master Gardeners or university professors or scientists. Look for websites that end with “edu.” You can also contact Peterborough Master Gardeners online (peterboroughmastergardeners.com) to ask questions or check out what events we will be at in 2025.
Enjoy your gardens.
Remember, you garden because you get enjoyment from your hard work. Wander through your garden, peaking at the new sprouts coming up or the gorgeous flowers opening. Breath deep. Enjoy the birds, insects and wildlife that visit. Research shows that gardening and being in nature help our minds, bodies & souls.
Happy New Year! From Peterborough Master Gardeners
When I recently purchased a new home, I was too preoccupied with the beautiful lake view to truly notice some of the gardening challenges that lay ahead for me. Once I began the process of itemizing what garden treasures I had, I became acutely aware of the gardening style of my predecessor … a style that included utilizing ground cover plants to “fill in” raised beds … and apparently the faster they spread, the better!!! The challenge I have ahead of me is the removal or containment of numerous ground covers that have invaded every inch of the property. In this segment I will briefly touch on the management and/or extraction of 4 different commonly used ground covers that range from just “annoying” to outright invasive.
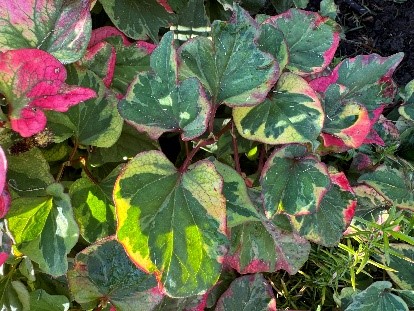
Although not considered invasive, Bugleweed can become problematic if left on its own without management, as it has a tendency to spread into adjacent lawn areas. I personally like the dark burgundy-red foliage, however, on my property it has spread across an entire garden and into the lawn. Bugleweed spreads through “shallow” underground runners with new baby plants popping up at the end of the runners. As a result, it is not impossible to remove nor contain. In the spring, I will be digging up the new plants all around the edge of the garden border and installing edging below the garden surface to stop the spread into the lawn. Periodic thinning (by digging up and removing some of the parent plants in the clump) will help to keep it manageable as well.
Yellow Archangel or Golder Deadnettle (Lamium galeobdolon):
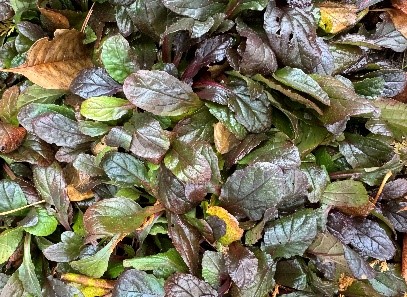
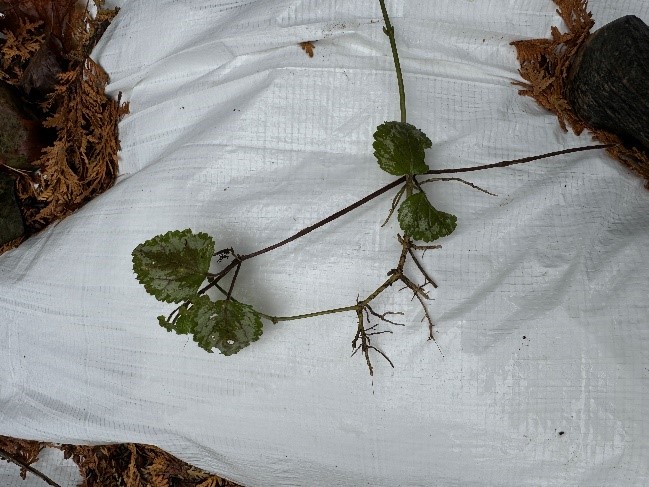
Although Lamium is a common ground cover used in many garden applications, it is invasive in Ontario. It has infested natural areas and will out-compete native groundcovers in the wild. Lamium spreads by plant fragments, rooting along the surface on the stems (see photo below). However, it also can spread by seed which can then be carried into natural environments by birds. For this reason, I will be completely removing it from several of the large shade gardens on the property and replacing with native species. Luckily it spreads along the surface and can be removed by mechanical means. This will be another spring project in the garden and once fully extracted, I will begin investigating other options such as anemone, wild ginger, bunchberry dogwood and ostrich fern for the heavily shaded areas of the garden.
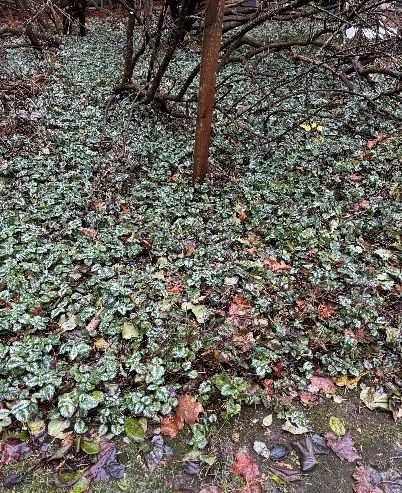
Periwinkle (Vinca minor):
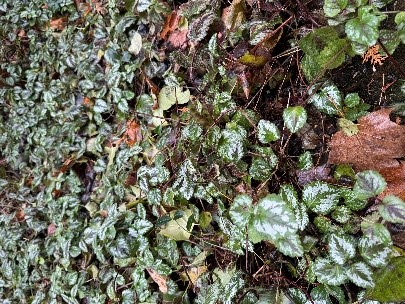
Periwinkle is a very common shade groundcover used by gardeners. It is considered to be invasive as it spreads quickly given the right climatic conditions. It poses a threat to natural biodiversity as it can out-compete other forest understory plants. However, because it spreads by rooting along the stems on the surface of the ground (stolons), it can be contained through proper management of the plant. I plan to dig up the roots and plants and cut back the excessive amount of Periwinkle in the garden, interspersing it with other shade loving plants. This will require ongoing observation and management on my part.
Chameleon Plant (Houttuynia cordata):
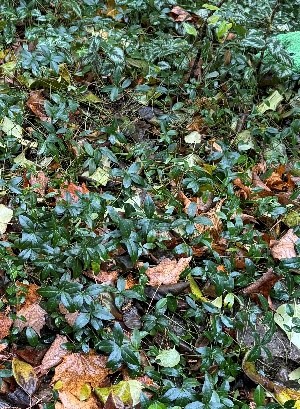
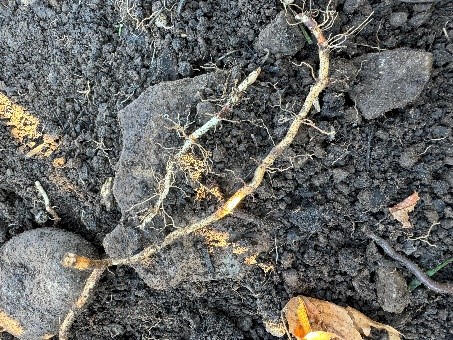
Avoid, avoid, avoid. Although an attractive groundcover, chameleon plant will invade your garden and lawn very quickly and became completely unmanageable. It is a non-native that spreads by a highly dense deep underground network of roots (rhizomes)(see pics below). Even a small segment of root left behind will live and spread for years to come making eradication very difficult. This fall, I began digging around the perimeter of the patch well outside of where the plant is visible on the surface. I dug down 12 inches and was still running into dense mats of roots!!! I then sifted through the soil to remove all plant segments and put the soil back. At this point I have just begun the process of eradication (Step 1) and will keep you posted on my progress in my blog next spring. If I need to resort to solarization (using the sun’s heat to kill the plants under plastic), then this might be the next step for me. Stay tuned!!!
If you are a fan of using plants as groundcover in your gardens and raised beds, proceed with caution. If it spreads quickly, filling in bare areas, then it is likely invasive at worst and hard to manage at best. Proceed with caution and be prepared to observe and manage the groundcover to avoid the situation where the plant literally takes over the garden, eliminating all other species. In addition, there are many native Ontario alternatives to the traditional groundcovers…try them out and enjoy (https://www.inournature.ca/native-groundcovers).
Five years ago I moved from a large rural garden outside Ottawa to a small urban lot in downtown Peterborough. One of the biggest changes in my gardening practice was making the switch from large, multi-bin composting to a single, small, black plastic bin. Over the years in my Ottawa garden I had developed a good system for adding kitchen and garden waste, turning the compost, adding leaf mulch, then spreading the compost over the gardens. Here in Peterborough, my small plastic bin was productive on a smaller scale but the raccoons, bunnies, and rats managed to chew through the plastic and serve themselves. It was more of a mess than a benefit. They defeated me. Thankfully, the municipal kitchen waste program kicked in about the time the racoons moved in, giving me a reasonable alternative for kitchen waste. My garden wasn’t getting much benefit except for the fall leaves that I mulched and put over the beds.
I realized that I really miss composting and I would prefer to be putting my own food scraps back into my garden. I started looking into composting systems for small spaces and came across bokashi composting. It’s not really composting, rather a fermentation process, and described as perfect for small spaces. Sometimes called a ‘pre-compost’ process, the fermented results are added to worm compost or outdoor compost where decomposition is completed. It’s also anaerobic so there’s no need to turn the compost or layer materials. The process is fairly fast, about two weeks for the initial fermentation step. Any kitchen waste, including meat, cheese, oil, can be added. Bokashi is a Japanese word meaning fermented organic matter; the practice originated in Japan.
The anaerobic fermentation process requires an accelerator, something like a starter for sourdough baking. It is often referred to as ‘bokashi bran’, the bran inoculated with microorganisms – fungi, lactobacteria, phytobacteria. It’s easy enough to put together a homemade system with a few 5-gallon buckets – one with a tight sealing lid – and other household items. One bucket should have holes drilled in the bottom; this bucket is placed inside the other; the holes allowing any moisture from the fermenting food to drip into the bottom bucket. Fill the top bucket with layers of small 2 – 3” kitchen scraps and bokashi bran until the bucket is almost full, cover and press with a layer of waxed paper, a cloth, or even some foam before sealing the bucket with the lid and leaving for a few weeks to ferment. After about one week some white mold with develop, after two weeks the bucket will smell like pickles and the fermented material can be buried in the garden about 6-12”deep. It will decompose fairly quickly in the garden and planting can be done around the fermented trough after a few weeks. Alternatively, it can be added to the compost heap or even into a large tub of soil indoors where it will continue to decompose. Any liquid – the ‘tea’ in the bottom bucket can be added to the compost or garden as well.
Bokashi bran is widely available online and at some garden centres; it’s also possible to buy a kit that includes bran, several buckets, and instructions. The buckets in the kits often have a tap and reservoir so the ‘tea’ can be collected at the bottom of the bucket. Like sourdough starter, the bran can be made at home, though some starters work more quickly than others. It’s worth experimenting to test a few products and compare results. I’ve learned that a few cities in western Canada have municipal bokashi programs so it is possible in colder climates. On a large scale, it is also being trialled at Sissinghurst, a famous garden in the UK.
The image on the left shows bokashi bran sprinkled on kitchen scraps.
The image on the right shows soil with fermented kitchen scraps after a few weeks in soil.
I confess to LOVING this time of year. The heat and humidity of the summer is gone, and our gardens are still looking lovely. Although my established gardens are beginning the slow process of fading and getting settled in for their winter sleep, fall is a wonderful time to plant for so many reasons.
They may not look perfect but they’ll be going to sleep soon and will wake up next spring in their new homes.
You Have Time
Unlike your annuals or tender perennials, most perennials (and native plants in particular) can be planted in September and well into October (depending on where you live in Ontario).
Smaller trees and shrubs in particular are fine to plant once they have gone dormant and leaves have dropped, as long as they are well watered until freeze up.
I love the fall as it seems less frenzied than the spring gardening season, with time to reflect on the summer that has passed. Unlike spring and summer, temperatures moderate during fall, not only for the plants but also for us! It’s terrific working weather – you start with your sweatshirt on in the morning, but by the afternoon the temperatures have warmed up considerably and you might be in a t-shirt. During July and August I can only work in my gardens in the early morning or late evening due to the heat. Your plants don’t like to be planted in the heat of summer either. So fall is my happy time.
Assessing and Dividing
Fall is the perfect time to look around your garden – do you have holes, bad-looking spots, poorly performing plants? Are there places that need something new or something moved?
I need to revamp this garden and think about moving some perennials around.
Fall is a great time to divide overgrown perennials, especially those that bloom in the spring. I just dug up all of my fragrant hostas the other day and moved them to a new location so that I can expand my shade native plant garden. Next up – planting a hedgerow.
Hostas at the front of the bed were removed to put in more native plants
Warmer Soil Temperatures
During fall, soil temperatures remain warm from the summer sun, so conditions are ideal for root growth.
Cooler Air Temperatures
Gone is the humidity and heat of the summer and the unpredictability of spring weather (and worries about frost). Daytime high temperatures are nice and there is less water evaporation from leaves.
More Rain, Less Work
With fall also comes more frequent rainfall and less need to water new plantings. There aren’t crazy swings in moisture levels – fall rains are warm and welcome and moisture levels are perfectly balanced, encouraging root growth.
When you plant in spring and early summer, the weather can be very variable, especially with regard to temperatures and rainfall. The soil is still cool, and plants take a while to get established.
Fall rains rejuvenate our gardens
Some Challenges
It can be challenging to plant new perennials in the fall – stock and selections at nurseries may be less (however the prices may be better!) and some plants have been sitting in plastic pots for months and look less than perfect. Be sure to purchase new plants at a nursery that takes good care of their plants over the gardening season (that generally does not include big box stores – shop local where you can) and pull the plant out and check for a healthy root mass in the pot.
Ideally, give your plants at least 6 weeks of optimal growing weather of fall before the colder winds start blowing in.
One Last Note
It’s a really good idea to add mulch to your fall gardening – it helps insulate the ground and maintains warm soil temperatures even during early winters. So, you are providing a nice warm area for young plants to establish their root systems before the frost.
A Special Note on Native Plants
They might look a little sad in the nursery, with not much top growth and it may be browning. However, under that soil are roots, lots of roots, and that is what you are buying when you purchase a native plant.
Although a bit brown on top, this native plant has great roots just ready for a new home.
So when you see a small three inch plant with roots coming out the bottom, recognize that it’s the perfect size to plant, and don’t worry about its ability to survive the winter.
Sleep, Creep, Leap
You may have heard the phrase “sleep, creep, leap” with respect to many plants, and especially native plants. Unlike most perennials, native plants just want to get their roots established during the first year (which is why they appear to ‘sleep’).
So if you plant in the fall, the roots are growing furiously, pushing south to grab moisture and nutrients to sustain them through the heat of summer next year. In the second year native plants creep, with more top growth and maybe even flowering. Watch out in the third year! They leap to their full size and blooming capacity.
So, if you can plant in the fall, the sooner your native plants can put down their roots in their new home, and be ready to grow in the spring season.
Bottom line? Fall weather is optimal for growth.
The perfect combo of warm soil temperatures near the root and cooler air temperatures on the top offer the ideal growing conditions for any new plantings or dividing existing perennials.
So get out in your gardens! (It’s also time to think about planting your spring flowering bulbs. Check out Master Gardener Cheryl Harrison’s excellent blog on how to do this.
Welcome to the second edition of Garden Jeopardy featuring a number of smaller native trees.
I do love trees and in my suburban garden the opportunity to grow multiple smaller varieties is appealing. The choices are many and discovering an interesting characteristic or benefit about a particular species inspires my choices. Hopefully this edition will be inspiring for gardeners looking to add more trees to their gardens this fall. You can confirm your responses at the end.
A shade-tolerant tree with smooth, blue-tinged bark and a fluted trunk sometimes known as ‘musclewood’.
A tree that bears white, showy clusters of flowers in June or July that develop into orange or red fruits that are persistant throughout the winter and much loved by birds.
A small evergreen tree that is resistant to insects and rot, rarely requires pruning and produces dark blue, berry-like cones that are a food source for Cedar Waxwings.
A species at risk tree for part to full shade that is a host tree for the Giant Swallowtail butterfly, the largest butterfly found in Canada.
An understory tree with branches in distinct layers that produces clusters of white flowers in spring, red leaves in the fall and is an important butterfly larval host.
A tough, adaptable and urban friendly tree with a distinct upright trunk, wide-spreading crown and the densest Canadian wood.
A tree bearing pea-flower shaped intense pink flowers in spring prior to leafing out, that is not native to Peterborough but will thrive here in a protected area.
An excellent Peterborough source for the aforementioned trees.
A bedraggled Giant Swallowtail in my garden.
What is the Blue Beech; Carpinus caroliniana?
What is the American Mountain Ash; Sorbus americana?
What is the Eastern Redcedar; Juniperus virginiana?
What is the Common Hoptree; Ptelea trifoliata?
What is the Alternate-Leaf Dogwood; Cornus alternifolia?
What is the Ironwood, Hop-hornbeam; Ostrya virginiana?
In the world of vegetable gardening, the fall garden starts about mid to late summer. This is an unusual time to think about starting seedlings or putting seeds in the ground for many.
Busy summer schedules, hot dry weather and maybe even lack of interest in the garden at this point in the year make the fall garden less popular. Perhaps gardening is not a project that’s high on your list in the middle of summer vacation.
Here is why I think you should do it anyway!
A chance to try some cool weather crops that don’t like the heat of summer.
Many fall garden vegetables taste better or sweeter in the cooler weather or after a frost.
Tasty herbs that can be enjoyed fresh and brought inside for winter.
Making use of available space after harvesting a summer crop.
Fewer bugs and weeds to contend with (in theory).
Helps the garden to look fresh and tidy and less like a shaggy jungle this time of year (if you’re anything like me).
How To Get Started
In general, you learn the first frost date for your area and count backwards based on the number of days your fall garden varieties need to reach maturity. In the Peterborough area, we can expect our first frost around the end of September or early October. This means there are about 40-50 days to work with from the day of this post (mid-August). Keep in mind, a lot of fall- friendly garden varieties can easily survive light frosts. This means you have more than enough time to grow some delicious food.
Here are some sources to help determine your growing zone’s last frost date:
Below is a list of plants that can be harvested 40-50 days from germination and tolerate light frosts. (The numbers can vary depending on the variety. Choose short season varieties if possible.)
Spinach
Lettuce (greens, not head)
Bok Choy
Cilantro
Turnips
Radishes
Green Onions
Mustard Greens
Swiss Chard
Arugula
This website has some more unique varieties to suggest:
Additionally, here are some vegetables that take longer to reach maturity but can also handle light frosts:
Carrots (70-80 days, depending on the variety – can be stored in the cool soil until snow comes)
Leeks (100-120 days – can be harvested as early as 60 days)
Parsley (60-70 days – these can be slow to germinate, so if you can find a plant, perfect!)
Some late season carrot seedlings popping up in the bed I recently harvested my garlic from.
You can also consider some cool weather crops with a slightly longer growing time by starting your fall garden a little earlier next year. Examples: Broccoli, Cauliflower, Cabbage, Potatoes.
Get Planting!
You can start your seeds in trays in a sunny window or sow right into the garden, outdoor pot, window box, etc.
Amend your soil with compost if you have it available.
Plant your seeds and water daily to ensure the seeds have a good chance to germinate. Decrease the frequency as sprouts appear.
Don’t forget to leave space to plant your garlic in the fall!
Trouble Seed Sourcing in Late Summer?
Use any extra seeds from spring.
Look for seed sales as companies look to clear out their seeds that can’t be sold next year.
Learn to seed save. It’s easier than you might think!
Allow your spring/summer plants to self seed. Ex. kale, cilantro, lettuce, spinach, etc.
Some kale seed pods from my spring plants that I can use for a fall crop.
A few trays of greens to go out into the garden for fall eating.
Have you ever looked out at your lawn and wondered why it is not as lush and green as the neighbors? Have you tried seeding and fertilizing your lawn but are still unhappy with the results? Here are some considerations that may help you create a lawn management plan that is successful in helping you achieve what you are looking for. Keep in mind that a healthy thick lawn will reduce your lawn susceptibility to pests and disease…so keep it healthy! And if you suspect an insect infestation such as chinch bugs (see Figure 1), web worms or grubs, you must endeavor to address this first. Similarly, a lawn with a heavy weed infestation requires special treatment, perhaps even a full lawn “renovation”, prior to a lawn management plan being initiated.
Watering: One of the most misunderstood, yet critical, elements of any lawn management plan is ensuring that your lawn receives the proper amount of water. A specific watering schedule cannot be provided given that each lawn is subject to different environmental conditions impacting its’ watering requirements. For example, the lawns facing south/west will dry out very quickly, depending upon the amount of shade. In contrast, lawns facing north/east will tend to hold moisture much longer and will require less frequent watering. The general rule of thumb is that a lawn typically requires about 1” (30cm or 300mm) of water per week to stay healthy. If there is sufficient rainfall and overcast days, no watering may be required 😊. However, if you determine that watering is required (soil feels dry several inches below grade), the following guidelines should be followed:
1. Sod should not be watered in the middle of the day. Sunlight on a freshly watered lawn will burn the grass blades as the water droplets act as a magnifying glass for the suns’ rays. Sod is best watered in the early morning. Watering grass at night leads to infestations with grubs and other sod loving parasites and can facilitate fungus spores to develop.
2. It is important to water your lawn deeply and less frequently. Why? It is very important to encourage grass to grow roots that are deep in the soil. Frequent light watering encourages superficial roots to develop and eventually the creation of grass that is not drought tolerant. A good rule of thumb…a sprinkler set for 30 minutes should provide the necessary moisture to thoroughly wet the sod 4-6” below the surface.
3. Keep in mind…once your lawn is beginning to turn brown…it is too late to start watering it!! Try to stay on top of watering and watch the weather…hopefully mother nature will help you out!
Mowing and “Grass-cycling”: Under normal conditions, an established lawn should be mowed with the blades at a height of 2½ – 3” with sharp mower blades. For many, this feels too long. However, removing too much of the grass blade puts the lawn into a state of stress making it susceptible to disease and insect infestations. Under normal circumstances, grass clippings can be mulched and left on the lawn (grass-cycling) as a source of additional nutrients, protection from dehydration and to attract earthworms that will naturally improve both aeration and water filtration. However, in the Spring IF the grass is heavy with moisture, and the lawn is growing quickly, you may wish to remove grass clippings.
Dethatching (deep raking): A lawn with a high percentage of fescue grass will benefit from dethatching – the removal of a thick layer of dead grass and roots that have not decomposed. This should be done if thatch is present and before aeration and topdressing the lawn.
Aeration & Topdressing and “Grass-cycling”: Grass needs nutrients and your lawn might benefit from adding a thin layer of top-dressing (compost) on the surface, particularly if the soil has a lot of clay. A lawn that has a large amount of clay will need to be top-dressed regularly with compost to provide both a steady supply of nutrients, and to improve the soil texture and water/nutrient holding capacity over time. This can be done in the spring and fall. Aerating with a core aerator, topdressing with compost and then raking will break up the cores and improve the penetration of the compost into the soil.
Fertilization: To maintain healthy lawns, 1.5-2.0kg/100m2 of nitrogen is recommended. If using a slow-release fertilizer, it can be applied twice in the growing season (spring, late summer/early fall), with a third application of specially formulated “winter” fertilizer in late fall. Keep in mind that grass grown in the shade requires ~ 50% less nitrogen than a lawn in the sun, so it is advisable to reduce the fertilization rate by one half in the shady areas of the lawn.
Overseeding: If your lawn could benefit from thickening, overseeding should be done in the late summer/early fall when there is less competition, and the roots can take hold.
In the end, if you desire a beautiful and lush lawn, with a little bit of work and a good management plan, you can achieve this. If your lawn is suffering from a significant weed infestation, or poor soil, you may require a full “renovation” – stay tuned for my next in the series to learn about what to do!
For many gardeners, deer are a constant problem in the garden. They can destroy a hosta display or your treasured roses in an afternoon. In my neighbourhood rabbits are plentiful and they eat many kinds of plants from tulips to hosta. I have chicken wire around the base of most of my clematis. I fence off my euonymus, willow and Rose of Sharon in the winter with fencing high enough to be well above the snow line. I have my vegetable garden fenced and try to remember to keep the gates closed. (although, this spring a determined female rabbit learned how to jump into my fenced compost pile and then into the vegetable garden where she decided to make a nest). I spray my tulips, roses and anything else that the critters start munching on with a product that repels deer and rabbits. It is stinky and washes off if there is heavy rain so needs to be resprayed for best results. I also use a product called Hen Manure to deter squirrels and chipmunks. Sprinkling hen manure in your freshly planted annual containers, will keep these creatures from digging. And it is an organic fertilizer too. I also cover a raised vegetable garden bed with a row cover which looks and feels like a bridal veil. It allows sun and rain in, but keeps squirrels, chipmunks and pests like beetles out and can be good for light frosts. Doesn’t look pretty but it works.
Rabbits & deer generally don’t like plants that have a fragrance. Think of mints, marigolds, sages and monardas. Rough or fuzzy leaf textures are also characteristics that deer and rabbits don’t enjoy.
There are some lovely perennials available that fit in those categories. Check plant tags as many growers are now listing if the plant is resistant to deer and rabbits.
Below, I have listed some plants that are generally resistant.
Perennials for Sun
Monkshood Aconitum carmichaelii
Geranium Geranium macrorrhizum
Peony Paeonia officinalis
False Indigo Baptisia australis
Salvia Salvis x sylvestris
Yarrow Achillea millefolium
Lavender Lavandula augustifolia
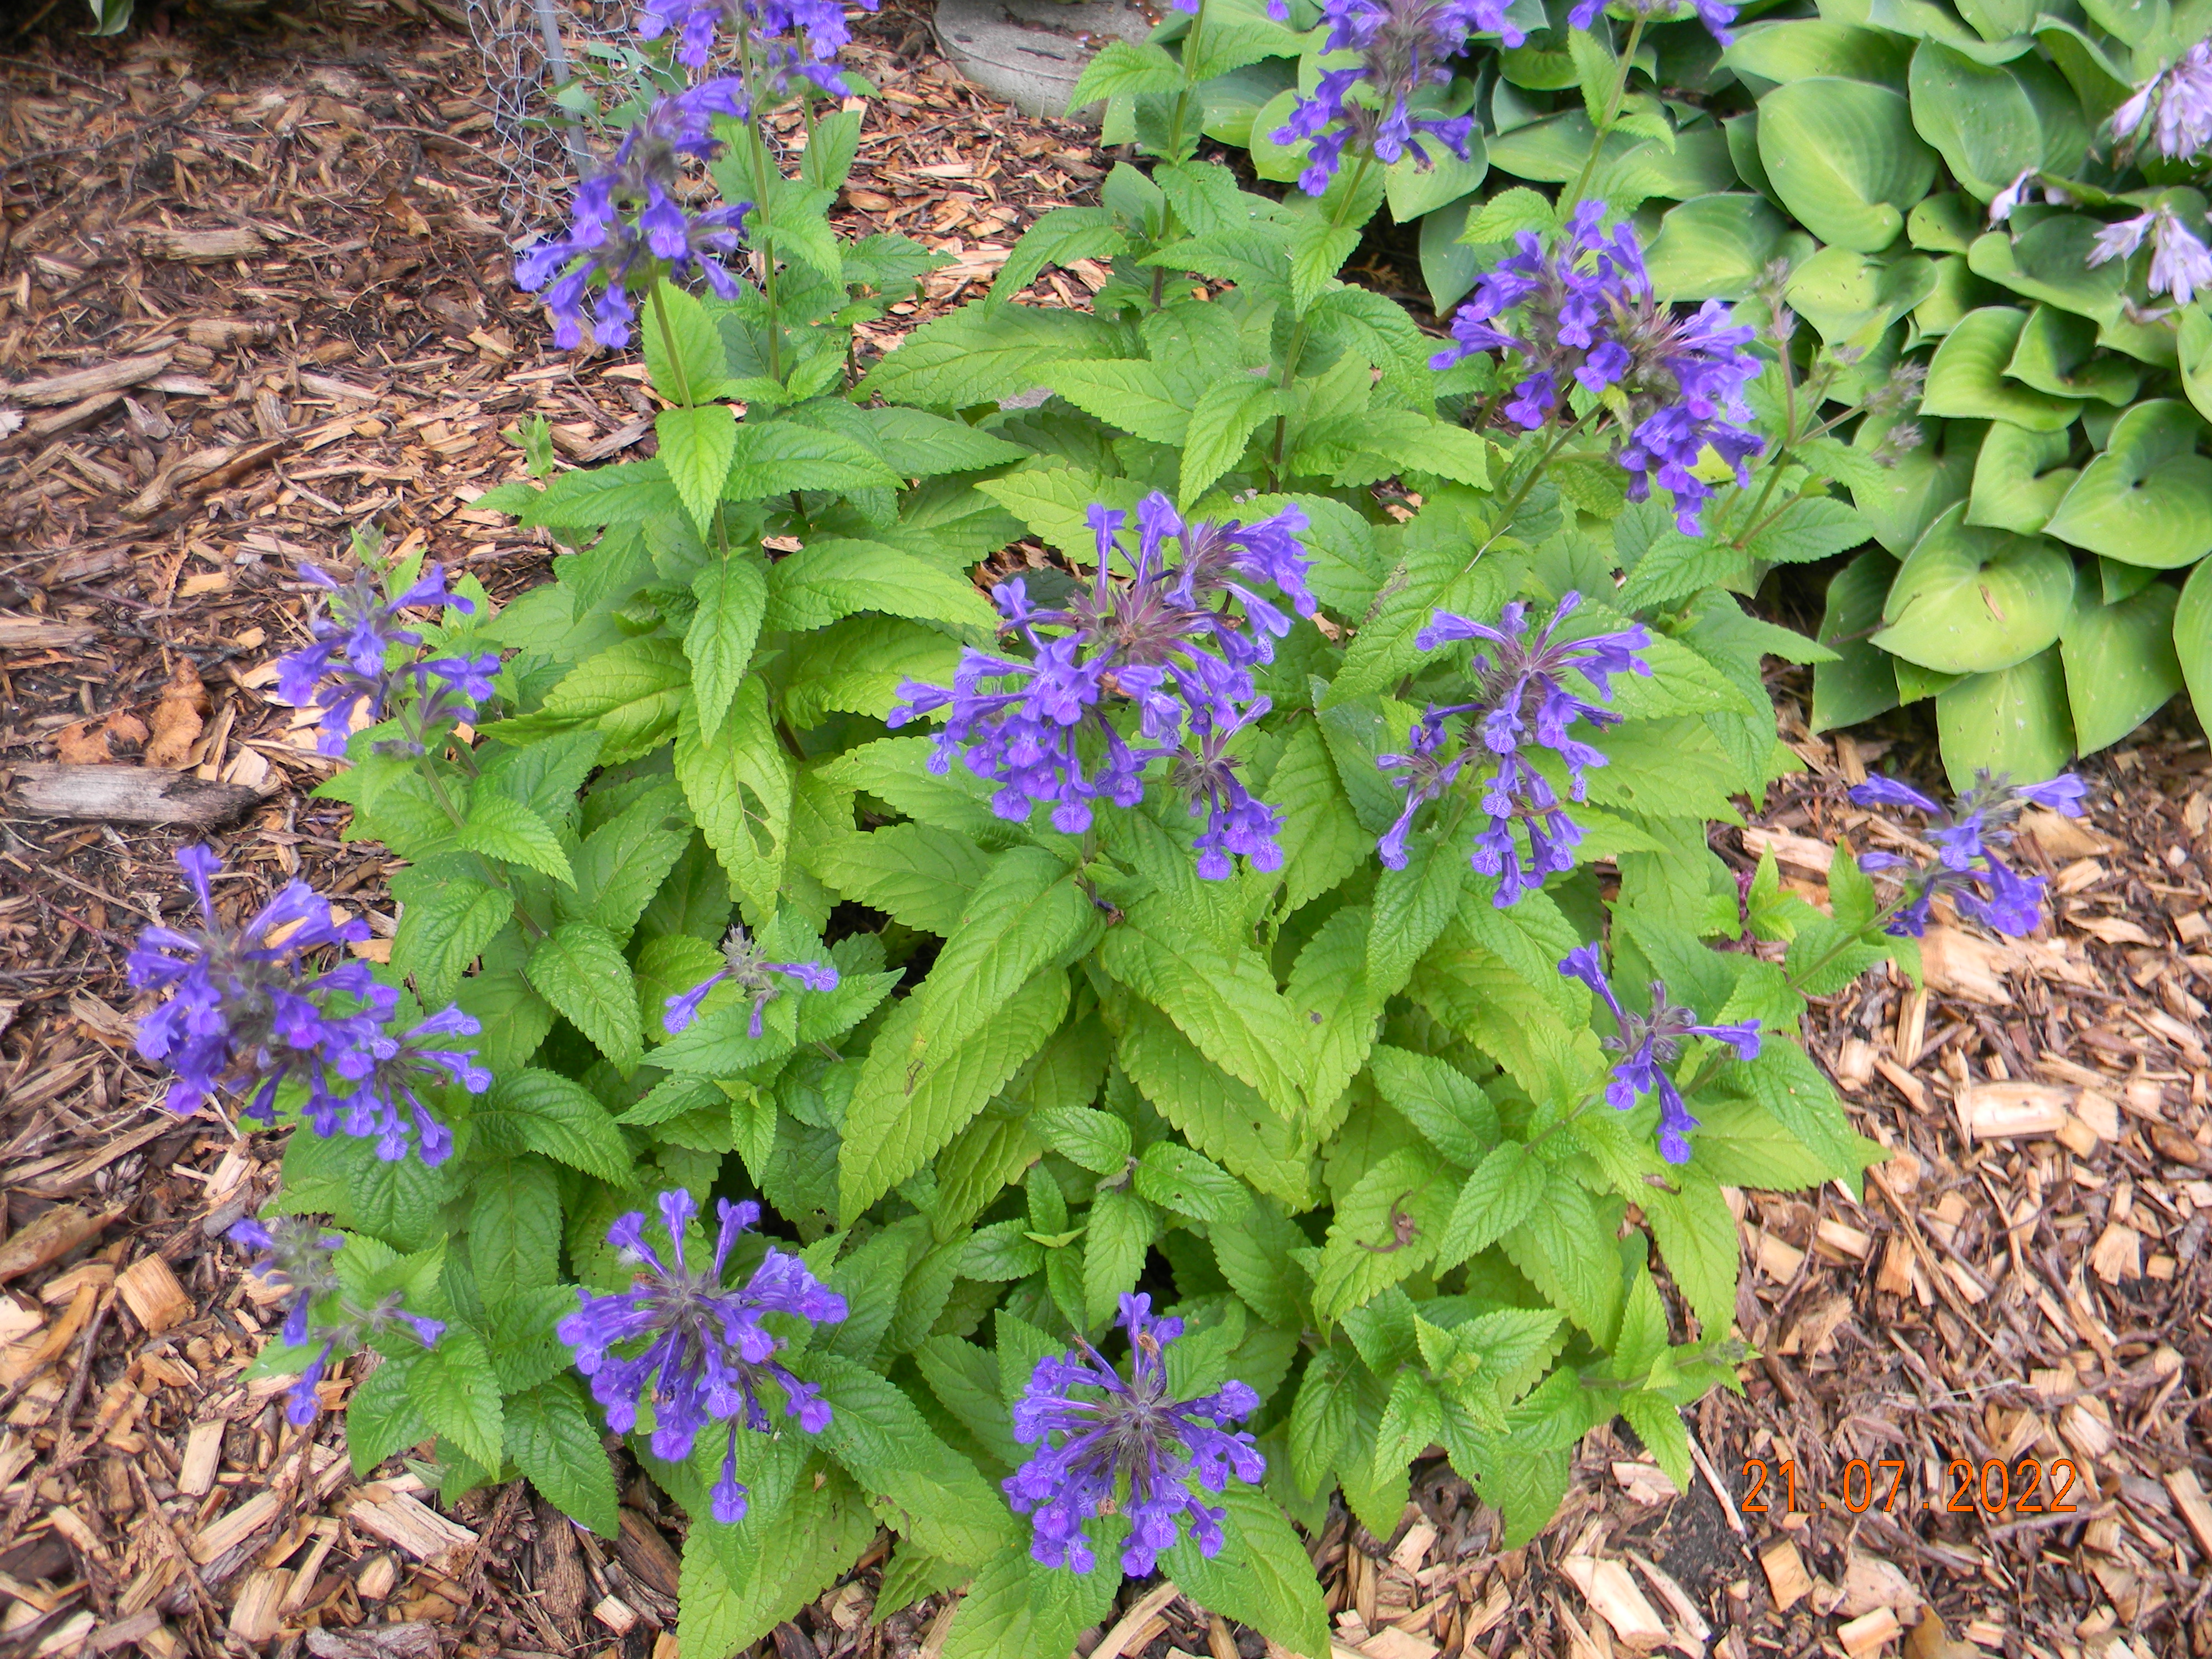
Catmint Nepeta
BeeBalm Monarda
Russian Sage Perovskia atriplicifolia
Amsonia Amsonia
Grasses – Karl Foerster, Big Bluestem, Northern Sea Oats, Blue Fescue, Blue Oat Grass
[Above, clockwise from left: Astilbe, yarrow, sage, monarda]
Perennials for Shade
Bleeding Heart Dicentra eximia
Hellebore Helleborus orientalis
Lady’s Mantle Alchemilla mollis
Snakeroot Actaea racemosa
Spurge Euphorbia polychroma
Astilbe Astilbe x arendsii
Japanese Spurge Pachysandra terminalis
Barrenwort Epimedium graniflorum
Bugloss Brunnera macrophylla
Hakone Grass Hakonechloa macra
Lungwort Pulmonaria
Sedge Carex morrowii
Ferns – Christmas, Cinnamon, Ostrich, Autumn, Japanese Painted
[Above, clockwise from left: Rabbit, geranium, Japanese painted fern, bleeding heart]
There are some shrubs that deer and rabbits usually don’t bother with. They include Weigela (Weigela florida), Spirea (Spiraea japonica) and Potentilla (Potentilla fruticosa).
Bulbs like Daffodils (Narcissus), Snowdrop (Galanthus nivalis), Ornamental Onion (Allium) and Autumn Crocus (Colchicum) are not favourites for deer.
Annuals like Dusty Miller (Senecio cineraria), Licorice (Helichrysum petiolare), Caster Bean (Ricinus communis) and Marigold (Tagetes tenuifolia) have rough or fuzzy leaves or a strong smell that deer or rabbits don’t like.
Herbs like Oregano, Rosemary, Thyme, Sage & Basil have a fragrance creatures stay away from also.
The plants listed above are generally resistant, but are not guaranteed to be deer and rabbit proof. If food is scarce or the creature is adventurous, they will try anything. Sometimes, rabbits just nip the flowers and leave them (grrrrr!)
Having wildlife in the garden is lovely and we enjoy watching our rabbits. But it is nice to have enough of the right plants that will survive and give a nice display of flowers. Balance in nature.
As the summer heat ramps up in Ontario, it’s time to get your garden ready to thrive in the hotter summer months. Here are some essential tips to ensure your garden stays healthy and vibrant despite the scorching temperatures that are most likely to hit us by the end of the month.
First, make sure to water your perennial plants deeply but less frequently now to get them used to what’s ahead. Early morning is the best time to water as it allows the moisture to penetrate the soil before the sun evaporates it. Consider investing in a drip or spray irrigation system to deliver water directly to the roots or lower portions of the plants, minimizing water loss through evaporation. Collect water in rain barrels for hand watering.
Newly planted trees, natives and other plants will begin to need extra support to make it through our harsh summer, and it is often a time that gardeners also struggle. Gardening seems so much easier in the spring, when everything is new and fresh, but do not give up when the temperature climbs and climbs! Summer gardening is so important to having a good garden year-round and working outside in the summer has its rewards too.
Native and non-native plants that have been planted this spring are probably not well enough established to be on their own this first summer, so they will need supplemental water this summer. For this purpose, I’ve purchased a couple dozen “pop bottle watering spikes” that screw onto a 2L pop bottle. Cut the bottom off of the bottle, put the spike on the threaded end and invert into the soil. The spike delivers water at a drip pace — I place these bottle waterers at the base of every new addition each year. By next summer, they can usually handle the dry conditions in our area a little better.
Version 1.0.0
Newly planted trees and shrubs get the “holey pail” treatment. Source a small pail like the ones that kitty litter comes in, and drill about 5 holes in the base. Place a pail beside each new tree or shrub. When temperatures soar and rain is scarce, drop a couple of litres of water into the pail. It will trickle out into the soil around the tree at a slow speed that will allow the tree to utilize the water.
Mulching is another crucial step in preparing your garden for the summer heat. Apply a layer of organic mulch on your flower beds and possibly a cheaper alternative such as straw or wood chips around your veggie beds to help retain moisture in the soil, regulate soil temperature, and suppress weed growth.
Don’t forget your trees! Apply 2 to 3 inches (5-7cm) of mulch around your trees, keeping it at least a few inches away from the trunk, avoiding mulch that has been artificially dyed.
Lastly, keep an eye out for pests and diseases, which tend to thrive in warm, humid conditions. Regularly inspect your plants for any signs of trouble and take appropriate measures to prevent infestations.
By following these simple tips, you can ensure your garden stays as lush and thriving as possible throughout the hot summer months which are just around the corner!
After reclaiming the full width of a garden path, I realized I needed to deal with the erosion of soil from the adjacent garden area. Erosion is a problem for me in a few other areas such as the public sidewalk which has garden sloping down to it. Not only soil goes sliding but after a heavy rain I find myself in the neighbour’s driveway apron sweeping up my mulch.
So, I have two goals. The first goal is the need for additional plants to better hold the soil and the second goal is for these plants to be a green mulch reducing the need for wood mulch in these sloped areas. MG Laura Gardner discusses the idea of green mulch in her blog from May 2023 https://peterboroughmastergardeners.com/2023/05/08/mulling-about-mulches/ . In Laura’s blog, green mulch is described by Benjamin Vogt as being a lower plant layer that covers 90% of the ground. To meet my first goal, I need to expand my plantings of fibrous rooted plants. Fibrous roots are the opposite of tap roots (like a carrot) and are most effective at binding the soil. When looking for fibrous rooted plants good choices are native grasses, native sedges (Carex), and most colonizing native wild flowers. For this blog I am referring to herbaceous plants but there are many native shrubs and trees that are excellent at preventing erosion. https://watersheds.ca/how-native-plants-help-with-erosion-control/
Some parts of these sloped areas are working well for me with plant material effectively holding soil and effectively mulching the soil. For other areas I need denser plantings for both sunny and dry, semi-shade and moist. Prairie Smoke (Geum triflorum) and Pussytoes (Antennaria neglecta) are two favourite native plants I have that may get used together in a spot that is sunny and dry. I am expanding my use of the native grass Prairie Dropseed (Sporobolus heterolepsis) along the sidewalk and a sedge (Carex), yet to be chosen, will underplant my Culver’s Root (Veronicastrum virginicum). Wild Ginger (Asarum canadense) and Foamflower (Tiarella stolonifera) will be expanded to cover and hold soil in a shadier, moist area. These native plant choices will all work to hold the soil and act as a green mulch.