Last April, I wrote an article entitled “How do my outdoor plants survive the winter?” Although not as popular a subject topic, a quick dip into the world of all things creepy crawly when the temperatures plummet may be of similar interest.
When winter hits our region, we head indoors, but what about insects? These creatures have incredible ways of making it through the cold winter months. So much for my favourite October joke: “What’s the best thing about October? The mosquitoes are dead.” True, but also not for long.
Some insects, like ladybugs and cluster flies, find shelter and enter a hibernation-like state called diapause. They slow their bodies down to a near standstill, using very little energy while tucked away in cracks, under leaves, or even in homes. Those sneaky lady beetles seem to be able to find a way into houses too!
Other insects, like woolly bear caterpillars, use natural antifreeze. Their bodies produce special chemicals called cryoprotectants, which prevent their cells from freezing. This allows them to survive temperatures well below zero.
Some insects, like mosquitoes, leave behind their eggs, which are tough enough to endure the cold. Come spring, these eggs hatch, and a new generation begins. Sigh. Similarly, some butterflies, like the Mourning Cloak, overwinter as adults in tree bark or woodpiles, waking up early in the spring.
For honeybees, survival is a team effort. They cluster together in their hives, shivering their bodies to create heat and keep the colony warm.
And then there are insects like crickets, which die off in the fall, leaving behind their eggs to carry on their legacy.
Winter may seem quiet, but beneath the snow, insects are surviving in remarkable ways. Whether through hibernation, antifreeze, or teamwork, our local insects prove how tough and adaptable nature can be—even in the coldest months. For some, like pollinators, that’s great news. For others, like the red lily beetle, the Japanese beetle, and aphids, we simply have to grin and bear it.
As we celebrate Thanksgiving this year, we should think about what we are thankful for in our gardens. I recently asked my Master Gardener friends to share what they are thankful for.
Rainfall – Everyone was happy with the amount of rain we received this year. According to the Canada Weather Stats website (peterborough.weatherstats.ca), our rainfall for the period from July 2023 to June 2024 was over 100mm more than the same months in the previous year. And we seemed to have it at the right times. Although rain is great, it is important to remember that watering still needs to be done, especially containers of annuals and vegetables and hanging pots. When plants get big and fill the pots, the rain may not get down into the soil which is where you want the moisture to go.
Good educational information – As Master Gardeners, we use scientifically-based resources for answering gardening-related questions. Use the extension “.edu” or “.sci” in the search box when you are googling. There is so much information out there, but we need to be sure it is the correct information. Master Gardeners are always asking questions, learning and sharing their knowledge.
Healthy Gardens – Feeding the soil is a big part of having a healthy garden. Putting good quality topsoil in a new garden area, and adding organic compost annually will help your soil. Mulching holds the moisture and suppresses weeds. Leaves are great for mulching on your perennial beds. Free local wood chips supplied by Ontario Hydro were a great mulch for one gardener.
Good Harvests – Vegetable gardens were bountiful this year. Thanks to an exceptional harvest of peppers, tomatoes and beets, there are stuffed peppers in the freezer, tomato sauce and salsa and pickled beets in the cupboard. Carrots and brussel sprouts grew well and herbs like parsley and rosemary were huge and healthy. One gardener reported two butternut squash plants produced 20 squash!
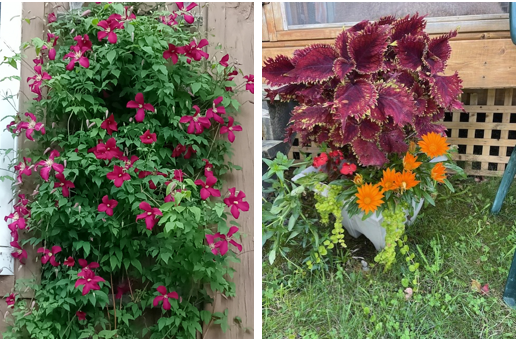
Beautiful Flowers – With all the rain and heat, hostas were huge, sunflowers towering, clematis bloomed long and luscious. Everything seemed to be big and beautiful and most bloomed earlier and longer than normal. Container annuals like coleus grew huge and healthy.
Nature in the Garden – Master Gardeners actively promote native plants in the garden to encourage more pollinators. Integrating natives amongst your cultivars works well if you don’t want that ‘wild’ appearance many natives provide. Several gardeners reported visits from birds like Chickadees, American Robins and House Wrens that made their nests and raised their babies in their gardens. Cedar Waxwings, White-Throated Sparrows, Song Sparrows, Dark-Eyed Juncos, American Goldfinches, Northern Cardinals, Hairy Woodpecker, and a Common Yellowthroat came to visit and forage. Birds are great for the garden as they will eat many pests. And they give us enjoyment.
I am trying to be thankful for the skunk who has been visiting my yard and digging grubs. My yard looks like a minefield, but it is healthier!
What are you thankful for in your garden?
Happy Thanksgiving!
And thank you to MJ, Gladys, Carol, Laura, Chris, Jenn, Silvia, Cheryl, Deb, Grant, & Mary Kathleen.
As fall arrives, many gardeners notice an increase in earwigs lurking around their plants. These small, dark brown insects with pincers on their tails can look a bit intimidating, but their impact on your garden is a mix of good and bad.
Earwigs get their name from the old European myth that they crawl into your ears and tunnel into your brain to lay their eggs while you are sleeping. YIKES! Lucky for us, this old wives’ tale is not true. But the pincers on the back on an earwig’s body are still enough to freak people out.
Earwigs are most active at night and can often be found hiding in damp, dark spots during the day. In the fall, they seek shelter from the cooler weather, often in garden beds, under mulch, or in piles of leaves. While earwigs have a bad reputation for munching on plants, their role in the garden isn’t all negative.
On the downside, earwigs do eat leaves, flowers, and vegetables like lettuce, strawberries, and soft fruits, which can cause damage to your garden. However, they don’t typically cause significant harm unless their population is out of control like in a season that’s wetter than normal.
On the positive side, earwigs help clean up the garden by eating decaying plant matter and even feeding on pests like aphids and mites. This makes them useful in keeping some pest populations down naturally. Earwigs will even eat other earwigs!
If you find earwigs causing damage, there are simple ways to manage them. Traps made from rolled-up newspaper or damp cardboard can attract them overnight. In the morning, simply dispose of the traps.
While earwigs can cause some harm to plants, they also play a helpful role in garden cleanup and pest control, making them a creature worth understanding in the fall garden ecosystem.
When I was asked to put together an article on seed saving for our local Horticultural Society’s newsletter, I thought it would also be a good topic for this forum. Seed collecting can be a fun activity. You can share the seeds with other gardeners and trade for some varieties you don’t have in your garden.
Some things are quite obvious; like pumpkin seeds and squash seeds that you save, dry, and keep for the next year. Vegetable seeds too can be saved, like beans and peas when they get too ripe to eat; let them mature on the plants until the pods are dry and harvest the seeds.
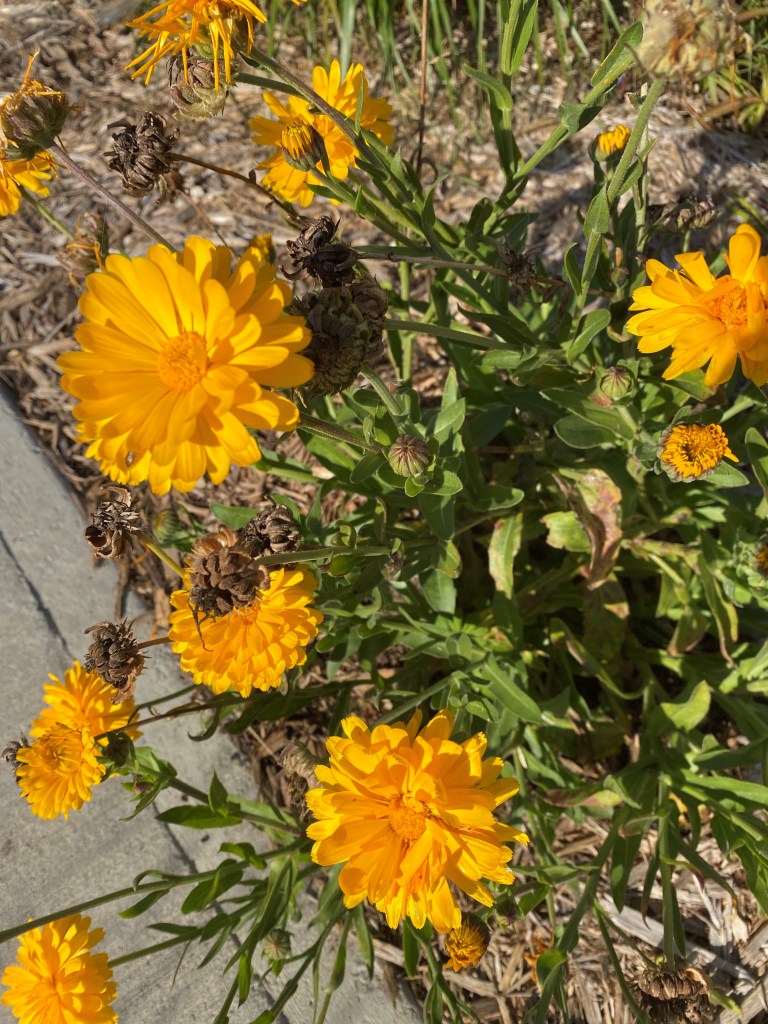
By not deadheading some flowers, you can let them go to seed and collect the seeds when the flower heads have dried. Many plants will self-seed like the dandelions we see all over our lawns. By collecting seeds we have some control over where they will grow.
For the most part, the majority of plants flower yearly, however there are those that only come into flower every other year like Hollyhocks and members of the carrot family. This can be frustrating if you forget where you have seeds planted or scattered like I do. This link describes types of plants.
For most seeds, we don’t have to do anything else except collect the seeds, and plant them the following year. Others do need special treatment:
Fermentation – A process where the outer gelatinous “skin” (my term) is removed from the seeds of such vegetables as tomatoes and cucumbers.
Scarification – Some seed shells are so hard that they need to be abraded or sanded/scratched to allow moisture to get into the seed germ.
Stratification – Some seeds need a period of cold to allow them to germinate. Winter sowing is a form of this strategy.
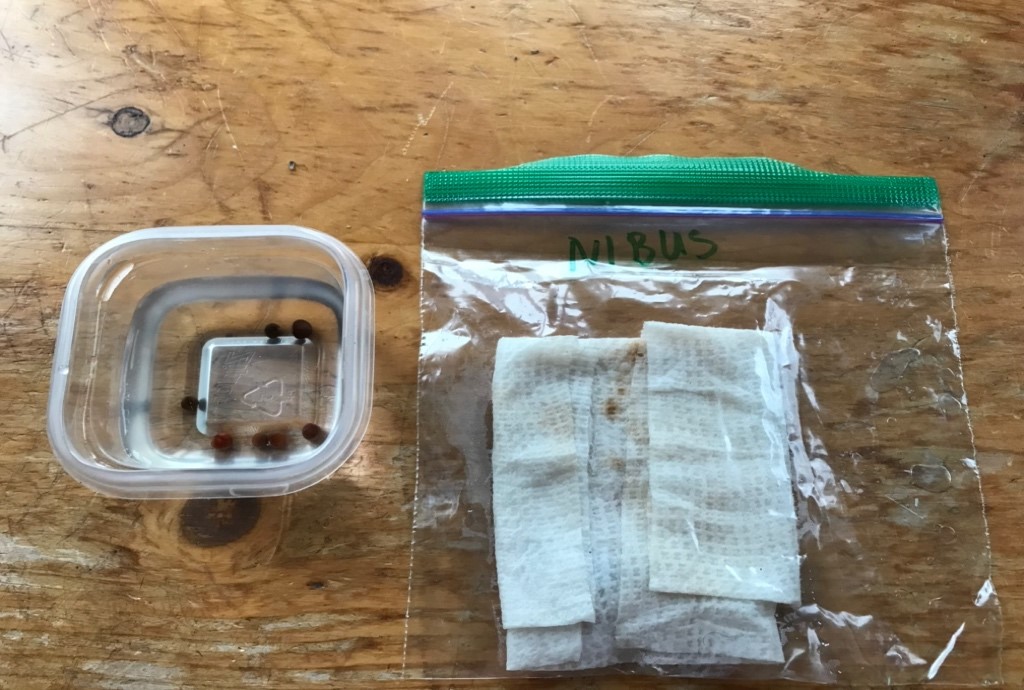
Some seeds are viable for a long time, others not so. To check viability, wet a paper towel and partly wring it out. It should be wet but not dripping. Put a few seeds on one half of the towel, fold the other half of the towel over seeds and put in a plastic bag and seal. Within a few days you will be able to tell if the seeds germinate or not.
Seeds need to be stored in a dry cool environment. I keep mine in a labeled paper envelope in a larger plastic box in the basement.
Wow. What a pleasure to finally see this book in print. Written by two very knowledgeable Ontario gardeners — Rick Gray and Shaun Booth — this is the native plant gardening resource I wish I had more than 5 years ago when I started incorporating native plants in my garden.
Focused specifically on the Southern Great Lakes Region, it’s an all-in-one, easy to use resource for those interested in plants that not only look wonderful but fulfill a critical role in our gardens in supporting wildlife, birds, and pollinators like butterflies, moths, bees, and insects.
It reminds me of an encyclopedia, with a full page spread on each native plant (and there’s over 150!). It’s not surprising to me that’s it’s already #4 on the Globe & Mail’s bestseller list.
The book is visually designed to make it easy to see key information at a glance, using quick guide key icons and two colour-coded bars providing exposure/light and moisture requirements. We’ve been blessed with several excellent native plant books in the past few years, but I appreciated several unique elements I hadn’t seen before – numerous appendices (matching soil types, seed collection and preparation, propagation, and butterflies and their host plants), as well as each plant’s Ontario’s Species at Risk status.
You’ll understand what each plant needs to thrive, how big they will get, and how to make more plants to share with your friends!
Sample spread page
As a Peterborough Master Gardener I have long been engaged in two Facebook groups – theOntario Native Plant Gardeninggroup (started by Shaun) and the Master Gardeners of Ontario group (where I am an admin and moderator). I remember clearly in May 2023 Rick trying to gauge interest from members on their proposed native plant book, and the incredibly positive response that they received. So full disclosure – I knew I was going to love this book before it was ever published.
The authors explain why the plants are organized by botanical/Latin name, which is important because common names can vary by region. However, if you only know the common name you can always search using the alphabetical index at the back of the book.
Essentially, each entry is a ‘checklist in a page’ on what you need to grow the plant. There are lots of photos (whole plant, leaves, flowers, fruiting bodies), a detailed description, easy to see symbols (the Quick Guide), information on the USDA Hardiness Zone, lifespan, propagation, and wildlife/pollinator value.
Skill levels are also mentioned but don’t be alarmed – most are listed as beginner, but there are certainly a few native plants that are a bit more challenging to grow and propagate.
Table of Contents plus shameless plug for my wonderful local, independent bookstore where I ordered the book.
I appreciate that in the introductory chapters the authors clearly explain things such as:
What is a native plant?
Aggressive vs invasive
Origin of the term weed
Nativar vs cultivar
Value of native plants
The authors clearly have a good sense of humour – there are pages titled “How to use this book”, “A coneflower by any other name”, “Fifty shades of…shade” and my favourite “2b or not 2b” (on the rationale for using USDA Hardiness zones). I loved the section on propagation and codes as I’m actively trying to grow more native plant material in my area.
I have to say that as a seasoned gardener I was surprised to see Echinacea pallida (pale purple coneflower) is not in the book (not native to most of this region but often sold as a native apparently) and Agastache foeniculum (Anise hyssop) is one that is included specifically because it is non-native to Ontario (it’s a western prairie plant). Oops! I have both in my garden north of Peterborough.
Was anything missing? Technically no, as the authors were clear that this was not a garden design book. Perhaps after putting out Vol. 2 (the other 150+ plants I know they wanted to include), they’ll consider something on understanding planting density and creating root competition, which I am learning is different to conventional perennials, and good plant pairings (which native plants support others).
One quick comment I will add is that native plants are wonderful once they are established, so you may need to do a bit of watering that first year, but after that they need no watering or fertilizing.
This book is perfect for reading at home (my husband gave me a quick quiz contest this afternoon on the Latin names) or taking with you to your local nursery as you search for native plants to add to your garden. Having trouble finding these plants? The Halton Region Master Gardeners maintain a dynamic map listing native plant nurseries around the province. Check it out!
The bottom line – a wonderful addition to my garden library, and to anyone interested in incorporating more native plants in their Ontario gardens.
The Gardener’s Guide to Native Plants of the Southern Great Lakes Region
By Rick Gray and Shaun Booth Publisher: Firefly Books, 2024 Paperback: 352 pages ISBN-10: 0-2281-0460-2 Price: C$45.00; available through local booksellers and larger book companies
About the Authors
Rick Gray (The Native Plant Gardener) has more than 300 species of native plants in his garden in southwestern Ontario and provides native plant garden design services.
Shaun Booth runs In Our Nature, an ecological garden design business, and launched the Ontario Native Plant Gardening group on Facebook.
Want More Information?
Many wonderful books on native plant gardening and naturalization have been published in the past few years – anything byLorraine Johnsonis a great complement to this book, and I love Piet Oudolf’s work (although he doesn’t always use native plants).
Dr Linda Chalker-Scott (and the Garden Professors blogon Facebook) is a great source of good, solid scientific information on gardeners keen to avoid the misinformation often seen on social media.
In 1696, a Sicilian monk discovered a vividly coloured flower with a bountiful fragrance in the hills surrounding the monastery. He transplanted it into his garden to grow on and was soon sending seeds from these transplants to other countries. He had discovered the sweet pea (Lathyrus odoratus). This variety is still readily available today and is known as Cupani’s original.
Cupani’s original
Over the subsequent years, plant breeders (especially in England) went onto develop numerous varieties and by 1910, the sweet pea was considered one of the most popular annual flowers under cultivation. It was often a garden favorite here in Ontario. Unfortunately, the sweet pea is not featured as often in our gardens. Our changing climate (more heat, less rain) has made it more of a challenge to grow this plant successfully. However, it can be done with a little planning.
Sweet peas are plants that thrive in cool weather and can withstand a fair degree of frost. I aim to plant mine outside 4-6 weeks before the last frost. This gives them time to establish a strong root system when temperatures are moderate and moisture plentiful. This also helps them to withstand the high temperatures of summer.
Sweet peas are deep rooted even as seedlings and need to be potted into a large container such as a 4 inch pot. My preference is to use “root trainers”. These are containers that open like a book, are five inches in depth and are have longitudinal grooves in their sides. These grooves encourage roots to grow straight down and prevent root circling. When it comes time to plant our, you just open up the trainer and lift out the plant intact.
Root trainers closed and open
Root trainers in rack with humidity dome
Starting the seed. Sweet peas have a hard outer coat. Many people soak the seed in water for 24 hr. prior to sowing to allow the seed coat to soften. There are others that “pre-sprout” the seeds by placing them in a folded wet paper towel that is placed in a plastic Ziploc bag and left in a warm place. Seeds are checked, those that have begun to sprout are planted into prepared pots. I have done both and found that the paper towel method results in a better germination rate but takes place over a much longer time period. Sweet peas take on average 14 -21 days to germinate when kept at 55-65 F. This time frame can vary widely between different varieties. This year, one variety was above ground before the others had even made an appearance. Once germinated, I grow my seedlings along at 50F which encourages root development and less top growth. Sweet peas are a climbing vine and require pinching when they are about 6-8 inches. Pinching encourages side shoots to develop which results in a stronger bushier plant.
Seeds soaking (left) and seeds being presprouted in paper towel; Presprouted seed (right)
About a week before planting out, I start to harden the plants off in order that they will be able to withstand the move to outdoors in mid-April. Once hardened, they can be planted out.
Site selection. Sweet Peas prefer slightly alkaline, well drained soil that has been amended with organic matter (as they are heavy feeders). They should be kept moist and will require trellising. Although they are full sun plants, they benefit from protection the harsh afternoon summer sun. In my case, I grow them on two trellises on the east side of my brick house. This provides protection from the harsh western sunshine. As well, the brick of the house provides some warmth early in the season that helps to moderate any very cold weather events that may occur. The location near the house makes it easy to remember to provide supplemental water when needed.
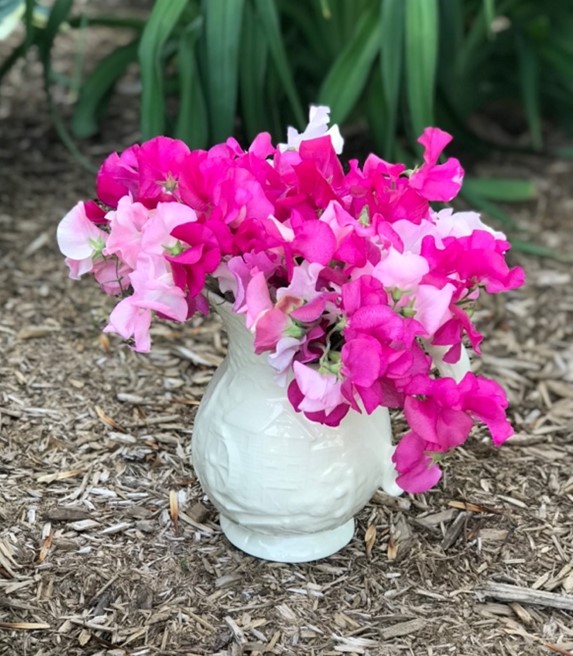
Sweet Peas require deadheading or harvesting on a regular basis (twice per week) to prevent seed from developing as once seed formation takes place the plants ceases to flower. I harvest mine for cut flowers and while they have only a short vase life (4 days) the scent is wonderful in the house. During the heat of the summer, the plant will eventually stop flowering however it will start again in the cooler days of autumn.
A myriad of colours and varieties are available to choose from. Heritage varieties such as Cupani or Painted Ladies are still popular. There are many English Spencer types (large and very frilly although less tolerant of the heat). Modern selections such as Mammoth and Old Spice have been bred to be somewhat heat resistant. The Elegance series is a short day variety that can be planted for fall bloom.
Once you have sweet peas, you will find it difficult to go without them.
“Sweet peas were the kind of flowers fairies slept in.” Allison Pearson
In the heart of downtown Selwyn where a heavy winter blanket covers my gardens, a magical process is unfolding in the underworld of some of my plants.
In the heart of my living room, I’m actively crossing off the days until Spring.
But, back to the plants. To monitor the seasonal progression and to time their reproductive development, plants must be able to sense and remember environmental cues such as temperature. The process by which plants use a prolonged cold period – winter – to promote flowering is known as vernalization.
Vernalization is the botanical equivalent of a winter sleepover, but instead of cozying up with blankets and hot cocoa, plants snuggle up to the cold. This process is essential for plants like winter wheat, rye, and most spring flowering bulbs in our region. Basically it is a cold period where specific plants not only go dormant (they hit the pause button until the weather warms) but must be exposed to a certain number of days with minimum temperatures or they will not grow properly and flower. It acts as a sort of safety mechanism to ensure that the growing and blooming process takes place at the correct time.
Picture this: a seed or bulb lies dormant in the frozen soil, patiently waiting for winter’s icy touch. As the temperature drops, the plant detects the chill and starts a biochemical countdown for a certain number of days. It’s as if the cold serves as a bell ringer, signaling that it’s time to prepare for the grand spectacle of spring. It’s amazing that even in the harshest conditions, nature has its own way of orchestrating the grand spectacle of life.
So, in my living room I continue to mark the winter days off one by one, reminding myself that the bulbs I planted in October need a cold cold winter to make my garden spring to life. It will definitely be worth it!
As this year ends, I’m offering a few New Year’s resolutions for gardeners for 2024. If you want more of a challenge, the Chicago Botanic Garden offers 50.
Add Native Plants To Your Garden
We’re all seeing the effects of climate change on our gardens.
Native plants adapt more readily to stressful and changing weather patterns, such as prolonged droughts or winter cold snaps, than hybrids and non-natives often seen in our nurseries.
Native plants help sustain beneficial insects and bird populations because they attract native pollinators and birds that might not be drawn to non-natives.
Create less work for you, as native plants tend to be lower maintenance than non-native ones.
The Native Conservancy of Canada offers some suggestions to get you started, or consult with your local Master Gardener group or Horticultural Society.
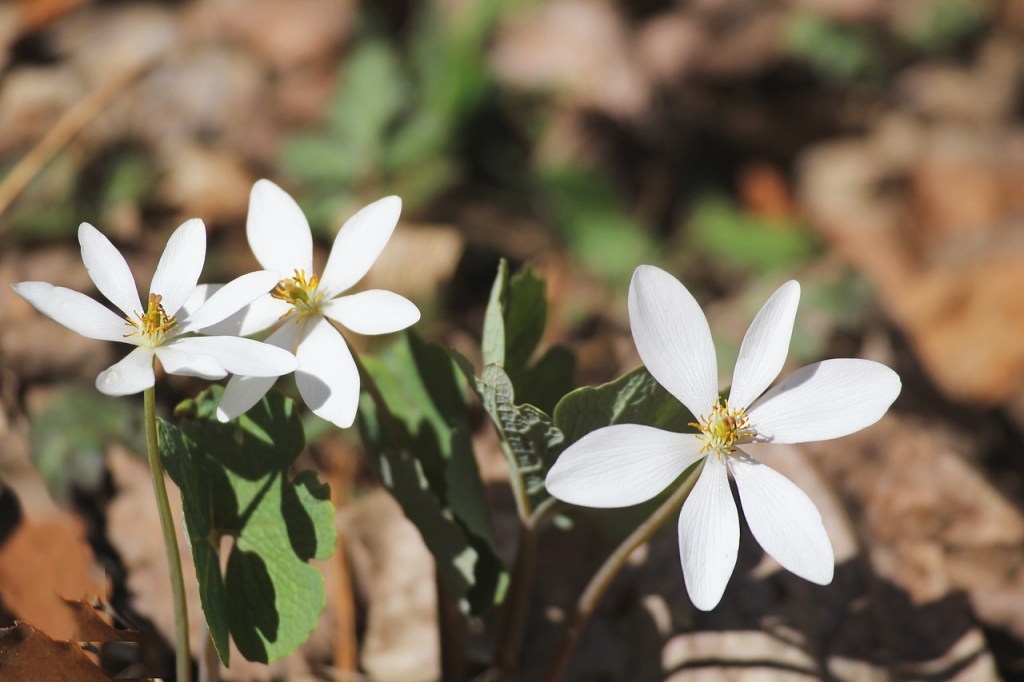
Bloodroot, Sanguinaria canadensis
Start A Compost Bin
Composting helps keep waste out of landfill by collecting and processing organics into material that can be used to create nutrient-rich compost used to feed and nourish soil.
Canadian Living offers a simple outline, as shared by Ed Begley Jr.
Or more here from the Thames Region Ecological Association, including troubleshooting issues.
Compost bin
Grow More Of Your Own Food
The pandemic has highlighted how our agricultural systems are vulnerable to global shocks. Issues with supply chains, migrant workers, transport, trade and border closures have resulted in some foods being in short supply or prices going up (while quality goes down).
Insects do all the hard work, and all pollinators benefit.
Gardening provides benefits for your wallet, your nutrition, and reduces your environmental footprint. By growing your own food (either from seeds or small plants), your food is automatically more sustainable simply because you are doing it onsite or in a community garden. If you control the ‘inputs’ and do it well, you can save a lot of money.
Ultimately there is nothing more rewarding than planting and maintaining your own vegetable garden and harvesting (and sharing) your results. And we all know how much better homegrown produce tastes versus conventional produce at the grocery store. If you have too much produce, then you can just share the love with others!
Plastic is a major component in the garden, from plastic plant pots and seed trays to watering cans, and compost bins. Most plastic gardening equipment will end up in landfills, where plastic pots alone can take up to 500 years to decompose.
There are a few easy swaps you can make in going plastic-free: Many of us want to use less plastic in the garden, from plant labels to watering cans, tools, plant pots and the sheeting used to suppress weeds. Buying (and therefore using) less plastic will not only reduce your plastic footprint but also sends a message to manufacturers that gardeners want alternatives to plastic (especially single-use plastic).
Try to find biodegradable pots that made from natural materials such as coir, bamboo, wood chips, or seaweed (or commit to using your plastic pots year after year).
If you use plastic string, make the swap for a natural jute or hemp, and protect your fruits and vegetables with metal mesh instead of plastic netting – it lasts for years.
Find alternatives to plastic pots, or commit to using (and reusing them) for many years
Happy gardening dreams until we can get out into our gardens again….
Many gardeners plant and harvest their own herbs throughout the summer either in outdoor planters, garden beds or even indoors where the aroma can be enjoyed throughout the season. And for some, fresh herbs from the garden come to an end as the growing season tapers off and fall temperatures and cool nights prevail. However, enjoying your herb bounty throughout the winter is not only possible, but easy to do. Frozen herbs can be enjoyed throughout the winter (I have used mine up to six months after freezing) in soups, casseroles, and other cooked dishes, using the same quantities in recipes as you would if they were “fresh”. However, they do tend to darken in color with freezing and as such cannot be used in some applications where raw fresh herbs are required (such as pesto and/or garnish).
To freeze herbs, the process is as simple as this:
Harvest your herbs before the frost takes them from you,
Ensure that they are clean (wash if unsure) and pat dry,
Lay them flat (leaves and stems) on a tray,
Put in freezer for one hour (“flash freeze”),
Remove and place in labeled freezer bags, and
Remove the air from the bags (use of a vacuum sealer may be helpful if freezing individual batches for later use.
Herbs that freeze well for use later in cooking include Basil, Chives, Dill, Lemongrass, Mint, Oregano, Rosemary, Sage, Savory, Tarragon and Thyme. An interesting option is to make an herb blend from your favourite herbs that you enjoy together. To do this, simply use 2 cups of fresh herbs and 1/3 cup of olive oil and blend thoroughly in a blender. Place the paste in an ice cube tray to freeze and then place frozen cubes in an airtight bag. Simply use the “herb paste” in any of your favourite dishes. I have used rosemary, thyme, basil, oregano, and mint together in a skillet chicken dish with fresh lemon zest, garlic and orzo pasta…simply delicious!!!
Alternatively, fresh herbs can be dried, stored and used throughout the winter as well. The process is as simple as this:
Bundle together 3-6 stems and bind end with garden yarn/string (see pic above),
Hang upside down in a dry and dark location,
Wait 2-3 weeks for them to be completely dry (ensure stems are brittle), and
Remove leaves and store in airtight jars or bags and use as per recipe as a “dry spice”.
Personally, I cannot see my summer herb bounty go to waste. It is well worth the effort to freeze, dry and/or make a paste blend…ensuring that you have fresh herbs throughout the season. Just add this activity to your fall canning party and share the wealth 😊.
Most of us are familiar with using stem cuttings to make a replica of a specific plant. Less commonly used in Canada are root cuttings, a form of asexual reproduction which can be used to propagate a range of herbaceous perennials and even a few woody plants in the later part of autumn when plants have gone dormant (full plant listing in references).
Beauty of Livermere Oriental Poppies (parents)
Last fall, I determined that I would need approximately 25 new oriental poppy (Papaver orientale) plants to place at the back border of one of my beds. “Beauty of Livermere” was already planted in another bed and I wished to have more of that variety. However, poppies have tap roots and are notoriously difficult divide. As oriental poppies do not come true from seed when looking to reproduce a particular cultivar, root cuttings seemed to be the answer.
As I had never done this before, I choose to take cuttings at more than one time – late September, late October and in the end of December when we had a surprising warm spell. I lifted a couple of plants brushing away the soil from the roots (washing would have worked better). I selected out roots with a diameter of a pencil and cut them off with secateurs taking less than 1/3 of any one plant. The donor was replanted immediately (and the crown mulched for winter protection).
Next, the roots were cut into 2–4-inch (5-10 cm) lengths making a horizontal cut at the upper end (part that was closest to the plant crown) and an angled cut at the bottom. You must preserve the polarity of the cutting. They will not grow if planted upside down. I filled pots with a 50/50 mixture of potting soil and vermiculite (perlite also works). I inserted the cuttings vertically into compost, ensuring that the angled end of the cutting was put in first to preserve polarity. The compost was watered until it was moist and then put out in my extension for the winter where they would be cool but would not freeze. Root cuttings do not require light until green growth begins to show and they can be kept in the basement if need be.
2 months (left) and 3 months (right)
In my case, it took about 2 months before any of the cuttings showed any green. The September cuttings were a flop as only a single cutting out of 10 had growth (too early to take root cuttings). I had almost 100 % strike from both the October and December batch. The cuttings were in a high light area so as they grew on, I did repot them up. In late April, the new plants were hardened off and planted out. They grew well in their new location and I look forward to next year’s bloom.
Potted up separately
Planted out!!
There are other advantages to using root cuttings instead of other means of propagation:
Root cuttings require no special aftercare (no humidity bag etc)
Large numbers of new plants can be generated from a single parent plant (good for larger gardens)
Plants derived from root cuttings are relatively large and vigorous
Cuttings are taken in a quieter season when a gardener may have a bit of time (I don’t know about you, but my spring stem cuttings have a high failure rate as I don’t keep as close an eye on them as I should and they either burn up in the plastic humidity bag or dry out from lack of water)
Growing on…
Perennials such as Japanese anemones (Anemone hupehensis) and Phlox (Phlox paniculata) can be propagated in this way. These plants have thinner roots and contain less food reserves so it is recommended for these species to use longer sections (3-5 inches) and lay them horizontally on top of compost in a tray covering with a thin layer of compost.
Whatever plant you wish to propagate, give root cuttings a try. You may be pleasantly surprised.