Dealing with Drought in the Garden

By Mary-Jane Pilgrim, Master Gardener

Plants are composed of anywhere from 50-90 percent water. When they suffer from the heat, it’s because of an insufficient amount of water being available to them. Drooping, seemingly lifeless leaves are a sign that a plant does not have enough water and is unable to take in carbon dioxide from the air through tiny, open pores on the underside of the leaves and make food.

When plants wilt from lack of sufficient water, they stop growing, stop producing and will die if their cells are not replenished with water.

Plant Selection

The best way to deal with drought is through plant selection. Grow plants that don’t ask for much!

pink-2678918_640

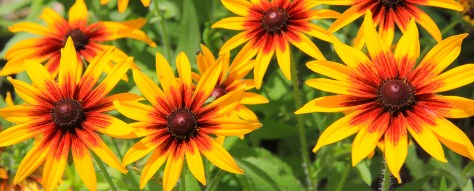
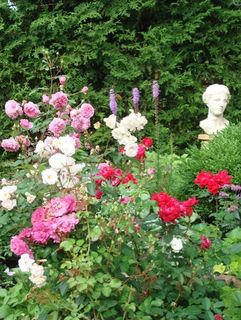
Choose plants that are drought resistant and can handle the heat in the first place, rather than struggling with the more sensitive types. Some suggestions are: ornamental grasses, salvia, sedums, cacti. Also native plants such as black-eyed susan, liatris, purple coneflower, coreopsis, lavender. Some non-native plants such as daylilies, hellebore, barrenwort/epimedium also all tolerate the heat well.

Watering

The best way to get moisture to the plants is to apply water at ground level with drip irrigation or via soaker hose, and the best time to do this is in the morning. The idea is to give the plants an infrequent but deep soaking. Water that seeps deep into the soil will help plants develop a deep root structure, which helps them survive prolonged periods without rain. The morning is the coolest time of the day, and there is less evaporation while temperatures are relatively cool than later in the day when the temperature is at or near its peak. The second best time is right at dark or just before dark.irrigation-2402568_640 (1)

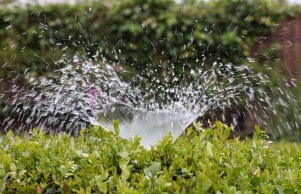
Using sprinklers is not as optimal because a significant amount of water is lost due to evaporation from the leaves into the air before the leaves can absorb the water.  However, for extensive garden beds, it may be the only available choice!

For patio container plants, consider adding water gels to the potting mix. The gels absorb water and release it slowly to the plant roots, reducing the number of times the plants will need to be watered. Another option for patio containers is a self-watering pot. These types of containers have a water reservoir from which water is absorbed up into the pot and to the root zone. Like the gels, these specialized containers will reduce the need for frequency of watering.

Mulching

Another way gardeners can help their plants survive excessive heat and drought is to mulch their garden beds. The mulch will help reduce evaporation, insulate plant roots from the high temperatures and reduce or eliminate weeds, which compete with desirable plants for water and nutrients. When choosing mulch, use only biodegradable materials that decay over time. Two to three inches of mulch should be plenty for the growing season. Don’t put mulch up against trees because it can cause the trunk to rot. Also, mice and other vermin may create nests in the mulch and chew on the tree’s bark.

IMG_2320Shredded leaves are also an excellent choice, but they break down faster than wood mulch and may harbor seeds like maple keys. However, earthworms love shredded leaves and will make the soil more friable and fertile with their castings. If leaves are hard and fibrous, leave them in place to decay. Oak and other tough leaves should be shredded and allowed to decay a bit before placing on the garden. Soils topped with shredded leaves will soon be crumbly and easy to plant.

Weed-free straw is good mulch and is often used in vegetable gardens. It packs down and hold weeds at bay. Make sure to use straw (grain stalks) instead of hay (dried grass) to prevent seeds from germinating.

There are many other tips / tricks about gardening during drought but the key message is that “you don’t have to stop gardening due to drought. Simply change the way that you garden to adapt to the conditions.”

Roses are Easy!

By Cauleen Viscoff, Master Gardener

EASIEST ROSES:

  • The new Landscape roses: “Drift”, “OSOEasy” etc.
  • Disease resistant, hardy and ever-blooming.
  • However, there are others just as lovely that require a bit more care.
  • Do your research: know your space and sunlight.

ROSES NEED 6 – 8 hours each day … otherwise they’ll struggle for nutrients and have weaker blooms and roots.

ZONE: Push your zone with roses and they don’t do their best.roses2
READ THE TAGS: Printed in US? Our zone 6 is their zone 5.

ROSES COME:
Bare Root (own root or grafted) – no leaves, no soil
Bagged: bare root in sawdust
Potted: blooming in pot

PLANTING:

  • Soak each rose for an hour or two before planting.
  • Dig hole deeper and wider than needed.
  • Don’t amend the soil – (recent construction?  remove stones, etc; add compost to existing soil otherwise roots will stay encircled in the composted hole without spreading out.)
  • Fill hole with water; let drain away.

POTTED:  Tangled, encircling roots? Slash down each side, teasing roots out. If rose comes out of pot easily, shake off the soil, and rinse well to rid of nursery chemical fertilizer.roses1

GRAFTED: plant bud union 4 inches below surface – protects against frost and the (graft point) should form its own roots over time.

BARE ROOT: mound soil; place roots over mound. Fill in and tamp down gently.

PRUNE and GROOM:


When Forsythia blooms in Spring — 4D’s: dead, diseased, dying, design.
Groom all summer: deadhead; broken canes or out of shape.
Never prune climber to ground or else it has to start all over. Prune side branches horizontally for blooms.

BOTTOM LINE: Know your space, light and rose.
Then, buy the one you love.

Growing Clematis

By Sharleen Pratt, Master Gardener

clematis-350358_640Clematis is a genus of about 300 species within the buttercup family, Ranunculaceae. They are a very popular perennial climber and produce many beautiful flowers in the summer months.

When purchasing a clematis, remove the plant from the pot and check for a tiny white bud on the very bottom roots. This will ensure a healthy plant. For best results, purchase a clematis that is at least two years old as they are tender when very young and take several years to mature.

Clematis absolutely demand good drainage. Either add sand to the soil, or line the bottom of the hole with a layer of gravel. When planting, it’s important to bury the crown of the plant at least two inches (6 cm) below the surface of the ground to encourage more stems to grow from the base. Water deeply at least once a week until the plant is well established.

To encourage good flowering, sprinkle superphosphate fertilizer onto the surface of the soil at planting time to promote good root growth and winter hardiness. For mature plants, add fertilizer once in the spring and again in June.flower-3394263_640

Clematis need at least six hours of sun per day, but their roots like to be kept cool. One suggestion would be to plant a large hosta at the base of the Clematis. Their roots are shallow so they won’t compete for nutrients. You could also use large rocks or flagstones.
If the stems of very young plants seem thin, pinch them back to just above a set of buds. This will help the stem to thicken, making them tougher and more resistant to damage.
You need to understand the kind of clematis you have before attempting to prune. Some clematis grow on last year’s vines, so you want to avoid cutting them to the ground in spring. Others flower on current-year vines, so they don’t mind being cut to the ground each year.

A very tough clematis is the Clematis x jackmanii, which is an old reliable climber, easily growing to three metres with large, deep purple flowers. It is the oldest large flowered cultivar, bred in 1858. Another easy to grow clematis is Clematis ‘Abundance’, which has a deep red flower with greenish-yellow stamens, which flowers in mid June.

You might consider checking The International Clematis Society website. It is full of valuable information for people new to growing clematis, with several links to catalogues, nurseries and education publications.

Herbs: Humble & Useful

By Vince Picchiello, Master Gardener in Trainingherbs-2523119_640

Perhaps one of the least celebrated plant family in our gardens is the herb.  Many gardeners show their prize possessions of roses and hydrangeas, yet others will speak endlessly of their succulent tomatoes and robust peppers and of course others will offer baskets of pears and pints of raspberries. Few however, honour the forgotten herb.

Herbs are among the oldest cultivated plants. Their early domestication was due to their aromatic, culinary and medicinal qualities.  Herbs are attractive plants and some even bear lovely flowers — such as lavender and chives to name but a few.  For the home cook, the ease from garden or container to the kitchen provides the tastiest and freshest example of ‘local shopping’ and sustainability.

Maintenance and Care

  • While most herbs will survive in virtually any soil, a well prepared soil amended with mature compost and organic material virtually guarantee success.
  • Most are easily started from seed indoors and can be planted as  seedlings in spring (or you can purchase from the nursery).
  • Mulches help to retain moisture and prevent weeds when planted in the garden.
  • There is no need for fertilizers as this may encourage ‘legginess’.
  • Most enjoy full sun with moderate moisture requirements. Others though, may require more moist conditions such as dill, mint, and parsley to name a few.
  • Many are also hardy, which make them tolerant of successive frosts.  Some, however, are tender and don’t do well in frosty conditions.  Examples of these are basil, marjoram and parsley.

Uses for Herbs

chives-3418953_640CULINARY : herbs are used in pesto’s, soups, salads, and flavours for vegetable preserves. Mint can be used as garnish in a drink or tea , parsley or cilantro on fish dishes

HEALING : Valerium and Chamomile are used as calming sedatives and for anti-anxiety, there are herbs for digestive issues, liver cleanses, anti-inflammatories, breath fresheners (mint or basil), first aid (plantain is great for scrapes and insect bites) and if you get industrious one can learn to make slaves, tinctures, and infusions all with many backyard/ container plants.

AESTHETICS: Lavender, lemon balm, roses, and lemon grass make great aromatics – Lets not forget their sheer beauty as some become lush with green foliage others provide lovely flowers

PRACTICAL: Many plants can be grown indoors or outdoors and in containers or in the yard.

In the coming days and weeks as you find yourself plotting and planning your garden/containers for an upcoming season, don’t forget the humble herb.

Growing Perennials in Containers

By Amy Woodward, Master Gardener

Throughout the years annuals have been a staple to grow in containers.  However, they can be high maintenance and expensive as they are discarded after a season of planting.  Growing perennials in containers has started to become popular.  Perennials require less maintenance and are expensive initially but are a great investment as they continue to grow year after year.  Advantages of growing Perennials in Containers:flower-3397964_640

  • Great way to have perennials if you don’t have a lot of space
  • Fast spreading perennials can be contained
  • Mobility- you can move your plants to suit your needs
  • Weeding is eliminated and less deadheading
  • You can adjust your soil PH easily depending upon the perennial you are planting
  • Perennials can be planted before annuals as they can handle the cooler temperatures

Choosing Plants and Containers:

  • Use plants that have similar requirements for sun, feeding and moisture.  Plants in containers will need more watering than those in the garden, as the plants can’t draw nutrients and moisture from the soil.
  • Use “thrillers, fillers and spillers”.  The tallest plants are the thrillers and they go in the middle of the pot.  Fillers are medium sized and go around the thriller plant. Spillers trail over the sides of the pot.
  • If you do not plan to overwinter the perennials then make sure you choose plants that are 2 zones hardier
  • Use larger pots as plants become root bound and are quick to dry out
  • Make sure your pot has been cleaned before use and has good drainage
  • Choose a container that does not dry out quickly or freeze

Examples of perennials to choose:flowerpot-1345371_640

Achillea, Echinacea, Aster, Heuchera, Astilbe, Hosta, Bergenia, Lamium, Bleeding Heart, Phlox, Coreopsis, Sedum

Options for Overwintering Perennials

In colder climates, perennials cannot be left outside in containers over the winter. Remember plants that are hardy in the ground may not last in a container.  When you chose perennials you must consider the zone.  If you choose to leave in a container over the winter the rule of thumb is to choose plants that are 2 zones hardier.  Here are some other options to overwinter perennials:

  1. Move plants in containers to an unheated garage. Do not fertilize when the plants are dormant.  Once plants stop growing in the fall, stop fertilizing.  Plants will need to be watered until the soil is frozen.  When temperatures increase in late winter or early spring gradually move containers back outdoors.
  2. Transplant into the garden.  Then dig them up in the spring and return to the containers.
  3. Bury the pots in the ground.  The roots will then be better insulated.  In the fall, dig a hole in the ground that is large enough for the container.  Place the container in the hole then cover with leaves or mulch.  In the spring, bring the pot out of the ground.

Trench or “Hole” Composting

By Suzanne Seryck,  Peterborough Master Gardener

After squirrels chewed through my black plastic compost bins 2 years in a row, I decided it was time to try something new. Trench or hole composting is a relatively simple, easy and cheap way to compost kitchen and yard waste. The plants are fed at the roots, where they need it the most, producing healthier plants with strong root systems.

The rules of what materials you can compost using this method are similar to that of a compost bin or pile:

  • Dead leaves
  • Kitchen Scraps
  • Newsprint
  • Coffee Grounds
  • Paper
  • Fresh Garden Waste
  • Wood chips
  • Vegetable waste
  • Corrugated cardboard
  • Fresh grass clippings
  • Sawdust
  • Manure
  • Corn Stalks
  • Hay
  • Dry Straw

For more information on what to use look at this Planet Natural article

In just 2 years of composting using this method I have already noticed a difference in the health of my soil, my plants and especially in the number of earth worms.

Trench composting works well in larger vegetable gardens and involves digging a trench approximately 12 to 18 inches deep, filling it with roughly 4 to 6 inches of yard waste and/or kitchen scraps and then back filling with the soil you removed. Trenches can be used either in a rotation cycle, where you would divide the garden into zones, an actively growing zone, a path and a trench composting zone. Each year you would rotate the zones, allowing you to compost the whole vegetable garden in 3 years. The second method is to dig trenches in between the vegetable rows, this method works well if you grow your vegetables in evenly spaced rows. Over time as everything breaks down the compost will then nourish the plants nearby.

compost-trench

However for my small city garden, I found the trench composting system did not work well. I don’t plant in rows and whilst I do practice crop rotation (which is a method of rotating your crops each year to manage soil fertility and help control pests and diseases) I like to use almost every available space in my vegetable garden. Instead I practice “Hole composting”, which works in all types of garden, vegetable, perennial and shrub, just about anywhere where you can dig a 12 to 18 inch hole.

It is especially good if you do not have room for a composter or do not have a sunny location to place a compost bin or pile. Basically you dig a hole, put in the kitchen and/or yard waste, again about 4 to 6 inches and fill the hole in. It really does not get any easier than that. Over time the waste is turned into decomposed organic matter or humus along with millions of microorganisms and there is nothing better for your plants. This type of composting is invisible, does not produce odours, takes very little effort (you don’t have to turn and layer as you would using a compost pile), it costs nothing, and you don’t have to buy other soil amendments or plant fertilizers.

2012-04-03_13-24-52

During the active growing season, I dig holes in my perennial garden and bury my kitchen and yard waste. However, in the fall after I harvest the vegetables I also practice this in my vegetable garden, in particular the areas where I have grown heavy feeders, like corn or squash. The following spring most of the material has decomposed and you are ready to plant. In just 2 years of composting using this method I have already noticed a difference in the health of my soil, my plants and especially in the number of earth worms.

Additional information on trench or hole composting here


Is it Dead?

By Emma Murphy, Peterborough Master Gardener

It’s been a long, cold, snowy winter in the Peterborough Ontario area, and a long, cold, wet spring. After our recent ice storm in mid-April, one was left wondering if spring would ever arrive. One thing is for sure – spring has been delayed in our area by several weeks.

Late Arrivals

Some trees, shrubs, and plants are always late arrivals – think of the Northern Catalpa tree (which can leaf out almost a month after other trees), Echinacea (Purple Coneflower), and Platycodon grandiflorus (Balloon Flower).

However, this spring has some gardeners in a panic. While many woody plants are sprouting buds, maybe one of your plants isn’t doing anything to show the slightest sign of life. Is it dead? Before panicking and assuming they are dead, look for some reasons for the delay.

  1. If you planted something late in the season last year, it may still be settling in and putting its energy into root growth before growing leaves. I have a new garden bed I planted last fall and everything in it is late emerging.
  2. I know part of our garden was submerged for an extended period this spring. A spring flood can delay leafing out for trees (but cause no other long term damage).
  3. Did you plant something near the edge of the normal hardiness zone? It is possible that the dormant buds may be dead but the tree may still be ok. You need to give it time to see if it recovers.
  4. For trees and woody shrubs check the branches – try the “bend but don’t break” test – try and bend them a bit – if they are dry and snap rather than bend that is not a good sign.

deadparrot

Doing the Scratch Test

My favourite trick is the scratch test. It’s very simple – you scrape the bark off a small section of your woody shrub or tree and take a look. With your fingernail or penknife, scratch a section so you can see the cambium (layer just under the outside bark). If the tree/shrub is alive, the cambium will be green. If it’s brown or white and dry, unfortunately, it may be dead. However, don’t give up all hope! If it’s brown you can try another scratch further down the trunk to confirm death (or life!)

If the cambium is dead, the only hope left is that the plant will be able to regenerate from its base. That’s often the case for shrubs, but not all trees. And if a tree does resprout from the base, if it was a grafted tree (the case with most fruit trees, for example), what grows may not be the cultivar you wanted but the stock plant (the tree the desirable variety was grafted on to).

Pruning Options

If you find only part of the stem on a plant is dead you may want to cut the stems back to the first visible green growth. If no new growth is visible, a rule of thumb is to cut the stems back a third of their length at a time until you find green tissue. Prune too early though and you risk further damaging the plants (for example, from a late frost). Check the Old Farmer’s Almanac list of frost dates (for Peterborough that’s about May 12). It is generally safe to prune about two to three weeks before the last frost date, since you are less likely to experience a damaging frost at that point.

Patience

The ultimate word is patience. Warmer weather has arrived now and hopefully you will be able to ascertain any damage to your garden from this tough Canadian winter and wet, cold spring. Happy Gardening!!126-2649_IMG

(Featured image from www.thetreecenter.com)

Perennials: When should they be divided?

By Mary-Jane Pilgrim, Master Gardener

Happily, perennial plants increase in size over the years, and at some point they will benefit from being divided. In general, the best time for this task is in the spring when they have just emerged from their winter hibernation.

Perennials should be divided when:RHS_PUB0003004_484282

  1. They have started to die out in the middle
  2. They don’t flower as well as they used to due to congestion or the roots grew to be old and woody
  3. They have used up all of the nutrients in the soil near them, resulting in stunted growth, yellowish leaves or lack of bloom
  4. They are infested with weeds

Rule of Thumb

One rule of thumb for division is this: perennials that flower between early spring and mid June are best divided in early fall. Perennials that flower after mid-June are best divided in the spring.

Summer and fall-flowering perennials have the whole spring and early summer to recover from being divided, and most will give you an excellent flower display the same year.

Three plants that prefer to be divided at other times are Peonies (fall only) and true Lilies (mid to late fall). Daylilies (Hemerocallis) can be divided at nearly any time.

The first time or two that you divide perennials will be a bit nerve-wracking and anxious. This is normal!

Basic Steps

The basic steps of dividing are simple. Once your plant shows signs of growth in the spring (an inch or two of new shoots is fine), dig up the entire clump with a deep shovel. Try to be generous and get as many thick roots as possible. Dig all the way around the clump, then pry it out of the ground. Put down a tarp somewhere handy, and transport your clump there.

Try and knock off any loose soil. Find a knife — a Hori-Hori knife, root knife or even an old bread kniofe. Look closely at your clump in an attempt to find a natural point where it can be easily separated. Cut directly down the center with your knife, from top to bottom. Once it’s split in two, then look at each half to see if there is a sensible spot to cut yet again, then split these each into two. Try and keep the sections generally of a good size, say the diameter of your fist or larger.

Discard old and woody roots from the middle (add them to the compost pile).

Then, replant!

Once your dividing task is complete it’s time to replant the pieces. Try to plant them at approximately the same depth they were growing. Water them in well at planting time, then maybe once a week for the first month unless spring rains are generous.

Frost Dates and Pushing the Limits

By Chris Freeburn, Master Gardener

Many of us have grown up with the rule of planting the vegetable garden on Victoria Day (May 24th) long weekend. With the changing weather, hardier plants and stretching the limits, we have realized that many plants can go into the ground well before that date, while others do need the soil to be warmer.spinach-3368254_640

Cool Weather Crops

Cold weather crops like lettuce, spinach, pea, beet and carrot seeds can be planted well before that mystical date. They actually like a cooler temperature to germinate. If you plant them the first week of May, you should have sprouts coming up by the time you plant other seeds.

Warm Weather Crops

Ground temperatures need to be warm for beans and cucurbits such as squash, pumpkin, cucumber and zucchini. Mid May to early June is probably best for putting actual plants in the ground, if you are in an area that does not get frost. Check your weather network for overnight lows. If the temperatures drop and the night sky is clear, chances of frost are better than on a cloudy night. If the air is still, colder air will settle close to the ground and damage plants. If your property is on a slope or higher ground, the cold air will settle around you in the valleys and you may not be touched by a light frost. Being closer to water often draws the cooler air away. If you have planted tomatoes and peppers and there is a frost warning, go out and cover your tender plants with sheets.

Basil and cilantro do not like cool nights, so leave these tender herbs in pots to bring in overnight or do not plant until June.

Annuals

pansy-3373732_640
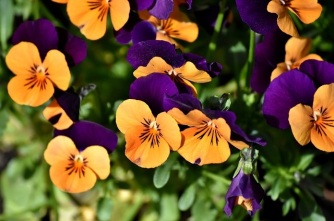
Some annuals such as pansies, dusty miller and english daisies are cold tolerant while others like potato vine and impatiens do not like temperature changes. Do not plant the latter 2 choices into the ground until all danger of frost has passed and the soil temperature has warmed. If the nights temperatures are dropping, bring your pots into your garage or cover with an old sheet to protect.

Perennials

Perennials have survived the winter frozen in the ground so a bit of frost will not hurt them. If you are buying perennials that have been grown and forced in a hot greenhouse, they will need to be pampered by slowly introducing them to seasonal temperatures. This is called hardening off. To harden off any plants that have been living in a warm greenhouse, put them outside in a shady area, protected from the wind for a few hours over several days. Bring them back into the warmth of your home or heated garage for the night. Increase the number of hours they are outside each day, until they are used to the outside temperatures.

According to the Farmers Almanac, the last frost date for Peterborough is May 14th, however the full moon is on the 28th. If the night of the full moon is clear and cool, we could see frost. Beware!

Preparing your garden beds for planting vegetables and annuals

By Judy Bernard, Master Gardener

It’s spring. You’ve got a lot of the clean-up well underway. You’re starting to look at your annual and vegetable beds to get them ready for bedding plants and seeds.

bannerpick

If you work the soil too early, it could be too wet and end up compacted. To test if it is time to prepare the soil, pick up a hand full and squeeze it into a ball. Then drop the ball from a height of about a meter or break it up with your fingers. If it shatters readily then it is ready to be worked. If it stays in clumps, then it is too wet and you need to wait a bit.

Can’t wait? Use a large flat board or two to step on. Move them around as you work. The board will distribute your weight and not compact the soil as much.

Remove any weeds that have sprouted over the winter.

If the soil is nice and light and easy to dig into, then all you need to do is add a good layer of compost and let the worms in the soil do the mixing for you. A healthy soil is moist, dark and crumbly with lots of organic matter. Compost is is full of all of the the nutrients the plants need which are released as the plants need them.fresh-2386786_640

Mulch the soil with some straw for the vegetable beds or shredded bark for the flower beds. This will discourage weeds and conserve moisture in the soil until it is time to plant. All you will need to do is to pull the mulch back, plant your plants, and put the mulch back in place.

For more information about soil check out this site:
https://www.planetnatural.com/garden-soil/

Happy Gardening!