
By Emma Murphy, Master Gardener
So in the spirit of the Christmas season, this week’s blog continues Part 2 of the 12 plants of Christmas—this one focuses on food and other traditions that are plant-related.
CHRISTMAS FOOD

8. Sage
Not only is sage a vital ingredient of the Christmas classic, sage and onion stuffing, its fragrant, evergreen leaves are also a wonderful addition to a homemade Christmas wreath, a table centrepiece with candles, or simply stuck in a vase with some silvery eucalyptus leaves, bay branches and rosemary. Sage is reputed to have health-giving properties – it is said to be an excellent anti-inflammatory and helpful in reducing irritations of the stomach and intestines. Sage is also thought to be a great memory booster and is one of the most effective treatments for a sore throat. There is an Arab proverb that says “How can a man die who has sage in his garden?” If you are interested in its medicinal properties, this Herbal Academy site has some fascinating background.
In your garden, sage likes full sun and a well-drained soil. Be sure to prune it right back every spring to stimulate new growth. It doesn’t have to go into a dedicated herb bed—plant it under roses and with lavender.
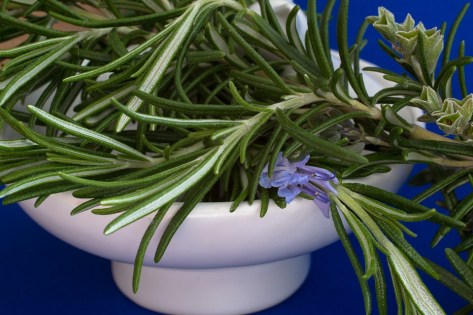
9. Rosemary
Its scientific name very charming – rosmarinus, which is from “dew” (ros) and “sea” (marinus) or “dew of the sea.” Rosemary is native to the rocky hills on the shores of the Mediterranean and loves a humid sea breeze. The ancients believed without a doubt that the sea air gave the tree its distinctive scent.
Rosemary was connected with the Virgin Mary (because it was thought to be Mary’s favorite plant) and people thought that it could protect you from evil spirits. It is also considered a plant of love, loyalty, and friendship and was the most common garnish put on the boar’s head that rich people ate at the main Christmas meal in the Middle Ages. Rosemary is also more commonly known as the remembrance herb, so it therefore used at Christmas to remember the birth of Jesus.
The English poet, Robert Herrick, who lived between 1591 and 1674 celebrated the holiday use of rosemary in this verse:
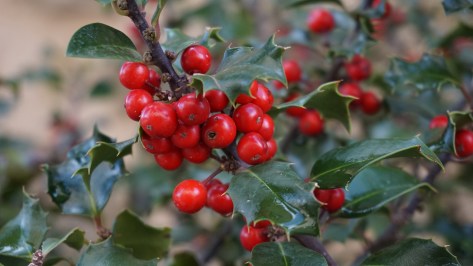
Down with the rosemary and so, Down with the baies and mistletoe, Down with the holly, ivie all Wherewith ye deck the Christmas hall.
Many people use (or give) a small, potted rosemary bush for a lovely little Christmas tree or fragrant centrepiece. If you need some tips on how to keep this humidity-loving plant alive after Christmas check out this blog.
CHRISTMAS TRADITION

10. Christmas Wreaths
Hanging a circular wreath of evergreens during mid-winter appears to have started back in Roman times when wreaths were hung on doors as a sign of victory and status. Rich Roman women also wore them as headdresses at special occasions (like weddings) and to show their wealth. The word ‘wreath’ comes from the Old English word ‘writhen’ which means to writhe or twist. Christmas wreaths as we know them today, might have started life as kissing boughs (a gesture of goodwill or to welcome guests) or come from the German and Eastern European custom of advent wreaths.

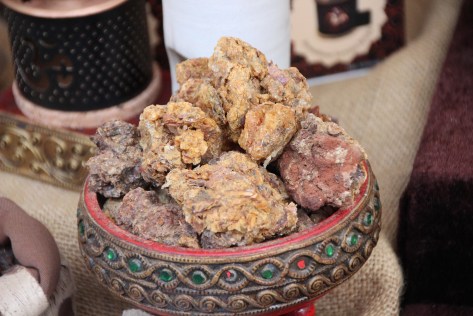
11. Frankincense
Frankincense derives from the tree Boswellia sacra. The frankincense tree grows in the Dhofar Fog Oasis, a remarkable area where three coastal mountain ranges of Oman and Yemen are cloaked in thick fog during the summer months. This species was a source of great wealth in centuries past. Frankincense from the Dhofar region (what is now Oman) provided much of the wealth through centuries of trade with Egypt, Jordan and Syria. Caravan routes carried the precious resource across the Arabian peninsula.
The BBC posted an amazing story about uses for both frankincense and myrrh in the modern age. Both frankincense and myrrh were widely available and would have been considered practical gifts with many uses. The expensive resins were symbolic as well. Frankincense, which was often burned, symbolized prayer rising to the heavens like smoke, while myrrh, which was often used in embalming, symbolized death.
12. Myrrh
Myrrh is derived from the species Commiphora myrrha a small tree that exudes gum resin as a pale yellow liquid when the bark is cut. This dries into reddish-brown lumps the size of a walnut from which the oil is distilled. Native to Somalia, Ethiopia, and Yemen, myrrh was very popular in the ancient world and was used as a medicine by the Chinese and Egyptians. It was important for use in the Egyptian sun-worshipping ritual and mummification. If you are interested in more information about the botanical connections to the Christmas season, this article has lots of links.
Well there you have it. Some fun and interesting gardening connections to the Christmas season.
If you are up for another garden-related challenge, try this 50 question quiz. Tell us how you did!


 Have you ever wandered through a forest or a neighbourhood in the winter and hear rattling in the trees and looked up to see brown leaves still in a few of the trees? Why did those leaves stay on when all of the other trees lost their leaves? We know that, by definition, deciduous trees drop their leaves in the fall. Coniferous trees, such as pine (Pinus) and spruce (Picea), keep most of their needle-like leaves all year round with some needles dropping throughout the year. There are also trees that are coniferous trees with deciduous characteristics as they lose their leaves in the fall (e.g. larch and tamarack Larix). So how do we explain deciduous trees that retain their dead and brown leaves?
 Marcescence is more often seen on young trees and may disappear as the tree matures. It may also be seen only on a few branches or on the lower branches of taller trees. If the retained leaves are on a conical-shaped tree with bleached, light tan leaves, it’s probably an American beech (Fagus grandiflora). There are also many species of oak (Quercus), witch hazel (Hamamelis), and hornbeam (Carpinus) that retain leaves in the winter.

 Clematis is a genus of about 300 species within the buttercup family, Ranunculaceae. They are a very popular perennial climber and produce many beautiful flowers in the summer months.


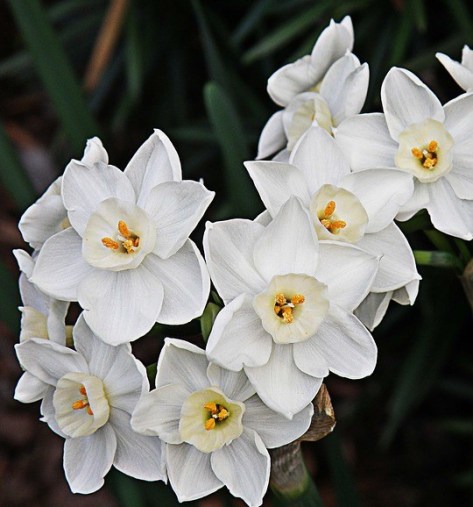
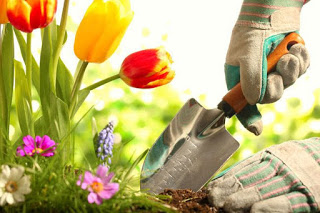
 from spring bulbs. The fresh green colour of their leaves and their colourful palette of blooms are a welcomed sign of the departure of winter and the awakening of life in the garden with all the hope and expectations that they may bring. Be it tulips, daffodils, hyacinths, grape hyacinths or alliums these early bloomers all have one thing in common. They are all true bulbs and being so means their continued lives depend on letting them become dormant through the cold winter, allowing them to bloom in the spring and die back naturally in order to complete their life cycle. This ensures the bulb’s good health so it has the ability to endure freezing temperatures throughout the winter, produce optimum blooms for the gardener to enjoy the following spring and continue to do so for years to come.
 corner, there are reasons to herald its arrival other than with Easter eggs, birdsongs and flowers to pick.