by Lee Edwards, Master Gardener
The task of planting is among the many tasks avid gardeners faces every season. Therefore, we’ll focus on the proper way to plant trees, shrubs and plants thereby reducing transplant stress while promoting lush, healthy, plants and root growth.
1. Dig A Proper Hole
To achieve the correct hole size that allows a plant, tree or shrub’s roots to stretch out, dig a hole wider than the width of the plant’s container; about two to two and a half times wider, and as deep as but not deeper than the container’s depth. Then, water the hole.
2. Remove Plant From Container
Ease the plant from its container, gently pushing up from the bottom. If roots are densely packed outside the container (rootbound), loosen the roots before removing the plant. Do not pull on the plant’s trunk, stem or branches when removing from the container, as this may severely damage the plant.
3. Inspect and Prune
Once out of the container, inspect the plant thoroughly. Prune damaged, girdling (circling), dying roots, and suckers. Water the roots, wrap with moist paper, and place in a shaded area away from the wind until ready to plant (same day). If you plan to plant in a few days, cover the paper with mulch and water thoroughly.
For bareroot plants, prune, completely wet then wrap roots, and keep shaded until roots are fully hydrated. For burlapped and dug plants, cut away burlap/wires, prune, wet then wrap roots, and keep shaded until ready to plant.
4. Prepare Soil
 Soil is important. Use the soil that was dug from the hole and amend it as needed; for example, add loamy soil to clay soil to ease denseness, or organic matter to sandy soil to slow the soil draining quickly. Ensure the soil is suitable for the plant being planted with sufficient nutrients to satisfactorily support and sustain the plant.
5. Plant Properly
The depth a plant is planted is important. If a plant’s crown is too far below soil level, stunted growth or crown rot may occur. A crown planted too high above soil level may cause sunscald and unnecessary drying out.
Place the plant in the pre-dampened hole and spread out its roots. Make sure the roots sit on firm soil with the crown slightly above soil level to safeguard the crown from sinking below soil level after watering. Fill the hole halfway with soil and tamp down with your hands. Water thoroughly to remove any air pockets. Fill the hole with the rest of the soil and create a shallow, bowl shape at soil level around the plant. Tamp down firmly.
6. Water and Mulch
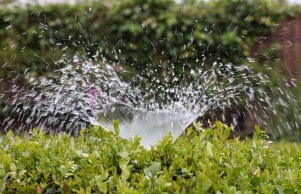
To reduce transplant stress, water the roots slowly and thoroughly allowing the water to completely sink down and around the roots. Add mulch as needed to maintain moisture then water again. For the next six weeks, regularly water taking care not to allow the soil to dry out.
Have Fun Gardening!
Lee Edwards is a Realtor, Master Gardener, and co-owner of Avid Gardeners-a Garden Consulting & Maintenance Company. She enjoys spending time with her family and best pal, Sir Max, along with reading, gardening and writing articles for online publications.


 Plant Label Materials:
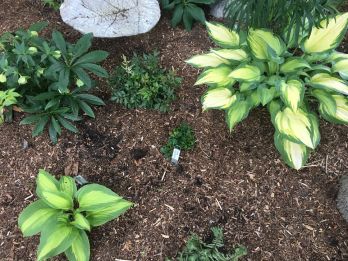
 MY Preferred Labeling System: hairpin-type label stakes (Lee Valley), pushed more than halfway down with white “live forever” plastic label tape (Amazon) printed on a small Brother labeller (see picture).
 Shredded leaves are also an excellent choice, but they break down faster than wood mulch and may harbor seeds like maple keys. However, earthworms love shredded leaves and will make the soil more friable and fertile with their castings. If leaves are hard and fibrous, leave them in place to decay. Oak and other tough leaves should be shredded and allowed to decay a bit before placing on the garden. Soils topped with shredded leaves will soon be crumbly and easy to plant.
 Clematis is a genus of about 300 species within the buttercup family, Ranunculaceae. They are a very popular perennial climber and produce many beautiful flowers in the summer months.


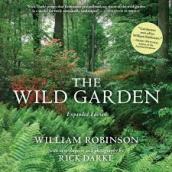
 Debunking many anecdotal garden myths, this book is backed by scientific research. Boring, it isn’t. It is charming and witty with a no-nonsense approach. Ms. Chalker-Scott is a passionate professor whose life work is devoted to raising consciousness about marketing misconceptions so we can garden with intention and confidence in an environmental and sustainable way. (paperback – $20.00)
 I learned so much from her first book, I bought this one and was not disappointed. She surprises, teaches and makes sense. (pp. $20.00)
 3. Weeds: in Defence of Nature’s Most Unloved Plant – Richard Mabey