By Sharleen Pratt, Master Gardener (in Training)
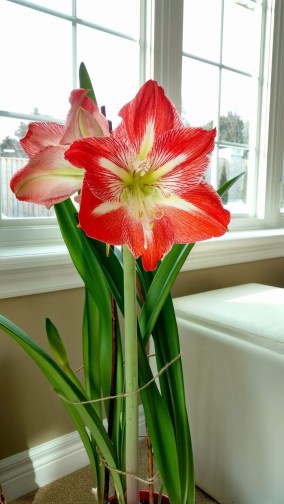
Amaryllis bulbs are a wonderful winter flower! They never disappoint and are easy to grow over the Christmas season. They come in many dramatic colours. The bigger the bulb, the bigger the bloom, so it is always a good idea to spend a little more to get a good sized bulb.
They are prized for their exotic trumpet-shaped flowers that sit on top of leafless stalks or “scapes”. They are native to Peru and South Africa. The bulbs were brought to Europe in the 1700s. In warmer climates, they have been known to bloom for 75 years.
In Canada, we generally buy new bulbs each year, but did you know that it is possible to keep these bulbs from year-to-year and it is relatively easy to get them to re-bloom. Below is a simple guide to what works for me, but I have also attached a few reliable articles. The methods are a little different, but with the same end result.
HOW TO GET YOUR AMARYLLIS TO RE-BLOOM
- Wait until the amaryllis finishes blooming.
- Remove the wilted flowers and allow the stalk to die back a little to feed the bulb, then cut it down. Leave any leaves as they also help to feed the bulb.
- When all chance of frost has past, take your amaryllis outside in the pot and place it in a protected area. It is best to choose a spot that gets morning sun rather than the scorching sun of the afternoon.
- If you wish, you can also remove it from the pot and plant it in the garden. I tend to leave it in the pot as I find there is less chance of infection from disease.
- During the summer months, feed it with an all purpose fertilizer about once a month. To be honest, I don’t always remember to do this! If we have a really hot summer, you may actually get another bloom during the summer season. I had this happen two summers ago.
- Around Thanksgiving, before a hard frost, remove the bulb from the ground or the pot.
- Cut all the foliage back, close to the bulb.
- Dry the bulb well (this is important), outside if it’s sunny or in a nice sunny window.
- Once it is good and dry, put the bulb in a brown paper bag and store it in a cool, dry place. I store mine in the back of the garage up against the house.
- Leave it for at least 6 weeks.
- Bring it back in, pot it up in good potting soil. Don’t use a pot that is too large as they like to be snug. Remember to leave the top 1/3 out of the soil.
- Put in some good supports, fertilize with an all purpose fertilizer at ½ strength, keep it watered but not too wet and ‘cross your fingers’.
- Indirect light is best until you see some growth, then move it to where you normally keep your amaryllis.
- You may find that you will get leaf growth first, but eventually you should see a stalk emerge.
- I have found that you tend to get flowers closer to the end of January, which is a real treat in the middle of winter. If you prefer to have them earlier, start the process before Thanksgiving.
- Good luck!!
For a slightly different method, check out this article by Sonia Day who writes for the Toronto Star. Or, check out this article written by a Master Gardener from Guelph-Wellington.
